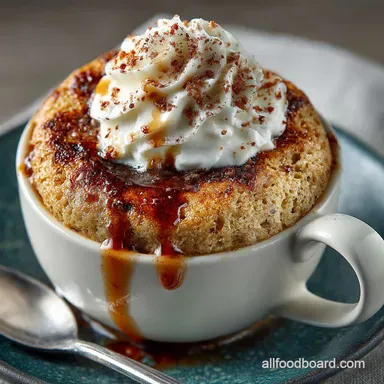
The Speedy Pudd 5Minute Classic Vanilla Mug Cake
Unlocking the Ultimate 5-Minute Vanilla Mug Cake Experience
There are few culinary comforts more satisfying than a warm, fluffy cake, and even fewer that can be achieved without breaking out the stand mixer or spending an hour waiting for the oven to preheat.
This definitive Vanilla Mug Cake experience is designed for instant gratification, delivering a perfectly moist single serving dessert in a total elapsed time of about five minutes.
It’s the ideal solution for tackling those insistent late night sugar cravings or providing a quick post dinner treat with zero fuss and minimal cleanup.
Defining the Single Serving Dessert Trend
The rise of the mug cake is entirely a product of modern convenience and our collective desire for speed. Unlike traditional baking, which requires careful scaling for multiple servings and dedicated time, the mug cake is a "speedy pudd" a commitment free dessert that measures, cooks, and serves in the very vessel it was mixed in.
This method ensures optimal portion control and eliminates the need for excess dishes. It’s a powerful dessert concept, blending the simplicity of a microwaved dish with the satisfying texture of homemade sponge, making it the perfect gateway to instant baking success.
Why the Microwave Delivers Perfect Sponginess
Many novice bakers wonder how a microwave can possibly replicate the tenderness of an oven baked cake. The secret lies in speed and steam. When the small amount of batter is exposed to high power microwave energy, the liquids (milk and oil) turn instantly to steam, driving the quick acting baking powder.
This process forces a rapid, aggressive rise that results in a wonderfully light and incredibly moist texture, provided the timing is precise. Mastering the vanilla mug cake microwave technique means learning to stop cooking right at the moment the cake is set, preventing that dreaded rubbery finish.
The Essential Tools for Zero Fuss Vanilla Mug Cake Baking
One of the great joys of learning How To Make A Cake In A Mug is the incredibly short equipment list. You don't need fancy gadgets; only standard kitchen essentials are required.
The most critical component is the mug itself: you must use a microwave safe mug with a capacity of 12 to 14 ounces (350 400 ml). This capacity is crucial because the batter will roughly double in volume as it cooks.
Aside from the mug, you will need accurate measuring spoons and a simple small fork or a mini whisk for combining the ingredients inside the mug.
Pantry Staples Required for Your Classic Mug Cake
While the mug cake concept is extremely simple, the quality of the finished product relies entirely on the accuracy of the ingredients used. This isn't a recipe where you can eyeball the measurements; precision ensures that the perfect moisture-to-flour ratio is achieved for a light, springy sponge.
Measuring Liquid and Dry Components Precisely
For this specific Vanilla Mug Cake recipe , we use four level tablespoons of all-purpose flour and four level tablespoons of granulated sugar. Because the batch size is so small, an extra granule of flour can drastically alter the final texture, making the cake dry or dense.
Therefore, always level your measuring spoons. The dry mixture flour, sugar, baking powder, and a pinch of salt must be thoroughly whisked together first directly in the mug. This foundational step ensures the essential leavening agent (baking powder) is distributed evenly before any liquids are introduced.
Necessary Substitutions for Milk and Egg in this Speedy Treat
This particular formulation for an Easy Mug Cake Recipe Vanilla uses oil and milk to create the perfect texture without relying on an egg, making this an ideal vanilla mug cake no egg option.
The oil, specifically a neutral vegetable or canola variety, contributes essential fat without heavy flavor, keeping the cake exceptionally light and moist. For milk, whole or semi skimmed works perfectly, but this recipe is highly adaptable.
You can substitute any plant based milk (almond, soy, oat) at a 1:1 ratio if you prefer a dairy-free treat. For those seeking a richer profile, replacing the oil with one tablespoon of melted butter will provide a classic buttery depth.
Elevating Flavor: Choosing the Right Vanilla Extract
Since vanilla is the star of this show, the type of extract you use matters immensely. Avoid inexpensive "vanilla essence," which often contains artificial flavors. Instead, invest in a good quality vanilla extract.
Half a teaspoon of a pure extract delivers a robust, authentic flavor that shines through the quick cooked sponge, transforming a simple cake base into a truly comforting Simple Cake In A Cup Recipe .
Related Recipes Worth Trying
- The Ultimate Spiced Carrot Cake Recipe with Silky Cream Cheese Frosting — Forget dry bakesthis is the definitive moist Carrot Cake recipe Perfect spices crushed carrots and that impossibly silky cream cheese frosting A baking...
- The Emergency Chocolate Mug Cake A OneMinute Molten Fix — When the craving strikes like a London bus whip up this glorious molten chocolate mug cake in 90 seconds Its the perfect fussfree rich Mug Cake For One...
- StickyMoist Carrot Cake with Cream Cheese Frosting A British Classic — This Best Carrot Cake with Cream Cheese Frosting recipe delivers a profoundly moist sticky sponge A true English teatime triumpheasy assembly zero lumps and...
Quick Fire Directions: Assembling and Cooking Your Speedy Pudd
The physical preparation of the batter takes mere moments, but these moments are critical. Successfully executing this recipe is less about time and more about technique specifically, the combining and mixing stage.
The Proper Way to Combine Ingredients (Avoiding Doughy Pockets)
After the dry components are thoroughly whisked together in the mug, add the milk, oil, and vanilla extract. The cardinal rule of mug cakes applies here: Mix gently until just combined. Use your fork to scrape the sides and bottom of the mug to ensure there are no pockets of unmixed flour lurking.
The moment the last streak of dry flour disappears, stop mixing. Over mixing even a few seconds too long will over activate the gluten, resulting in a tough, rubbery cake. A few small lumps are perfectly acceptable and far preferable to a dense texture.
Microwave Power Levels and Achieving the Ideal Rise
Timing is everything in the microwave. For best results with this quick cooking vanilla sponge, aim to cook the cake on High power (1000W) for 60 to 75 seconds. If your microwave has a lower wattage (common in older models), you may need to extend the time up to 90 or even 120 seconds.
It is always safer to undercook and add 10-second bursts than to overcook instantly. The quick, high heat zap facilitates the maximum volume and tenderness required for the perfect mug cake.
Visual Cues: Knowing When Your Cake is Perfectly Done
You don't need a toothpick test here; visual inspection is key. A perfectly cooked mug cake will be visibly set, slightly puffy, and the surface will look relatively dry. The cake will pull slightly away from the sides of the mug.
If the center still appears glossy or very wet, continue cooking in short 10-second intervals until the shine disappears. Once cooked, let the cake rest in the mug for one minute. This essential resting period, known as carryover cooking, allows the residual heat to finalize the internal structure, resulting in the desired light texture.
Customizing and Troubleshooting Your Vanilla Mug Cake
Once you've mastered the basic technique, the possibilities for customization are endless. The simple vanilla base provides a perfect canvas for creative toppings and flavor infusions.
Brilliant Topping Ideas to Finish Your Treat
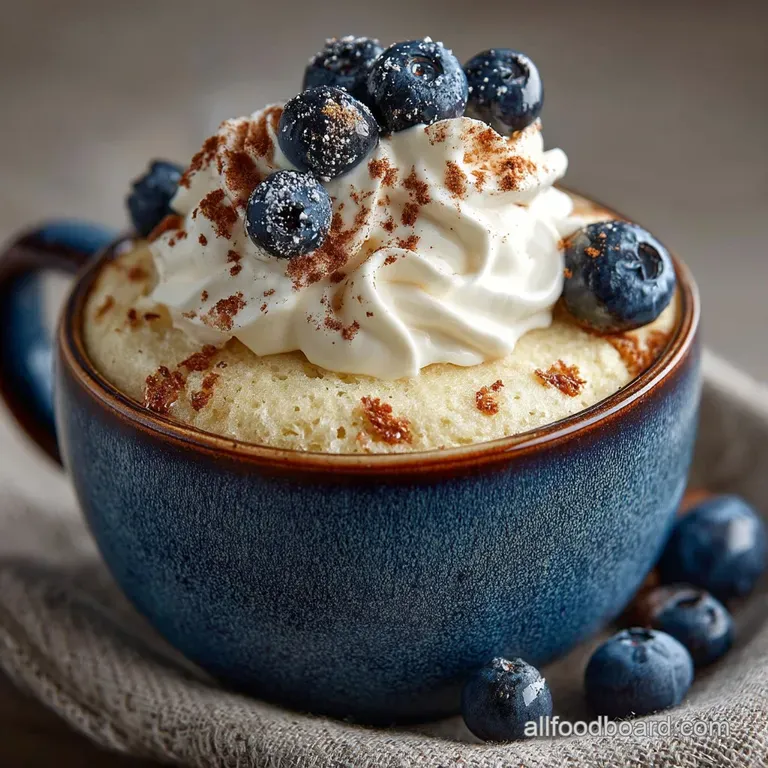
Serving the warm, newly cooked cake straight from the mug is the ultimate indulgence. For an added layer of flavor and texture, consider folding in one tablespoon of mini chocolate chips before cooking for a molten center.
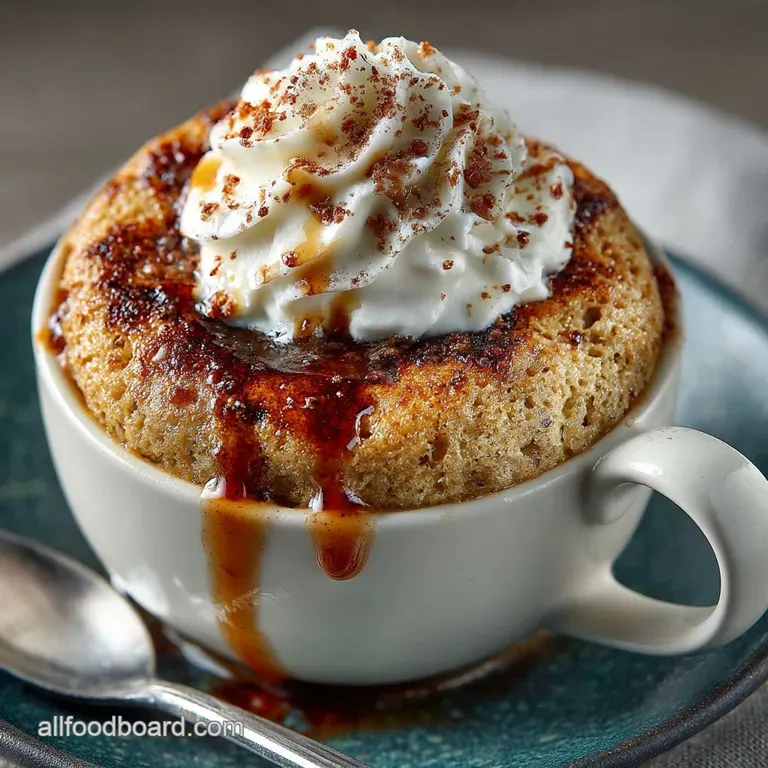
After the cake has rested, classic elegance demands a generous dollop of freshly whipped cream or a scoop of cold vanilla ice cream, which melts appealingly into the warm sponge. For a slightly different twist, mix a half teaspoon of lemon zest into the batter before cooking, and finish with a simple lemon glaze made from icing sugar and juice a bright and sophisticated take on the Vanilla Mug Cake .
Troubleshooting Dry Cake: Fixing Common Microwave Mistakes
The single most common mistake when making a mug cake is overcooking, which instantly leads to a dry, tough texture. If your cake comes out dense, the culprit is almost certainly the duration or the power of your microwave. To fix this, first, ensure your initial mixing was minimal.
Next, reduce the cooking time by 10 seconds on your next attempt, or try dropping your microwave power level down to 70% and extending the cooking time slightly (e.g., 90 100 seconds total).
Remember, because mug cakes are designed to cook fast, they transition from perfectly moist to completely dry in a matter of seconds.
Storing Leftover Vanilla Mug Cake: make ahead Tips
The Vanilla Mug Cake is fundamentally designed to be cooked and consumed immediately for peak freshness. While you could technically store a cooled mug cake, the texture degrades rapidly and becomes less appealing the following day. We strongly recommend making only one serving at a time.
The preparation is so quick just three minutes of prep time that making a fresh batch is always superior to storing leftovers. Embrace the instant nature of this indulgent treat!
Quick Nutritional Snapshot for the Classic Serving
As this Easy Mug Cake Recipe Vanilla is designed as an immediate indulgence, it naturally falls into the category of a rich dessert. Based on the ingredients specified (flour, sugar, oil, and milk), the resulting single serving estimates between 320 350 kcal.
It provides a satisfying balance of carbohydrates and fats, delivered in a comforting, warm format. It’s the perfect high-quality reward for minimal effort.
Recipe FAQs
My mug cake turned out tough and rubbery, like an old cricket ball! What went wrong?
Ah, the two cardinal sins of mug cake making are over mixing and over cooking. Once you add the wet ingredients, mix only until the flour streaks disappear don't whisk it like you’re making meringues! Too much stirring develops the gluten, resulting in a rubbery texture.
Also, keep an eye on the microwave time; cooking for too long evaporates the moisture, turning your lovely sponge into a chewy disaster.
How can I jazz up this Classic Vanilla Mug Cake if I want something a bit fancier?
There are loads of ways to elevate your simple pudding! Try folding 1 tablespoon of chocolate chips or a small handful of fresh berries into the batter before cooking. For a richer flavour, use melted butter instead of oil.
When serving, nothing beats a proper British topping like a scoop of creamy custard or clotted cream, which melts beautifully into the warm sponge.
My microwave is ancient (or super strong). How do I get the cooking time just right?
Microwave wattage is a tricky beast! Our timing is based on a standard 1000W machine. If your microwave is less powerful, you may need up to 120 seconds. The best tip is to start at 60 seconds, then check the cake: if the top is still visibly wet in the centre, microwave it in short 10 15 second bursts until it looks set and the surface is dry.
Better undercooked than overcooked!
Can I use butter instead of oil, or swap out the dairy milk?
Absolutely, you can! Substituting the neutral oil for 1 tablespoon of melted, unsalted butter will definitely give the cake a richer, deeper flavour. For dietary swaps, most plant based milks (almond, oat, soy) work perfectly as a 1:1 replacement for dairy milk.
These mug cakes are delightfully adaptable, much like a good roast dinner!
Can I mix the Vanilla Mug Cake batter ahead of time and keep it in the fridge?
It's generally not advisable to pre-mix the batter. The baking powder starts working as soon as it meets the wet ingredients, and that leavening power is quickly lost if the batter sits around. If you try to save the batter, your resulting cake will likely be dense and won’t rise properly.
Since this recipe takes literally five minutes from start to finish, it’s best treated as an immediate, emergency indulgence!
5minute Classic Vanilla Mug Cake