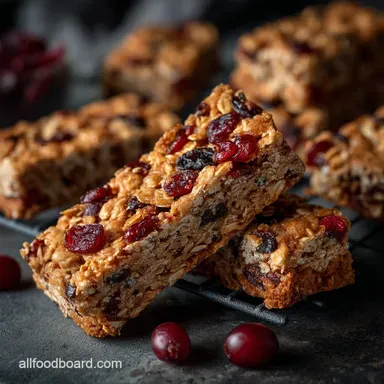
The Chefs Goto Chewy Granola Bars Soft Stable and Simply Divine
- Why These Chewy Granola Bars Are Guaranteed to Set Perfectly
- Building the Perfect Foundation: Oats, Nuts, and Binders
- The Chewy Bar Masterclass: From Mixing Bowl to Baking Pan
- Troubleshooting and Taming Your Homemade Granola Bars
- Customizing the Crunch: Flavour Swaps and Fun Add-ins
- Recipe FAQs
- 📝 Recipe Card
Why These Chewy Granola Bars Are Guaranteed to Set Perfectly
If you've ever attempted a granola bars recipe only to end up with a pan full of dry, dusty crumbs, you know the frustration. The secret to stability in any truly chewy granola bar recipe isn't about baking them until they turn into bricks; it’s all about the quality and preparation of the binder.
Our technique ensures that the base of old-fashioned rolled oats is perfectly encased in a sticky, caramelized mixture that locks everything into place during the cooling process, resulting in flawless, sliceable, and genuinely chewy granola bars every time.
This robust method eliminates the need for excessive egg whites or complicated stabilizers, relying instead on simple kitchen chemistry.
The Magic of the Gently Cooked Binder
The crucial difference between a successful homemade granola bars recipe and a failure lies in the brief cooking of the wet ingredients. By placing the butter, brown sugar, honey, and nut butter in a saucepan and bringing them just to a low simmer for exactly one minute, we slightly cook the sugars and starches.
This process changes their molecular structure, turning them into a powerful, taffy like adhesive rather than just a simple liquid sweetener. Once this mixture cools, it naturally firms up, creating the stable matrix necessary for a bar that holds its structure beautifully.
Say Goodbye to Crumbly, Dusty store-bought Snacks
While convenience is king, commercial granola bars often lack the satisfying texture we crave. They are frequently either too brittle from overbaking or excessively dry. Our recipe delivers a soft, pleasant bite that makes this the definitive chewy granola bar recipe .
Beyond that,, when you make homemade granola bars , you gain complete control over the ingredients, allowing you to sidestep the unnecessary preservatives and highly processed fillers found in pre-packaged alternatives.
The Essential Equipment Checklist for Success
Making these bars is simple, but precision tools help. You will need an 8 x 8 inch (20 x 20 cm) baking pan, which is the perfect size to achieve the ideal thickness for 12 standard bars.
Lining this pan with parchment paper, allowing for a generous overhang on two sides creating a lifting ‘sling’ is non-negotiable for easy removal later. Plus,, a small saucepan for preparing the binder and a large, sturdy rubber spatula or the flat bottom of a measuring cup are essential for the vital pressing step.
Building the Perfect Foundation: Oats, Nuts, and Binders
A great granola bars recipe starts with high-quality, whole ingredients that offer both nutritional value and structural integrity. For this recipe, we focus on balancing a rich, dense base with a powerful, sticky binder.
Choosing the Right Oats (Rolled vs. Instant)
The base of our bars requires 2 cups of old-fashioned rolled oats. It is imperative that you avoid instant or quick cooking oats. Rolled oats retain their shape, providing structure and chewiness, while instant oats tend to turn mushy when mixed with the hot binder, leading to a much softer, less appealing final texture.
To boost the nutritional content of these healthy granola bars , we also incorporate 2 tablespoons of wheat germ or ground flaxseed into the dry mixture.
Navigating Nut Butters: Stabilized vs. Natural
The binder benefits significantly from the inclusion of 1/2 cup of smooth nut butter, such as almond or peanut butter. We recommend using natural, un-stabilized varieties, as their oil separation, while annoying in the jar, actually helps create a smoother, more effective emulsion when mixed with the melted butter and sugars.
If you require granola bars without peanut butter , smooth almond butter or sunflower seed butter are excellent, flavourful substitutes.
Sweeteners That Stick: Honey, Syrup, and Maple Options
Our binder leverages the specific properties of both crystalline sugar and liquid sugar. We combine 1/4 cup of packed brown sugar with 1/3 cup of honey. The brown sugar contributes depth of flavour and helps with setting, while the honey provides the crucial stickiness needed for our chewy granola bars .
For those seeking a vegan option, pure maple syrup can be used in place of the honey and provides a beautiful, aromatic sweetness while maintaining the necessary binding properties.
Related Recipes Worth Trying
- Easy 4Ingredient Peanut Butter Banana Bars Recipe — Whip up these genuinely satisfying Peanut Butter Banana Barstheyre chewy dense and unbelievably simple The perfect easy peanut butter banana treats for...
- The Best Caramel Apple Cheesecake Bars Recipe — Make these phenomenal Caramel Apple Cheesecake Bars for a proper comfort food dessert The secret is a buttery crust and homemade salted caramel swirl Get...
- Paula Deens Pumpkin Gooey Butter Cake Bars Southern Bliss — Paula Deens Pumpkin Gooey Butter recipe just got easier These cake bars are pure Southern comfort gooey spiced utterly delicious Get the recipe now
The Chewy Bar Masterclass: From Mixing Bowl to Baking Pan

Once you have your ingredients ready 2 cups of dry mix (oats, flax, salt, cinnamon) in a large bowl, and the mix-ins reserved it's time to bring the components together swiftly and efficiently.
The Critical Step: Simmering the Sticky Binder Mixture
In your saucepan, melt 1/4 cup of unsalted butter (or refined coconut oil). Once melted, stir in the brown sugar, the 1/3 cup of honey, and the 1/2 cup of nut butter. Continue to stir gently over low heat until the mixture is uniform.
Now for the most important step: bring the mixture just to a low simmer where you see tiny bubbles forming around the perimeter and cook for exactly 60 seconds, stirring continuously. This precise timing ensures optimal stickiness.
Immediately remove it from the heat and stir in 1 teaspoon of vanilla extract.
Ensuring Even Distribution (The Wet-to-Dry Ratio)
Pour the warm, caramelized binder directly over the dry ingredients in the large bowl. Working quickly, use a spatula to mix everything together until every single oat flake is thoroughly coated. Achieving this even saturation is key to producing stable, non-crumbly homemade granola bars .
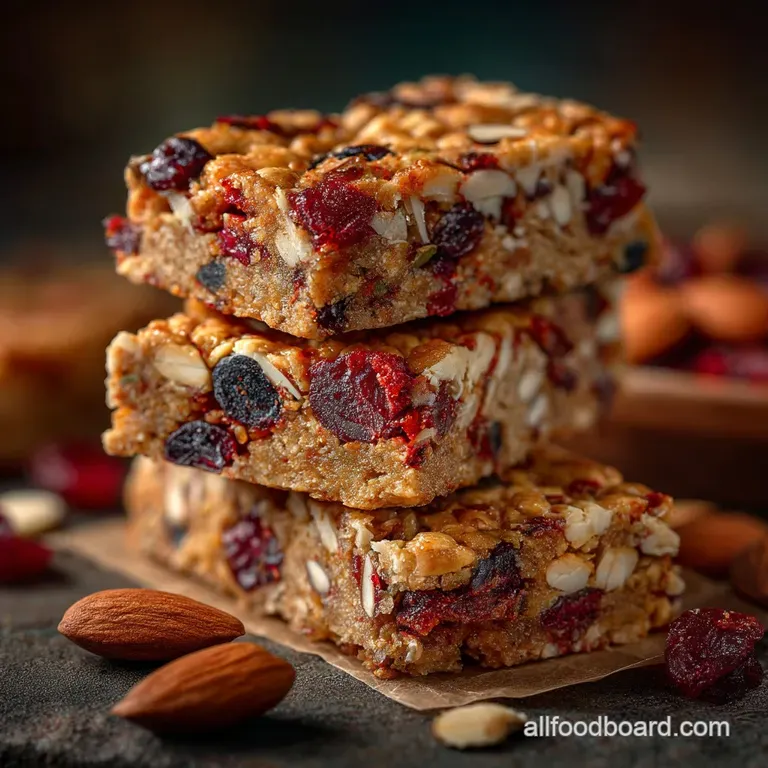
Once the oats are coated, fold in the optional 1/3 cup of mini chocolate chips and 1/4 cup of chopped dried fruit until they are evenly dispersed throughout the mixture.
The Gentle Art of Pressing and Setting Your Granola Bars
Transfer the entire mixture into your prepared 8 x 8 inch pan. Now comes the defining moment: compression. Using the back of a sturdy measuring cup or a rubber spatula, press the mixture down with significant, firm pressure. You must compact the oats tightly into the pan.
This compression step is arguably the most crucial physical technique in the granola bars recipe as it eliminates air pockets and ensures the bars will slice cleanly and hold their shape once cooled.
Troubleshooting and Taming Your Homemade Granola Bars
The two most common issues with a granola bars recipe are brittleness (too hard) and crumbling (too soft). Brittleness usually stems from overbaking; the ideal bake time is 20 to 25 minutes, aiming only for lightly golden edges while the centre remains slightly soft.
Crumbly bars are almost always the result of insufficient pressing in the pan or, far more commonly, insufficient cooling time. Always adhere strictly to the guidelines regarding compression and chilling to ensure a consistently perfect result.
Customizing the Crunch: Flavour Swaps and Fun Add-ins
One of the great joys of making homemade granola bars is the opportunity to adjust the recipe to suit individual tastes or dietary needs.
The Golden Rule of Cooling: Why Patience Prevents Crumbling
I cannot stress this enough: the structural integrity of your chewy granola bars relies entirely on patience. After baking for 20 to 25 minutes, remove the pan and place it on a wire rack to cool completely. This means allowing a minimum of two hours.
If you try to slice the bars while they are still warm, the binder will not have set, and they will absolutely fall apart. Once they are mostly cool, transferring them to the refrigerator for 30 minutes can expedite the final setting process and yield even cleaner cuts.
Optimal Storage Methods for Freshness and Texture
Once fully cooled and sliced into 12 even bars, your treats can be stored for up to one week. The best method is to keep them in a well sealed, airtight container at room temperature.
Stacking the bars between small squares of parchment paper will prevent them from sticking together, especially if they contain meltable ingredients like chocolate.
Making It a Proper Treat: Indulgent Chocolate Drizzle Techniques
If you are already including the 1/3 cup of mini chocolate chips, why stop there? For an extra layer of decadence, melt 1/4 cup of dark chocolate and drizzle it decoratively over the cooled, set bars before slicing.
This upgrade is especially popular when preparing granola bars for kids , adding a touch of visual appeal and richness.
Turning Up the Volume: Spices, Zests, and Extracts
The recipe includes 1/2 teaspoon of ground cinnamon, which adds warmth, but feel free to expand your flavour horizon. Try adding a pinch of nutmeg and cloves for a seasonal feel, or substitute the vanilla extract with almond extract for a marzipan note.
Citrus zest like the zest of one lime can transform the bars into a bright, tropical snack, pairing beautifully with dried mango or pineapple.
Nut-Free and Vegan Alternatives for Dietary Requirements
This recipe is highly adaptable. If you need granola bars without peanut butter due to allergies, you can successfully substitute it with a smooth sunflower seed butter or tahini.
To create suitable healthy granola bars that are also vegan, swap the butter for refined coconut oil and use maple syrup or agave nectar in place of the honey.
For those focusing on granola bars for diabetics or managing sugar intake, you can reduce the brown sugar or substitute the honey with a lower glycaemic sweetener, being mindful that this may slightly alter the final texture and setting power.
Beyond the Basic Bar: Converting This Recipe into Energy Balls
The beauty of this robust granola bars recipe is that the final mixture is incredibly versatile. If you prefer a mess free, bite sized snack, skip the baking pan altogether.
Once the oats are fully coated with the binder, allow the mixture to cool slightly until it is warm enough to handle comfortably. Then, simply roll the mixture into small, dense balls (about one inch in diameter). They set beautifully in the refrigerator and are a superb alternative to the traditional bar format.
Recipe FAQs
My homemade Granola Bars look a bit sad and fell apart when I cut them. What went wrong?
Ah, the classic crumbling dilemma! This usually comes down to two things, old chap: insufficient pressing or not allowing enough cooling time. You must press the mixture into the pan with real conviction like you’re trying to flatten the UK countryside before baking.
Additionally, cutting the bars before they are completely cool and set (preferably chilled) is a guaranteed disaster, so patience is key.
I need to make these dairy-free and vegan; is it an absolute pain to swap the butter and honey?
Not a pain at all; it’s a total doddle! You can easily swap the butter for refined coconut oil or vegan block margarine using the same measurements. For the honey, substitute pure maple syrup or agave nectar.
These alternatives work brilliantly within the binder and ensure you still achieve that proper chewy texture without fuss.
Why is simmering the binder for just one minute so crucial is that really necessary for a good chew?
That short simmer is utterly crucial, yes! It gently heats the sugars and nut butter, creating a slightly caramelised effect that drastically increases the ‘stickiness’ of the binder.
This stability is what stops your bars from becoming crumbly or overly soft at room temperature, making sure they hold together like a proper bit of kit.
Once baked, how should I store these delicious little bits of kit, and how long do they keep?
Once they are fully cooled and cut, store the bars in an airtight container at room temperature. They should keep spot-on for about a week, making them perfect for grabbing on the hoof for a packed lunch. If you've made a huge batch and need them to last longer, they freeze beautifully!
Just wrap them individually and they’ll keep well for about a month.
Can I play around with the oats or the chocolate chips to vary the texture?
You absolutely can, but stick to old-fashioned rolled oats; instant oats will just turn to sad mush during baking. When choosing mix-ins, ensure you chop larger additions (like dried apricots or pecans) finely so they don't break the structure of the bar.
For best results, use mini chocolate chips or dust them with a bit of flour before adding them, which prevents them from sinking straight to the bottom of the pan.
Easy Chewy Granola Bars Recipe