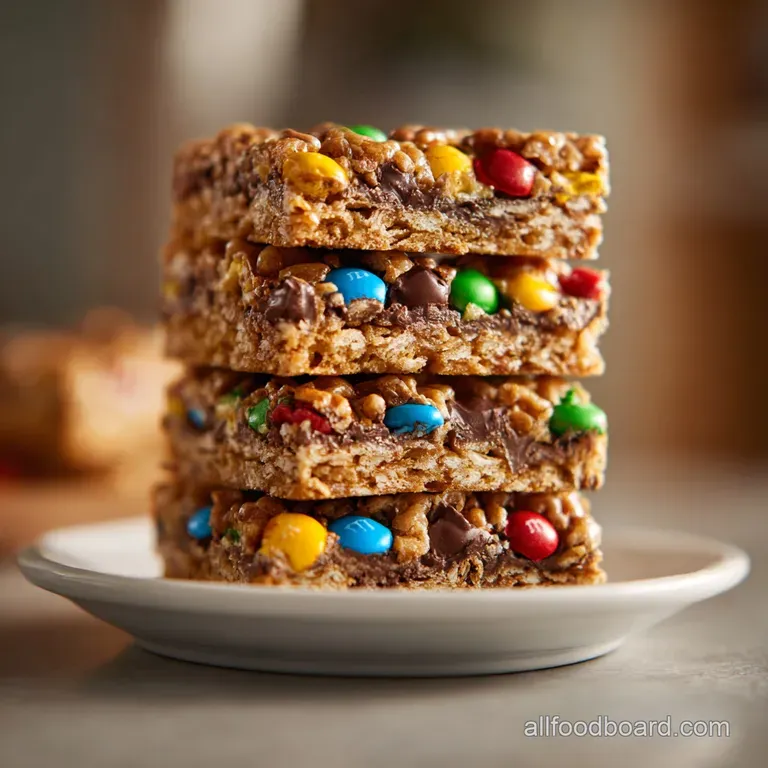
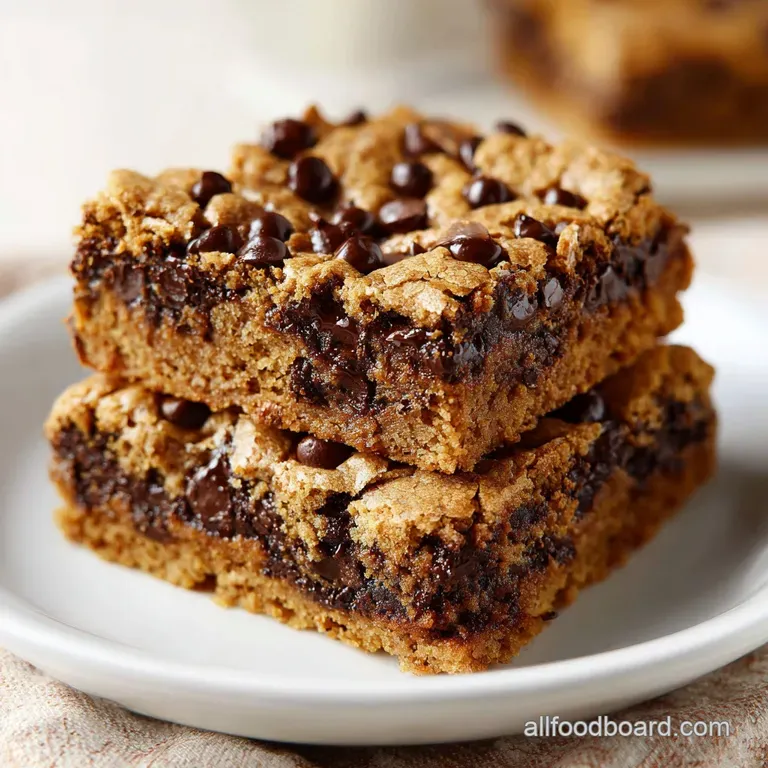
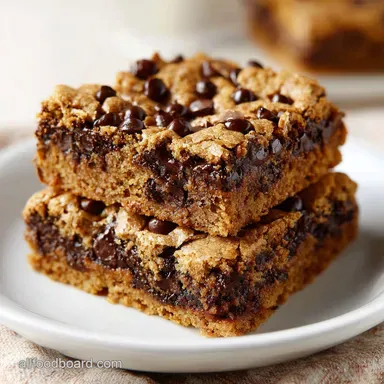
Thick Chewy Mm Cookie Bars
- Time: Active 15 minutes, Passive 25 minutes, Total 40 minutes
- Flavor/Texture Hook: Fudgy, buttery, and shatter crisp
- Perfect for: School bake sales or lazy Sunday snacking
- Master the Ultimate Thick Chewy MM Cookie Bars
- The Secret to the Squish
- Ingredient Deep Dive Analysis
- Everything You Need for Success
- Essential Kitchen Tools Needed
- Step by Step to Perfection
- Mastering Texture and Avoiding Flaws
- Scaling Your Batch for Any Crowd
- Creative Twists and Ingredient Swaps
- Storing and Repurposing Your Treats
- The Best Ways to Serve These
- Recipe FAQs
- 📝 Recipe Card
Master the Ultimate Thick Chewy MM Cookie Bars
Imagine the smell of browning butter and warm vanilla wafting through your kitchen, hitting you the second you crack the oven door. I remember the first time I nailed this recipe; it was a rainy Tuesday, and I was desperate for something that didn't require chilling dough for hours.
I wanted that specific, heavy weight of a bakery style bar that doesn't just crumble into dust when you take a bite.
These aren't your average thin, crispy discs that go hard by the next morning. We're talking about a substantial, velvety center that stays soft for days. I once made the mistake of using cold butter and over beating the eggs, which resulted in a cakey mess.
Since then, I've learned that the secret lies in the temperature of your ingredients and the restraint of your whisk. Trust me, once you see those molten chocolate pockets and the bright shatter crisp shells of the candies, you won't go back to the boxed stuff.
We are going for a specific architecture here. It’s about creating a foundation that can support a heavy payload of M&Ms without sagging. You’ll get that iconic crinkle on top, a dense middle, and edges that have just enough bite to keep things interesting.
Let’s get stuck into what makes this work so well.
The Secret to the Squish
Protein Control: Using an extra egg yolk increases the fat to liquid ratio, ensuring a tender, fudgy crumb that resists drying out.
Starch Interference: Cornstarch physically gets in the way of gluten strands, preventing the bars from becoming tough or bready.
Molecular Hydration: Melted butter integrates more deeply with the sugars than creamed butter, leading to a denser, more humid interior.
| Feature | Fast Method (Melted) | Classic Method (Creamed) |
|---|---|---|
| Texture | Fudgy and dense | Airy and light |
| Prep Time | 5 minutes | 15 minutes |
| Visuals | Shiny, crackly top | Pale, matte finish |
The melted butter technique is a total win for anyone who hates waiting for butter to soften on the counter. It creates a richer, more toffee like flavor profile that pairs perfectly with the saltiness of the dough. If you've mastered this and want to try another texture, you should definitely look at my Classic Chocolate Chip Cookies recipe.
Ingredient Deep Dive Analysis
| Component | Science Role | Pro Secret |
|---|---|---|
| Brown Sugar | Adds moisture and acidity | Pack it tight for maximum chew |
| Cornstarch | Softens flour proteins | Prevents the bars from being "tough" |
| Egg Yolk | Provides emulsifiers and fat | Use room temp for a smooth mix |
| Fine Sea Salt | Enhances chocolate perception | Don't swap for coarse table salt |
Using light brown sugar is non negotiable here because it contains molasses, which is hygroscopic meaning it literally pulls moisture from the air to keep your treats soft. It’s the same logic I use in my Perfectly Chewy Peanut recipe to get that signature bend.
Everything You Need for Success
- 1 cup (225g) unsalted butter: Melted and cooled slightly. Why this? Melted butter creates a denser, fudgier texture than creamed butter.
- 1 cup (200g) light brown sugar: Packed firmly. Why this? Molasses in brown sugar ensures the bars stay soft and bendy.
- 1/4 cup (50g) granulated sugar: For those crispy, golden edges.
- 2 large eggs + 1 large egg yolk: Room temperature. Why this? The extra yolk adds richness and prevents a cakey result.
- 1 tablespoon pure vanilla extract: Don't skimp; it’s the backbone of the flavor.
- 2 1/4 cups (280g) all purpose flour: Measured by weight if possible.
- 1 tablespoon cornstarch: The secret weapon for a tender crumb.
- 1/2 teaspoon baking soda: Gives just enough lift without being puffy.
- 1/2 teaspoon fine sea salt: To balance the sweetness.
- 1 1/4 cups M&M candies: Divided for mixing and topping.
- 1/2 cup dark chocolate chips: 60% cacao works best.
Chef's Tip: Freeze your M&Ms for 10 minutes before folding them in. This prevents the dye from bleeding into the dough, keeping your bars looking clean and vibrant.
Essential Kitchen Tools Needed
You don’t need a fancy stand mixer for these, which is one of the reasons I love this recipe so much. A sturdy whisk and a silicone spatula are your best friends here. You will want a 9x9 inch square baking pan metal is better than glass for these because it conducts heat more evenly, giving you those sought after sharp corners.
Parchment paper is another must have. Don't just grease the pan; create a "sling" by letting the paper hang over two sides. This allows you to lift the entire block of bars out at once, making slicing a breeze.
If you use a glass dish, keep in mind they hold heat longer, so you might need to pull them out 2 minutes earlier to avoid over baking.
step-by-step to Perfection
- Prep the oven. Preheat to 350°F (180°C) and line your 9x9 inch pan with parchment paper.
- Melt the butter. Let it cool for 5 minutes until it is warm but not hot. Note: Hot butter will scramble the eggs.
- Whisk the sugars. Combine melted butter with brown and granulated sugars until smooth and glossy.
- Incorporate the eggs. Add eggs, the extra yolk, and vanilla, whisking vigorously until the mixture looks velvety.
- Sift dry ingredients. Fold in flour, cornstarch, baking soda, and salt until just a few streaks of flour remain.
- Add the candies. Fold in 1 cup of M&Ms and the chocolate chips gently.
- Transfer to pan. Press the dough into the pan until even and flat.
- Add the garnish. Press the remaining 1/4 cup of candies into the top for a professional look.
- Bake the bars. Cook for 25 minutes until the edges are golden and the center is set.
- Cool completely. Let them rest in the pan for at least 1 hour until firm enough to slice.
Mastering Texture and Avoiding Flaws
The most common hurdle with bar desserts is the dreaded "greasy bottom." This usually happens if the butter was too hot when mixed with the sugars, causing it to separate from the emulsion. If you see oil pooling at the edges, your emulsion broke. Next time, let that butter cool until it’s just barely liquid.
Another trick for the best look is the "carry over cook." When you pull these out, the center might still look a tiny bit wobbly. That is exactly what you want! The residual heat from the metal pan will finish the job. If they look "done" in the oven, they will be overdone by the time they cool.
Why Your Bars Sunk
If the middle of your bars dips significantly, you likely over mixed the eggs. Incorporating too much air creates a soufflé effect where the bars rise and then collapse. Mix until just combined for a dense, consistent height.
To Achieve Clean Slices
Wipe your knife with a damp cloth between every single cut. It sounds tedious, but it prevents the chocolate smears from ruining the look of your neat squares.
| Problem | Root Cause | Solution |
|---|---|---|
| Dry/Crumbly | Too much flour | Use a kitchen scale for accuracy |
| Too Cakey | Too much air whipped in | Mix by hand, not electric mixer |
| Bleeding Colors | Candies got too warm | Chill M&Ms before folding in |
Common Mistakes Checklist:
- ✓ Ensure eggs are at room temperature to maintain the butter emulsion.
- ✓ Don't over bake; pull them out when the center still has a slight jiggle.
- ✓ Use light brown sugar instead of dark to avoid an overwhelming molasses taste.
- ✓ Let the bars cool entirely before lifting them out of the pan.
- ✓ Use a metal baking pan for the most even heat distribution.
Scaling Your Batch for Any Crowd
If you're baking for a big party, you can easily double this for a 9x13 inch pan. The bake time will increase by about 5 to 8 minutes, so keep a close eye on those golden edges. When doubling, I suggest only using 1.5x the salt and vanilla to keep the flavors from becoming too aggressive.
For a smaller treat, you can halve the recipe and use an 8x4 inch loaf pan. Since you can't easily halve an egg, beat one egg in a small bowl and use roughly 2 tablespoons of it to represent "half" an egg, plus the full yolk for richness. Reduce the bake time by about 20% and start checking at the 18 minute mark.
Creative Twists and Ingredient Swaps
| Original Ingredient | Substitute | Why It Works |
|---|---|---|
| Unsalted Butter | Salted Butter | Works well; just omit the added sea salt. |
| M&M Candies | Peanut Butter Chips | Adds a nutty flavor. Note: Bars will be softer. |
| All Purpose Flour | 1:1 gluten-free Blend | Similar structure. Note: May be slightly grittier. |
If you want a more "adult" version, try swapping the dark chocolate chips for white chocolate chunks and adding a pinch of espresso powder to the dry ingredients. The coffee notes really make the chocolate pop without making the bars taste like a latte.
For a festive look, you can use seasonal M&Ms like the red and green ones for Christmas or pastels for Easter.
Storing and Repurposing Your Treats
Storage: These bars are best kept in an airtight container at room temperature. They will stay soft and fudgy for up to 4 days. If you find they are starting to firm up, a 10 second zap in the microwave will bring back that "just baked" velvety texture.
Freezing: You can freeze the sliced bars for up to 3 months. Wrap each bar individually in plastic wrap, then place them in a freezer bag. This prevents freezer burn and makes it easy to grab a single snack whenever the craving hits.
Zero Waste Tip: If you end up with edge pieces that are a bit too crunchy for your liking, don't toss them! Crumble them up and use them as a topping for vanilla bean ice cream or fold them into a batch of homemade milkshake.
You can also pulse the scraps in a food processor and use them as a base for a cheesecake crust.
The Best Ways to Serve These
These bars are quite rich, so they pair beautifully with something acidic or neutral. A cold glass of whole milk is the classic choice, but I actually prefer them with a sharp raspberry coulis or a side of tart Greek yogurt to cut through the sugar.
If you're serving these at a dinner party, try plating a warm bar with a scoop of salted caramel gelato. The temperature contrast between the warm, fudgy bar and the freezing gelato is incredible. You could even sprinkle a tiny bit of extra flaky sea salt on top right before serving to make the flavors sing.
The Myth of Room Temp Butter
Many people think you must cream softened butter to get a good cookie. In the world of bar desserts, melted butter is actually superior. It leads to a denser, more cohesive structure that feels more like a confection and less like a cake.
The "Over Mixing" Misconception
While you don't want to beat air into the eggs, you actually want to make sure the flour is fully hydrated. Don't be afraid to give the dough a few good turns with your spatula to ensure there are no dry pockets hiding at the bottom of the bowl.
It won't make the bars tough as long as you stop once the flour disappears.

Recipe FAQs
Can I substitute granulated sugar for all brown sugar?
No, stick to the ratio using mostly brown sugar. Granulated sugar creates crisp edges, but the molasses in brown sugar is vital for retaining moisture and achieving that signature chewy center.
How to prevent the M&M candy dye from bleeding into the dough?
Freeze the M&Ms for at least 10 minutes before folding them in. This slows the leaching process significantly, keeping your dough looking clean and preventing streaks.
Why are my finished bars turning out cakey instead of dense and fudgy?
False. You likely incorporated too much air when mixing the eggs. For a fudgy bar, you want a dense structure, so whisk the eggs just until they are uniform, not pale and fluffy.
How to get perfectly square edges when slicing the cooled bars?
Use a parchment paper sling to lift the entire block out of the pan first. Then, wipe a sharp knife with a damp, hot cloth between every single cut to prevent chocolate smearing.
Is it true that I must use room temperature eggs for this recipe?
Yes, room temperature eggs are highly recommended. Cold eggs can cause the melted butter to seize up slightly, breaking the critical fat and sugar emulsion necessary for a uniform texture.
How do I achieve a perfect, shiny, crinkly top crust?
This comes from the high ratio of sugar to flour and baking at the correct temperature. If you mastered the texture control in this recipe, see how the same science applies to surface development in our The Classic Neiman recipe.
Can I make this dough ahead of time for better flavor development?
Yes, chilling the dough overnight significantly deepens the overall flavor. Cover the dough tightly and refrigerate for up to 24 hours before pressing it into the pan and baking.
Thick Chewy Mm Cookie Bars
Ingredients:
Instructions:
Nutrition Facts:
| Calories | 347 kcal |
|---|---|
| Protein | 3.9 g |
| Fat | 17.1 g |
| Carbs | 44.2 g |
| Fiber | 1.1 g |
| Sugar | 29.8 g |
| Sodium | 112 mg |
