Ghoulishly Good Chocolate Eyeball Truffles a Trickortreat Delight
- Conjuring the Perfect Halloween Centerpiece: Why These Truffles Reign Supreme
- Demystifying the Deathly Deliciousness of Spooky Eyeball Truffles
- Assembling Your Arsenal of Sinister Sweets Components
- Sourcing the Essentials for Stellar Spooky Eyeball Truffles
- The Alchemical Process: From Chocolate Base to Terrifying Treat
- Sculpting the Pupils: Achieving Realistic Eyeball Textures
- Prognosis and Preservation: Keeping Your Spooky Creations Fresh
- Elevating the Horror: Creative Customizations and Serving Suggestions
- Recipe FAQs
- 📝 Recipe Card
Conjuring the Perfect Halloween Centerpiece: Why These Truffles Reign Supreme
When the veil thins and the leaves turn crisp, our culinary aspirations shift toward the delightfully dramatic. Forget simple sugar cookies; this season demands theatrics, and nothing steals the spotlight quite like a meticulously crafted confection that offers a visual shock followed by utter, decadent bliss.
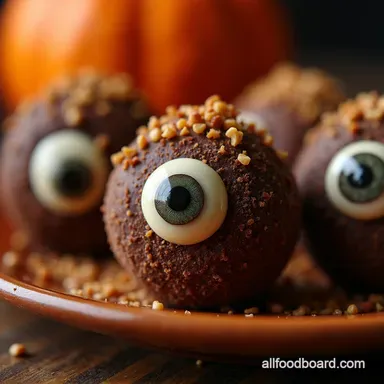
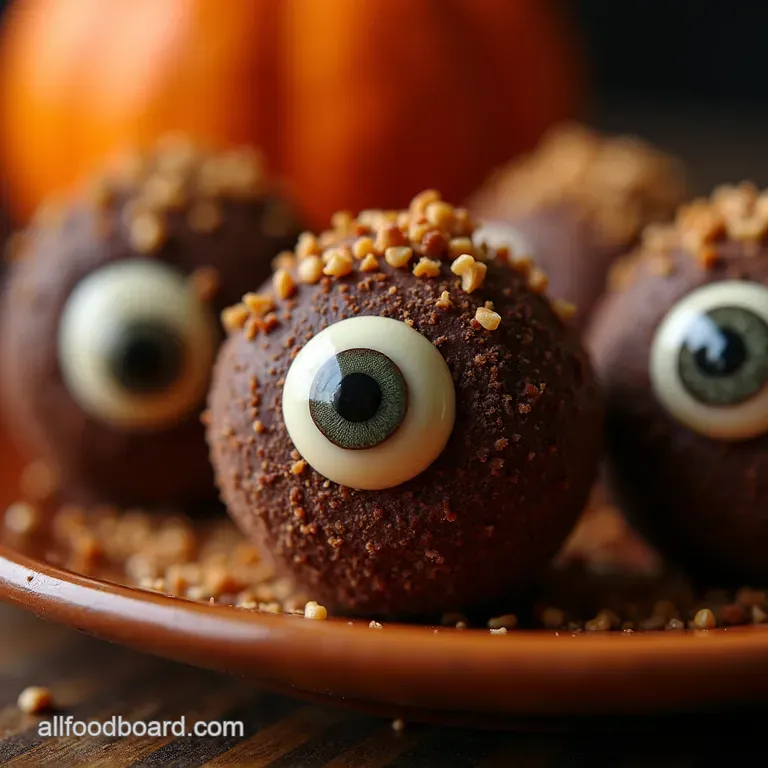
We are diving deep into the creation of Spooky Eyeball Truffles , a dessert that manages to walk the tightrope between being genuinely creepy and irresistibly delicious. These treats aren't merely snacks; they are miniature works of edible art, guaranteed to elevate any spooky gathering.
If you are looking for truly memorable Halloween Food Treats Easy to execute, this recipe delivers fright and flavour in perfect measure.
Demystifying the Deathly Deliciousness of Spooky Eyeball Truffles
Crafting these Halloween eyeball truffles might sound like a task reserved for professional pastry artists, but I assure you, the foundation of this recipe is rooted in accessible, rich ingredients.
The heart of this creation is a deep, intensely flavoured dark chocolate ganache, providing a luxurious, melt-in-your mouth contrast to the vibrant, eerie exterior. The "eyeball" effect relies on clever, simple layering of coloured white chocolate, making the final presentation far more complex than the actual effort required.
These are designed to be show stopping Spooky Desserts that impress every guest.
A Chef’s Promise: Maximum Fright, Minimum Fuss
My commitment to you is that these Creepy Treats For Halloween will not leave you tangled in complex techniques. While the difficulty level hovers around medium due to the necessary chilling times and the fine detail work on the eyes, the actual steps are straightforward: make a rich base, chill, dip, and decorate.
We manage the time effectively, breaking the process into manageable segments. This focus on efficiency ensures that even busy hosts can pull off these stunning Spooky Baking Recipes without sacrificing the evening’s fun.
Setting the Stage: What Makes This Recipe Unforgettable
What truly sets these Halloween Inspired Snacks apart is the textural contrast. You start with that firm, deeply satisfying dark chocolate core, which quickly melts on the tongue, followed by the crisp snap of the white chocolate shell.
Then come the visual surprises: the vibrant, slightly unsettling iris and the piercing black pupil. This sensory experience ensures that these truffles become the memorable talking point of your party, making them ideal candidates for any Halloween Desserts For Bake Sale where presentation equals profit (or praise!).
Assembling Your Arsenal of Sinister Sweets Components
Before we begin the alchemy, preparation is key. Success in any intricate decoration lies in having your components organized and ready before the main action starts. For these Spooky Eyeball Truffles , the ingredients fall naturally into three categories: the decadent interior, the necessary tools for shaping, and the final colourful coatings.
Sourcing the Essentials for Stellar Spooky Eyeball Truffles
To achieve that deep, satisfying darkness in the centre, we must prioritize quality. The better the chocolate you use for the ganache, the less sugar and extra flavouring you will need, letting the cocoa shine through.
Remember, since the time commitment for this recipe is around two hours and thirty five minutes total, ensuring your ingredients are high-quality means the waiting time is truly worthwhile.
The Decadent Core: Ingredients for the Ganache Foundation
Our foundation demands dark chocolate, specifically one in the 60 70% cacao range, finely chopped for smooth melting. To transform this into a rollable truffle base, we require heavy cream, minimum 35% fat, to create the proper emulsion.
A touch of softened unsalted butter is introduced for richness and pliability, complemented by pure vanilla extract and a tiny pinch of fine sea salt to amplify the deep chocolate notes. These elements, when combined correctly, yield a ganache perfect for rolling.
Tools of the Trade: Essential Equipment for Sculpting Eyeballs
Uniformity is vital when creating a batch of identical eyeballs! I highly recommend using a small cookie scoop or a melon baller to ensure every truffle base is the same size before rolling. A heatproof bowl set over a simmering saucepan will serve as your makeshift double boiler for melting chocolate gently.
Crucially, you'll need a baking sheet lined with parchment paper or a silicone mat for setting the dipped truffles. Finally, for the terrifyingly realistic detail work, a small piping bag fitted with a very fine round tip, such as a Wilton #1, is non-negotiable for precision.
The Icing on the Corpse: Decorating Materials Breakdown
The exterior transformation requires white chocolate melting wafers or high-quality white chocolate chips for the coating, as they melt beautifully and set quickly. To ensure that coating stays fluid and manageable for dipping, a teaspoon of vegetable shortening or coconut oil is a secret weapon.
The artistry comes from highly concentrated food colouring gels red, black, and your chosen iris colour (green, blue, or yellow) as liquid colouring will seize the chocolate instantly.
Related Recipes Worth Trying
- The Ultimate 3Ingredient Oreo Truffles NoBake Magic — Discover the secret to truly decadent Cream Cheese Oreo Truffles that require zero baking These easy Oreo truffles are rich dense and the perfect no bake...
- Spooky Fun Halloween Candy Corn JellO Shots Recipe — Get your Halloween party started with these layered Candy Corn JellO Shots Easy boozy and ohsofestive The ultimate adult Halloween treat recipe Check it out
- Easy Vegan Oreo Truffles in 20 Minutes — Make delightful Vegan Oreo Truffles in just 20 minutes! These no-bake treats feature Oreos and vegan cream cheese. Perfect for dessert lovers!
The Alchemical Process: From Chocolate Base to Terrifying Treat
The magic begins by creating the truffle interior. Heat the heavy cream until it’s steaming just shy of boiling. Pour this immediately over your finely chopped dark chocolate in a bowl, allowing it to sit undisturbed for five full minutes.
This resting period allows the residual heat to penetrate the chocolate thoroughly. Then, gently whisk everything until you achieve a seamless, glossy emulsion. Stir in the softened butter, vanilla, and salt until fully incorporated.
Cover the surface directly with plastic wrap to prevent a skin from forming, and let this rich mixture chill in the refrigerator for a minimum of two hours until it is firm enough to handle.
Sculpting the Pupils: Achieving Realistic Eyeball Textures
Once the ganache has achieved its required firmness, we move into the shaping phase, followed by the delicate artistry of decoration. Working swiftly is key here, as body heat can soften the chocolate too quickly.
Phase One: Crafting the Rich, Moldable Chocolate Mass
Using your small scoop or spoon, portion the chilled ganache into consistent amounts aiming for about one tablespoon each. Roll these portions quickly between your palms to form smooth, uniform spheres, about one inch in diameter. Place these formed balls onto your parchment lined baking sheet.
To ensure they are rock solid before dipping, transfer the sheet to the freezer for about 15 to 20 minutes. A very cold center prevents the truffle from collapsing under the warm coating.
Chilling & Shaping: Forming the Spherical Specters
While the bases firm up, gently melt your white chocolate coating along with the optional shortening for optimal flow over the double boiler, stirring until velvety smooth.
Once the truffle bases are thoroughly chilled, pierce one with a toothpick, dip it completely into the melted white coating, and gently lift, tapping off the excess chocolate against the side of the bowl. Place it back onto the parchment.
Smooth over the tiny hole left by the toothpick with a warm finger if necessary, and let the coating set completely at room temperature or in a cool spot.
Glazing and Drizzling: Achieving That Ominous Sheen
This is where we introduce the colour! Divide a small amount of your remaining melted white chocolate into separate, small bowls. Colour these portions using your highly pigmented gel colours to create your iris shades (perhaps a sickly green or a bloodshot yellow).
Keep these coloured coatings warm enough to be fluid but not hot enough to melt the white base underneath.
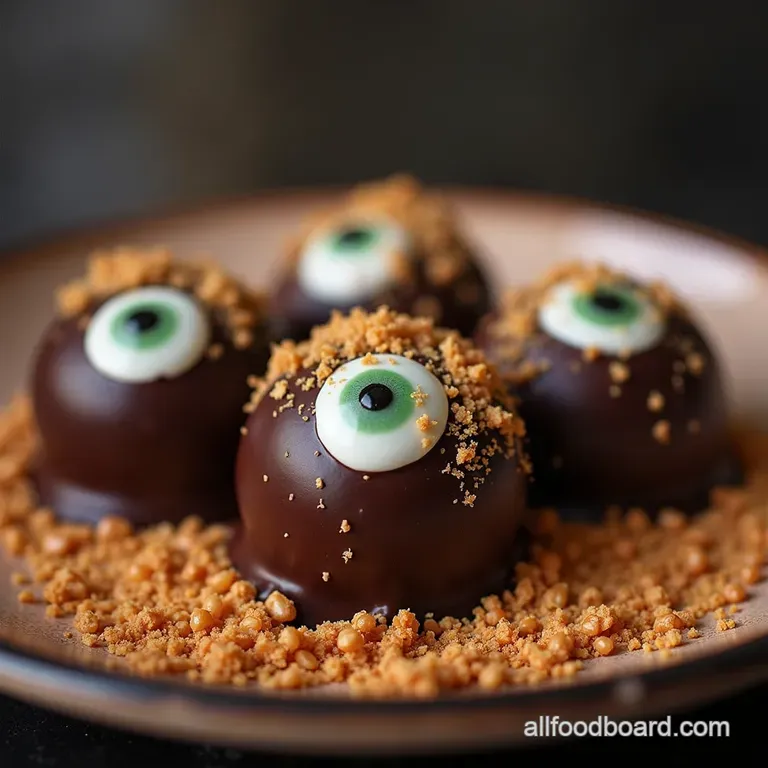
Finalizing the Gaze: Placing the Iris and Pupil Accents
Using your fine tipped piping bag or the very tip of a toothpick, pipe a neat circle of the coloured 'iris' chocolate onto the centre of the set white surface. Work quickly while this layer is still wet.
Immediately follow this by piping a precise, small dot of black coloured chocolate directly into the centre of the wet iris to form the pupil. A tiny dot looks far more realistic and sharp than a large blob, which is why fine tools are essential for creating these Halloween Desserts Creepy masterpieces.
Prognosis and Preservation: Keeping Your Spooky Creations Fresh
Once all the pupils are placed, allow the decorations to fully set patience here prevents smudging! These rich confections have a wonderful shelf life, provided they are stored correctly, making them excellent for advance preparation.
Troubleshooting Common Truffle Terrors (Fixes for Soft Centers)
If you find your ganache base is too soft to roll even after chilling, it means the cream-to-chocolate ratio was slightly off, or it didn't chill long enough. Combat this by returning the entire bowl to the refrigerator for another 30 minutes, or alternatively, add a tablespoon of finely sifted powdered sugar or cocoa powder to the mixture to help absorb excess moisture and firm it up before rolling again.
Optimal Resting Conditions: Storage Tips for Long Term Spookiness
Because these are primarily chocolate based, they fare best when kept cool. Store your finished Spooky Eyeball Truffles in an airtight container in the refrigerator. They will keep delightfully for up to two weeks.
For the absolute best flavour and texture, remove them from the fridge about 20 minutes before serving to allow the ganache core to soften slightly.
Dietary Diversions: Vegan Swaps and Allergy Adjustments
Creating treats for everyone is important! For a dairy-free option, substitute the heavy cream with the thick, solidified cream from the top of a can of full fat coconut milk (refrigerated overnight). Ensure you use vegan certified dark chocolate chips and vegan white chocolate melts for the coating.
Since we are not using any nuts in the core recipe, these are naturally free of tree nuts, though always verify the labels of your chosen chocolate brands for cross contamination warnings if allergies are severe.
Elevating the Horror: Creative Customizations and Serving Suggestions
The base recipe is fantastic, but a little extra flair can push these Spooky Eyeball Truffles into legendary territory. Think about adding an element of narrative to your display.
Vampire’s Kiss Dipping Sauce
To amplify the gruesome aesthetic, prepare a simple raspberry or cherry coulis thickened slightly with cornstarch if needed and serve it alongside the platter. This deep, glossy red sauce serves as a perfect, albeit slightly macabre, dipping accompaniment.
Eerie Presentation: The Graveyard Fog
When arranging these on your serving platter, dust the surface liberally with powdered sugar. This white dusting instantly mimics a spooky, early morning frost settling over the scene, making the eerie eyes pop out dramatically against the muted background.
Pairing with Potent Potions
These rich, slightly bitter dark chocolate creations pair beautifully with strong beverages. Consider serving them alongside chilled milk, a dark espresso martini, or perhaps a warm, spiced apple cider.
The complexity of these Halloween Desserts Creepy demands a beverage that can stand up to their intense chocolate profile.
Recipe FAQs
How do I stop my Spooky Eyeball Truffles from melting while I’m rolling them? They keep getting messy!
Ah, the classic sticky truffle struggle! The secret here is chilling time you simply can't rush the ganache. Make sure your base is firm enough to scoop cleanly, which usually means at least two hours in the fridge.
If they start softening while you’re rolling, pop the batch back into the fridge or freezer for ten minutes to firm up before tackling the next lot.
My white chocolate coating seized up when I tried to melt it. What did I do wrong?
That’s a real pain, like finding a sock missing from the wash! Chocolate hates moisture. If you used a double boiler, ensure there wasn't any steam condensation dripping in, and if you added any water based flavouring, that could do it too.
Try melting it again very gently over low heat, whisking in a teaspoon of neutral oil or coconut oil to loosen it up.
Can I make these ahead of time for my Halloween bash? How long do the finished Spooky Eyeball Truffles last?
Absolutely, making them ahead is the smart move! You can store the undecorated, plain white truffles in an airtight container in the fridge for up to a week. Once fully decorated, they should be fine in the fridge for 4 5 days, but honestly, they’re best eaten within three days for peak freshness and flavour.
I’m not brilliant at piping details. Is there an easier way to make the iris and pupil effect?
Don't fret, we all have different levels of steady hands! If piping feels like tackling a jigsaw puzzle, try using very small dots of coloured candy melts instead of food colouring.
Alternatively, you can use small, coloured nonpareils (sprinkles) for the iris colour, and then just place a single black sprinkle right in the centre for the pupil it still looks remarkably effective!
I need a dairy-free version for a guest. Can I substitute the cream and white chocolate?
You certainly can dodge the dairy without losing the decadence! For the ganache, use the thick cream off the top of a chilled can of full fat coconut milk instead of heavy cream, and use high-quality dairy-free dark chocolate.
For the coating, look specifically for vegan white chocolate melts or chips, as these usually lack dairy solids.
Spooky Eyeball Truffles