The Proper Chop Kimchi Fried Rice Quick Fiery and Utterly Satisfying

- Why This Recipe Replaces Every Other Weeknight Meal Plan
- The Soulful Science Behind Authentic Kimchi Bokkeumbap
- The Essential Arsenal: Sourcing the Right Components
- Mastering the Sizzle: Techniques for Perfect Texture
- The Flavor Layering Process: Step-by-Step Execution
- Troubleshooting Common Kitchen Catastrophes
- Elevating Your Leftovers: Variations and Pairings
- Recipe FAQs
- 📝 Recipe Card
Why This Recipe Replaces Every Other Weeknight Meal Plan
Forget the tedious chopping and the complex layering required by so many "quick" dinner recipes. This particular Kimchi Fried Rice Recipe , known in Korean kitchens as Kimchi Bokkeumbap , is the ultimate weeknight workhorse.
It demands minimal active time barely 10 minutes of actual cooking yet delivers a depth of flavour that suggests hours spent simmering. It’s the perfect marriage of vibrant acidity from fermented cabbage and the comforting, smoky heat that hooks you from the very first bite.
If you’re searching for dynamic Asian Food Recipes Rice dishes that satisfy without stress, look no further. This isn't just about using leftovers; it’s about creating a spectacular culinary event using humble pantry staples.
The Soulful Science Behind Authentic Kimchi Bokkeumbap
Authenticity in this dish hinges on two core concepts: the quality of your souring agent and the management of heat. Many home cooks rush the process, leading to a soggy result. We are aiming for distinct, separate grains of rice, each coated in flavour, with little pockets of crispy, caramelized kimchi throughout.
This Rice And Kimchi Recipe is deceptively simple, but mastering the texture elevates it from a quick fix to true comfort food.
Unlocking Deep Umami: The Secret to Next Level Flavor
The cornerstone ingredient here is very well fermented, sour kimchi. When kimchi ferments past its peak for eating raw, its lactic acid level rises, resulting in a sharp, powerful tang.
This sourness is crucial because it beautifully cuts through the richness we add later, particularly if you opt for richer proteins like pork belly. We also harness the vibrant liquid drained from the cabbage those reserved 3 tablespoons of kimchi juice are liquid gold, injecting concentrated umami and spice directly into the rice mixture, far more effectively than just using the cabbage alone.
Kimchi Fried Rice: From Fridge Scraps to Culinary Star
This dish embodies resourceful cooking. It’s traditionally made with rice that is at least a day old, having had time to dry out slightly in the refrigerator. Freshly cooked rice is too moist; it steams instead of fries, resulting in that dreaded mushiness.
By using cold, firm grains, we ensure that every grain can be individually heated and lightly toasted in the wok. This transforms humble leftovers into the basis for our Easy Kimchi Fried Rice .
Setting Expectations: Flavor Profile and Preparation Time
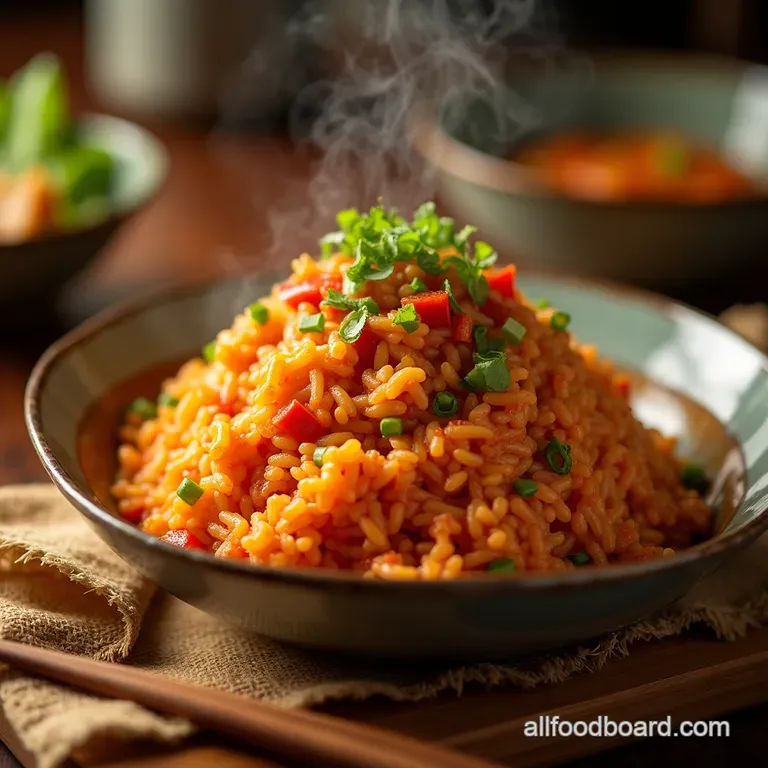
When you follow this Kimchi Fried Rice Recipe , you should expect a profile that is spicy, tangy, slightly sweet (from the caramelized Gochujang), and intensely savoury.
We are aiming for a total time commitment of around 22 minutes from chopping board to table for two very satisfied diners. The preparation phase, which involves chopping the protein (perhaps Kimchi Fried Rice with Spam for a classic twist, or firm tofu for a vegetarian approach) and the aromatics, needs to be efficient since the actual cooking occurs rapidly over high heat.
The Essential Arsenal: Sourcing the Right Components
Success in stir frying always begins with preparation. Before the heat even touches the pan, every single component from the protein to the garnish must be measured, chopped, and sitting within arm’s reach.
Crucial Components: Selecting Your Fermented Cabbage
As mentioned, your kimchi needs that deep, established sourness. If your refrigerator only holds fresh, crisp kimchi, you can accelerate the process slightly by leaving it on the counter for a day, or by simply utilizing more of that potent reserved juice during the seasoning phase.
We need about one packed cup of chopped kimchi for this recipe, enough to permeate the entire batch of rice without overwhelming the other flavours.
The Aromatic Foundation: Gochujang, Garlic, and Sesame Oil Ratios
The balance of the paste is key. We use 1 tablespoon of Gochujang (Korean chili paste) for a good, moderate heat level, which you can adjust. Crucially, we don't just stir the Gochujang into the mixture; we toast it briefly in the hot oil before adding the kimchi.
This small step melts the sugars slightly and unlocks a smoky depth that simple mixing cannot achieve. Two cloves of minced garlic and a single teaspoon of finishing sesame oil provide the signature warm fragrance without making the dish greasy.
Optional Upgrades: Meat, Seafood, and Vegetarian Substitutions
While pork belly lends unmatched richness due to its rendered fat which we utilize for sautéing the onions many variations exist. For a salty, convenient option, diced Kimchi Fried Rice with Spam is a nostalgic favourite.
Alternatively, 4 ounces of firm tofu, pressed very dry and pan-fried until golden, serves as an excellent vegetarian protein base. Regardless of your choice, ensure the protein is diced small so it integrates evenly into the final rice mixture.
Related Recipes Worth Trying
- The Fakeaway Air Fryer Fried Rice Crispy Quick Dinner — Tired of greasy takeaway Our Air Fryer Fried Rice recipe nails the crispy texture without the fuss Learn this foolproof method for healthy family meals air...
- Easy Crockpot Chicken Fried Rice All the Takeout Flavour — Ditch the wok This Easy Crockpot Chicken Fried Rice recipe delivers incredible comfort food flavour with minimal effort The perfect simple Crockpot recipe...
- The Ultimate SetandForget Crockpot Chicken and Rice Soup — Our foolproof Crockpot Chicken and Rice Soup recipe delivers deep comforting flavour with minimal effort This healthy slow cooker option is perfect for easy...
Mastering the Sizzle: Techniques for Perfect Texture
The secret weapon for any great stir fry is high heat and constant movement. We use a large wok or the largest, heaviest skillet available to ensure the temperature doesn't drop when cold ingredients are added.
This high heat environment is what allows the rice grains to toast slightly against the metal surface, creating those coveted crispy edges, rather than just steaming the dish into submission.
The Flavor Layering Process: step-by-step Execution
This Kimchi Fried Rice Recipe is structured in distinct phases of flavour introduction. We build the flavour profile sequentially so that each ingredient cooks properly before the next is introduced.
Step 1: Taming the Kimchi The Initial Sauté
After rendering your protein (like the pork belly) and setting the crispy bits aside, you sauté the onions until translucent. The kimchi then hits the hot oil/fat. Stir frying the kimchi aggressively for two to three minutes concentrates its flavour, mellowing its raw acidity slightly and ensuring it becomes tender rather than stringy in the final dish.
This step is non-negotiable for maximum impact in your Kimchi Bokkeumbap .
Step 2: Integrating the Protein and Day-Old Rice
Once the kimchi is perfectly cooked down, we create a small space in the pan. This is where the Gochujang meets the direct heat for that critical 15-second toast before being vigorously mixed with the kimchi. Only after the flavour base is established do we add the 3 cups of cold, crumbled rice.
Toss continuously until the rice grains are separated and fully coated in the developing sauce.
Step 3: Achieving the Caramelized Crust on Your Kimchi Fried Rice
This is the moment for texture. Once the rice is hot, let it sit undisturbed on the pan surface for about 30 seconds before stirring again. You should hear it sizzle and perhaps see some slightly browned edges forming this is the beginning of the crust. Now, introduce the soy sauce and the reserved kimchi juice.
Toss again until everything is evenly distributed and steaming hot, then fold in the reserved crispy meat.
Step 4: The Final Garnish and Presentation Perfection
Turn the heat off. The final flourish involves drizzling in the pure sesame oil which is best used as a finishing agent rather than a cooking fat and mixing in half the fresh scallions. The dish is then immediately divided into bowls. Crucially, crown each serving with a perfectly fried, runny yolked egg.
That yolk mixing into the spicy rice is the final, unmissable step in this incredible Rice And Kimchi Recipe .
Troubleshooting Common Kitchen Catastrophes
If your finished dish is weeping moisture, it almost always points back to using fresh, rather than cold, rice, or cooking the ingredients over heat that was too low, causing them to steam.
If the flavour falls flat, you likely skipped toasting the Gochujang or didn't use sour enough kimchi; rectify this next time by adding an extra splash of the reserved kimchi juice right at the end.
Conversely, if it’s overwhelmingly salty, add a small amount of water or a squeeze of fresh lime juice to balance the salinity from the soy sauce and kimchi.
Elevating Your Leftovers: Variations and Pairings
While this recipe is optimized for immediate consumption, the flavours actually meld beautifully overnight, making the leftovers fantastic.
FAQ: Ensuring Crisp Rice, Not Mushy Rice
Q: My rice turned into a clump. How do I prevent this in future Kimchi Fried Rice Ingredients preparations? A: The golden rule remains: the rice must be cold, ideally straight from the fridge, and you must use high heat.
If you are making a very large batch, cook the rice in two separate batches rather than overcrowding the wok, which lowers the temperature too quickly.
Storage Solutions for Optimal Leftover Kimchi Bokkeumbap
Store cooled leftovers in an airtight container in the refrigerator for up to three days. When reheating, use a non-stick pan over medium heat, splash in a teaspoon of water or stock, cover briefly to create steam, and then uncover to let the heat crisp the edges again.
Inspired Pairings: What to Serve Alongside This Fiery Dish
This Kimchi Fried Rice is hearty enough to stand alone, but it truly shines when contrasted with something cooling. Serve it alongside simple, quick pickled radishes ( danmuji ) for a palate cleanser, or a side of cool cucumber salad dressed lightly with vinegar.
For drinks, a crisp Korean lager or even a simple glass of iced barley tea provides the perfect counterpoint to the spice.
Health Snapshot: Nutritional Considerations for this Rich Meal
While undeniably satisfying, this meal can be high in sodium and, depending on the protein used, saturated fat. For those conscious of managing a Kimchi Rice Diet , focus on using leaner proteins like chicken breast or tofu, reducing the soy sauce slightly, and ensuring you balance the richness with an extra portion of fresh, non-starchy vegetables on the side.
Nevertheless, the fermented nature of the kimchi does offer excellent probiotic benefits alongside its phenomenal flavour.
Recipe FAQs
What’s the secret to ensuring my Kimchi Fried Rice isn't soggy?
The absolute golden rule is to use day-old, cold, refrigerated rice no exceptions! Freshly cooked rice holds too much internal moisture, which steams the dish rather than frying it. Also, make sure you drain your kimchi well before chopping it, though don't discard that precious juice!
Can I use fresh kimchi instead of the really sour, old stuff?
While you can, the flavour profile won’t be quite right; you want kimchi that's well fermented and noticeably sour. That intense tanginess is what cuts through the richness of the oil and the sweetness of the Gochujang.
If your kimchi is too fresh, let it sit on the counter for a day or two to encourage that necessary sourness.
I don't eat pork; what's the best substitute for the protein in Kimchi Fried Rice?
You're in luck, this dish is brilliantly versatile! Diced Spam is a traditional and delicious alternative, providing that salty, fatty hit. For a leaner option, use firm tofu that you've pressed well to remove excess water, or swap it out for finely diced chicken thigh.
How do I make sure the rice gets that lovely toasted flavour, not just heated up?
Keep your heat high once the rice goes in, and don't overcrowd the pan if necessary, cook in smaller batches. You need to toss and stir vigorously until you hear the grains starting to sizzle and perhaps see a few lightly browned edges forming.
Also, remember to briefly toast the Gochujang paste on its own before mixing everything in; that deepens the flavour immensely.
Can I make a batch of Kimchi Fried Rice ahead of time or freeze leftovers?
It stores brilliantly in the fridge for 3 4 days; just keep it airtight. When reheating, use a splash of water or reserved kimchi juice and reheat gently in a skillet to bring back the texture, as the microwave can sometimes make it slightly dense.
Freezing is possible, but the texture of the rice may degrade slightly, so fresh is always best if you can manage it!
Proper Kimchi Fried Rice

