The Go Bananas for Peanut Butter Swirl Loaf Nextlevel Banana Bread
- Why This Peanut Butter Banana Bread Redefines Comfort Baking
- The Marriage of Comfort: Nutty Swirls Meet Tender Loaf
- Assembling Your Arsenal: What You'll Need for Optimal Flavor
- The Master Plan: Step-by-Step Guide to Baking Bliss
- Troubleshooting and Tips for Your Peanut Butter Banana Bread Triumph
- Recipe FAQs
- 📝 Recipe Card
Why This Peanut Butter Banana Bread Redefines Comfort Baking
Right then, let's get cracking on what is shaping up to be a proper corker of a bake! Peanut butter and banana the ultimate comfort food pairing, isn't it? Like a perfect Sunday roast, but in loaf form. Forget that slightly dry loaf you made last time.
This recipe takes that classic banana bread and gives it a real luxurious, nutty kick. We’re creating a luscious swirl throughout the crumb, ensuring every slice has that satisfying blend of sweet, roasted peanut flavour and tender, ripe banana.
It's the perfect slice for elevenses, teatime, or even a quick breakfast when you need a bit of a boost far better than anything you’d find in a plastic wrapper down the local corner shop!
This "Go Bananas for Peanut Butter" Swirl Loaf delivers an intensely moist result, and perhaps best of all, it’s an Easy Peanut Butter Banana Bread that anyone can master.
The Marriage of Comfort: Nutty Swirls Meet Tender Loaf
This isn't just a quick bread; it’s a deeply satisfying textural experience. The rich, salty undertones of the peanut butter cut beautifully through the inherent sweetness of the caramelized bananas, creating a depth of flavour that elevates this far beyond the standard fare.
The process is designed for reliability, focusing on simple creaming methods that trap air for a light crumb despite the richness of the additions.
Elevating the Classic: Introducing the Luxurious Nutty Kick
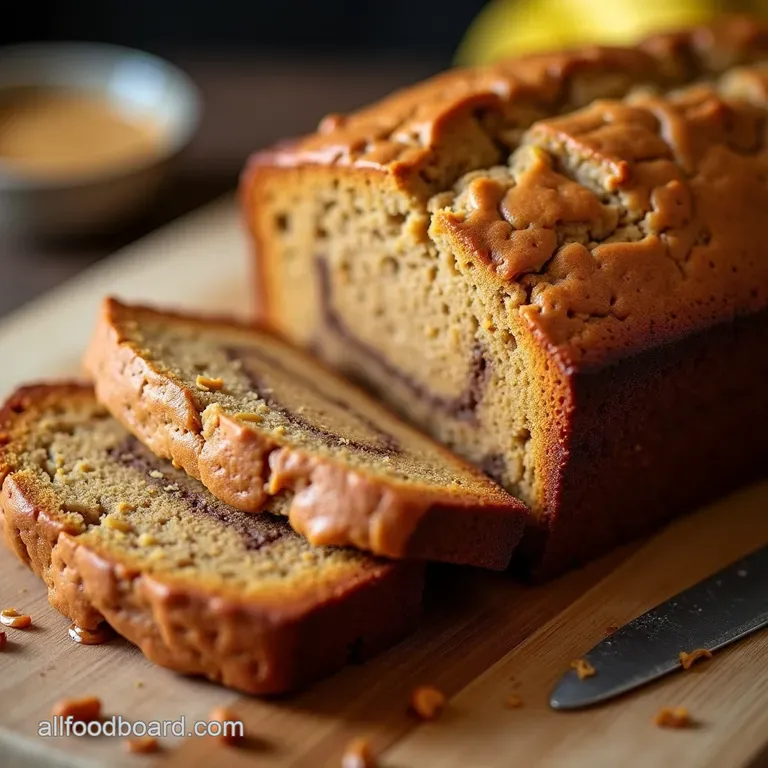
What truly sets this Peanut Butter Banana Bread Recipe apart is the deliberate swirl. While you could certainly fold in peanut butter chunks, creating a defined ripple ensures that pockets of intense, unadulterated peanut flavour greet you in every bite.
We use a small amount of powdered sugar in the swirl mixture to help stabilize the peanut butter, preventing it from sinking to the bottom or bleeding excessively into the surrounding batter during baking. This method helps maintain the gorgeous marbled visual effect.
Straightforward Success: A Loaf Anyone Can Master
Our difficulty level settles firmly in the 'Easy' category. This is essentially a ‘dump and stir’ quick bread, meaning there’s no complicated technique required. You’ll need about 20 minutes of active prep time before this masterpiece heads into the oven for approximately 55 to 65 minutes of baking bliss.
If you’re looking for an Easy Peanut Butter Banana Bread , this is it no yeast proving, no tricky folding, just standard creaming and mixing for maximum payoff.
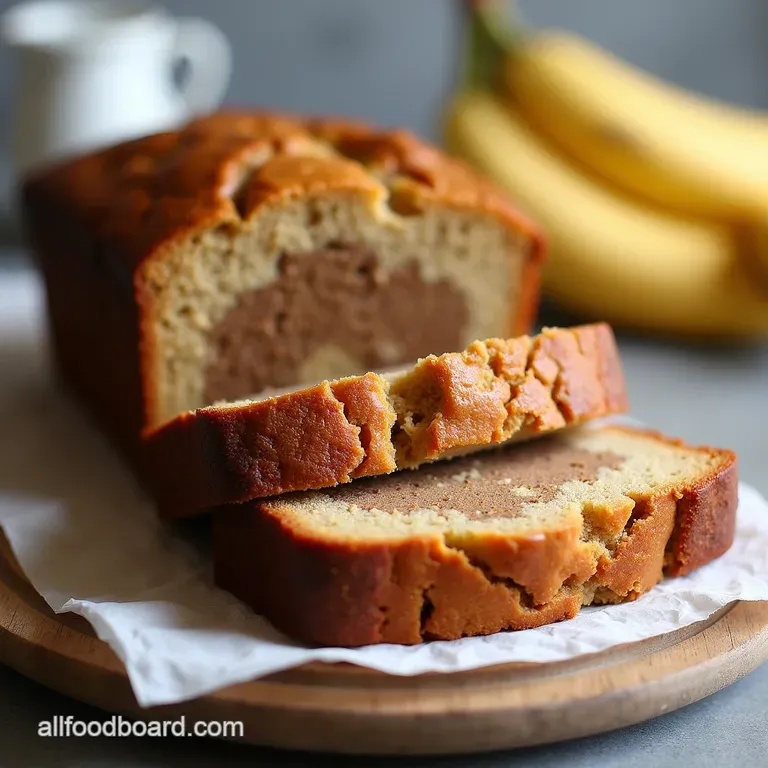
Why We Swirl: Achieving Visual and Flavor Perfection
The visual appeal of a well swirled loaf is undeniable. When sliced, the contrast between the pale golden banana batter and the deep tan peanut butter creates immediate appeal. On top of that,, the swirl ensures an even distribution of that luxurious flavour, guaranteeing that this Banana Peanut Butter Bread Recipe hits all the right notes from crust to centre.
Related Recipes Worth Trying
- The Best Soft Chewy Peanut Butter Cookies Recipe — Tired of dry biscuits This easy recipe delivers the softest chewiest homemade peanut butter cookies youve ever tasted Perfect for your biscuit tin
- Perfectly Chewy Peanut Butter Cookies Classic Fork Mark Recipe — Master the Best Peanut Butter Cookies This easy recipe yields perfectly chewy nostalgic treats ideal for any bake sale Get the foolproof technique now
- The Best Peanut Butter Cookies Chewy Foolproof — Learn how to make truly classic meltinyourmouth Peanut Butter Cookies with this foolproof recipe Get the perfect texture every time
Assembling Your Arsenal: What You'll Need for Optimal Flavor
To ensure your loaf turns out beautifully moist and perfectly speckled, preparation is key. Having your ingredients measured and ready your mise en place —will make the 20-minute prep fly by.
This recipe yields one standard 9x5 inch loaf, perfect for slicing into 10 to 12 satisfying portions.
The Ripe Bananas Blueprint: Selecting the Perfect Fruit Base
The success of any banana bread hinges entirely on the quality and ripeness of your fruit. You are aiming for bananas that are heavily speckled, bordering on black. This intense ripeness means the starches have fully converted to sugar, maximizing both natural sweetness and moisture content.
Aim for about 1 ½ cups of mashed banana roughly 3 to 4 medium bananas to ensure the characteristic dense, moist crumb this bread promises.
Mise en Place for Maximum Moisture: Fats, Sugars, and Leavening Agents
For the main batter, we rely on room temperature ingredients for optimal emulsification. You will need softened unsalted butter (½ cup), two large eggs, and 1 teaspoon of pure vanilla extract.
The dry components marry two types of sugar ¾ cup granulated and ¼ cup packed brown sugar to balance texture and flavour depth. The lift comes from 1 teaspoon of baking soda, complemented by ½ teaspoon of salt and 1 teaspoon of ground cinnamon to warm the overall profile.
Tool Talk: Necessary Equipment Beyond the Mixing Bowl
While a sturdy wooden spoon and a whisk can accomplish everything, having an electric hand mixer can make the initial creaming step significantly faster. Essential equipment includes two large mixing bowls, a rubber spatula for careful folding, and, most importantly, a standard 9x5 inch loaf pan.
We recommend greasing and flouring this pan, or lining it with parchment paper that overhangs the sides, which is invaluable for lifting the finished loaf out gently onto a wire cooling rack.
The Master Plan: step-by-step Guide to Baking Bliss
Following these steps ensures the structure is sound before we introduce the flavour accents. Remember, the goal here is tenderness, which means restraint in mixing is your best friend.
Crafting the Perfect Dough and Introducing the Swirl
First, set your oven to 350° F ( 175° C). In one bowl, whisk together your dry elements: 1 ¾ cups of all-purpose flour, both sugars, baking soda, salt, and cinnamon. In your second, larger bowl, mash those perfectly spotty bananas.
Gently cream the softened butter into the mashed fruit, then incorporate the two room temperature eggs one at a time, followed by the vanilla.
Prepping the Batter: Combining Wet and Dry Components Seamlessly
Now, introduce the dry ingredients to the wet mixture incrementally, mixing only until the last streaks of flour vanish. Overmixing is the enemy of tenderness here, so stop as soon as you can no longer see dry pockets.
To prepare the beautiful contrast, combine the swirl components in a small dish: ½ cup of creamy peanut butter, 2 tablespoons of powdered sugar, and start with just 1 teaspoon of milk. Mix until it’s a thick, easily drizzlable paste. If it seems overly stiff, add that second teaspoon of milk sparingly.
Executing the Iconic Peanut Butter Ripple Technique
Pour exactly half of the banana batter into your prepared loaf pan. Next, evenly dollop the thick peanut butter mixture across that first layer of batter. Follow this by gently spooning the remaining banana batter over the top.
Now, take a butter knife or a thin skewer and gently cut through the batter 3 or 4 times in an ‘S’ shape. Resist the urge to over swirl; too much agitation will muddy the colours and compromise the structure.
Oven Time: Achieving That Golden Brown Exterior Crust
Bake the loaf for 55 to 65 minutes. A skewer inserted into the deepest part of the bread should emerge clean or with only moist, tender crumbs attached never wet batter. If the top browns too rapidly around the 40-minute mark, loosely tent it with foil.
Allow the loaf to rest in the pan for 15 minutes before transferring it to the wire rack to cool completely before slicing.
Troubleshooting and Tips for Your Peanut Butter Banana Bread Triumph
Even with an Easy Peanut Butter Banana Bread Recipe , a few pitfalls can occur. The most common is a loaf that sinks in the middle or one that seems tough rather than tender.
The key to avoiding a collapsed centre is ensuring your leavening agent (baking soda) is fresh and that you are not underbaking. If the centre is wet after 65 minutes, keep baking at 5-minute intervals. If the edges are burning, tent it lightly with foil.
Variations on a Theme: Adding Chocolate Chips or Spices
If you are a true devotee of this flavour combination, consider adding ½ cup of dark Peanut Butter Banana Bread with Chocolate Chips into the batter just before you pour it into the pan for an extra layer of indulgence.
Alternatively, you can enhance the warmth by adding ¼ teaspoon of ground nutmeg to the dry ingredients. For those exploring texture options, turning this into Peanut Butter Banana Bread Muffins is simple; reduce the baking time to about 20- 25 minutes.
The Crucial Cool Down: Why Patience Yields Better Slices
Resist slicing while the loaf is hot! That 15-minute rest in the pan allows the structure to set firmly. Rushing it will result in a gummy, messy slice. Patience ensures the crumb is fully stabilized, offering clean cuts perfect for spreading or transforming into something entirely new.
Freezing Fundamentals: Maintaining Peak Freshness Overnight
If you manage to have leftovers, this loaf freezes wonderfully. Wrap the completely cooled loaf tightly in plastic wrap, then again in foil. It will hold perfectly for up to three months. Thaw on the counter for a few hours.
You can also take a pre-sliced piece and gently toast it, perhaps even transforming it into a creative Peanut Butter Banana Bread Pudding the next day a delicious resurrection for slightly stale slices!

Recipe FAQs
My loaf tends to come out dry. How can I ensure this Peanut Butter Banana Bread stays wonderfully moist?
The secret lies in the bananas! Make absolutely certain they are spotty, almost black, as the riper they are, the more moisture and sugar they release. Also, be vigilant about not overmixing the batter once the flour is added; stop as soon as the streaks disappear to keep that gluten development in check.
What's the best way to get that beautiful peanut butter swirl without having it sink to the bottom?
The key is texture and technique. We add powdered sugar to the peanut butter mixture to thicken it up considerably, preventing it from being too runny. When layering, pour half the batter, dollop the peanut butter mix on top, then add the remaining batter, and use a knife to gently cut through it just a couple of times no aggressive stirring!
Can I make this recipe ahead of time, and how should I store the finished loaf?
Absolutely, quick breads often taste even better the next day! Once completely cooled, wrap the loaf tightly in cling film or foil and store it at room temperature for up to three days. For longer storage, it freezes brilliantly when wrapped well; just thaw it on the counter or warm it gently in the oven.
I’m out of bananas! Can I use frozen bananas or substitute the peanut butter in this recipe?
Yes to both, don't panic! Frozen bananas work perfectly; just thaw them overnight and drain off any excess liquid before mashing them into your batter. If you need to swap the peanut butter, sunflower seed butter or a thick tahini will give you a comparable textural swirl, though the flavour, of course, will be different.
My loaf is browning too fast on top, but the centre feels wet. What should I do mid-bake?
That’s a common issue, usually due to the high sugar content in the banana and peanut butter. If the top starts looking suspiciously dark around the 40-minute mark, grab a sheet of aluminium foil and loosely tent it over the top of the pan.
This protects the crust while allowing the heat to penetrate and cook the middle through properly.
Peanut Butter Swirl Loaf

Instructions:
Nutrition Facts:
| Calories | 320 Cal |
|---|---|
| Fat | 16g |
| Fiber | 2g |
