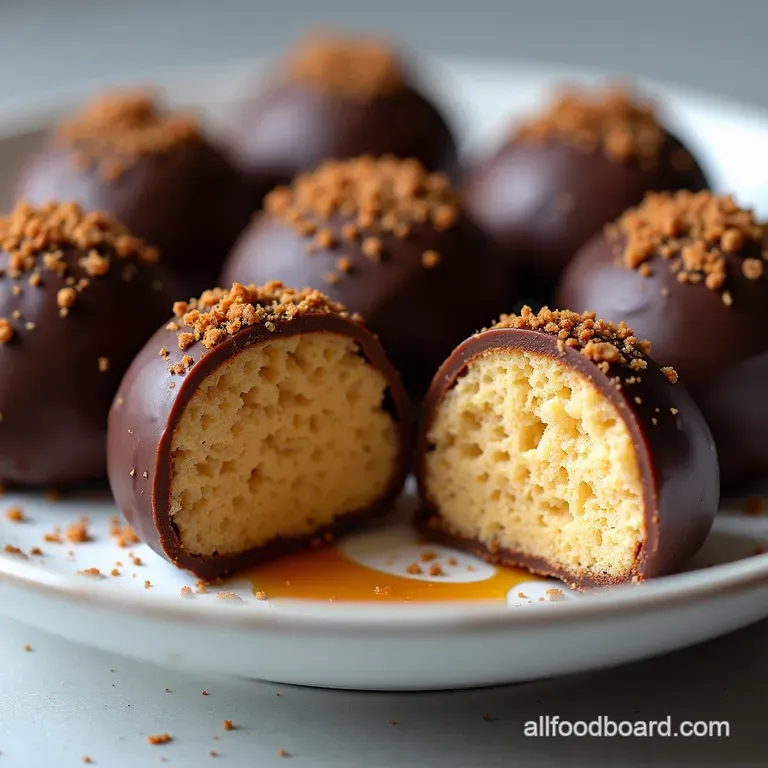
The Millionaires Shortbread Snowballs Nobake Caramel Chocolate Truffles
- Why These NoBake Christmas Treats Are Your Holiday MVP
- Ditching the Oven: The Ultimate Festive Shortcut
- Assembling Your Decadent Truffle Components
- Essential Supplies for Effortless NoBake Christmas Treats
- The Simple Assembly Sequence for Truffle Perfection
- Chilling and Finishing: Setting Your Holiday Candy
- Elevating Your Snowballs: Advanced Variations and Storage
- Troubleshooting Common NoBake Challenges
- Frequently Asked Questions
- 📝 Recipe Card
Why These NoBake Christmas Treats Are Your Holiday MVP
The festive season is synonymous with abundance, beautiful decorations, and, inevitably, an oven that’s running near constantly. When the kitchen is commandeered by roasting turkeys and bubbling pies, having a selection of stellar NoBake Christmas Treats in your arsenal is not just convenient it’s strategic.
These Millionaire's Shortbread ‘Snowballs’ are the answer to those last minute dessert demands or when you simply need a gorgeous, indulgent confection without adding another minute to your oven duty.
They capture the rich, layered essence of a classic favourite, condensing that complex flavour into a single, satisfying bite that screams luxury but whispers simplicity.
Ditching the Oven: The Ultimate Festive Shortcut
We are aiming high on decadence while keeping the process incredibly grounded. This recipe is a magnificent example of Easy Christmas Treats No Bake done right, eliminating the fiddly process of shortbread baking and focusing purely on texture and rich flavour delivery.
Because these rely on the magic of chilling rather than heat setting, they are remarkably stable and perfect for assembling in batches when you have small pockets of downtime. They are truly Quick Christmas Sweets that punch far above their weight class in terms of visual appeal and taste satisfaction.
Introducing the Zero Stress Chocolate Delight
The foundation of these snowballs is a dense, buttery biscuit crumb, held together with just the right touch of golden syrup. This base provides the necessary structural integrity and the familiar, comforting crunch that contrasts so beautifully with the softer elements.
By using finely crushed digestive biscuits (or graham crackers if you prefer), we eliminate any lumps, ensuring a perfect platform for the next layer. This foundational step is crucial, requiring nothing more than a bowl and a firm press into a lined tin.
Capturing Millionaire's Magic Without the Heat
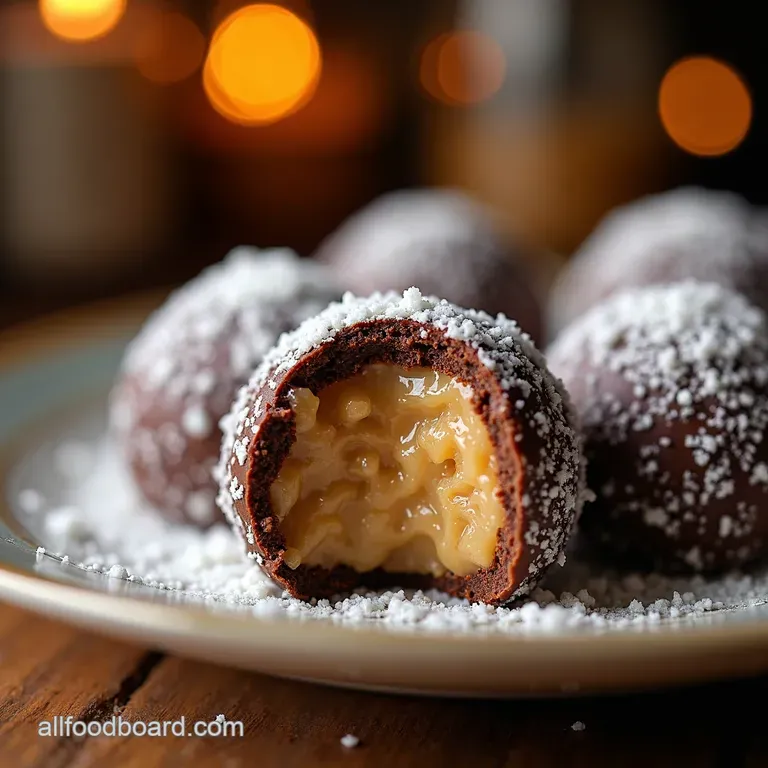
The heart of this indulgence is the rich, slow simmered caramel centre. Unlike some overly sweet, quick fix microwave caramels, this version uses a gentle stovetop method involving sweetened condensed milk, butter, and dark brown sugar.
Cooking this mixture slowly over low heat allows the sugars to deepen in colour and flavour, yielding that signature, slightly salty, chewy toffee note characteristic of true Millionaire's Shortbread. It’s a five minute active cooking process that transforms simple ingredients into liquid gold.
Perfect Portions for Last Minute Gifting
One of the greatest assets of these Shareable Christmas Treats is their perfect portability. Once set, they can be cut into neat squares or gently rolled into rustic spheres, resembling miniature snowballs ideal for holiday hampers or quick contributions to an Christmas Treats For Office Party .
Since they don't rely on precise, fragile layers, they travel beautifully, making them top-tier Holiday Treats To Make For Gifts .
Assembling Your Decadent Truffle Components
Success with these No Bake Christmas Treats Easy hinges on preparing each component correctly before assembly. We need a robust base, a deeply flavourful caramel, and a flawless, snappy chocolate shell. Let’s look at what goes into creating these perfect layers.
Essential Supplies for Effortless NoBake Christmas Treats
Gathering your ingredients ensures a smooth workflow, especially when dealing with ingredients that firm up quickly upon cooling. For this recipe, we are combining pantry staples to achieve complex textures.
The Rich Base: Biscuit and Butter Ratios
The base demands a 1 ½ cup measurement of finely crushed digestive biscuits, bound together by 6 tablespoons of melted unsalted butter and 2 tablespoons of golden syrup. The syrup is key here; it acts as a liquid binder, ensuring the crumb presses down densely without becoming dry or crumbly later.
Mix until it resembles damp sand before pressing it firmly into the base of your parchment lined tin.
Crafting the Silky No-Cook Caramel Layer
For the caramel, the ratio is key: a full 14-ounce can of sweetened condensed milk paired with 4 tablespoons of butter, ½ cup of packed dark brown sugar, and a critical ¼ teaspoon of fine sea salt.
This mixture must be stirred continuously over medium low heat until it thickens enough to coat the back of a spoon a visual cue that it will set into a firm but chewy layer when chilled.
What You Need: Sourcing Premium Chocolate Coatings
Since there is no baking to mute lower quality ingredients, the coating must shine. Use at least 10 ounces of good quality dark chocolate (60% cocoa solids minimum). Adding just 1 teaspoon of coconut oil helps lower the viscosity of the melted chocolate slightly, ensuring a smoother dip and a less brittle, more satisfying snap once set.
This makes dipping far more manageable for anyone making No Bake Christmas Treats With Few Ingredients .
Tools to Guarantee Smooth Truffle Rolling
While the base is pressed, the chilled caramel squares can be shaped into snowballs by briefly rolling them between warm hands. You will need a medium saucepan for the caramel, a large bowl for mixing the base, and most importantly, a wire cooling rack set over parchment paper.
This rack is essential for allowing excess chocolate to drip away cleanly and for achieving an even set on the coating without leaving a messy pooling puddle at the bottom of your candy.
Related Recipes Worth Trying
- MapleBacon Brussels Sprouts Easy Christmas Side Dishes — Forget sad sprouts These MapleBacon Brussels Sprouts with pecans are one of our favourite easy Christmas side dishes Quick to roast and packed with flavour...
- Showstopping Truffled Potato Gratin Christmas Side Dishes — Upgrade your Christmas Dinner Sides with this decadent Truffled Potato Gratin Its a showstopping Christmas side thats easier than it looks Get the recipe now
- The Ultimate Easy Ice Cream Sandwich Cake Triple Chocolate NoBake — Skip the oven My ultimate Easy Ice Cream Sandwich Cake is a triplelayered icebox cake hero Get the simple nobake recipe for this quick frozen dessertminimal...
The Simple Assembly Sequence for Truffle Perfection
Once your base is chilled and firm (a minimum of 30 minutes will suffice), it's time to pour on the caramel. Pour the hot caramel evenly over the biscuit layer and return the entire tin to the refrigerator. The total chilling time here is vital; the caramel needs at least 1.
5 hours to become rock solid before handling. This firm stage prevents messy merging when you cut and shape the individual pieces, which is essential for creating attractive No Bake Christmas Treats For Kids —kids love helping shape the balls!
Chilling and Finishing: Setting Your Holiday Candy
This final phase transforms the layered slab into beautiful, finished truffles, ready for festive platters.
Crushing & Combining: Creating the Shortbread Foundation
Ensure your biscuit crumbs are very fine a food processor works best, but a sturdy bag and rolling pin can certainly do the trick. Once the melted butter and syrup are incorporated, press this mixture firmly into the lined pan.
A flat bottomed glass works perfectly for achieving that hard, even layer needed to support the thick caramel above it.
The Quick Set Caramel Mixing Technique
When cooking the caramel, keep the heat low and steady. Constant stirring is the rule to prevent scorching the sugars on the bottom of the pan. Once it thickens to the point where you can see the pan bottom briefly when scraping through it, it’s done. Pour immediately to lock in that luscious texture.
Forming Uniform 'Snowballs' Before Dipping
After the slab is fully set, lift it out using the parchment paper overhang. Cut it into approximately 1 inch squares. If you prefer the 'snowball' aesthetic, gently warm the pieces between your palms the slight heat allows the edges to soften just enough to roll into a rough sphere.
This gentle warming ensures the subsequent chocolate coating adheres perfectly.
Achieving a Flawless Chocolate Shell Finish
Melt your dark chocolate slowly. Dip each chilled 'snowball' completely, using a fork or a dipping tool to submerge it. Lift it out and gently tap the fork against the side of the bowl to shake off any major excess chocolate. Place it immediately onto the waiting wire rack.
A final sprinkle of flaky sea salt while the chocolate is still wet introduces that gourmet finish that elevates these No Bake Christmas Treats from simple sweets to stunning gifts.
Elevating Your Snowballs: Advanced Variations and Storage
Once you’ve mastered the basic blueprint, these treats are ripe for creative variation. To enhance the festive theme, consider adding ½ teaspoon of ground ginger and a pinch of cinnamon directly into the biscuit base mixture.
This adds a subtle warmth that complements the dark chocolate beautifully, making them even more appealing for adult palates at a gathering.
Troubleshooting Common NoBake Challenges
The biggest hurdle in no-bake cooking is usually patience, particularly regarding chilling times. If your caramel seems too runny after the initial stovetop cook, don’t panic it will firm up significantly in the fridge.
However, if you’re in a rush, slightly increase the cooking time by one minute on the next batch, focusing on that point where the mixture pulls cleanly away from the saucepan base.
Storage Secrets: Keeping These Treats Fresh Through Christmas
Because these No Bake Christmas Treats rely on butter and chocolate rather than eggs or dairy that require constant refrigeration, storage is straightforward. Keep them in a single layer or separated by parchment paper inside a tightly sealed, airtight container.
Store them in a cool, dark place a basement or a cool cupboard is perfect for up to two weeks. Avoid storing them right next to anything strongly scented, as the butterfat in the base can absorb odours.
Festive Customizations: Adding Spice and Zest
For a brighter citrus note, finely grate the zest of one orange and stir it into the melted chocolate just before dipping. The orange zest combined with the dark chocolate is a classic Christmas pairing.
Alternatively, for a richer undertone, a teaspoon of good quality vanilla extract can be added to the caramel mixture just before you remove it from the heat.
Making Larger Batches of These Wonderful NoBake Christmas Treats
These treats scale up exceptionally well. If you need to make a massive batch for a corporate event or large family gathering, simply double or triple the recipe, ensuring you use a larger, shallower tin (like a half sheet pan) for the base layers.
The chilling times might increase slightly due to the thickness, but the active preparation time remains minimal, solidifying their reputation as fantastic Christmas Treats For Office Party contributions.
Frequently Asked Questions
Are these NoBake Christmas Treats suitable for freezing? I’ve made too many!
Absolutely, these truffles freeze brilliantly, which is handy when you’re batch making for the holidays! Pop them into an airtight container, separating layers with parchment paper, and they should keep well for up to two months.
Just let them thaw on the counter for about 30 minutes before serving so they aren't rock solid.
My caramel mixture seems too runny after cooking; what’s gone wrong?
If your caramel is too runny, it usually means it hasn't cooked long enough to reach the proper setting point. Give it another minute or two over a gentle heat, stirring constantly until it visibly thickens and coats the back of your spoon nicely.
Don't panic, though even if it's a bit softer, it will firm up significantly once it's had a proper chill in the fridge.
Can I make these NoBake Christmas Treats vegan or dairy-free?
Yes, you certainly can adapt them, though you’ll need to swap out a few key components. Use dairy-free biscuits for the base, substitute the butter with a good quality vegan block butter, and source a vegan condensed milk alternative (coconut based works well).
Finally, use high-quality dark vegan chocolate for dipping.
How far in advance can I prepare these if I need them ready for Christmas Eve?
These actually taste better after they've had a good long chill, so they are perfect for making ahead. You can safely prepare the entire batch up to 5 days in advance and keep them stored in the fridge in an airtight container. The chocolate coating stays lovely and shiny if they are kept cool.
The chocolate coating looks dull after setting how do I get that professional, glossy finish?
A dull finish often means the chocolate was either too hot when you dipped the truffles, or it cooled too slowly. For a proper sheen, ensure your chocolate melts smoothly with the teaspoon of coconut oil this helps keep it fluid and glossy.
Also, try to set them relatively quickly, either on a rack at cool room temperature or popping them in the fridge for a fast set.
Nobake Millionaire Snowballs

