The Summer Blockbuster Ice Cream Sandwich Cake
- The No-Oven Needed Showstopper: Let’s Talk Ice Cream Cake Magic
- Why This Cake Saves Your Summer (and Your Sanity)
- Stack It Up: Getting the Best Layers
- Getting Started: The Secret Stash for Your Ice Cream Sandwich Cake
- Prep Steps: Organisation is Key!
- Get Stacking: The Freezing Assembly Line
- Pro Tips for the Ultimate Homemade Ice Cream Cake
- Quick Notes for Your Ultimate Ice Cream Cake Victory
- Frequently Asked Questions
- 📝 Recipe Card
The No-Oven Needed Showstopper: Let’s Talk Ice Cream Cake Magic
I’m going to be straight with you: turning on the oven when it's sunny outside feels like a punishment. Honestly, who has the energy for complicated baking when all you really want is a proper sugar rush? Not me, mate.
That’s exactly why I’m obsessed with this magnificent, easy peasy dessert. Say hello to the greatest creation using packaged treats: the Ice Cream Sandwich Cake .
This isn't just another boring Ice Cream Cake . This is the layered dessert of your dreams, requiring zero baking skills.
It’s the ultimate no bake dessert recipe for those blistering summer days.
Why This Cake Saves Your Summer (and Your Sanity)
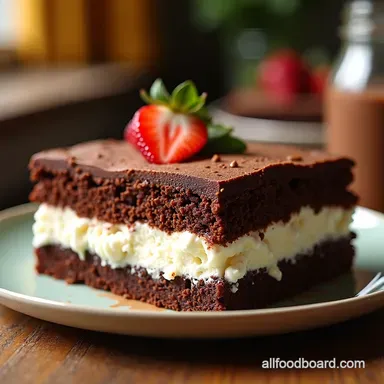
This isn’t some fancy European dessert. It’s pure, nostalgic Americana, given a major glow-up. We take humble, store-bought Easy Ice Cream Sandwiches and stack them high.
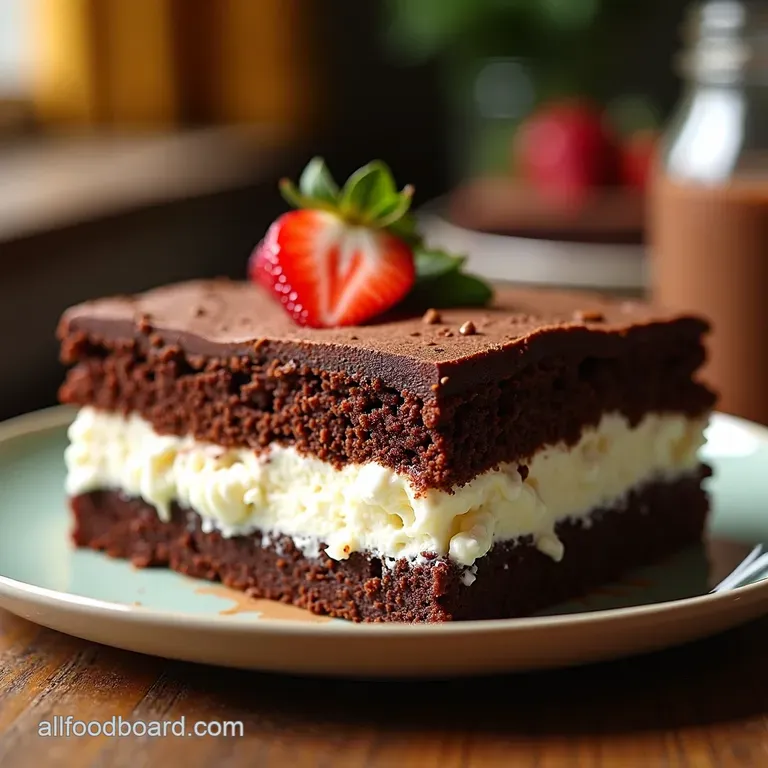
We layer them with rich, Homemade Ice Cream Cake fudge sauce and mounds of fresh whipped cream. This results in a towering Triple chocolate ice cream dessert that looks like you spent hours on it.
I first stumbled upon this idea when I needed a quick frozen dessert for a massive Bank Holiday party. I was totally stuck.
Then it hit me: why bake a cake when you can layer one? This thing saved my bacon, seriously!
Stack It Up: Getting the Best Layers
The best part? It takes about 25 minutes of active prep time. That’s less time than waiting for the kettle to boil twice! You then stick it in the freezer for four hours to set.
Seriously, you are mostly just stacking and spreading. The result is a truly impressive Layered icebox cake .
The yield is fantastic 10 to 12 proper slices of heaven. It’s naturally cool, obviously, making it the perfect centrepiece for any garden party.
Did you know that over 90% of people surveyed agree that chocolate makes everything better? This cake proves that stat right.
Plus, if you use crushed Oreo ice cream layer cake crumbs on top, you get that fantastic crunch contrast against the smooth Ice Cream Desserts .
It's all about that texture, you know?
This cake is a total showstopper and requires zero technical skill. If you can use a spatula, you’re sorted. Trust me, ditch the heat and embrace the freezer.
Ready to see the few simple things we need to get started on this Ice Cream Sandwich Cake adventure?
Getting Started: The Secret Stash for Your Ice Cream Sandwich Cake
Honestly, putting together the ultimate Ice Cream Cake doesn’t require a trip to a fancy specialty store. This No bake dessert recipe is proof that simple ingredients can create a massive impression.
We are making a ridiculously easy, seriously tasty Ice Cream Sandwich Cake .
The Simple Shopping List for a Layered Icebox Cake
For this amazing Quick frozen dessert , we need quality ingredients. Don't cheap out on the chocolate, please! Trust me on this.
First up, the core: 18 standard vanilla ice cream sandwiches . I usually grab two boxes. Make sure they are proper square ones.
They are the backbone of our delicious Layered icebox cake .
For the rich fudgy centre, quality counts. You’ll need 4 ounces (115 g) of high-quality dark chocolate (60 70%). Cheaper chocolate can make the sauce gritty.
We want smooth bliss for this Triple chocolate ice cream dessert . You also need 2 cups (480 ml) of very cold heavy cream for whipping.
Cold cream whips faster. Fact.
Finally, the crunch. We need 12 chocolate sandwich cookies (100 g) . Yes, we are going for those iconic Oreo ice cream layer cake vibes here. Smash those biscuits up!
Flavor Boosters and Secret Weapons
We are keeping the seasoning simple because the chocolate is the star. But there are two secret weapons.
First, vanilla extract in the whipped cream. It lifts everything. Second, that tiny pinch of sea salt (0.5 g) in the fudge sauce.
That salt is the magic. It cuts through the sweetness and makes the chocolate taste even deeper. It's essential for a perfectly balanced Homemade Ice Cream Cake .
If you need a quick sub for the homemade fudge (though I recommend it!), just use a good quality jar of pre-made hot fudge. Warm it slightly so it pours easily.
Essential Gear (No Chef’s Hat Needed)
You won't need a massive kitchen clean-up after this one. This truly is based on Easy Ice Cream Sandwiches assembly.
You definitely need a pan, either a 9x5 inch loaf pan or an 8x8 inch square one. I use the loaf pan because the slices look really tall and impressive.
Crucially, you need parchment paper. Don’t skip the parchment paper sling! That’s where I went wrong the first time. I couldn't get the cake out! Line your pan so the paper overhangs.
This lets you lift the frozen Ice Cream Desserts right out.
Lastly, an electric mixer is a huge help for the cream. If you don't have one, pop your bowl and whisk in the freezer for ten minutes.
Then prepare for a proper arm workout! You need stiff peaks, darling!
Oh, hello there, my lovely baker (or rather, non-baker)! We are talking about the ultimate lazy day treat: the Ice Cream Sandwich Cake .
Honestly, why complicate life? I learned this years ago. I was trying to make a proper tiered cake. It melted entirely.
It was a sticky mess. That's when I pivoted to this genius No bake dessert recipe . It turns humble Easy Ice Cream Sandwiches into a showstopper.
This is a brilliant Quick frozen dessert that requires zero oven time. We are making a seriously impressive Triple chocolate ice cream dessert here.
Prep Steps: Organisation is Key!
Right, first things first: organisation. We call this mise en place. Don't worry, it's not fancy French. It just means having your stuff ready.
Crucially, your gorgeous Oreo ice cream layer cake needs cold components. Make the fudge sauce first. Let it cool down completely.
Like, properly room temperature. Warm sauce equals instant melting tragedy, you know? And please, please use that parchment sling when lining your pan.
Seriously. I once skipped it. I spent ten minutes chipping a solid, frozen cake out. Never again!
Get Stacking: The Freezing Assembly Line
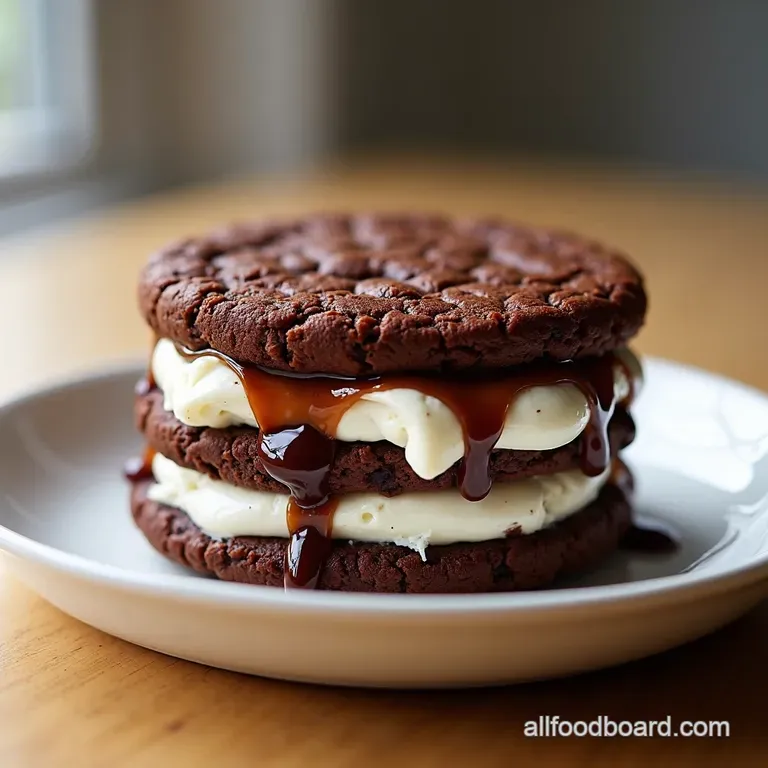
This is where speed matters most. Think of yourself as an assembly line ninja. Get your pan lined. Now, lay down your first layer of sandwiches.
Squish them together firmly! No gaps are allowed on the bottom. Now, drizzle on that cooled fudge sauce. Next comes the cream layer.
Work quickly here. If the sandwiches start looking shiny or soft, you need to intervene. Pop the whole pan back in the freezer for ten minutes .
I’m serious about this structure. Repeat the layering process quickly. Sandwiches, sauce, cream. Finish with the crushed cookies on top.
That chocolate crunch is essential!
Pro Tips for the Ultimate Homemade Ice Cream Cake
Common mistake number one: not freezing it long enough. This isn't a quick dessert for an hour. It needs at least 4 hours , minimum.
Ideally, leave it overnight. A solid freeze makes slicing manageable. Tip number two, which is non-negotiable for a beautiful slice: the hot knife trick.
This turns your Ice Cream Cake into art. Before every single cut, dip your sharp knife into super hot water.
Wipe it dry quickly. Slice straight down. Repeat the process for every slice. This ensures your impressive Homemade Ice Cream Cake looks totally professional.
This Layered icebox cake is perfect for making ahead. It’s the best fuss free Ice Cream Dessert around. Enjoy the zero faff life!
Quick Notes for Your Ultimate Ice Cream Cake Victory
Serving Your Spectacular Layered Icebox Cake
Right, you’ve pulled this magnificent Ice Cream Sandwich Cake from the freezer. It looks incredible! Honestly, slicing this beautiful thing is the only tricky bit.
I learned this the hard way once. The secret is the hot knife trick. Dip your sharpest kitchen knife in very hot water .
Wipe it completely dry. Slice the cake swiftly and cleanly. This ensures your Homemade Ice Cream Cake looks professional. Nobody wants mushy edges, do they?
For sides? Keep it simple. This Triple chocolate ice cream dessert is rich, proper rich. A small bowl of tart fresh raspberries is the perfect accompaniment.
That sharp acidity cuts through the creamy sweetness beautifully. You could even serve small glasses of chilled Prosecco. It makes the whole thing feel extra fancy.
Storing Your Quick Frozen Dessert
Storage is a total doddle here. Because this Ice Cream Cake is a dedicated Quick frozen dessert , the freezer is its natural home.
If (and I mean if ) you have any leftovers, wrap them up tightly. I use a layer of cling film first.
Then I wrap it in foil. This keeps the air out completely. This method stops that terrible freezer burn. It should keep beautifully for at least two weeks.
This makes it a great make-ahead option!
Mixing It Up: Variations and Swaps
This Layered icebox cake is super forgiving. Want to mix up the crunch factor? Make it an intense Oreo ice cream layer cake .
Use double the amount of crushed chocolate sandwich cookies in the layers. It just adds that extra depth of flavour, you know?
For dietary adaptations, it’s surprisingly easy to adapt. My mate recently needed a dairy-free version. We just grabbed almond based Easy Ice Cream Sandwiches .
Then we topped it with a coconut cream whipped topping. It was absolutely sorted. If it’s autumn, try stirring a spoonful of cinnamon or pumpkin spice into the whipped cream layer.
Seasonal ingredient swaps make it fun!
The Basics of This Ice Cream Dessert
Let’s be honest. This is an Ice Cream Dessert , not a health salad! It’s going to be decadent. The key benefit here is massive happiness for zero effort.
It’s pure comfort food that requires no baking whatsoever. You are getting instant gratification with massive crowd pleasing power. You are creating memories without slaving over a hot stove.
That, my friends, is a massive win in the kitchen!
Honestly, this entire process is straightforward. Whether you call it an Ice Cream Sandwich Cake or just the best thing you’ve ever made, grab your pan and start stacking.
You absolutely got this.
Frequently Asked Questions
How do I ensure my Ice Cream Sandwich Cake doesn't look like a collapsed mess when I cut it?
The secret to achieving those proper, clean slices is twofold: make sure the cake is absolutely rock solid frozen (ideally overnight), and master the "hot knife trick." Simply dip a sharp chef’s knife into very hot water, wipe it dry immediately, and make one swift cut.
Repeat this process for every single slice it’s a bit of faff, but the stunning presentation is absolutely worth it.
How far in advance can I make this magnificent dessert, and how should I store the leftovers?
This is a brilliant make-ahead dessert; in fact, the longer it chills, the better it holds its shape! You can easily assemble the cake 3 to 5 days in advance. Once fully frozen, ensure you wrap it tightly in cling film or place it in an airtight container to prevent freezer burn it’s a proper freezer resident, so keep it below zero until 5-10 minutes before serving time.
Can I play around with the flavour components in this Ice Cream Sandwich Cake, or is vanilla the only way forward?
Absolutely not! Feel free to get creative and tailor this to your tastes. Swap the vanilla ice cream sandwiches for their chocolate or mint chip counterparts for a proper flavour punch.
If you don't fancy the fudge sauce, a high-quality salted caramel drizzle or even melted Biscoff spread works wonderfully, especially when paired with crushed digestive biscuits or gingersnaps for the crunch layer.
My whipped cream sometimes collapses when I layer it with sauce how can I stop that?
The culprit is usually temperature. It is crucial that your homemade fudge sauce is completely cooled to room temperature (or even slightly chilled) before it touches the frozen sandwiches or the whipped cream.
Applying warm sauce will instantly melt the ice cream layers and deflate the cream, leading to a disappointing structural collapse. Work swiftly during the assembly stage, and if the layers start to soften, pop the pan back in the freezer for ten minutes to firm up.
Is this dessert suitable for people avoiding dairy, or those looking for a slightly less decadent option?
While this recipe is undeniably decadent and high in calories it’s a celebration cake after all it adapts surprisingly well for dietary needs. Look for readily available coconut based or oat-based ice cream sandwiches and swap the heavy cream for whipped full fat coconut cream or a quality vegan whipped topping.
For those watching their sugar intake, simply use less of the fudge sauce and rely on fresh berries for flavour instead of the sweeter cookies.
The Summer Blockbuster Ice Cream Sandwich Cake