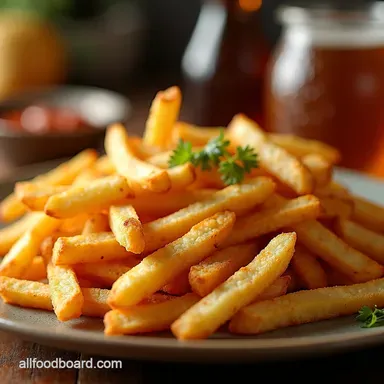
The Chip Shop Champion Perfect Doublefried Homemade French Fries
- Unlocking the Secret to Truly Glorious Homemade French Fries
- Why the Double Fry Method Guarantees Crispy Success
- Gathering Your Golden Components for Homemade French Fries
- The Double Deep-Fry Technique: Precision Temperature Control
- From Raw to Rave Review: Cooking Sequence Breakdown
- Troubleshooting and Elevating Your Fry Game
- Storage, Reheating, and Serving Suggestions
- Frequently Asked Questions
- 📝 Recipe Card
Unlocking the Secret to Truly Glorious Homemade French Fries
There’s nothing quite like a proper chip crispy, golden, and utterly addictive. Many home cooks resign themselves to ordering takeout when a craving hits, believing true chip shop quality is beyond the reach of a home kitchen. I'm here to tell you that this is a myth!
This recipe unlocks the magic behind professional fries by employing the essential two-stage frying technique. We start with a lower temperature soak to cook the potato through, followed by a blistering hot finish to achieve that iconic crunch.
These Homemade French Fries pair perfectly with everything from a classic Ploughman's lunch to a sophisticated steak frites. Prepare for your kitchen to smell like a proper seaside holiday!
This process is rated as Medium difficulty; while cutting the potatoes is easy, achieving the perfect fry relies on precise temperature control and timing during the two frying stages.
We estimate about 25 minutes of active prep time, plus at least an hour for soaking, leading to a total time of roughly 1 hour 45 minutes to yield 4 generous side servings.
Why the Double Fry Method Guarantees Crispy Success
The foundational secret to achieving the Best Homemade French Fries lies squarely in the double fry. This is not merely a suggestion; it is the technique that separates a soggy, oil-laden potato stick from a masterpiece boasting a shattering crust and a melt-in-your mouth, Fluffy Interior French Fries texture.
The process divides the cooking into two distinct thermal events, ensuring the internal starches gelatinize perfectly without burning the exterior.
Goodbye Soggy Sides: Our Crisp Factor Commitment
Our commitment to crispness starts long before the oil heats up. The key initial ingredient is the Russet or Maris Piper potato, selected specifically for its high starch content. We leverage this starch by thoroughly rinsing and soaking the cut potatoes for at least an hour.
This process washes away the surface starch that, if left intact, would leach into the oil during cooking, creating steam pockets and leading directly to sogginess. On top of that,, draining and patting the potatoes absolutely bone dry post soak prevents dangerous sputtering when they hit the heat and ensures an even dehydration layer forms, ready to crisp up beautifully.
The Anatomy of a Perfect Pomme Frites Cut
Consistency is king when preparing Homemade French Fries in Oil . If your potato pieces are uneven, they will cook at different rates, meaning some parts will burn while others remain undercooked. Aim for uniform sticks, typically about 3/8 inch (1 cm) thick.
While you can use a sharp knife, a mandolin (used with extreme caution) ensures perfect uniformity. This careful shaping is vital for even absorption during the initial low-temperature cook.
A Brief History of the Humble Fried Potato
While we obsess over achieving the perfect texture today, the history of these beloved Appetizer Snacks French Fries is surprisingly debated! Most attribute the origin to Belgium or France in the late 17th century, where small river fish were supposedly fried when the rivers froze over, replaced by potatoes cut into similar shapes.
Regardless of birthplace, the technique refined over centuries culminating in the precise double fry method we use here is what elevates the simple potato to this iconic status.
Gathering Your Golden Components for Homemade French Fries
To create a batch worthy of praise, you need to treat your ingredients and tools with respect. For our recipe, you will need about 2 lbs (900g) of high starch potatoes and between 6 to 8 cups of neutral, high heat cooking oil enough to reach a depth of about two inches in your pot.
Crucially, you will need plenty of fine sea salt for seasoning immediately upon removal from the fryer.
Selecting the Ideal Starch Foundation
As mentioned, Russets are the gold standard in the US due to their fluffy internal structure when cooked correctly. If you are in Europe, seek out Maris Pipers. These varieties have the necessary low moisture and high starch ratio needed to achieve that desirable creamy interior contrasted against a rigid exterior.
Avoid waxy potatoes (like Yukon Golds) for this method, as they tend to hold their shape too firmly and resist the fluffy transformation we are chasing.
The Necessary Oil Selection for High Heat Frying
When working with high temperatures, stability is everything. You must select an oil with a high smoke point. Canola, peanut, or sunflower oils are excellent, neutral choices that won't impart unwanted flavour into your Crispy Homemade French Fries .
Avoid olive oil or butter, as they break down rapidly under the required heat, creating smoke and off-flavours.
The Exact Ratio of Potato to Coarse Salt
The ratio is less about exact weight and more about immediacy. You need enough coarse sea salt to lightly coat every surface of the fries as soon as they exit the oil. Salt adheres best to the residual hot oil clinging to the surface.
If you wait even one minute too long, the texture firms up, and the salt won't stick as effectively. Seasoning generously is the final, vital step in flavour development.
Essential Equipment: Beyond Just a Pot
While a sturdy, heavy bottomed Dutch oven is perfect for maintaining consistent heat, the most critical piece of equipment for this recipe is a deep fry or candy thermometer .
Unlike stovetop burners, which cycle temperature unpredictably, the thermometer allows you to precisely monitor and adjust the oil to the required 300° F and 375° F benchmarks for each stage of cooking.
A slotted spoon or spider skimmer is also necessary for safely removing the fries from the hot oil.
Related Recipes Worth Trying
- The Best Homemade Pimento Cheese Recipe Southern Comfort — Forget storebought Master this easy Pimento Cheese spread recipe for the creamiest tangiest dip Ready in 15 minutes plus chill time for perfect flavour
- Best Homemade Pimento Cheese Dip Perfectly Sharp Creamy — Forget the jarred stuff This easy Pimento Cheese Dip recipe delivers authentic Southern flavour in 15 minutes Its irresistibly sharp and creamy
- The Secret CAKE HACK How to Make a Box Cake Taste Homemade Better Than Bakery — Ditch the box instructions This CAKE HACK uses sour cream and butter to achieve a ridiculously rich moist crumb Its the lowfaff secret to bakerystyle...
The Double Deep Fry Technique: Precision Temperature Control

Successfully executing the Homemade French Fries Recipe hinges entirely on managing the temperature changes between the two frying phases. This technique mimics what you would see in professional fryers designed to handle this dual process automatically.
From Raw to Rave Review: Cooking Sequence Breakdown
The entire cooking process moves through three distinct phases: preparation, blanching, and browning.
Phase One: The Blanching Fry (The Low-Temperature Soak)
First, heat your oil to 300° F ( 150° C) . This lower temperature is crucial. Carefully introduce your dried potato sticks in small batches do not overcrowd the pot, or the temperature will plummet. Fry gently for 5 to 7 minutes.
During this stage, the moisture inside the potato turns to steam, gently cooking the starch until it is tender and opaque all the way through. They will remain pale; this is correct. Browning now would result in burnt exteriors and raw centres later.
The Crucial Cooling Interlude for Crisp Development
Once blanched, remove the fries and allow them to drain thoroughly on paper towels or a wire rack. This rest period is non-negotiable. As the fries cool, the surface moisture evaporates, and the internal structure begins to set.
This allows the external layer to become firm enough to resist the blistering heat of the second fry, ensuring that subsequent high heat crisps the outside without cooking the interior further. You can leave these blanched fries to rest for 20 minutes, or even refrigerate them for several hours.
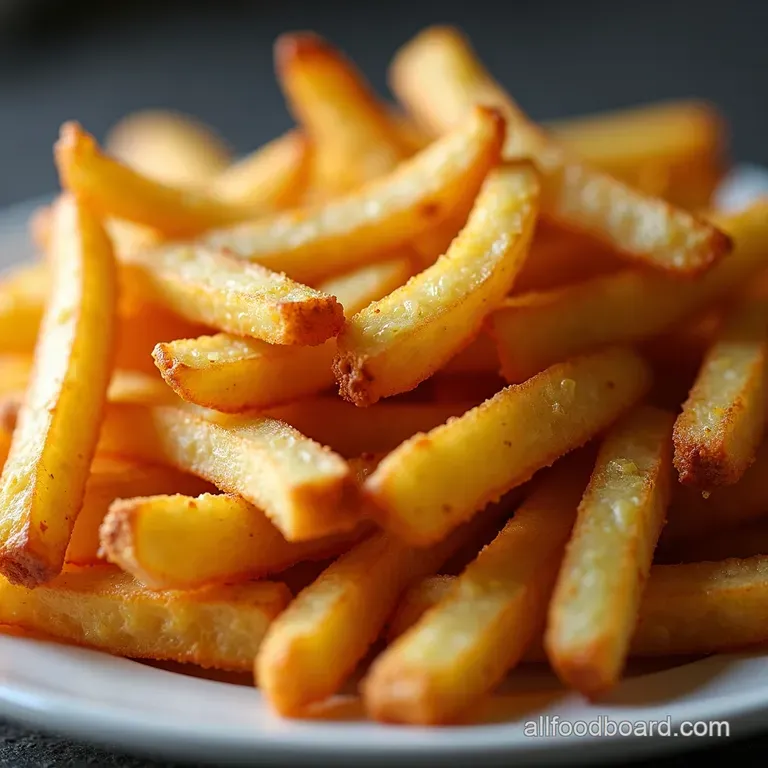
Phase Two: The Browning Fry (Achieving Golden Perfection)
Once cooled, increase your oil temperature significantly to 375° F ( 190° C) . Return the blanched and cooled fries to the hot oil, again in small, manageable batches. This second fry is much quicker, usually lasting only 2 to 4 minutes.
The goal here is rapid dehydration of the exterior layer, creating that signature shatteringly crisp shell. They should emerge a deep, beautiful golden brown. If you are keen on trying a slightly healthier route, the Homemade French Fries in Air Fryer variation will use the same pre-blanched potatoes but requires light oil spraying before a 400° F blast.
Immediate Seasoning: Sealing in the Flavor
As soon as the fries are lifted from the 375° F oil, drain them for just a moment on fresh paper towels to remove excess oil. Immediately transfer them to a large bowl and season vigorously with fine sea salt.
The heat of the potato is what makes the salt stick and dissolve slightly, ensuring maximum flavour penetration.
Troubleshooting and Elevating Your Fry Game
Even with the best intentions, issues can arise. If your fries are soft, it almost always points back to oil temperature: either the initial oil was too hot (burning the outside before the inside cooked) or the oil cooled too much during frying due to overcrowding.
Remember, if you are seeking an alternative method, Homemade French Fries in Oven work, but will never achieve the same level of consistent crispness as deep frying.
Preventing Oil Splatter: Safety First
When submerging potatoes into hot oil, safety is paramount. Always ensure the potatoes are as dry as humanly possible after soaking. Use a gentle lowering method don't drop them from a height using a spider skimmer to lower them slowly toward the oil surface.
Keep a lid handy for the pot in case of an emergency flare-up, and never leave hot oil unattended.
Flavor Twists: Beyond Salt and Pepper
While salt is essential, consider boosting flavour during that final seasoning stage. A light dusting of smoked paprika, a pinch of cayenne pepper for heat, or even tossing them with finely chopped fresh parsley and garlic powder can transform your Homemade French Fries in Deep Fryer into a gourmet experience.
How to Restore Leftover Crispy Homemade French Fries
If you find yourself with leftovers (unlikely, I know!), do not resort to the microwave. The best way to revive them is a quick blast in a very hot oven, around 425° F ( 220° C), for about 5– 7 minutes until the exterior reheats and crisps up again.
Storage, Reheating, and Serving Suggestions
For optimal crispness, these Crispy Homemade French Fries must be served immediately after the second fry. If you need to prepare ahead, complete only Phase One (the blanching fry and cooling rest) and store the pale, cooled fries in the refrigerator until you are ready to serve.
Then, simply reheat your oil to 375° F and complete Phase Two.
These perfectly rendered, golden sticks shine brightest when kept simple. Serve them with a sharp, homemade garlic aioli or a slightly spicy ketchup blend. For a more substantial meal, they are the perfect foundation for a modern poutine or as the essential sidekick to a grilled bistro steak.
Enjoy the fruits (or rather, the tubers) of your labour!
Frequently Asked Questions
Why are my Homemade French Fries coming out soggy instead of crispy?
This is usually down to one of two culprits: not soaking and drying the potatoes properly, or having the oil temperature too low during the second fry. Remember the double fry technique the first fry cooks the interior, and the second, hotter fry (around 375°F/190°C) is what locks in that beautiful, shatteringly crisp exterior.
Don't skimp on drying!
Do I really need to soak the potatoes? What happens if I skip that step for my Homemade French Fries?
Absolutely, soaking is non-negotiable if you want chip shop quality! Soaking draws out the excess surface starch, which prevents the fries from sticking together and ensures they develop a crisper crust rather than steaming themselves into flabby sticks.
Think of it as giving your potatoes a proper wash before sending them into the heat.
Can I make these ahead of time, or can they be frozen?
You can definitely prep ahead! After the first fry (blanching), allow the fries to cool completely; they can be stored airtight in the fridge for up to 24 hours before the final crisping fry.
For freezing, blanch them, let them dry thoroughly, and flash freeze them on a tray before bagging they’ll be ready for that final blast in the hot oil when you fancy a treat.
My oil keeps smoking! How do I manage the temperature for the two different frying stages?
Managing the heat is key to avoiding smoky oil and burnt fries. You must use a reliable deep fry thermometer; you can’t just eyeball it! The first stage requires a gentle 300°F (150°C) for cooking through, and the second stage needs a significant jump to 375°F (190°C) for crisping.
Wait for the temperature to stabilize after each batch before dropping the next lot in.
What’s the best potato variety to use for truly traditional, fluffy Homemade French Fries?
For the fluffiest interior, you want a high starch potato in the US, that means Russets are the gold standard. If you’re across the pond, Maris Pipers or King Edwards are the traditional choice.
These varieties break down slightly inside while frying, creating that lovely, fluffy texture that contrasts so well with the crisp outside.
Doublefried Homemade French Fries