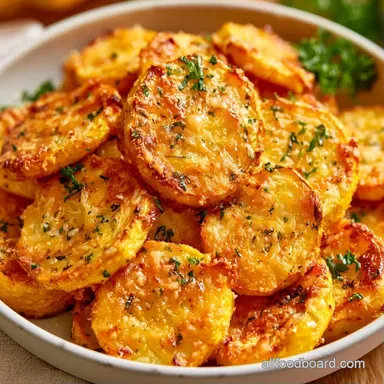
Crispy Baked Yellow Squash
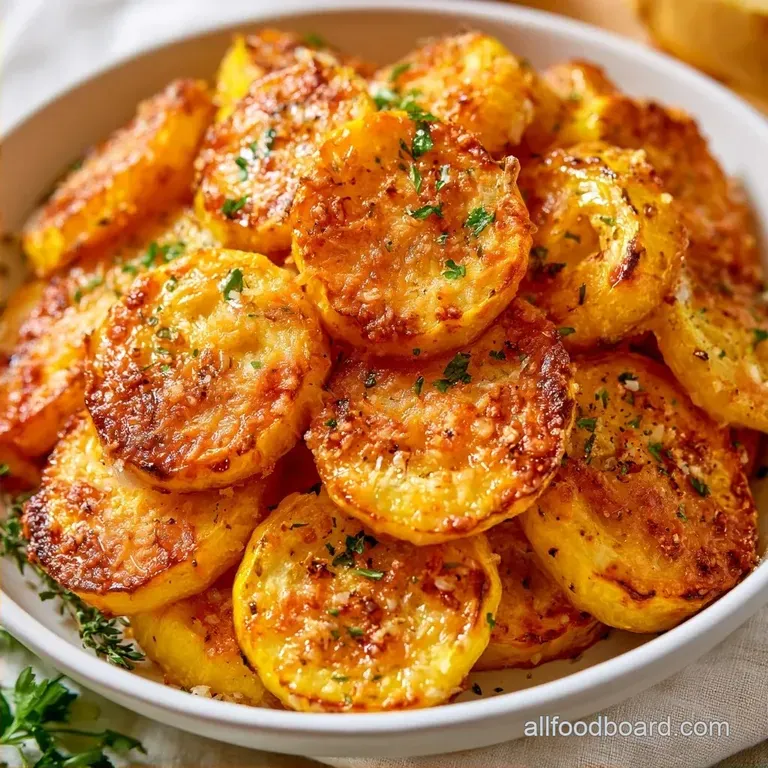
- Time: 10m prep + 15m oven
- Taste Profile: A crisp parmesan exterior paired with a smooth, buttery center
- Ideal for: Easy weeknight meals or nutritious meal prepping
The aroma of toasted cheese and roasting garlic is easily the highlight of this process. It’s that magic moment where the squash transforms from a simple vegetable into something truly irresistible.
Many home cooks end up with a mushy, colorless pile on their plate. This happens because yellow squash has a high water content; low heat allows that moisture to escape, steaming the produce instead of roasting it. We solve this by cranking up the temperature.
You'll get a colorful, savory dish that keeps its structure. This Baked Yellow Squash remains sturdy enough for a fork but feels rich and tender. It’s a dependable way to add more vegetables to your table without the usual blandness.
Crispy Baked Yellow Squash Guide
High Heat: 425°F (218°C) evaporates surface moisture quickly, which stops the squash from stewing in its own juices.
Strategic Spacing: Leaving gaps between the slices lets hot air circulate, creating those browned, crispy roasted yellow squash edges.
Cheese Barrier: The Parmesan acts as a dry layer that absorbs remaining moisture and toasts into a crust.
| Method | Time | Texture | Best For |
|---|---|---|---|
| Fast over High heat | 15 mins | Crispy edges, tender center | Weeknights |
| Classic Low Roast | 30-40 mins | Soft, uniform, pale | Slow meals |
Quick Recipe Specs
This approach is all about efficiency. We use one bowl and one pan, keeping the cleanup minimal. The goal is a quick hit of savory flavor without spending an hour in the kitchen.
Since we're focusing on sustainability, I recommend using organic squash if you can find it. It often has a tighter skin and slightly less water content, which helps the browning process.
The Shopping List
| Ingredient | Purpose | Substitutes |
|---|---|---|
| Yellow Summer Squash | Core vegetable | Zucchini (works just as well) |
| Extra Virgin Olive Oil | Searing agent | Avocado oil or melted vegan butter |
| Grated Parmesan | Umami and crunch | Nutritional yeast or vegan parm |
| Garlic Powder | Pungent depth | Fresh minced garlic (add during last 5 mins) |
For the best outcome, purchase a block of Parmesan and grate it yourself. Pre-shredded varieties often include cornstarch to avoid clumping, which can result in a grainy texture rather than a smooth finish.
Main Ingredients:
- 450g (1 lb) yellow summer squash, sliced into 1.3cm (1/2 inch) roundsNote: Consistent slices ensure they all finish cooking at once
- 15ml (1 tbsp) extra virgin olive oilNote: Offers a robust flavor and handles heat well
- 3g (1/2 tsp) kosher saltNote: Helps remove excess water for a better sear
- 1g (1/4 tsp) black pepperNote: Provides a slight spicy edge
- 25g (1/4 cup) grated Parmesan cheeseNote: Builds a savory, toasted exterior
- 2g (1/2 tsp) garlic powderNote: Allows the seasoning to coat every piece
- 1g (1/4 tsp) dried oreganoNote: Introduces a woody, herbal aroma
Tools You'll Need
This recipe doesn't require any specialized equipment. All you really need is a standard rimmed baking sheet. A convection oven is great if you have one, but a traditional oven works just as well.
I always line the pan with parchment paper. It prevents the cheese from sticking to the metal, which makes cleanup a breeze.
- Large mixing bowl
- Rimmed baking sheet
- Parchment paper
- Chef's knife and cutting board
Making The Squash
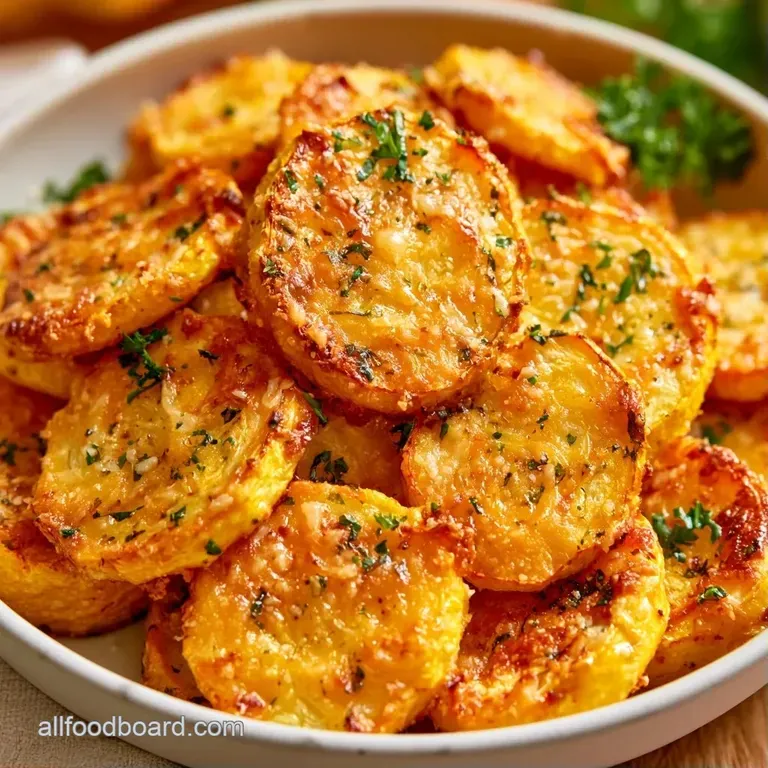
- Set your oven to 425°F (218°C) and line a large rimmed baking tray with parchment paper. Note: High heat is essential for achieving a crispy texture
- In a large mixing bowl, combine the sliced yellow squash with olive oil, salt, and pepper until evenly coated.
- Toss in the garlic powder and dried oregano, mixing well.
- Gently fold in the grated Parmesan cheese so it adheres to the squash surfaces.
- Spread the slices in a single layer on the baking sheet, ensuring they aren't touching. Note: Overcrowding the pan can lead to sogginess
- Bake for 12–15 minutes until edges are golden brown.
- Optional: Turn on the broiler for the final 60 90 seconds until the cheese bubbles and turns deep gold.
- Remove from the oven and let the Baked Yellow Squash rest for 2 minutes before serving.
- Arrange on a serving platter or serve directly from the sheet.
- Garnish with fresh parsley if you have some on hand.
Chef's Tip: If you're using very large squash, slice them lengthwise into half moons rather than full rounds. This keeps the surface area uniform so the centers cook through without the edges burning.
Fixing Common Problems
The most frequent issue is the squash releasing too much water. This usually happens if the oven temperature dropped during loading or if the slices were piled on top of each other. When the water can't evaporate, it creates a pool of liquid that boils the vegetables.
Another common slip is using too much oil. While you want a coating, swimming in oil prevents the cheese from crisping up, leading to a greasy texture instead of a roasted one.
Stopping the Sogginess
If your slices are limp, check your spacing. Give each piece at least a half inch of breathing room.
Preventing Sticking
Ensure your parchment paper is flat. If the cheese leaks onto the pan, a quick spritz of oil on the paper helps.
Avoiding Burnt Cheese
If the Parmesan browns too fast, move the rack to the lower third of the oven.
| Problem | Fix |
|---|---|
| Watery bottom | Increase spacing between slices |
| Pale color | Crank heat to 425°F or use broiler |
| Greasy texture | Reduce oil to exactly 1 tbsp |
Serving Suggestions
This side dish is incredibly adaptable. I find it works best when paired with something bright to balance out the savory Parmesan. Finishing the dish with a squeeze of fresh lemon juice just before plating really enhances all the flavors.
For a main course that fits this profile, give these Vegetarian Enchiladas a try. The smoky notes in the sauce are a great match for the toasted garlic in the squash.
For a more decadent touch, try dipping the slices in a dollop of Homemade Mayonnaise mixed with a pinch of smoked paprika. It provides a creamy contrast to the crispy edges.
Decision Shortcut:
- Extra tang? → add 1 tsp lemon zest after baking
- Spicy kick? → add 1/4 tsp red pepper flakes to the toss
- Nuttier flavor? → swap Parmesan for Pecorino Romano
Storage Guidelines
Store leftovers in a glass container and keep them chilled for roughly 3 days. While the cheese will lose its crunch, the flavor stays just as bold.
Avoid freezing this dish. The squash's high water content causes it to become mushy upon thawing, which completely ruins the texture.
Zero Waste Tip: Collect any small squash ends. Store them in a freezer bag with other veggie remnants, such as onion skins and carrot tops, to brew a plant based vegetable broth later.
Reheating for Crunch: To restore the crispiness, stay away from the microwave. Instead, place the slices on a baking sheet at 400°F (200°C) for 5 minutes. This removes excess moisture and re-crisps the cheese.
Easy Flavor Twists
If you're keeping things strictly plant based, this recipe is easy to adapt. Use a vegan Parmesan substitute or a mix of nutritional yeast and garlic salt. The nutritional yeast provides a similar savory, nutty profile that browns well under the broiler.
Diet Swaps: - Vegan: Swap Parmesan for 3 tbsp nutritional yeast. Note: It won't bubble as much as dairy cheese but tastes great. - Low Sodium: Omit the added salt and use an extra tablespoon of Parmesan, which provides its own saltiness.
Flavor Variations: - Pesto Twist: Toss the slices in 1 tbsp of basil pesto instead of oil and garlic powder. - Everything Bagel: Replace the oregano and garlic powder with "Everything Bagel" seasoning for a crunchier, seed filled crust.
Another great way to use this is as a base for a healthy baked yellow squash casserole. Just layer these roasted slices with a bit of vegan cream sauce and a sprinkle of breadcrumbs, then bake for another 10 minutes.
Quick Truths
Searing doesn't "seal" moisture. Many people think you need to pan sear squash first to keep it from getting soggy. In reality, moisture loss happens throughout the cooking process. The over high heat oven method achieves the same browning without the extra pan.
Peeling is unnecessary. The skin of yellow summer squash is thin and tender. Peeling it actually removes structural support, making the slices more likely to collapse or become mushy during the roast. Keep the skin on for better results.
Right then, you've got everything you need. Just remember: high heat, plenty of space, and a little bit of patience while the cheese bubbles. Enjoy your Baked Yellow Squash!
Recipe FAQs
How do you cook yellow squash in the oven?
Toss sliced squash with oil and seasonings, then bake at 425°F on a lined baking sheet.
Tip: Space the slices so they roast rather than steam.
How long does it take to bake?
Roast for 12 to 15 minutes until the edges are golden brown.
Tip: Finish under the broiler for 60 to 90 seconds to brown the cheese.
Could I substitute zucchini for yellow squash?
Yes, zucchini works perfectly as a direct substitute.
Tip: If you like the savory baked profile of this side, see how the same roasting principle works in a savory tomato pie.
Is it true that this dish freezes well?
This one's false: the high water content turns the squash into mush once thawed.
Tip: Keep leftovers in a glass dish for about 3 days.
What makes this recipe gluten-free?
Every ingredient used is naturally free from gluten.
Tip: Verify that your grated Parmesan is pure cheese without fillers.
Crispy Baked Yellow Squash