Cool Whip Frosting: Stable and Fluffy
- Time: Active 10 minutes, Passive 30 mins, Total 40 minutes
- Flavor/Texture Hook: Airy, velvety, and stable
- Perfect for: Family birthday cakes, summer potlucks, and beginner bakers
- Make Stable Cool Whip Frosting That Lasts
- Why This Works
- Ingredient Deep Dive and Science
- Ingredients and Smart Swaps
- Essential Kitchen Tools for Success
- Mastering the Mixing Steps
- Solving Common Frosting Problems
- Unique Flavor Variations to Explore
- Storage and Waste Free Tips
- Serving and Pairing Inspiration
- Recipe FAQs
- 📝 Recipe Card
Make Stable Cool Whip Frosting That Lasts
I remember the absolute disaster of my daughter's third birthday party. I had spent hours baking a beautiful yellow cake and decided to top it with just a tub of whipped topping and some berries. It looked great in the kitchen, but ten minutes out on the patio, the frosting started to weep.
By the time we sang "Happy Birthday," the layers were literally sliding apart like a muddy landslide, and we had to eat the whole thing with spoons out of a bowl.
That cake soup was a humbling moment, but it taught me that if you want a whipped finish that actually behaves, you need a little help from the pantry. Most people think they have to make a heavy buttercream to get stability, but you can actually keep that light, cloud like texture without the risk of a meltdown.
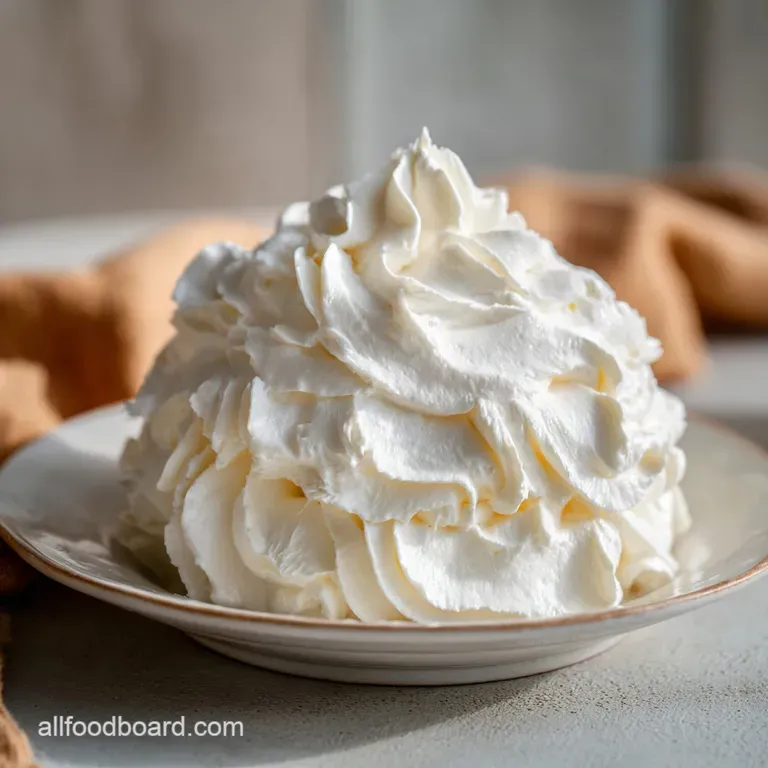
It’s all about creating a structural "net" that holds those air bubbles in place so the frosting stays tall and proud on your dessert.
We are going for a finish that is silky and smooth, not grainy or greasy. This method is my absolute go to for those humid summer days or when I'm in a rush but still want my cake to look like it came from a professional bakery.
It's incredibly budget friendly, and honestly, most kids (and adults) prefer this lighter taste over the super sweet traditional frostings.
Why This Works
- Starch Suspension: The modified cornstarch in the instant pudding mix acts as a thickening agent that traps the milk's water molecules.
- Structural Support: The pudding creates a dense gel that provides a "skeleton" for the airy Cool Whip to cling to.
- Fat Integration: Cold whole milk provides enough fat to keep the mouthfeel velvety without making the mixture heavy or oily.
- Hydrocolloid Hydration: Giving the frosting a rest in the fridge allows the stabilizers to fully bond, ensuring it won't deflate when piped.
| Method | Time | Texture | Best For |
|---|---|---|---|
| Pudding Method | 40 mins | Silky & Stable | Piping and layer cakes |
| Cream Cheese Swap | 15 mins | Tangy & Dense | Cupcakes and brownies |
| Plain Whip | 5 mins | Airy & Weak | Topping fruit or cocoa |
This comparison shows why taking the extra 30 minutes to chill the pudding based version is so important for structural integrity. While a plain whipped topping is fast, it lacks the "backbone" needed to support heavy cake layers or intricate piping designs.
Ingredient Deep Dive and Science
| Ingredient | Science Role | Pro Secret |
|---|---|---|
| Instant Pudding | Primary Stabilizer | Use "Instant" only; "Cook & Serve" will not set cold. |
| Whole Milk | Hydration Agent | Use cold milk to prevent the starch from clumping instantly. |
| Cool Whip | Aeration Base | Thaw completely in the fridge, never the microwave. |
| Powdered Sugar | Extra Stiffness | Sift it first to ensure a perfectly velvety finish. |
The interaction between the milk and the dry pudding mix is where the magic happens. When you whisk them together, the starches immediately begin to swell, creating a thick base that the Cool Whip can fold into without losing its volume.
Ingredients and Smart Swaps
To get this right, you'll need a few basics from the dairy and baking aisles. I always keep these on hand for last minute celebrations because they are so shelf stable and affordable.
- 8 oz (226g) Cool Whip: Fully thawed. Why this? Provides the light, airy volume that remains stable at room temp.
- Substitute: Homemade stabilized whipped cream (use gelatin).
- 3.4 oz (96g) instant pudding mix: Vanilla or your flavor of choice. Why this? The starch acts as the glue for the entire recipe.
- Substitute: 45g cornstarch and 50g sugar (requires cooking first).
- 1 cup (240ml) whole milk: Must be cold. Why this? The fat content helps create a richer, more velvety texture.
- Substitute: 2% milk (will be slightly less creamy).
- 1 tsp pure vanilla extract: For that classic bakery aroma. Why this? Boosts the flavor of the pudding mix significantly.
- Substitute: Vanilla bean paste for those pretty black specks.
- 0.25 cup (30g) powdered sugar: Optional for extra stiffness. Why this? Adds a tiny bit of extra structure and sweetness.
- Substitute: Omit entirely for a less sweet topping.
Essential Kitchen Tools for Success
You don't need a massive stand mixer for this, which is one of the reasons I love it. A simple large glass or stainless steel mixing bowl is best. I prefer glass because you can see if any pudding powder is stuck at the bottom.
You will also need a sturdy balloon whisk to get that pudding base thick and glossy in those first two minutes of mixing.
A silicone spatula is non negotiable here. When it comes time to combine the pudding and the whipped topping, you cannot use a whisk or an electric mixer, or you'll knock all the air out. A spatula allows you to use the "cut and fold" technique, which keeps the frosting tall and fluffy. If you plan on decorating, a piping bag with a large star tip will show off the stability of this Cool Whip Frosting perfectly.
Mastering the Mixing Steps
- In a large mixing bowl, combine the 240ml cold whole milk, 1 tsp vanilla extract, and the 96g dry instant pudding mix. Whisk vigorously for 2 minutes until the mixture is thick, glossy, and leaves trails. Note: This creates the "anchor" for your frosting.
- Add the 226g thawed Cool Whip to the pudding base. Use a silicone spatula to gently fold the mixture using a "cut and fold" motion until the color is uniform and no white streaks remain. Note: Do not overmix; we want to keep the air bubbles intact.
- If you want a very stiff consistency for piping flowers, sift in the 30g of powdered sugar now and fold gently.
- Transfer the bowl to the refrigerator and allow it to chill for 30 minutes until the frosting feels firm to the touch. Note: This allows the stabilizers to fully hydrate for a professional finish.
- Once chilled, give it one very gentle stir with your spatula before loading into a piping bag or spreading on your cake.
Solving Common Frosting Problems
Why Your Frosting Is Lumpy
If you see little yellow or white beads in your frosting, it usually means the pudding mix wasn't whisked into the milk quickly enough. The starch can "clump" if it sits in the liquid without being agitated. To fix this, you can try passing the pudding base through a fine mesh sieve before you fold in the Cool Whip.
It’s an extra step, but it saves the batch!
Why Your Frosting Is Runny
This is the most common issue, and it usually stems from the temperature. If your milk wasn't ice cold, or if your Cool Whip was still halfway frozen when you folded it in, the mixture won't set correctly.
Also, make sure you didn't accidentally use "Cook & Serve" pudding; that version requires heat to activate the thickeners and will stay liquid if mixed cold.
| Problem | Root Cause | Solution |
|---|---|---|
| Grainy Texture | Undissolved sugar/powder | Sift dry ingredients and whisk pudding for full 2 mins |
| Deflated Frosting | Over mixing | Use a gentle folding motion with a spatula only |
| Separating | Temperature shock | Ensure all ingredients are cold before starting |
Common Mistakes Checklist
- ✓ Ensure the Cool Whip is completely thawed in the fridge for 4-6 hours.
- ✓ Use a bowl that is larger than you think you need to fold properly.
- ✓ Whisk the pudding and milk for the full 120 seconds.
- ✓ Never use an electric mixer once the Cool Whip is added.
- ✓ Let the final mixture chill for at least 30 minutes before piping.
Unique Flavor Variations to Explore
One of the best things about this recipe is how easy it is to change the flavor just by swapping the pudding box. If you are making a carrot cake recipe, try using cheesecake flavored pudding for that tangy kick. It’s much cheaper than buying multiple blocks of cream cheese!
To Achieve a Velvety Mouthfeel
For a richer finish, replace 1/4 cup of the milk with heavy cream. This adds a boost of fat that makes the frosting feel more like a traditional chantilly cream. Just be careful not to over whisk, or it can become too heavy.
For a Decadent Chocolate Finish
Use chocolate fudge instant pudding and add a tablespoon of unsweetened cocoa powder to the dry mix. This creates a deep, dark frosting that looks incredible on a white cake. If you want to scale this recipe up for a big sheet cake, you can double everything but only increase the vanilla to 1.5 teaspoons to keep the flavor balanced.
Storage and Waste Free Tips
This frosting stores beautifully because the stabilizers keep it from weeping as it sits. You can keep it in an airtight container in the fridge for up to 3 days. If it seems a little soft after sitting, just give it one very gentle fold with a spatula don't whip it hard, or you'll lose the volume.
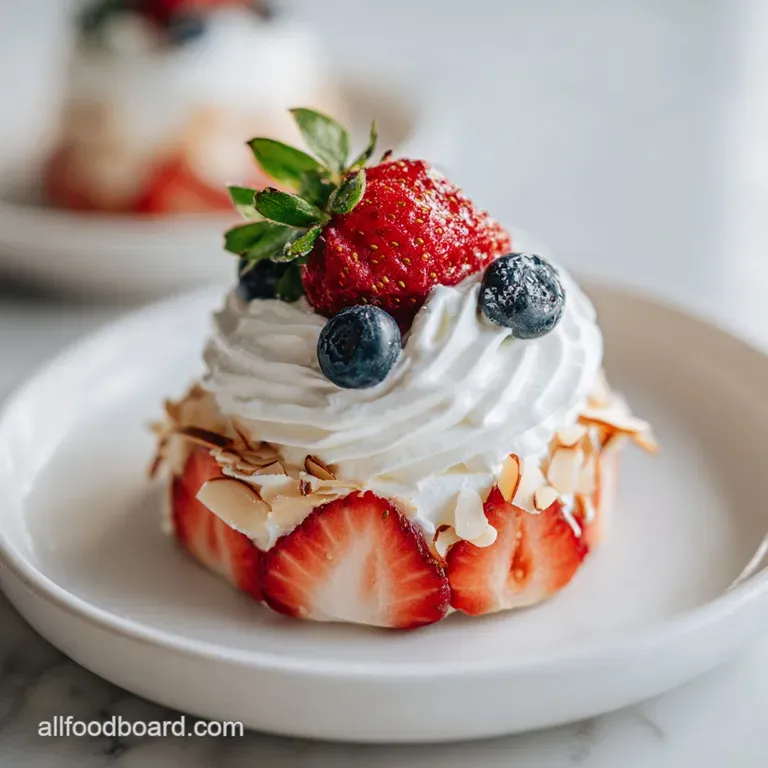
Zero Waste Tip: If you have a small amount of leftover frosting, don't throw it out! It makes an incredible "dip" for fresh strawberries or graham crackers. You can also dollop small mounds onto a parchment lined tray and freeze them.
Once frozen, pop them into a freezer bag; they are perfect for dropping into a hot cup of coffee or cocoa for a "melty" treat. This frosting will stay good in the freezer for up to 2 months.
Serving and Pairing Inspiration
Because this frosting is so light, it pairs perfectly with dense cakes that need a bit of airiness. It is the classic choice for a "poke cake" where you want the topping to sit thick on top of the gelatin infused layers.
I also love using it as a filling for cream puffs or eclairs because it holds its shape better than plain whipped cream once inside the pastry.
If you are looking for a more traditional texture for a holiday cake, you might want to check out my recipe for German Chocolate Frosting, which is much heavier and coconut forward. However, for an everyday birthday or a simple Sunday dessert, this Cool Whip version is unbeatable for its ease and reliability. Just remember to keep the cake refrigerated until about 15 minutes before serving to keep that "shatter" cold and the texture silky.

Recipe FAQs
Can Cool Whip be used as frosting?
Yes, but it requires stabilization. Pure Cool Whip is too aerated and unstable for professional looking cake coverage on its own, so it must be folded with instant pudding mix to create a pipeable, firm consistency.
How to thicken up Cool Whip to use as frosting?
Whisk 1 cup of cold whole milk with 3.4 oz of instant pudding mix for 2 minutes before folding in the thawed Cool Whip. Chilling the final mixture for 30 minutes allows the hydrocolloids in the pudding to hydrate, creating a stable, scoopable structure similar to the silky filling technique used in classic appetizers.
What are the two ingredients in Cool Whip frosting?
The primary base components are 8 oz of thawed Cool Whip and 3.4 oz of instant pudding mix. While these are the core elements, adding cold milk and vanilla extract is essential to bridge the texture and flavor requirements.
Can you mix Cool Whip with regular icing?
No, this is a common misconception. Mixing traditional butter based icing with Cool Whip often causes the emulsion to break, resulting in a runny, oily mess that will not hold its shape on a cake.
Is it true I can use an electric mixer to speed up the process?
No, this is a common misconception. You must never use an electric mixer once the Cool Whip is added, as the high speed mechanical action will destroy the delicate air bubbles and deflate the mixture completely.
How to store leftovers so it stays fluffy?
Seal the mixture in an airtight container and store it in the refrigerator for up to 3 days. If the texture feels slightly soft after storage, perform one gentle 'cut and fold' motion with a spatula to restore the volume without breaking the structure.
Is it necessary to thaw the Cool Whip completely?
Yes, you must ensure the Cool Whip is fully thawed in the refrigerator for 4-6 hours before starting. Using semi frozen product prevents the pudding mix from incorporating evenly, leading to lumpy frosting that will not set properly.
Stable Cool Whip Frosting

Ingredients:
Instructions:
Nutrition Facts:
| Calories | 52 kcal |
|---|---|
| Protein | 0.3 g |
| Fat | 1.9 g |
| Carbs | 7.5 g |
| Fiber | 0 g |
| Sugar | 6.2 g |
| Sodium | 65 mg |
