Hot Fudge Chocolate Cobbler Recipe
- Time: Active 10 minutes, Passive 35 minutes, Total 45 minutes
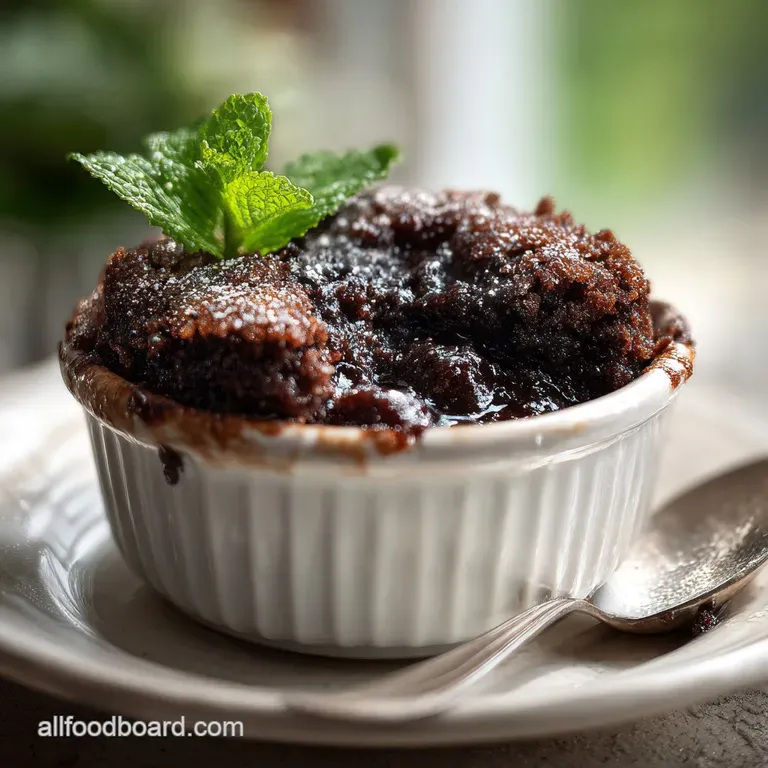
- Flavor/Texture Hook: A shatter crisp sugary crust covering a velvety, molten chocolate river.
- Perfect for: Rainy weeknight cravings, family gatherings, or beginner bakers wanting a "wow" factor.
- Perfecting the Rich Hot Fudge Chocolate Cobbler
- Why This Gooey Dessert Always Wins
- Timing and Measurements for Success
- Essential Components for Fudgy Foundations
- Basic Tools for Your Baking
- Step by Step Cobbler Guide
- Expert Techniques for Perfect Results
- Creative Ways to Customize Flavor
- Keeping Your Leftovers Moist
- Perfect Pairings for Warm Chocolate
- Recipe FAQs
- 📝 Recipe Card
Perfecting the Rich Hot Fudge Chocolate Cobbler
The first time I saw someone pour boiling water over a perfectly good cake batter, I nearly had a heart attack. I was sitting in my grandmother's kitchen, watching her sprinkle a gritty layer of cocoa and sugar over the dough, then douse the whole thing in hot liquid. It looked like a muddy disaster.
I was convinced we'd be eating chocolate soup for dinner, but 35 minutes later, the oven door opened to an aroma so rich it felt like a hug.
That "muddy disaster" had transformed into a structural miracle. The top was a crackling, brownie like crust that shattered under a spoon to reveal a deep, dark pool of bubbling fudge. We ate it straight from the pan with cold cream, and I’ve been chasing that specific "shatter and ooze" texture ever since.
This Hot Fudge Chocolate Cobbler is that exact childhood memory, refined by years of testing to ensure the sauce stays thick and the cake stays light.
You don't need a stand mixer or fancy equipment for this one. It's a humble, one bowl process that relies on a bit of kitchen physics rather than elbow grease. We're going to talk about why you should never stir the water, how to get that signature crust, and why the type of cocoa you choose changes everything.
Trust me, once you see that sauce bubbling up around the edges, you'll be hooked.
Why This Gooey Dessert Always Wins
- Thermal Inversion: The boiling water sinks through the batter, dissolving the sugar cocoa topping to create a thick fudge sauce at the bottom.
- Starch Gelatinization: High heat from the water instantly starts cooking the flour’s starches, setting the cake structure before it can dissolve into the sauce.
- Leavening Lift: Baking powder reacts twice, once with the milk and again with the heat, allowing the cake to "float" atop the heavy chocolate liquid.
- Fat Suspension: Melted butter creates a tender crumb by coating flour proteins, preventing excess gluten from making the sponge tough.
Comparison of Cooking Methods
| Method | Time | Texture | Best For |
|---|---|---|---|
| Standard Oven | 35 minutes | Crisp top, molten bottom | Maximum texture contrast |
| Slow Cooker | 2 hours 30 mins | Uniformly soft and pudding like | Potlucks and hands off prep |
| Air Fryer | 20 minutes | Extra crunchy top, less sauce | Small batches (halve recipe) |
This dish relies on the stark contrast between the cakey upper layer and the liquid base. While the oven provides the most reliable "shatter" on top, the slow cooker method is a great alternative if you need to free up oven space for a big family dinner. If you're a fan of Southern style sweets, this reminds me of the deep, dark cocoa notes found in a Classic Mississippi Mud recipe but with a much lighter, airy sponge.
Timing and Measurements for Success
The Physics of the Sink
The science behind this Fudge Chocolate Cobbler is all about density and solubility. By pouring boiling water over the sugar and cocoa, you create a heavy syrup that is denser than the cake batter.
Because the batter contains air bubbles from the baking powder, it remains buoyant and stays on top, while the syrup migrates to the bottom to become the "fudge" layer.
| Ingredient | Science Role | Pro Secret |
|---|---|---|
| 10g Baking Powder | Aeration | Ensure it is fresh so the cake floats above the sauce |
| 350ml Boiling Water | Solvent | Must be bubbling to "bloom" the cocoa for deep flavor |
| 30g Cocoa Powder | Flavor/Structure | Dutch processed cocoa provides a darker color and smoother finish |
Chef's Tip: Use a light colored baking dish if possible. Dark pans absorb heat faster and can cause the sugar in the fudge layer to scorch before the cake center is fully set.
Essential Components for Fudgy Foundations
To make this Hot Fudge Chocolate Cobbler, you'll need the following ingredients from your pantry. Don't skip the salt - it's the only thing standing between "rich" and "cloying."
- 125g all purpose flour: The structural backbone.
- 200g granulated white sugar: For the cake batter sweetness.
- 30g unsweetened Dutch processed cocoa powder: Divided for batter and topping. Why this? Dutch processed is less acidic and tastes more intensely like "dark chocolate."
- 10g baking powder: For that essential lift.
- 2g fine sea salt: To balance the sugar.
- 120ml whole milk: Adds moisture and fat for a tender crumb.
- 60g unsalted butter, melted: Provides richness and flavor.
- 5ml pure vanilla extract: Anchors the chocolate notes.
- 100g light brown sugar, packed: Used in the topping for a caramel undertone.
- 100g granulated white sugar: Additional topping sugar for the "crust."
- 350ml boiling water: The catalyst for the fudge sauce.
Ingredient Substitutions
| Original Ingredient | Substitute | Why It Works |
|---|---|---|
| Whole Milk | Unsweetened Almond Milk | Works well but the cake will be slightly less rich. |
| Unsalted Butter | Melted Coconut Oil | Adds a subtle tropical scent and keeps the fat ratio. |
| All Purpose Flour | 1:1 gluten-free Blend | Note: Use a blend with xanthan gum for the best structure. |
If you are looking for a different kind of chocolate experience that uses a more traditional crumb, you might enjoy the coconut and pecan textures in a Dreamy German Chocolate Frosting recipe as a side topping or inspiration.
Basic Tools for Your Baking
You don't need a lot of gear to get this done, which is why it's my go to for vacation rentals or busy Sundays. A 9x9 inch square baking pan is the standard, though an 11x7 inch rectangular dish works beautifully too.
You'll also need a large mixing bowl for the batter and a small bowl to whisk your topping sugars together.
A sturdy whisk and a silicone spatula are essential for getting the batter smooth without overworking the flour. Most importantly, you need a kettle or a small saucepan to bring your water to a rolling boil.
If you use lukewarm water, the "magic" won't happen the cocoa won't bloom, and the sugars won't dissolve properly into a sauce.
step-by-step Cobbler Guide
Phase 1: Building the Structural Base
Preheat your oven to 350°F (180°C). In your large bowl, whisk together the 125g flour, 200g granulated sugar, half of the cocoa powder (15g), baking powder, and sea salt. Note: Whisking dry ingredients first prevents cocoa clumps in the finished cake.
Phase 2: Incorporating the Liquids
Stir in the 120ml milk, 60g melted butter, and 5ml vanilla extract. Mix until the batter is thick and smooth. It will be thicker than standard cake batter more like a soft cookie dough. Spread this evenly into your ungreased baking pan using a spatula.
Phase 3: The Sugar Cocoa Dusting
In a separate small bowl, combine the 100g brown sugar, the remaining 100g white sugar, and the remaining 15g cocoa powder. Sprinkle this mixture liberally and evenly over the top of the batter. It will look like a lot of sugar, but don't panic; this is the soul of the sauce.
Phase 4: The Thermal Bloom Step
Carefully pour the 350ml boiling water over the back of a spoon onto the sugar layer. Note: Using a spoon breaks the fall of the water so it doesn't wash a "hole" into the batter.DO NOT STIR. Leave the mess exactly as it is.
Phase 5: The Finishing Cues
Bake for 35 minutes until the top is firm and crackly. The center should have a slight jiggle, and you’ll see the dark chocolate sauce bubbling up around the edges of the pan.
| Checkpoint | Targeted Value | Why It Matters |
|---|---|---|
| Oven Temp | 350°F (180°C) | Balanced heat for rising and crust formation |
| Water Temp | 212°F (100°C) | Necessary to dissolve sugar and bloom cocoa |
| Total Bake Time | 35 minutes | Prevents the sauce from being absorbed into the cake |
Expert Techniques for Perfect Results
Prevent Gummy Undercooked Centers
The biggest mistake I see is people pulling the cobbler out too early because they see the sauce bubbling. You want that top cake layer to be fully baked. If the center feels like liquid dough rather than a springy sponge, give it another 5 minutes.
The sauce at the bottom won't dry out, but an underbaked cake will feel heavy and gummy.
Restaurant Quality Flavor Depth
To make this taste like it came from a high end bistro, add a teaspoon of instant espresso powder to the sugar cocoa topping. It won't make the cobbler taste like coffee, but it will intensify the chocolate flavor significantly.
Also, use a pinch of flaky sea salt on top right after it comes out of the oven to highlight the sweetness.
Avoid the Muddy Look
While this is a "messy" dessert, you can keep it looking appetizing by letting it rest for at least 10 minutes before serving. This allows the sauce to thicken slightly. If you scoop it immediately, the sauce will be very thin and run all over the plate. Patience results in a velvety, spoonable fudge.
Common Mistakes Checklist
- ✓ Stirring the water after pouring (this ruins the layers and creates a gray, murky mess).
- ✓ Using cold or tap warm water (the sugar won't dissolve, leaving a gritty texture).
- ✓ Substituting Dutch process for natural cocoa without adjusting (natural cocoa is more acidic and may react too much with the baking powder).
- ✓ Over mixing the batter (this develops gluten and makes the cake layer tough instead of tender).
- ✓ Forgetting to grease the pan (actually, for this specific recipe, an ungreased pan often helps the cake "climb" the sides).
Troubleshooting the Sauce
| Problem | Root Cause | Solution |
|---|---|---|
| Sauce is too thin | Water wasn't boiling | Ensure water is at a rolling boil next time. |
| Cake is dry/no sauce | Overbaked | Reduce bake time by 5 minutes or check oven temp. |
| Gritty topping | Sugars didn't dissolve | Pour water more evenly across the entire surface. |
Creative Ways to Customize Flavor
This recipe is a fantastic canvas for your own tweaks. If you want a Salted Caramel Twist, swap the boiling water for a mixture of hot water and jarred caramel sauce, and use all brown sugar for the topping. The result is a deeper, more buttery flavor that pairs perfectly with sea salt.
For a dairy-free Version
You can easily make this vegan friendly by using a plant based milk (oat milk is particularly good here for its creamy texture) and substituting the butter with a neutral oil or a vegan butter stick.
Since there are no eggs in this recipe, the structure relies entirely on the flour and baking powder, making it one of the easiest desserts to adapt for dietary needs.
Quick Decision Shortcuts
- If you want it richer, add 50g of semi sweet chocolate chips to the batter before spreading it in the pan.
- If you want it lighter, serve it with fresh raspberries or strawberries to cut through the heavy fudge.
- If you want a shortcut, use a boxed devil's food cake mix for the base, but keep the homemade cocoa sugar water topping for that authentic sauce.
For those who love a "set" dessert rather than a molten one, you might find my Homemade Chocolate Cream recipe to be a better fit for a summer gathering where heat isn't invited.
Keeping Your Leftovers Moist
Storage Guidelines
If you actually have leftovers (a rare occurrence at my house), keep them in the baking dish and cover tightly with plastic wrap or foil. It will stay fresh at room temperature for about 2 days, or in the fridge for up to 4 days.
Note that as it sits, the cake will continue to absorb some of the sauce, so it won't be quite as "lava like" on day two.
Reheating and Zero Waste
To bring back that molten magic, reheat individual portions in the microwave for 20-30 seconds. If the sauce has been completely absorbed, add a tiny splash of milk or water before heating to loosen it up. Any leftover "cake" scraps can also be folded into vanilla ice cream for a homemade fudge ripple effect!
Perfect Pairings for Warm Chocolate
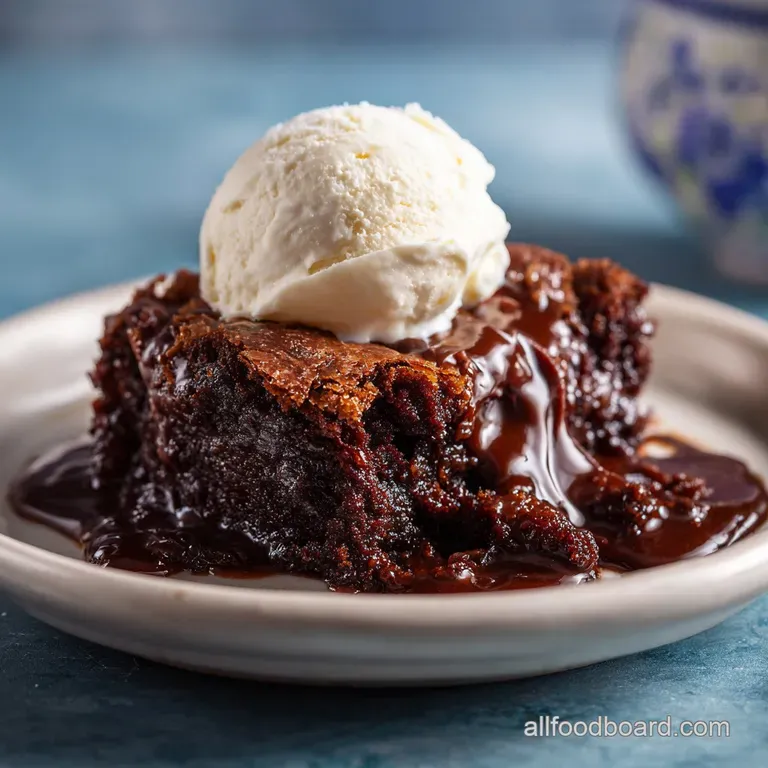
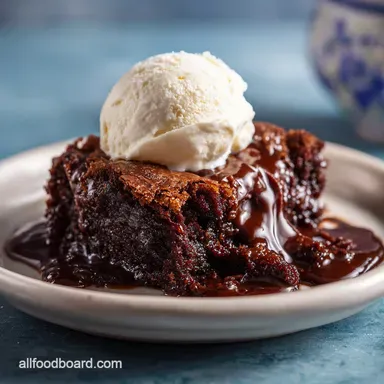
This cobbler is essentially a delivery system for cold toppings. A massive scoop of high-quality vanilla bean ice cream is the classic choice; the way it melts into the hot chocolate sauce is purely cinematic.
If you want to go the Southern route, a simple pour of cold heavy cream or a dollop of unsweetened whipped cream provides a lovely temperature contrast without adding too much extra sugar.
For a drink pairing, a cold glass of milk is the nostalgic winner. However, a strong cup of black coffee or a glass of tawny port can turn this simple home bake into a sophisticated finale for a dinner party.
The bitterness of the coffee or the dried fruit notes of the port play beautifully against the Dutch processed cocoa.
Fresh vs. Shortcut Comparison
| Feature | Fresh From Scratch | Boxed Mix Shortcut |
|---|---|---|
| Texture | Light, airy sponge | Denser, more "boxed" crumb |
| Flavor | Deep, customizable cocoa | Standard sweet chocolate |
| Time | 10 mins prep | 5 mins prep |
Honestly, don't even bother with the boxed mix unless you're in a massive rush. The scratch version takes almost the same amount of time and the flavor difference is night and day. Trust me, your kitchen smelling like real cocoa and vanilla is half the fun!

Recipe FAQs
Can I substitute whole milk with a non-dairy alternative?
Yes, but choose wisely. Unsweetened oat milk works best because its fat content mimics whole milk, keeping the cake tender. Almond milk is acceptable but the final crumb will be slightly less rich.
Why is my topping crust gritty instead of fudgy?
No, the water was not hot enough. You must pour boiling water (212°F/100°C) over the sugar and cocoa topping to ensure full dissolution. Lukewarm water will not properly "bloom" the cocoa or dissolve the sugars into a sauce.
How to ensure the cake floats above the sauce layer?
Use newly purchased, fresh baking powder. The leavening agent needs maximum lift to create enough air pockets to keep the batter buoyant atop the dense, sugary syrup. If you master this air incorporation, you see the same principle applied to lighter bakes like our The Speedy Pudd recipe.
Is it true that I must use Dutch processed cocoa for the best flavor?
No, it is not strictly required, but highly recommended. Dutch processed cocoa is less acidic, yielding a darker, smoother, and more intense chocolate taste. Natural cocoa works but may react slightly differently with the leavening agent.
How to tell when the cobbler is perfectly baked?
Check the cake top for firmness and slight cracking. The edges of the fudge sauce should be visibly bubbling vigorously, but the very center of the cake layer should still have a slight, barely perceptible jiggle. Pull it early and you risk a gummy center.
What is the secret to avoiding a tough, dry cake layer?
Mix the batter only until just combined. Over mixing develops gluten in the flour, which leads to a chewy, tough cake instead of the required light, tender crumb. You want to see a few small streaks of flour when you stop mixing. If you enjoyed learning about managing gluten structure here, see how we apply the same logic to pie crusts in the Crème de la recipe.
How long should I let the cobbler rest before serving?
Rest for a minimum of 10 minutes after removing it from the oven. This pause allows the bubbling sauce to thicken slightly; serving immediately results in a thinner sauce that runs everywhere rather than clinging to the cake pieces.
Hot Fudge Chocolate Cobbler
Ingredients:
Instructions:
Nutrition Facts:
| Calories | 330 kcal |
|---|---|
| Protein | 3.6g |
| Fat | 7.8g |
| Carbs | 66.7g |
| Fiber | 3.5g |
| Sugar | 50.2g |
| Sodium | 148mg |
