Fried Ice Cream with a Crunchy Twist
- Fried Ice Cream with a Crunchy Twist: A Delightful Dessert Adventure
- Essential Ingredients Guide: Unlocking Your Culinary Potential
- Mastering the Art of Fried Ice Cream with a Crunchy Twist
- Pro Tips & Secrets
- Perfect Presentation
- Storage & Make-Ahead
- Creative Variations
- Complete Nutrition Guide
- Expert FAQ Solutions
- Wrapping it Up
- 📝 Recipe Card
Fried Ice Cream with a Crunchy Twist: A Delightful Dessert Adventure
Oh my gosh, have you ever had fried ice cream? if not, you're in for a treat! let me tell you a little story.
I remember the first time i tried it at a local mexican restaurant. i was minding my own business, digging into my tacos, when my friend ordered this fascinating dessert.
The waiter brought out this golden brown ball, and i thought, “what in the world is that?” when i took a bite, i was hooked! creamy, cold vanilla ice cream tucked inside a crispy coating? yes, please!
that moment sparked my quest to figure out how to make fried ice cream with a crunchy twist at home, and let me tell you, it’s been a riot ever since.
A Sweet Slice of History
Now, let's chat about where this delightful dessert came from. fried ice cream originates from various cultures, but it's particularly popular in mexican cuisine.
It's a delicious way to play with temperatures and textures. back in the day, it was a fun street treat, and it's still a crowd pleaser at parties today.
Can you believe this simple dessert has hung around for decades?
You might be wondering, “how tough is this to whip up?” i’d say it’s about a medium difficulty level. it’s not rocket science, but it does involve some key steps like freezing and frying that might feel daunting for some new cooks.
But trust me, with a bit of practice, anyone can master this.
Worried about the time? you’ll spend about 15 minutes on active prep work, but don’t forget to set aside about 2 hours for chilling.
After that, you're just five minutes away from frying up some melt-in-your mouth magic! and let's be real, the cost? it’s pretty low for a dish that feels gourmet.
You’ll end up with about four good sized servings enough to share or keep all to yourself; no judgment here!
Benefits Beyond the Yum Factor
Now, if you’re looking for reasons to make this ice cream with a toppings twist, let’s drop some knowledge. first off, it's got some health perks! okay, don’t roll your eyes just yet while it’s definitely a treat, you can sneak some better for-you ingredients into your crunchy coating.
Plus, when you pair it with fresher ingredients like fruit or a drizzle of chocolate sauce, it’s like you’re leveling up your dessert game.
Talk about unique dessert ideas !
The best part? this treat is perfect for any special occasion birthdays, summer bbqs, or just a tuesday night when you need a little pick-me-up.
Folks go wild for it! i once made it for a friend’s party, and people were pledging their love to me.
I mean, who doesn’t want to impress their friends with creative ice cream recipes?
You know what’s even better? it’s a wound out community trend! diy sweet treats like this are the heart and soul of food blogs, local diners, and family kitchens across america.
The thrill of serving your guests a plate of fresh, warm fried ice cream just can’t be beaten. trust me; you’ll love sharing this story!
Time to Gather the Goods!
Alright, folks! we’ve covered the basics of why you should get your frying pan ready. it’s time to chat about the ingredients you’ll need to whip up this delightful creation.
Trust me, you’ll want to start gathering those items because it’s coming together soon, and your taste buds will thank you! let’s dive into what you need to make this simple yet delectable ice cream treat.
Essential Ingredients Guide: Unlocking Your Culinary Potential
If you're diving into the world of cooking, you’re gonna want to get your pantry stocked with some premium core components .
Trust me, having the right ingredients on hand makes all the difference. today, we’re exploring essential ingredients for making amazing dishes like fried ice cream with a crunchy twist and other crowd pleasing desserts.
Let’s break it down!
Premium Core Components
Detailed Measurements
When it comes to cooking, precision is key. for example, when making that fried ice cream you’ve been dreaming about, you need 4 large scoops of vanilla ice cream (that's about 1 cup or 240 ml ).
Whether you're a metric fan or love those classic cups, i’ve got you covered.
Quality Indicators
Not all ingredients are created equal. Look for rich, creamy ice cream with vanilla bean specks for authentic flavor. For your crunchy coating , choose crispy cornflakes it’s all about texture, baby!
Storage Guidelines
Ice cream? keep that frozen, my friend. for the crunchy coating, make sure to store it in an airtight container to avoid that stale situation.
Most spices? they generally last about 1-2 years if stored in a cool, dark place.
Freshness Tips
Always go for fresh ingredients! For herbs, look for vibrant colors and avoid any wilted leaves. Trust me; it makes all the difference in flavor.
Signature Seasoning Blend
Let’s talk spices and flavor enhancers. A key part of any successful dish is knowing your herbs and spices.
Essential Spice Combinations
For that signature twist , try cinnamon and sugar in your crunchy coating. It’s all about building layers of flavor.
Herb Selections and Pairings
Want extra pizzazz? Fresh mint pairs perfectly if you wanna elevate your dessert game. You might even find it in some Mexican desserts !
Flavor Enhancers
Think beyond salt and pepper! A drizzle of honey can add an unexpected depth to desserts. And don't overlook the magic of vanilla extract a little goes a long way!
Smart Substitutions
Sometimes you might not have everything you need on hand. No worries, I’ve got some common alternatives for you!
Common Alternatives
Out of cornflakes? Use crushed graham crackers instead! Same crunch, different vibe.
Dietary Modifications
Got a dairy allergy? Sub out the milk with almond or coconut milk. It's an easy swap that still tastes delish.
Emergency Replacements
Run out of sugar? Honey or pure maple syrup can step in like a dessert superhero !
Seasonal Options
Use seasonal fruits or spices to take your dish up a notch. Think pumpkin spice in the fall!
Kitchen Equipment Essentials
You don’t need a fancy pants kitchen to knock it out of the park. Here’s a quick rundown of must have tools .
Must Have Tools
A good deep frying pan is essential when you learn the ice cream frying technique . Oh, and keep a slotted spoon handy for those golden fried balls of goodness.
Alternative Equipment Options
No deep fryer? No biggie! Just use a heavy bottomed pot.
Preparation Tips
Always prep your ingredients before hitting the stove. It makes for a smoother cooking process.
Storage Solutions
Make sure your tools are organized. It’ll save you time and frustration. Trust me!
Now that you’re armed with this essential guide to ingredients and equipment, you're ready to tackle your fried ice cream recipe adventure.
It doesn’t matter if you’re a seasoned pro or a first time cook; these tips will elevate your culinary journey.
And once you've got all your components lined up, just wait 'til you dive into making fried ice cream with a crunchy twist .
It's a summer party waiting to happen, and nothing beats the delight on friends' faces when they dig into a delicious crunchy ice cream dessert .
Let's get cooking!
Mastering the Art of Fried Ice Cream with a Crunchy Twist
Alright, ya’ll! let’s talk about one of my all-time favorite treats: fried ice cream with a crunchy twist . seriously, if you’ve never tried this, you’re missing out big time.
This delightful dessert, inspired by mexican cuisine, combines the creamy goodness of vanilla ice cream with a golden, crunchy coating.
It’s like a frozen symphony in your mouth! so, get ready to embark on a sweet adventure that’ll have everyone at your party raving.
Essential Preparation Steps
Mise en place first off, let’s get our ducks in a row. you’ll need to gather all your ingredients.
Here’s what you’ll want ready: 4 scoops of vanilla ice cream , crushed cornflakes , and all your frying gear.
Trust me, it makes everything smoother.
Time management tips now, this isn’t just a throw-it-all together recipe. you’ll want to plan for 2 hours of chilling for the ice cream.
That means you gotta do some prep work first. while your ice cream's setting, you can whip up the coating.
Organization strategies set up your work station! have your bowls for the batter and crunchy coating ready, and keep that baking sheet handy for freezing the coated ice cream.
It’ll make the process so much easier.
Safety considerations okay, let’s not burn our eyebrows off. keep a close eye on that oil. it'll be cooking at 350° f ( 175° c) , so use a thermometer if you’ve got one.
And always have a slotted spoon ready to pull them out. safety first, friends!
step-by-step Process
Scoop the ice cream start by scooping that vanilla ice cream into balls, maybe about 1/4 cup each, and place them on a baking sheet.
Cover ‘em up with plastic wrap and toss ‘em in the freezer for at least 2 hours .
Make the crunchy coating while the ice cream is setting, mix crushed cornflakes , flour , cinnamon , and sugar in a bowl.
This is what gives our fried ice cream that tasty crunch!
Prep the Batter – In another bowl, whisk together one egg and 1/2 cup of milk until smooth. Simple, right?
Coat the ice cream time to play! dip each frozen ice cream ball in the batter. let the excess drip off, then roll it in that delicious coating mixture.
Repeat until all balls are covered.
Freeze Again – Pop those coated ice cream balls back in the freezer for 30 more minutes to ensure they’re solid.
Fry it up heat up the frying pan with your oil. carefully add the frozen balls to the hot oil and fry for about 15-20 seconds until golden brown.
Don’t overcrowd; let each ball bask in that oil!
Drain and Serve – Use your slotted spoon to lift them out and place them on paper towels. Serve immediately with your favorite chocolate sauce drizzle or whipped cream toppings.
Expert Techniques
Now, let’s get real. Frying ice cream can seem tricky, but let me share some expert tips.
For that crunchy coating, consider double coating by dipping in the batter again before rolling in the coating. More crunch = more yum!
Keep an eye on your oil temperature . If the oil is too hot, you’ll burn the coating before the ice cream melts. Too cool, and it’ll just soak up oil.
Experiment a bit! Try different ice cream flavors like chocolate or even a fruity twist. Nothing wrong with switching it up a bit.
Success Strategies
Everybody makes mistakes it’s how we learn! Common missteps include not freezing the balls long enough. Trust me; don’t skip that freeze time or you’ll end up with a melty mess.
A good rule of thumb is to always do a quality check before you fry. If they seem too soft, back in the freezer they go.
For those who love to prepare ahead, you can keep those fried ice cream balls prepped and frozen. Just fry them fresh when you’re ready to serve!
And seriously, don’t forget those serving suggestions. A sprinkle of cinnamon sugar or a drizzle of chocolate sauce takes this dessert from good to gourmet!
Additional Information
Wrapping up, the journey of creating fried ice cream with a crunchy twist isn’t just about the final product it’s about the joy in every step.
From the push and-pull of the batter to that satisfying crunch when you take a bite. it’s one of those fun summer desserts that’ll have your friends begging for more.
So what are you waiting for? grab your ingredients and dive into making one of the most delectable ice cream treats you and your loved ones will ever have! happy cooking, and don’t forget to enjoy the delicious chaos along the way.
Pro Tips & Secrets
Alright, folks, let’s unlock some secrets for perfecting that fried ice cream with a crunchy twist ! first things first: chill thoroughly.
You want those ice cream balls to feel as solid as a rock before they hit the oil. trust me, if they're mushy, the frying process can turn into a hot gooey mess.
Next, is that oil temperature aim for a sizzling 350° f . use a thermometer if you’ve got one; it’s worth it.
And, oh man, don’t overcrowd the frying pan! fry in small batches. this keeps the temperature just right and helps achieve that golden perfection.
Speaking of perfection, if you want extra crunch, consider doubling up on the coating. dip the balls in the batter once, roll them in that crunchy coating, dip again, and coat just one more time.
It’s a game changer!
Perfect Presentation
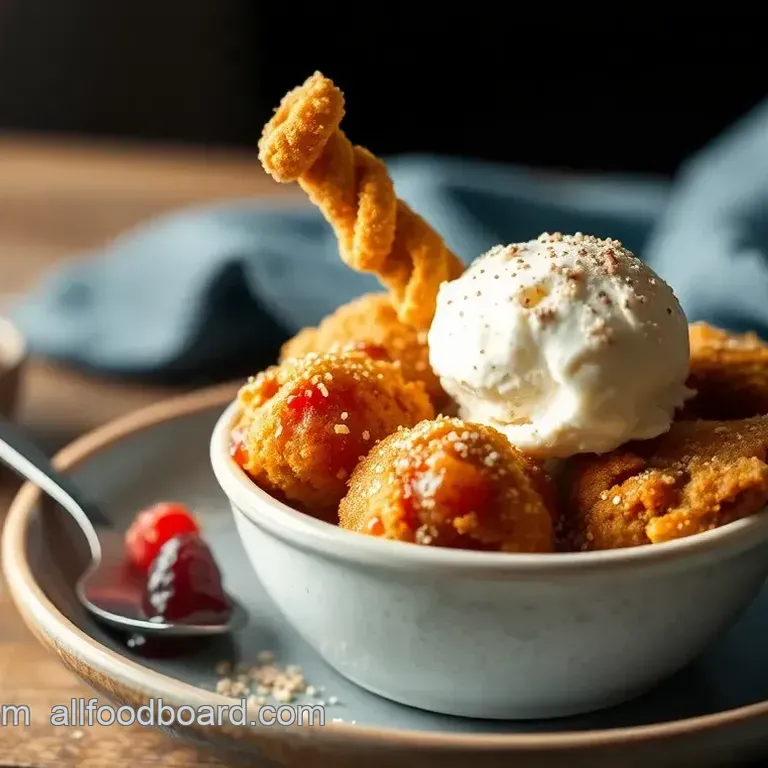
Now, let’s chat about presentation because we eat with our eyes first, right? when serving your fried ice cream , you can’t go wrong with a drizzle of chocolate sauce or a sprinkle of cinnamon sugar coating .
Seriously, throw in some whipped cream toppings and visually it goes from "meh" to "wow!"
For plating, try using a colorful dessert plate. place your fried ice cream on a bed of fresh fruit or alongside a small scoop of sorbet.
The color combinations will make the dessert pop like it just walked off a magazine cover.
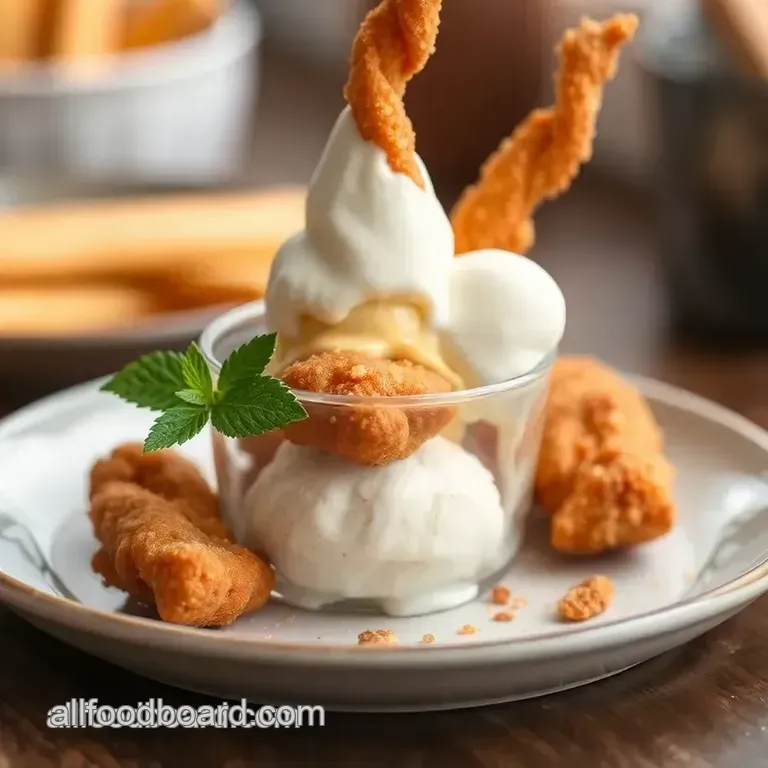
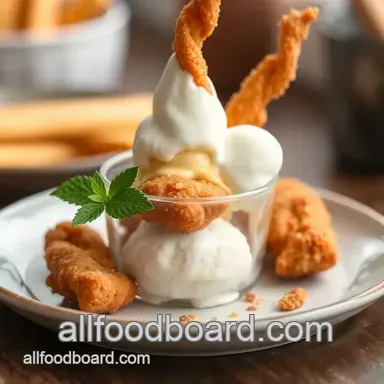
And hey, don’t forget to use those fun garnish ideas! Toasted coconut flakes, crumbled cookies, or even a sprig of mint can take your dish to the next level.
Storage & make-ahead
Let’s keep it real: you might not eat all four servings in one go. Store any leftover fried ice cream by placing it in a single layer in an airtight container.
But, here’s a pro tip: fried ice cream doesn't really store well in the freezer once it's been fried. for make-ahead options, freeze those un-fried, coated balls.
They can last up to two weeks , and when you’re ready for dessert, just fry them hot and fresh!
As for reheating, let’s keep it traditional don’t go there! Just fry them again right before serving for that fresh crunch.
Creative Variations
Now, if you’re someone who likes to switch it up ( raises hand ), here are a few creative variations you can try! instead of plain ol’ vanilla, why not experiment with other flavors? think chocolate chip cookie dough for a fun twist or even some tangy fruity ice creams .
Want a guilty pleasure? dip your fried ice cream in chocolate right after frying! who said dessert can't be extra decadent? and let’s not forget the seasonal options.
Why not make a pumpkin spice version in the fall? talk about fun summer desserts and crowd pleasing treats !
Complete Nutrition Guide
Okay, let’s break it down. your fried ice cream isn't exactly a "health food" item, but hey, you’re treating yourself, right? with about 350 calories per serving, this can fit into a balanced meal just maybe not after a burger feast.
The homemade version allows you to control ingredients a bit! adding some fruit toppings or a berry sauce can give nutritional boosts.
But portion guidance? maybe don’t have it every night or you’ll be wearing those calories!
Expert FAQ Solutions
You probably have questions everyone does! here's what i often hear. “what do i do if my ice cream melts while frying?” chill it longer.
If you have a big scoop, keep the rest in the freezer while you fry!
“I tried it once and it didn’t work!” Don’t fret. Sometimes it’s just about timing or temperature. Trust your gut, and if the first one flops, you still have more ice cream to play with!
Wrapping it Up
So there you have it the ins and outs of making fried ice cream with a crunchy twist ! whether you’re throwing a fun party or just looking to impress your family, this irresistible dish is sure to be a hit.
Remember, cooking is all about having fun, experimenting a bit, and, of course, enjoying those delectable ice cream treats. look into in, embrace the mess, and let your flavor creativity soar!
Delicious Mexican Fried Ice Cream
Ingredients:
Instructions:
Nutrition Facts:
| Calories | 350 |
|---|---|
| Protein | 4g |
| Fat | 20g |
| Carbs | 38g |
| Fiber | 1g |
| Sugar | 10g |
| Sodium | 160mg |
