Cozy Baked Rice Pudding
- Time: Active 10 minutes, Passive 2 hours, Total 2 hours 10 mins
- Flavor/Texture Hook: Silky custard with warm nutmeg notes and a subtle, chewy rice bite.
- Perfect for: Slow Sunday afternoons, holiday gatherings, or a nostalgic family treat.
- The Ultimate Cozy Baked Rice Pudding
- The Science Behind Perfect Results
- Analyzing the Component Chemistry
- The Building Blocks of Flavor
- Essential Tools for Baking Success
- Step-by-Step Baking Process
- Comparing Stovetop and Oven Methods
- Solving Common Baking Hurdles
- Adjusting the Recipe Yield
- Shortcuts and Flavor Variations
- Debunking Common Pudding Myths
- Keeping Leftovers Fresh Longer
- Beautiful Ways to Serve Pudding
- Cozy Baked Rice Pudding FAQs
- 📝 Recipe Card
The Ultimate Cozy Baked Rice Pudding
The scent of warm nutmeg and toasted milk hitting a hot oven is a sensory trigger that takes me straight back to my aunt’s drafty farmhouse kitchen. On rainy afternoons, she’d slide a heavy ceramic dish into the oven, and we’d wait with impatient spoons as the house filled with that sweet, comforting aroma.
There is something about the way the milk caramelizes at the edges that makes this dish feel like a warm hug in a bowl.
I remember the first time I tried to recreate it on my own. I rushed the process, cranked the heat, and ended up with a dish of scorched milk and crunchy rice. It was a disaster, but it taught me the most important lesson about this dessert: patience is the secret ingredient.
You can't force the rice to give up its starch; you have to coax it out with gentle heat and plenty of time.
We've all had those cafeteria versions that are gluey or bland, but this isn't that. This version uses heavy cream and sweetened condensed milk to create a richness that feels high end while remaining incredibly simple to pull off. It's the kind of recipe you'll find yourself making whenever the weather turns chilly and you need something that feels truly homemade. It’s similar to the cozy vibes of a Classic Bread and recipe, but with a silky, grain based twist.
The Science Behind Perfect Results
Starch Gelatinization: As the rice bathes in the milk at 300°F, the starch granules swell and eventually burst, creating a natural thickening agent that turns thin milk into a velvety custard.
Maillard Reaction: The slow two hour bake allows the sugars in the milk to interact with the proteins, forming that iconic, chewy mahogany skin on the surface that adds deep, caramel like flavor.
Fat Stabilization: The combination of heavy cream and whole milk provides enough fat to prevent the proteins from curdling under the prolonged heat, ensuring a smooth finish.
Osmotic Balance: By adding salt and sugar (via the condensed milk) at the start, we control how much liquid the rice absorbs, preventing the grains from becoming unpleasantly mushy or "blown out."
| Servings | Ingredient Adjustments | Pan Size | Cook Time |
|---|---|---|---|
| 2-3 people | Half all ingredients; use 1/2 can condensed milk | 1 quart dish | 1 hour 15 mins |
| 6 people | Use quantities in official recipe | 2 quart dish | 2 hours |
| 10-12 people | Double all ingredients; 2 cans condensed milk | 9x13 inch pan | 2 hours 30 mins |
When you're feeding a crowd, the surface area of the pan matters just as much as the volume. A wider pan like a 9x13 will give you more of that delicious skin, which is usually everyone's favorite part. If you prefer a deeper, creamier center with less "crust," stick to a high sided ceramic casserole dish.
Analyzing the Component Chemistry
| Ingredient | Science Role | Pro Secret |
|---|---|---|
| Medium Grain Rice | Controlled starch release | Don't rinse it; those surface starches are vital for the creamy "sauce" binding. |
| Sweetened Condensed Milk | Sugar and protein density | This provides a concentrated dairy flavor that won't separate like granulated sugar often does. |
| Whole Milk | Liquid hydration base | Stick to full fat; the calcium helps the rice structure stay intact during the long bake. |
| Heavy Cream | Fat based mouthfeel | This prevents the pudding from feeling "watery" once it cools down and the starches set. |
Using the right rice is the most frequent mistake I see. Long grain rice (like Jasmine) stays too firm and separate, while short grain (like Arborio) can get a bit too gummy. Medium grain is the "Goldilocks" choice here it releases just enough starch to thicken the pudding while keeping a distinct, tender bite.
The Building Blocks of Flavor
To get this dish right, you need to be specific with your pantry choices. Here is what we are working with:
- 1/2 cup (100g) uncooked medium grain white rice: Why this? Provides the ideal balance of starch release and texture retention. (Substitute: Arborio rice for a much thicker, risotto like finish).
- 3 cups (720ml) whole milk: Why this? The fat content is essential for a silky, non watery custard. (Substitute: 2% milk, though it will be less rich).
- 1 can (14 oz / 397g) sweetened condensed milk: Why this? Adds sweetness and a caramelized dairy depth simultaneously. (Substitute: 1 cup sugar + 1/2 cup extra milk).
- 1 cup (240ml) heavy cream: Why this? Ensures the pudding stays creamy even after it has cooled. (Substitute: Coconut milk for a subtle nutty undertone).
- 1/4 tsp salt: Why this? Sharpens the sweetness and prevents the dairy from tasting flat. (Substitute: Sea salt flakes).
- 1 tbsp (15g) unsalted butter, softened: Why this? Greasing the dish adds flavor and prevents the rice from sticking. (Substitute: Salted butter, but omit the extra salt).
- 1 tsp pure vanilla extract: Why this? Provides the foundational floral aroma for the custard. (Substitute: Vanilla bean paste for those beautiful black flecks).
- 1/2 tsp ground cinnamon: Why this? Adds the "warmth" factor that defines cozy baking. (Substitute: Cardamom for a more floral, Scandinavian vibe).
- 1/4 tsp ground nutmeg: Why this? Essential for that classic, old-fashioned British rice pudding profile. (Substitute: Freshly grated mace).
- 1/2 cup (75g) raisins: Why this? Provides little bursts of sweetness and texture throughout the pudding. (Substitute: Dried cranberries or chopped apricots).
Chef Tip: If you aren't a fan of raisins, try soaking dried cherries in a little bit of warm brandy for 10 minutes before adding them to the mix. It adds a sophisticated edge to an otherwise humble dish.
Essential Tools for Baking Success
You don't need a kitchen full of gadgets for this, which is why I love it. A simple 2 quart baking dish is your best friend here. Ceramic or glass works best because they distribute heat more evenly than metal, which can cause the milk to scorch at the corners.
You will also want a sturdy whisk to make sure the condensed milk is fully incorporated into the whole milk and cream. If it settles at the bottom, it might burn before the rice is even cooked.
Finally,, a small saucepan helps to "scald" the milk before it goes into the oven, which jumpstarts the cooking process and shaves about 15 minutes off your wait time.
step-by-step Baking Process
- Preheat and Prep. Set your oven to 300°F (150°C). Rub the 1 tbsp unsalted butter all over the inside of a 2 quart baking dish. Note: This creates a non stick barrier and adds a toasted flavor to the edges.
- Combine the Dairy. In a large bowl, whisk together the 3 cups whole milk, 1 can sweetened condensed milk, and 1 cup heavy cream. Continue until the mixture is completely smooth and streak free.
- Season the Base. Stir in the 1/4 tsp salt, 1 tsp vanilla extract, 1/2 tsp cinnamon, and 1/4 tsp nutmeg.
- Add the Grains. Pour the 1/2 cup uncooked medium grain rice into the buttered baking dish, then pour the milk mixture over the top.
- The Fruit Fold. Sprinkle the 1/2 cup raisins evenly over the liquid. Do not worry if they sink; they will redistribute as the pudding thickens.
- The First Bake. Place the dish in the center of the oven and bake for 1 hour.
- The Gentle Stir. After 1 hour, carefully pull the dish out and give it a very gentle stir. Stir only the bottom to loosen any settled rice, leaving the top skin mostly intact.
- The Final Stretch. Bake for another 1 hour until the top is deeply golden and the pudding wobbles slightly like Jello when shaken.
- The Critical Rest. Remove from the oven and let it sit on the counter for 20 minutes. Note: The rice continues to absorb liquid during this time; skipping this leads to a "soupy" pudding.
- Final Check. Serve warm or chilled, depending on your preference.
Comparing Stovetop and Oven Methods
While you can technically make rice pudding on the stove, the results are fundamentally different. Stovetop pudding is faster but often lacks the complexity and specific textures that the oven provides.
| Method | Time | Texture | Best For |
|---|---|---|---|
| Oven Baked | 2 hours | Velvety with a chewy, caramelized top skin | Special occasions and "hands off" cooking |
| Stovetop | 30-40 mins | Uniformly creamy, more like a thick porridge | Quick weeknight cravings |
| Slow Cooker | 4 hours | Very soft, almost pudding like with no crust | Large batches and meal prep |
If you are looking for that classic, old-fashioned feel, the oven is the only way to go. The dry heat of the oven creates that "skin" on top that is essentially a thin layer of milk jam (dulce de leche) which you just can't get in a pot.
Solving Common Baking Hurdles
Sometimes things go sideways in the kitchen, but rice pudding is very forgiving. If your pudding looks like a desert or a soup, it’s usually an easy fix involving temperature or time.
Why Your Pudding Is Dry
If you pull the dish out and it looks like a solid block, you likely overbaked it or your oven runs hot. As the pudding cools, it thickens significantly, so you want to pull it out while it still has a "loose" look in the center.
If Your Rice is Still Crunchy
This happens if the milk didn't reach a high enough temperature to break down the rice starch. It usually means the oven was too cold or you used an old bag of rice that has become excessively dehydrated.
| Problem | Root Cause | Solution |
|---|---|---|
| Curdled Milk | High heat or acidic additions | Keep oven at 300°F; avoid adding citrus juice until after baking. |
| Rice Sinks/Clumps | Not stirring halfway through | Give it one gentle stir at the 60 minute mark to redistribute grains. |
| No Golden Skin | Not enough fat/sugar on surface | Use full fat milk and don't cover the dish with foil. |
Common Mistakes Checklist
- ✓ Never rinse your rice; you need that surface starch for the "cream" effect.
- ✓ Use room temperature dairy if possible to avoid shocking the rice.
- ✓ Don't use a convection/fan setting, as it dries out the top too quickly.
- ✓ Ensure your baking dish is the right size; too shallow and it will evaporate too fast.
- ✓ Let it rest for at least 20 minutes before serving to allow the custard to set.
Adjusting the Recipe Yield
If you are cooking for a smaller household or a massive party, you can't always just double the numbers and hope for the best.
- Scaling Down (½ or ¼): Use a smaller, deeper pan to prevent the milk from evaporating too quickly. Reduce the total cook time by about 30%, but keep a close eye on it starting at 45 minutes.
- Scaling Up (2x-4x): When doubling, only increase your spices by 1.5x to prevent them from becoming overpowering. You'll likely need to add 20-30 minutes to the total bake time because of the increased volume.
- Baking Large Batches: If you're doing two pans at once, rotate them halfway through to ensure they both get that even, golden crust from the oven's heating elements.
Shortcuts and Flavor Variations
Sometimes you want to shake things up or save a few minutes. If you are in a rush, you can "par boil" the rice in the milk on the stovetop for 10 minutes before putting it in the oven. This can cut about 30 minutes off your baking time.
For a different flavor profile, try swapping the vanilla for almond extract and adding a handful of toasted slivered almonds on top after baking. This pairs beautifully with our Classic Apple Crisp Recipe if you want to serve a duo of desserts. Another great trick is to replace half the heavy cream with full fat coconut milk and add some lime zest for a tropical version of this "cozy baked rice" dish.
Debunking Common Pudding Myths
One of the biggest lies in the kitchen is that you must use "pudding rice." While specialty rice exists, standard medium grain white rice works perfectly fine. Another myth is that you should cover the dish with foil.
Covering it prevents the Maillard reaction from creating that delicious skin and often leads to a "steamed" flavor rather than a baked one. Finally, many people think you have to stir it constantly. In the oven, the convection currents do most of the work for you; one stir halfway through is all you need.
Keeping Leftovers Fresh Longer
Storage: This pudding will keep in the fridge for up to 4 days. Store it in an airtight container with a piece of plastic wrap pressed directly onto the surface to prevent a second, tougher skin from forming.
Freezing: I don't recommend freezing rice pudding. The rice tends to break down and become grainy upon thawing, and the dairy can "weep," leaving you with a watery mess. It's best enjoyed fresh or from the fridge.
Zero Waste Tip: If you find yourself with leftovers that have become a bit too thick, don't toss them! Whisk in a splash of cold milk or even a spoonful of yogurt to loosen it back up. Cold rice pudding also makes a fantastic "power breakfast" when topped with fresh berries and a drizzle of honey.
Beautiful Ways to Serve Pudding
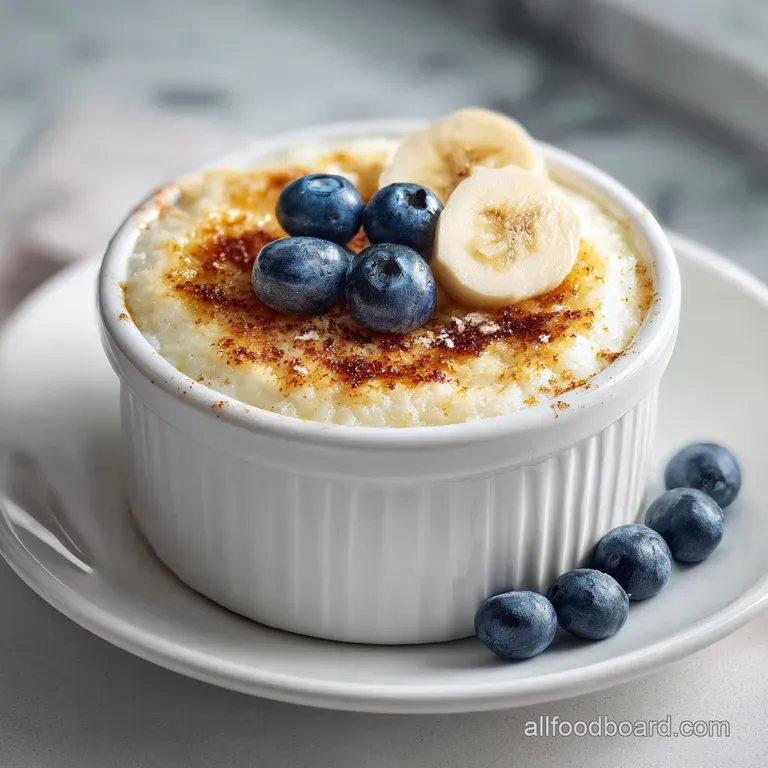
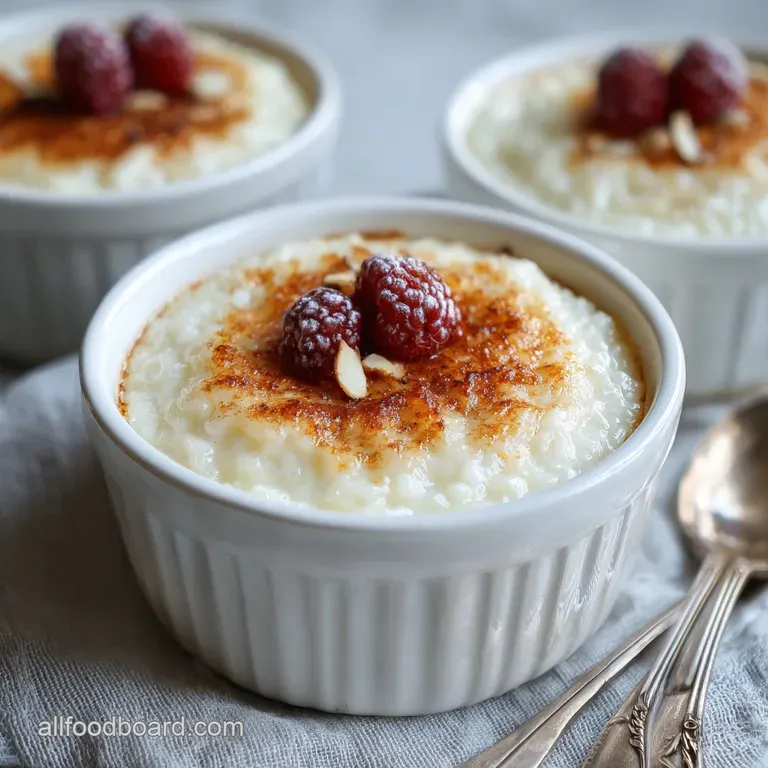
For a rustic look, serve it straight from the baking dish with a large silver spoon. There’s something communal and inviting about letting people scoop their own portions. If you want to take it up a notch for a dinner party, bake the pudding in individual ramekins.
This gives everyone their own piece of that coveted golden skin.
To finish the dish, a tiny sprinkle of fresh nutmeg or a cinnamon stick tucked into the side adds a professional touch. If you’re feeling extra indulgent, serve it with a dollop of lightly sweetened whipped cream or a pour of cold single cream over the hot pudding. The contrast between the hot custard and the cold cream is absolutely "shatter"-ingly good well, okay, it's velvety, but the experience is definitely memorable! For more ideas on warm, milky desserts, our Crème de la recipe offers another layer of comfort you might enjoy.

Cozy Baked Rice Pudding FAQs
What type of rice is best for baked rice pudding?
Medium grain white rice is ideal. It provides the perfect balance of starch release for creaminess and texture retention, preventing it from becoming too mushy or too firm.
Can I substitute dairy milk with a non-dairy alternative?
Yes, you can substitute with full fat coconut milk for a tropical twist. It will add a subtle nutty undertone and maintain richness, similar to how dairy fat stabilizes textures in recipes like our Creamy Corn Casserole: A Southern Comfort Classic!.
How do I prevent my rice pudding from being dry?
Do not overbake and allow adequate resting time. The pudding continues to thicken as it cools; pulling it out when it still wobbles slightly in the center is key to a moist result.
Why is my rice still crunchy after baking?
Your oven might not have reached a high enough temperature, or the rice could be old. Ensure your oven is properly preheated to 300°F (150°C) and use relatively fresh rice for optimal starch breakdown.
How long does baked rice pudding keep in the refrigerator?
Up to 4 days. Store it in an airtight container with plastic wrap pressed directly onto the surface to prevent a tough skin from forming.
Is it true you must use specialty "pudding rice"?
No, this is a common misconception. Standard medium grain white rice works perfectly well and provides the necessary starch for a creamy texture. If you enjoyed mastering the basic grain cooking principles here, see how they apply in our Authentic Naan Bread Recipe: Homemade Fluffy Indian Flatbread.
Can I make rice pudding on the stovetop instead of baking?
Yes, but the texture and flavor will differ. Stovetop versions are faster and uniformly creamy, while baked pudding develops a desirable caramelized skin and a richer custard like consistency.
Cozy Baked Rice Pudding

Ingredients:
Instructions:
Nutrition Facts:
| Calories | 537 kcal |
|---|---|
| Protein | 11.4 g |
| Fat | 26.2 g |
| Carbs | 66.1 g |
| Fiber | 0.8 g |
| Sugar | 49.3 g |
| Sodium | 266 mg |
