The Oldschool Classic Perfectly Chewy Peanut Butter Cookies the Threeingredient Fork Mark Favourite
- Unlocking the Magic Behind This Quintessential Comfort Bake
- Why This Classic Peanut Butter Cookies Recipe Triumphs Over All Others
- Assembling Your Hallmarks for Perfect Batch Creation
- Scrutinizing the Essentials: Ingredient Deep Dive
- Step-by-Step Mastery: From Bowl to Oven
- Troubleshooting Common Setbacks in Your Peanut Butter Cookies Journey
- Elevating Your Batch: Flavor Twists and Substitutions
- Recipe FAQs
- 📝 Recipe Card
Unlocking the Magic Behind This Quintessential Comfort Bake
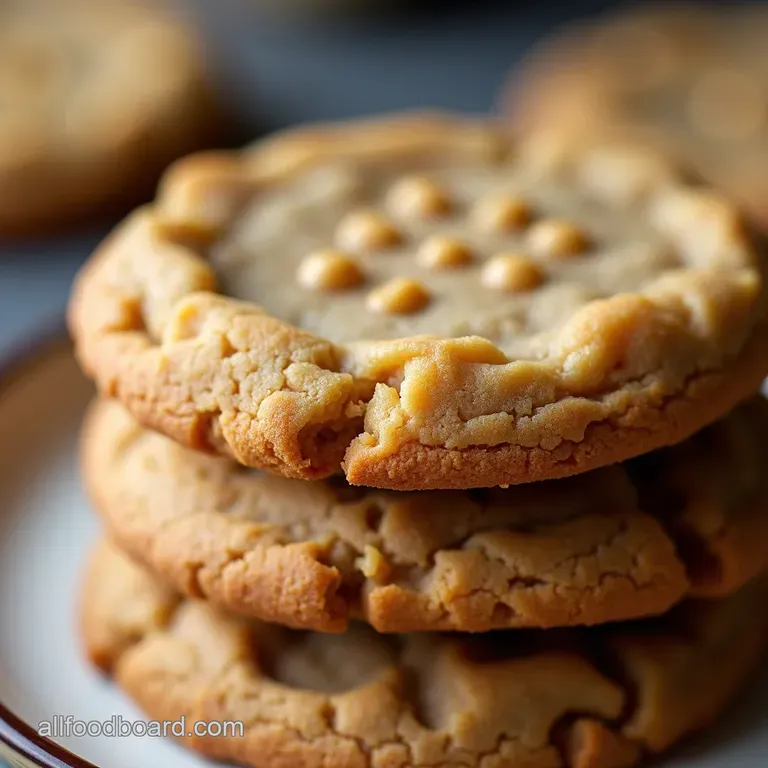
There are few aromas that instantly transport you back to childhood quite like freshly baked Peanut Butter Cookies . They are the undisputed heavyweight champion of the bake sale circuit and the ultimate marker of simple, satisfying baking.
As an expert baker, I find that while many recipes promise perfection, few deliver the ideal combination of a slightly crackled, golden brown exterior and a deep, nutty, wonderfully chewy interior.
Achieving this balance is not rocket science, but it does require understanding the interplay between fats, sugars, and that essential resting period. Today, we are diving deep into my definitive Peanut Butter Cookie Recipe —a process so reliable, it quickly becomes your go-to solution for quick treats or planned gatherings.
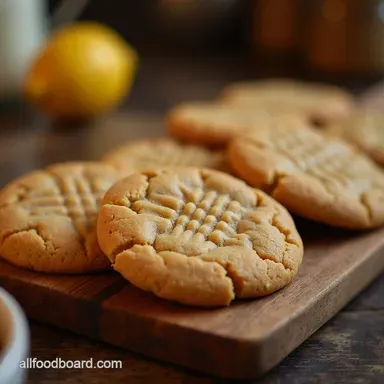
Why This Classic Peanut Butter Cookies Recipe Triumphs Over All Others
What sets this iteration apart from others you might have tried? It is all about honoring the traditional proportions while respecting the chilling time. We are aiming for the Classic Peanut Butter Cookies experience.
Many quick recipes skip the chilling, resulting in cookies that spread thin and become crunchy rather than delightfully soft. This specific method prioritizes texture retention, making it one of the Best Peanut Butter Cookies you will ever pull from your oven.
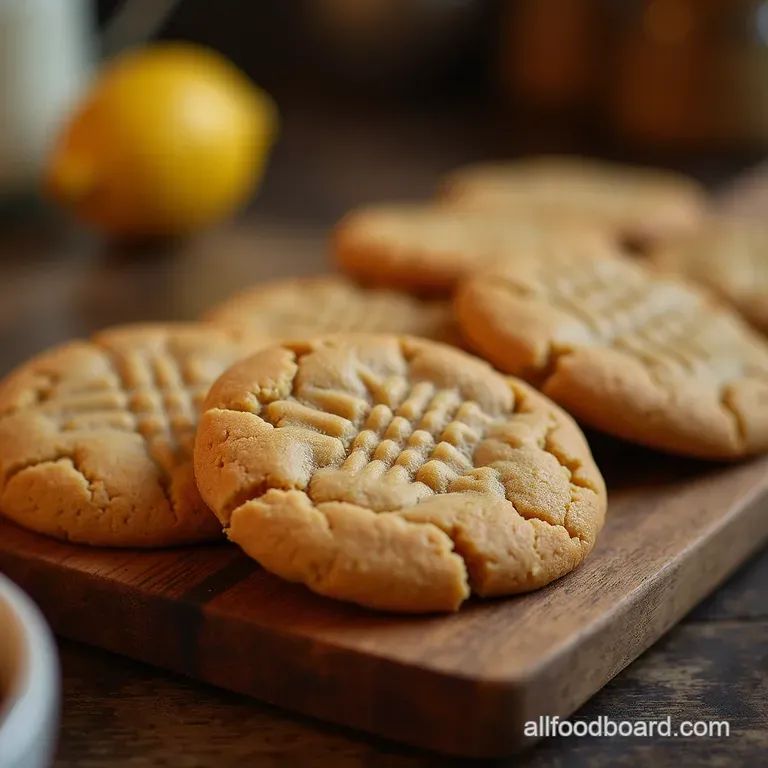
The Secret to Achieving That Signature Crinkled Top Texture
That beautiful, patterned top is achieved in two steps. First, the precise ratio of brown sugar to white sugar ensures the dough spreads just enough during the initial bake phase. Second, and most critically, is the manual intervention with the fork.
The gentle flattening achieved by pressing the tines down twice once horizontally and once vertically creates those perfect grooves. This mechanical action controls the spread and guarantees the signature look we associate with truly nostalgic Peanut Butter Cookies .
A Nod to Nostalgia: Why We Love Simple Baking
In a world demanding complex techniques, the beauty of these cookies lies in their accessibility. They are perfect for anyone looking for Simple Peanut Butter Snacks without a complicated ingredient list.
You begin with just a cup and a half of flour, a few pantry staples, and the star ingredient peanut butter. This simplicity is what makes them perfect for that last minute need for a dessert or a quick contribution to a Peanut Butter Cookie Bake Sale .
Setting Expectations: Chewy Centers Guaranteed
Our goal here is unequivocally chewy. We achieve this by using a higher proportion of brown sugar, which retains moisture better than granulated sugar, and by ensuring the dough contains the necessary binding agents, including one crucial room temperature egg.
If your previous attempts have resulted in dry, crumbly discs, this recipe, utilizing room temperature butter and egg, will correct that issue by creating a beautifully emulsified dough structure.
Assembling Your Hallmarks for Perfect Batch Creation
Before we even touch the mixer, setting up your workspace correctly ensures efficiency and preserves the integrity of the dough structure. For this recipe, which yields approximately 18 to 20 medium cookies, gathering your tools is the first tactical step.
You will need your trusty stand or handheld electric mixer for the creaming stage, a reliable set of measuring spoons and cups, and a rubber spatula for scraping down the sides a step often skipped but vital for even mixing.
For uniformity, which promotes even baking, I highly recommend having a standard 2-tablespoon cookie scoop on hand. Finally, prepare your baking sheets by lining them with parchment paper or silicone mats to prevent any sticking, ensuring your beautifully baked goods lift off cleanly.
Related Recipes Worth Trying
- The Best Peanut Butter Cookies Chewy Foolproof — Learn how to make truly classic meltinyourmouth Peanut Butter Cookies with this foolproof recipe Get the perfect texture every time
- Elevated Sweet Potatoes With Marshmallows Recipe Brown Butter Glory — Ditch the bland casserole This Sweet Potatoes With Marshmallows recipe uses brown butter for depth The top is perfectly toastedpure comfort food
- The Best Zesty 10Minute Cowboy Butter Recipe for Steak — Whip up The Ranchers Secret Weapon easy Cowboy Butter in just 10 minutes This garlic red pepper compound butter elevates steak chicken or pasta instantly
Scrutinizing the Essentials: Ingredient Deep Dive
The quality of your core ingredients directly translates to the flavour profile of your finished cookies. We are using standard baking ingredients elevated by one key component: the peanut butter itself.
Necessary Utensils for Flawless Mixing and Shaping
Beyond the mixer, your environment matters. Ensure your butter is truly softened to room temperature pliable but not melted or greasy. If the butter is too cold, it won't cream properly with the sugars, leading to a dense final product.
Likewise, if your egg is straight from the fridge, it can "shock" the creamed butter mixture, causing it to deflate slightly. A quick soak in warm water for five minutes can bring that egg to the ideal temperature.
Choosing the Right Peanut Butter for Optimal Results
This is perhaps the most important consideration for these Peanut Butter Cookies . Do not use natural, oil-separated peanut butter for this recipe. The standard, emulsified, shelf stable varieties the kind that don't require stirring provide the necessary fat and stabilizer content to hold the cookie structure together during baking.
Natural peanut butter will yield a much flatter, greasier cookie because the added oils interfere with the flour’s ability to bind.
Precision Measurements: Ensuring Balanced Sweetness and Salt
We balance the rich nuttiness with a combination of light brown sugar (for chewiness and depth) and granulated sugar (for spread and crisp edges). The salt content is deliberately low, at ¼ teaspoon, because the peanut butter already contributes significant sodium.
This precise measurement ensures the sweetness shines through without becoming overwhelming. Always spoon your flour into the measuring cup and level it off; scooping directly from the bag compacts the flour, leading to too much dry ingredient in the batch.
step-by-step Mastery: From Bowl to Oven
The journey from raw ingredients to golden delight involves a few critical stages, starting with the dry components. In a separate bowl, gently whisk together your 1 ½ cups of all-purpose flour, ½ teaspoon of baking soda, and ¼ teaspoon of salt.
This simple step ensures the leavening agent is evenly distributed, preventing pockets of puffiness in the finished cookie.
Next comes the creaming. This is where volume is built.
Creaming Butter and Sugar: The Foundation of Texture
In your mixing bowl, beat the ½ cup (one stick) of softened unsalted butter along with the ½ cup of packed light brown sugar and ¼ cup of granulated sugar. Mix this combination on medium speed for a full two to three minutes until the mixture is visibly lighter in colour and fluffy in texture.
This aeration process traps air, which creates lift in the oven. After creaming, beat in your ¾ cup of creamy peanut butter until thoroughly combined, scraping down the sides. Finally, incorporate one large egg and one teaspoon of vanilla extract until just mixed.
Now, gradually add the dry mixture to the wet ingredients on the lowest speed setting. Stop mixing the moment the last streaks of flour disappear. Overmixing develops gluten, which results in tough cookies the opposite of our goal.
The Crucial Fork Technique for Ideal Cookie Structure
Once mixed, the dough must rest. Wrap the dough tightly and chill it in the refrigerator for a mandatory 30 minutes. This chilling time is what prevents excessive spreading.
Once chilled, scoop uniform balls (about 1.5 tablespoons each) and place them two inches apart on your prepared baking sheets.
This brings us to the iconic marking.
The Crucial Fork Technique for Ideal Cookie Structure
Lightly dust a dinner fork with flour to prevent sticking. Press down gently onto the centre of the dough ball to flatten it slightly, then rotate the fork 90 degrees and press again, creating the classic crisscross pattern.
This technique is crucial not just for aesthetics but for ensuring the cookie bakes evenly through the centre.
Baking Temperature Calibration for Golden Edges
Preheat your oven precisely to 350° F ( 175° C). Bake the cookies for 10 to 12 minutes. You are looking for edges that are set and lightly golden, but the centre should still appear slightly puffy and underdone.
They will continue to cook after being removed from the heat.
The Cool Down Period: Preventing Breakage Post Bake
Resist the urge to move them immediately! Allow the Peanut Butter Cookies to rest on the hot baking sheet for a full five minutes. This period allows the residual heat to gently finish the cooking process and firm up the delicate centres.
After five minutes, use a thin spatula to transfer them carefully to a wire rack to cool completely.
Troubleshooting Common Setbacks in Your Peanut Butter Cookies Journey
If your cookies spread too thin, it’s almost always due to warm dough or incorrect ingredient temperatures. Remember that 30-minute chill time is non-negotiable! If your cookies are too crumbly, you likely added too much flour or used a natural peanut butter that was too oily.
Conversely, if they are overly dense, you may have overmixed the flour into the batter. A common question for those looking for Easy Peanut Butter Cookies is about omitting the egg; see the next section for handling that modification.
Elevating Your Batch: Flavor Twists and Substitutions
While the classic version is sublime, customization is the spice of life in baking. For those who find the pure peanut flavour intense, folding in ½ cup of chocolate chips creates fantastic Peanut Butter Cookies with Chocolate Chips .
If you are feeling truly decadent, try pressing a chocolate kiss into the centre immediately after they come out of the oven to create "Blossoms."
Extending Freshness: Optimal Storage Solutions
These cookies maintain their optimal chewiness for about three days when stored in an airtight container at room temperature. If you need them to last longer, ensure they are completely cooled before sealing.
Can You Skip the Egg? Addressing Dietary Modifications
If you are seeking Peanut Butter Cookies No Eggs , you can attempt this recipe by replacing the single egg with a "flax egg" (1 tablespoon of ground flaxseed mixed with 3 tablespoons of water, allowed to sit for 5 minutes) or ¼ cup of applesauce.
Be warned: skipping the egg in this specific recipe will result in a slightly different, denser texture, as the egg plays a vital role in structure and richness. For a truly egg-free option, look specifically for recipes built around the 3 Ingredient Peanut Butter Cookies concept, which typically relies solely on peanut butter, sugar, and an egg substitute or baking powder.
Freezing Dough vs. Baked Goods: Which Method Preserves Best?
Freezing the dough is vastly superior for quality preservation. Roll your dough into balls, place them on a parchment lined tray, and freeze until solid. Transfer the frozen balls to a freezer safe bag.
When ready to bake, place them directly onto the baking sheet (no need to thaw) and add 2– 3 minutes to the baking time. Baked cookies can be frozen, but they often lose some textural integrity upon thawing.
Expert Tips for Scaling This Recipe Upwards
This recipe scales beautifully. If you are preparing for a large event or need a serious volume for a Peanut Butter Cookie Bake Sale , double the ingredients precisely.
When doubling, be mindful of your mixer’s capacity, and ensure you rotate your baking sheets halfway through the bake time to account for oven hot spots, guaranteeing consistent results across all batches.

Recipe FAQs
Why are my Peanut Butter Cookies spreading out flat instead of staying thick?
This is usually down to two things: either your butter was too soft/melted, or you skipped chilling the dough. Make sure your butter is just soft to the touch, not greasy. Most importantly, chilling the dough for that crucial 30 minutes firms up the fat, which stops them from spreading like a pancake in the oven.
Can I use natural, runny peanut butter in this recipe?
Honestly, I’d steer clear of it for this specific recipe. Natural peanut butter tends to separate and contains more oil, which ruins the structure needed for that classic chewiness.
Stick to standard, emulsified peanut butter (like Skippy or Jif) to ensure your cookies have the right thickness and crumb structure.
How do I store leftover Peanut Butter Cookies to keep them chewy?
The key to freshness is airtight storage think of them like a quality tin of biscuits. Store them in a container at room temperature for up to five days, but avoid the fridge as it can dry them out.
If you want them soft for longer, pop a slice of bread in the container; it keeps the moisture circulating beautifully!
What’s the secret to getting those perfect, classic crisscross fork marks?
It’s all about technique and flour! After you’ve rolled your dough balls, lightly dust your fork with a little flour this stops it sticking when you press down. Press once to flatten slightly, then press a second time perpendicularly (at a 90-degree angle) to create that iconic pattern before baking.
Can I make these cookies ahead of time, or freeze the dough?
Absolutely, these freeze brilliantly, which is handy for batch baking! You can freeze the dough balls right after rolling and marking them, placing them on a tray until solid, then transferring them to a freezer bag.
You can bake them directly from frozen; just add 2 3 minutes to the baking time to ensure they are cooked through.
Chewy Peanut Butter Cookies
Instructions:
Nutrition Facts:
| Calories | 160 calories |
|---|---|
| Fat | 9g |
| Fiber | 1g |
