Brown Butter Chocolate Chip Cookie Recipe
- Time: Active 20 minutes, Passive 10 minutes, Total 30 minutes
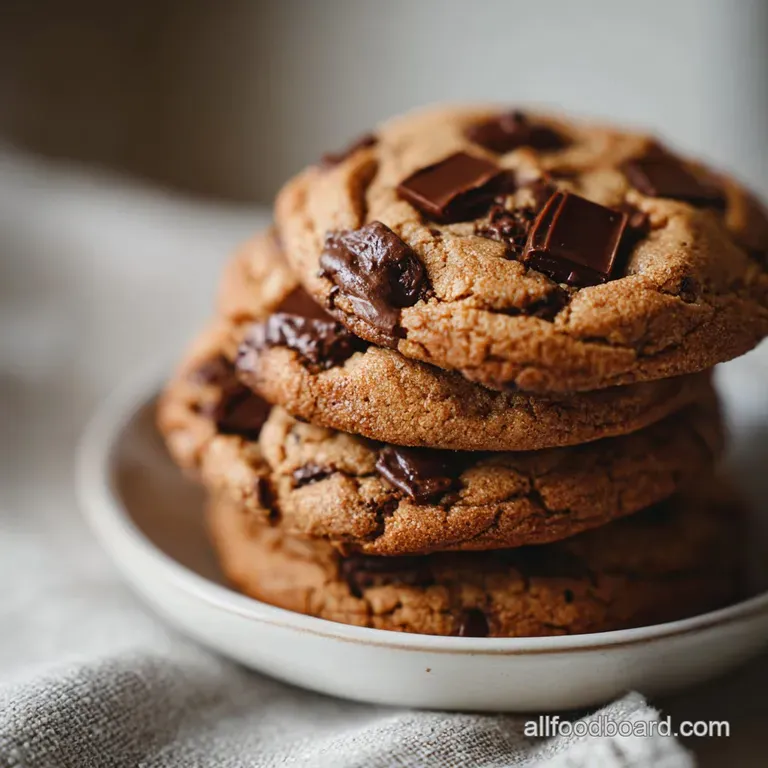
- Flavor/Texture Hook: Shatter crisp edges with a chewy, toffee like molten center.
- Perfect for: Impressing guests at dinner parties or treating the family on a cozy Sunday.
- Mastering the Brown Butter Chocolate Chip Cookie
- The Chemistry of Toffee Crunch
- Component Analysis for Peak Texture
- Required Pantry Elements
- Necessary Baking Tools
- Method for Golden Results
- Solving Common Baking Issues
- Flavor Swaps and Ideas
- Adjusting Batch Sizes
- Preserving Cookie Freshness
- Debunking Cookie Myths
- Perfect Serving Suggestions
- Recipe FAQs
- 📝 Recipe Card
Mastering the Brown Butter Chocolate Chip Cookie
There is a specific sound that happens about four minutes into melting butter a rhythmic, bubbly hiss that suddenly transitions into a quiet, foaming whisper. That is the sound of water evaporating and milk solids beginning to toast.
The first time I tried this, I was terrified I’d burnt it because the kitchen smelled like toasted hazelnuts and dark caramel, but that "mistake" turned out to be the greatest discovery of my baking life. Indulge in the ultimate brown butter chocolate chip cookie with this amazing Foodima recipe.
We’ve all had those flat, greasy cookies that look better than they taste, but this version is different. We are chasing that elusive combination of a crisp, caramelized ring and a center that feels almost like fudge.
It is about understanding how a few minutes on the stove changes the molecular structure of your fat, turning a basic sweet into a sophisticated treat.
You don't need fancy culinary school skills for this, just a watchful eye and a bit of patience. I’ve made every mistake possible from using cold eggs that curdled the dough to over mixing the flour until the cookies were as tough as hockey pucks.
Today, we’re skipping the frustration and going straight to what works for a real home kitchen. This Ultimate Brown Butter Chocolate Chip Cookie Foodima style is going to be your new go to.
The Chemistry of Toffee Crunch
The Maillard Reaction: Browning the butter creates new flavor compounds through the breakdown of amino acids and sugars, resulting in a nutty, complex profile.
Moisture Control: Evaporating the water from the butter ensures a more concentrated fat content, which prevents the cookie from becoming cakey and promotes a chewy, dense texture.
Glucose Interaction: The addition of molasses provides acidity that reacts with the baking soda, creating a specific type of lift and a deeply crackled surface.
| Prep Method | Speed | Final Texture | Best For |
|---|---|---|---|
| Stovetop Browning | 8 minutes | Toffee like and nutty | Ultimate flavor depth |
| Room Temp Butter | 2 minutes | Classic and creamy | Quick afternoon snacks |
| Melted (Not Browned) | 3 minutes | Dense and greasy | Basic chewy cookies |
When you choose the stovetop method, you are actively choosing to trade ten minutes of your time for a cookie that tastes like it came from a high end patisserie. The difference in the shatter of that first bite is undeniable.
Using a heavy bottomed pan is essential here to prevent the milk solids from catching and burning before the fat has fully clarified.
Component Analysis for Peak Texture
| Ingredient | Science Role | Pro Secret |
|---|---|---|
| European Butter | High fat, low water | Use a light colored pan to see the milk solids change color. |
| Blackstrap Molasses | Humectant | This keeps the center soft for days by attracting moisture from the air. |
| Bittersweet Chocolate | Sugar balance | Hand chopping creates "pools" of chocolate rather than uniform, dry chips. |
Required Pantry Elements
To get these results, we need specific players in the bowl. If you are out of something, don't panic. I've tested these swaps and they hold up well in this Brown Butter Chocolate Chip Cookie Foodima version.
- 225g unsalted European style butter: Higher fat content means less spreading and more flavor. Why this? European butter typically has 82% fat, providing a richer, creamier mouthfeel.
- Substitute: Standard unsalted butter. You may need to chill the dough longer as it has more water.
- 15ml pure blackstrap molasses: The secret to that professional, deep chew. Why this? It provides the acidic hit needed to activate the baking soda perfectly.
- Substitute: Honey or maple syrup (cookies will be slightly sweeter and softer).
- 10ml pure vanilla bean paste: Those tiny black specks make everything feel more artisanal.
- Substitute: 10ml pure vanilla extract.
- 325g unbleached all purpose flour: Provides the structural skeleton.
- Substitute: Bread flour for an even chewier, pull apart texture.
- 5g baking soda: Our leavening agent for that golden browning.
- Substitute: Not recommended to swap; baking powder won't provide the same browning.
- 6g flaky sea salt: To cut through the intense sugar.
- Substitute: 4g fine table salt (measure carefully!).
- 200g dark brown sugar: For moisture and caramel notes.
- Substitute: Light brown sugar with an extra teaspoon of molasses.
- 100g granulated white sugar: This gives us those crispy, lacy edges.
- Substitute: Coconut sugar (adds a toasted flavor but the edges will be less crisp).
- 1 large egg + 1 large egg yolk: The extra yolk adds a velvety richness. Why this? Lecithin in the yolk acts as a natural emulsifier for a smoother dough.
- 250g bittersweet chocolate (60-70% cacao): Go dark to balance the sweet dough.
- Substitute: Semi sweet chocolate chips if you prefer a sweeter profile.
Chef's Tip: Freeze your chocolate bar for 15 minutes before chopping. This prevents the heat from your hands from melting the edges, giving you clean, distinct shards that create beautiful layers in the baked Chocolate Chip Cookie Foodima.
Necessary Baking Tools
You don't need a professional kitchen, but a few specific tools make this process seamless. I always use a light colored stainless steel skillet for the butter; if you use a dark non stick pan, you won't be able to see the milk solids turning amber, and you'll likely burn them.
A digital scale is my biggest recommendation here. Baking is chemistry, and 325g of flour can vary by nearly half a cup depending on how you scoop it. For the best Brown Butter Chocolate Chip Cookie Foodima experience, weighing your ingredients ensures the same perfect result every single time.
You'll also want a sturdy whisk and a silicone spatula to scrape every last bit of those browned butter bits that’s where the gold is hidden!
Method for Golden Results
- Brown the butter. Place 225g unsalted European style butter in a light colored skillet over medium heat. Melt, then continue cooking as it sizzles and foams. Wait for the aroma of toasted nuts and remove from heat immediately when the solids are the color of a shiny penny.
- Infuse the aromatics. Stir 15ml pure blackstrap molasses and 10ml pure vanilla bean paste into the hot butter. Note: The residual heat blooms the vanilla and thins the molasses for easier mixing.
- Whisk the sugars. In a large bowl, combine 200g dark brown sugar and 100g granulated white sugar. Pour the warm butter mixture over the sugars and whisk vigorously. Keep whisking until the mixture looks like shiny, wet sand.
- Incorporate the eggs. Add 1 large egg and 1 large egg yolk (room temperature). Whisk for 2 full minutes. The mixture will lighten in color and become velvety.
- Sift dry ingredients. In a separate bowl, whisk 325g unbleached all purpose flour, 5g baking soda, and 6g flaky sea salt.
- Combine the dough. Fold the dry ingredients into the wet using a spatula. Stop as soon as no white streaks remain to avoid over developing the gluten.
- Fold the chocolate. Add 250g roughly chopped bittersweet chocolate. Ensure the chocolate is distributed so every bite has a molten pocket.
- Port and chill. Scoop the dough into 18 portions (about 55-60g each). Place on a tray and chill for at least 30 minutes. This prevents the cookies from spreading into flat puddles.
- Bake the cookies. Preheat your oven to 175°C. Arrange dough balls on a lined sheet. Bake for 10 minutes until the edges are set and golden but the centers still look slightly soft.
- Cool and set. Let the cookies rest on the hot pan for 5 minutes. They will finish cooking through carryover heat while maintaining a fudgy center.
This technique is very similar to what I do for my Classic Chocolate Chip Cookies recipe, but the browning of the butter adds a layer of complexity that feels like a total upgrade.
Solving Common Baking Issues
My Cookies Spread Too Much
If your cookies look like thin pancakes, the butter was likely too hot when you added the sugars, or the dough wasn't chilled long enough. The fat needs to be semi solid to hold the structure while the flour sets in the oven.
Always aim for a "nap" in the fridge; 30 minutes is the minimum, but overnight is the dream.
The Butter Didn't Brown, It Burned
This happens in a heartbeat. The transition from "amber" to "black" takes about ten seconds. If you see black specks and the smell is acrid rather than sweet, throw it out and start over. Butter is cheaper than a ruined batch of cookies.
Use a medium low flame if you're nervous it takes longer but offers more control.
The Texture is Cakey, Not Chewy
This is usually the result of over mixing the flour or using too much of it. When you work the dough too hard, you develop gluten, which creates a bread like structure. Also, make sure your eggs are large, not jumbo, as excess moisture from the whites can steam the dough instead of letting it bake into a chewy crumb.
| Problem | Root Cause | Solution |
|---|---|---|
| Greasy bottom | Butter was oily/separated | Whisk the sugar/butter longer to emulsify. |
| No "crinkle" top | Oven temp too low | Ensure oven is fully preheated to 175°C. |
| Dry, crumbly dough | Too much flour | Use a digital scale to measure exactly 325g. Note: Scooping with a cup packs the flour too tightly. |
Common Mistakes Checklist
- ✓ Never use cold butter for browning; it splashes and cooks unevenly.
- ✓ Don't skip the extra egg yolk it is the insurance policy for a chewy center.
- ✓ Ensure your baking soda is fresh (less than 6 months old) for the best rise.
- ✓ Avoid over chopping the chocolate; you want chunks, not dust.
- ✓ Let the browned butter cool for 5 minutes before adding to the sugar to avoid melting it completely.
Flavor Swaps and Ideas
The "Salted Miso" Variation
Swap 30g of the butter for white miso paste. Add the miso to the sugars before pouring in the browned butter. The saltiness and fermented depth of the miso highlight the nutty butter in a way that is absolutely addictive. It’s a trick I learned while experimenting with my Dreamy White chocolate recipe to balance out the sweetness.
The Espresso Boost
Add 5g of instant espresso powder to the dry ingredients. Coffee acts as a flavor megaphone for chocolate. It doesn't make the cookie taste like a latte; instead, it makes the bittersweet chocolate taste more like... well, better chocolate.
If you are looking for a completely different vibe, you can even take these flavors and apply them to a Classic Edible Cookie recipe by heat treating the flour and omitting the eggs.
Adjusting Batch Sizes
Scaling Down (Making 9 Cookies) Halve everything exactly. For the eggs, beat one whole egg in a small bowl and use 25g of it, then add just the single yolk from a second egg. Use a smaller saucepan for the butter so it doesn't evaporate too quickly.
Scaling Up (Making 36 Cookies) Double all ingredients, but keep the salt and baking soda at 1.5x the original amount (9g salt and 7.5g soda) to prevent a metallic aftertaste. Work in batches for the browning of the butter to ensure it toasts evenly.
Baking Double Batches If you are baking two trays at once, lower the oven temp by about 10°C and rotate the pans halfway through. This prevents the bottom tray from burning while the top tray stays pale.
Preserving Cookie Freshness
Storage Guidelines Keep these in an airtight container at room temperature for up to 5 days. I like to put a small piece of plain white bread in the container; the cookies will pull the moisture from the bread to stay soft.
Freezing the Dough This is the ultimate hack. Scoop the dough into balls, freeze them on a tray until solid, then toss them into a freezer bag. They stay perfect for 3 months. When you want a cookie, bake them straight from frozen at 165°C for 12-14 minutes.
Zero Waste Tip Don't throw away the tiny shards of chocolate left on your cutting board! Save them in a jar in the freezer. They are perfect for topping oatmeal, stirring into yogurt, or sprinkling over the top of the cookies the moment they come out of the oven for that "viral" look.
Debunking Cookie Myths
"Brown butter is just melted butter." This is completely false. Melted butter still contains 15-18% water. Browned butter has had that water cooked off, leaving behind concentrated fat and toasted protein. The texture it produces is fundamentally different.
"You must chill the dough for 24 hours." While chilling helps the flavors meld, you don't need a full day. Even 30 minutes in the freezer can stabilize the fats enough to prevent a massive spread.
The "Foodima Chocolate Chip Cookies" method works because it balances chemistry with practical home cooking.
Perfect Serving Suggestions
These are heavy hitters, so they don't need much. A cold glass of whole milk is the classic choice, but if you want to be fancy, serve them warm with a scoop of high-quality vanilla bean ice cream. The heat from the cookie creates a velvety sauce as the ice cream melts into the brown butter crannies.
For a grown up pairing, try a small glass of tawny port or a smoky stout. The dark, roasted notes in the drink mirror the toasted milk solids in the Brown Butter Chocolate Chip Cookie Foodima style. Trust me, it’s a game changer for your next movie night.
Just remember to add that final sprinkle of sea salt it’s the "reset button" for your taste buds, making every bite feel like the first one. Let’s crack on and get that butter browning!

Recipe FAQs
Should I use regular butter or brown the butter for maximum flavor?
Brown the butter. Browning transforms the fat by toasting the milk solids, creating nutty, complex notes that regular melted butter cannot achieve.
How long must the dough chill before baking to prevent excessive spreading?
Chill the dough for a minimum of 30 minutes. Chilling allows the fat to solidify, which controls spread, ensuring you get those desirable thick centers rather than flat puddles.
How to know when the butter is perfectly browned and not burnt?
Watch for the aroma of toasted hazelnuts and remove from heat immediately when milk solids turn amber. The sputtering sound will quiet down, signaling the water has evaporated and the solids are toasting.
Is it necessary to use both brown sugar and white sugar in this recipe?
Yes, both sugars are essential for the texture. Brown sugar adds moisture and chewiness due to its molasses content, while white sugar promotes thin, crispy, lacy edges.
How to achieve a chewy center when the edges look perfectly baked?
Remove the cookies from the oven when the centers still appear slightly soft. They will continue to cook via carryover heat on the hot baking sheet for the final 5 minutes, resulting in a fudgy interior.
How can I substitute the butter if I want a dairy-free version?
Substitute with high-quality vegan butter sticks intended for baking. While you will lose the true brown butter flavor profile, you can still brown vegan butter alternatives for a similar nutty depth, similar to mastering flavor balancing in our Best Cookie Dough Recipe: Edible or Bakeable Bliss!.
Why do my cookies taste overly sweet, even with bittersweet chocolate?
The likely culprit is an imbalance between the salt and sugar ratios, or potentially using old baking soda. Ensure you are using the full amount of flaky sea salt listed, as it is necessary to cut through the sweetness provided by the sugars.
Brown Butter Cookie Recipe Foodima
Ingredients:
Instructions:
Nutrition Facts:
| Calories | 303 calories |
|---|---|
| Protein | 3.1 g |
| Fat | 15.1 g |
| Carbs | 38.2 g |
| Fiber | 1.5 g |
| Sugar | 22.1 g |
| Sodium | 244 mg |
