Vanilla Whipped Ganache Frosting: Velvety and Stable

- Time: Active 15 minutes, Passive 6 hours, Total 20 minutes
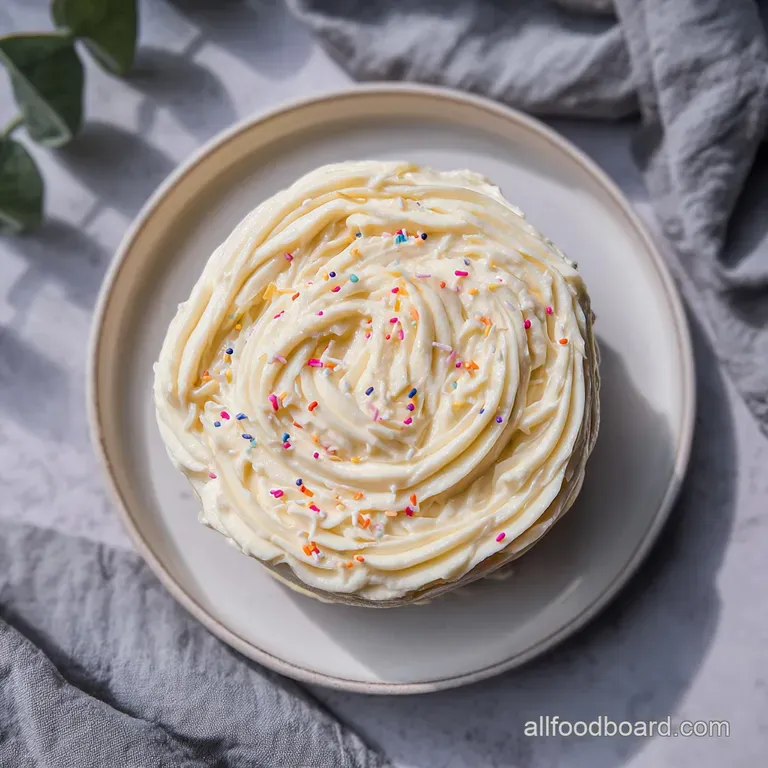
- Flavor/Texture Hook: Billowing, velvety, and intensely floral vanilla notes
- Perfect for: Wedding cakes, delicate macarons, and rustic tiered pastries
- Creating a Velvety Vanilla Whipped Ganache Frosting
- Exploring the Science of Fat Emulsions
- Crucial Timing for Event Results
- Component Analysis
- Curating Finest Pastry Grade Elements
- Essential Tools for Silky Finishes
- Mastering the Art of Emulsion
- Solving Common Stability Issues Safely
- Artistic Twists for Every Celebration
- Keeping Your Pastries Fresh Longer
- Elegant Pairings for Artistic Presentations
- Recipe FAQs
- 📝 Recipe Card
Creating a Velvety Vanilla Whipped Ganache Frosting
Have you ever wondered why some bakery displays feature cakes with frosting that looks as light as a summer cloud yet stands firm against the heat of a crowded room? It is a bit of a kitchen riddle, especially when we are used to heavy buttercreams that can feel a bit too rustic for an elegant celebration.
The answer lies not in more sugar, but in the specific way we treat white chocolate and heavy cream.
When I first started experimenting with this vanilla whipped ganache frosting, I treated it like a regular ganache, whipping it immediately while warm. It was a disaster soupy, flat, and honestly quite sad. But then I learned about the patience required for cocoa butter to actually set. Now, when I see the glossy ribbons of cream merging with the ivory white chocolate, I know I’m creating something truly special that will hold every petal and swirl I pipe onto a Classic Vanilla Cake.
There is something deeply nostalgic about the aroma of high-quality vanilla bean paste hitting warm cream. It reminds me of the flour dusted kitchen counters of my youth, where every cake was a labor of love.
This frosting is the sophisticated older sibling of those childhood treats refined, silky, and capable of turning a simple sponge into a professional tier pastry. It is all about the science of the chill and the precision of the whip.
Exploring the Science of Fat Emulsions
The stability of this frosting isn't magic; it's molecular. By understanding how the ingredients interact, you can achieve a texture that is both light and incredibly durable.
- Crystallization: Cocoa butter requires a long rest at low temperatures to form a stable crystal structure. This ensures the frosting doesn't collapse once whipped.
- Emulsification: The immersion blender stage creates a tight bond between the water in the cream and the fats in the chocolate, preventing weeping.
- Aeration: Whipping the matured mixture traps tiny air bubbles within the solidified fat network, creating that signature billowing volume.
- Stabilization: Adding a second portion of cold cream after the initial melt stops the "cooking" process of the chocolate, preserving its delicate floral notes.
| Method | Time | Texture | Best For |
|---|---|---|---|
| Fast Method | 1 hour | Soft, slightly runny | Glazing or quick drips |
| Classic Method | 6 hours+ | Firm, pipeable, stiff | Wedding cakes and filling |
| Overnight | 12 hours+ | Maximum stability | Intricate piping and heat resistance |
Adding the second half of the cream cold is a trick that many professionals use to temper the mixture quickly. This prevents the chocolate from seizing and allows the vanilla bean specks to distribute evenly without sinking to the bottom of the bowl.
Crucial Timing for Event Results
When preparing for an occasion, timing is your most valuable ingredient. This recipe requires 20 minutes of active work, but the secret is in the waiting.
| Serving Size | Ingredient Adjustments | Bowl Size | Whip Time |
|---|---|---|---|
| 15 Servings | 300g Chocolate / 400ml Total Cream | Medium (2 Qt) | 3-5 minutes |
| 30 Servings | 600g Chocolate / 800ml Total Cream | Large (5 Qt) | 6-8 minutes |
| 45 Servings | 900g Chocolate / 1200ml Total Cream | Professional (7 Qt) | 10-12 minutes |
Regardless of the batch size, never rush the chilling phase. If the core of the ganache is even slightly warm, the air bubbles will pop as soon as they are formed, leaving you with a dense, greasy mess rather than a light frosting.
Component Analysis
Selecting the right elements is the difference between a greasy topping and a professional finish.
| Ingredient | Science Role | Pro Secret |
|---|---|---|
| White Chocolate | Provides structural fat and sweetness | Use "Couverture" with 28%+ cocoa butter for the smoothest melt. |
| Heavy Cream | Liquid base for aeration and silkiness | Ensure it is at least 35% fat; lower fat won't hold the air. |
| Vanilla Bean Paste | Flavor and visual aesthetic | Paste provides the dark flecks that signify authentic quality. |
| Sea Salt | Flavor balancer | A tiny pinch cuts the sweetness and enhances the chocolate's depth. |
Curating Finest Pastry Grade Elements
To achieve that professional look, every ingredient must be of the highest caliber. I always opt for 300g of white chocolate that lists cocoa butter as the primary fat source. Avoid "white morsels" or "candy melts," as these often contain palm oil which feels waxy on the tongue and won't emulsify correctly.
The cream is equally vital. You need 200ml for the initial simmer (Part 1) and another 200ml kept ice cold for the end (Part 2). This dual temp approach is what sets this vanilla whipped ganache frosting apart from simpler versions.
For the flavor, 10g of vanilla bean paste offers a more intense aroma than extract, and 1g of fine sea salt is just enough to wake up the palate without making the frosting salty.
Essential Tools for Silky Finishes
You don't need a professional bakery setup, but a few specific tools will make the process much more successful.
- Heat proof bowl: Glass or stainless steel is best to avoid scorching the chocolate.
- Silicone spatula: Essential for gentle stirring without incorporating too much air too early.
- Immersion blender: My secret for a truly silky emulsion; it breaks down any tiny chocolate bits the whisk might miss.
- Stand mixer: While a hand mixer works, a stand mixer fitted with a whisk attachment provides the consistent power needed for stiff peaks.
Chef's Tip: Freeze your whisk attachment and mixing bowl for 10 minutes before the final whipping stage. Cold metal helps the fats stay firm and speeds up the aeration process.
Mastering the Art of Emulsion
Following these steps precisely ensures your frosting will be event ready and visually stunning.
- Chop the chocolate. Finely shard the 300g of white chocolate. Note: Smaller pieces melt faster and more evenly, preventing lumps.
- Simmer the base. Heat 200ml of cream with 10g vanilla paste and 1g salt until it just begins to steam. Cook until bubbles appear at the edges.
- Initiate the melt. Pour the hot cream over the chocolate. Let it sit for 2 minutes until the chocolate is softened and translucent.
- Stir for gloss. Use your spatula to mix from the center. Stir until the mixture is uniform and shiny.
- Emulsify. Use an immersion blender for 30 seconds. Note: This creates the most stable fat in-water emulsion possible.
- Add cold cream. Pour in the remaining 200ml of cold heavy cream. Mix until completely incorporated.
- Seal and chill. Place plastic wrap directly on the surface. Refrigerate for at least 6 hours until the mixture is cold and thick like pudding.
- Whip to peaks. Transfer to your mixer. Whip on medium high speed until it holds stiff, sharp peaks and triples in volume.
Precision Checkpoints
- Liquid Temp: Ensure the cream hits 180°F (82°C) before pouring over chocolate.
- Chill Time: Exactly 6 hours is the minimum; 12 hours is better for stability.
- Whip Finish: Stop immediately when the whisk leaves a clear, defined trail that doesn't merge back into the bowl.
Solving Common Stability Issues Safely
Even seasoned bakers run into trouble with white chocolate. It is more temperamental than dark chocolate because of its high sugar and milk solid content.
Why Your Ganache Is Grainy
If the frosting looks curdled or "split," it's usually because the cream was too hot when it hit the chocolate, or you whipped it while it was still slightly warm. This causes the fats to separate from the liquids.
Fixing a Grainy Texture
If it splits during whipping, don't throw it out! Add a tablespoon of cold, unwhipped heavy cream and whisk gently by hand. If it's already too far gone, you can gently remelt the entire mixture, re emulsify it with a blender, and start the 6 hour chill over again.
| Problem | Root Cause | Solution |
|---|---|---|
| Frosting is runny | Insufficient chilling time | Chill for another 2 hours; ensure it's below 40°F (4°C). |
| Chocolate lumps | Pieces were too large | Use an immersion blender to smooth the warm mixture. |
| Butter like texture | Over whipping | Fold in a splash of liquid cream to soften the peaks. |
Common Mistakes Checklist
- ✓ Never let the cream reach a rolling boil (it can scorch the delicate vanilla).
- ✓ Do not skip the 2 minute "rest" after pouring cream over chocolate.
- ✓ Use a kitchen scale for the chocolate rather than measuring by the cup.
- ✓ Keep the plastic wrap touching the surface to prevent a rubbery skin.
- ✓ Always whip on medium speed first to build a stable bubble structure.
Artistic Twists for Every Celebration
Once you have the base down, you can play with the profile to suit different cakes. If you want a bit more tang, you can check out my technique for Cloud Nine Cream and apply similar principles here.
- Mascarpone Twist: Fold in 100g of cold mascarpone during the final whipping stage for a thicker, slightly savory edge.
- Citrus Infusion: Steep lemon or orange zest in the hot cream for 5 minutes, then strain before pouring over the chocolate.
- Espresso Depth: Add a teaspoon of instant espresso powder to the hot cream to create a mocha latte flavor profile.
Decision Shortcut
- If you want Maximum Height, whip on medium high for 4 minutes until very stiff.
- If you want Silky Smoothness for a naked cake, whip on medium only until soft peaks form.
- If you want Heat Resistance, increase the white chocolate to 350g for more structural fat.
Keeping Your Pastries Fresh Longer
Storage is simple, but because this is a dairy heavy frosting, you must be careful with temperatures.
- Fridge
- Store in an airtight container for up to 5 days. If already whipped, you may need to give it a quick 30 second whisk by hand to restore the fluffiness.
- Freezer
- You can freeze the un whipped ganache base for up to 2 months. Thaw overnight in the fridge before whipping as directed.
- Zero Waste Tip
- If you have leftover whipped frosting, it makes an incredible topping for waffles or a dip for fresh strawberries. You can even dollop it into coffee for a decadent "white chocolate mocha" experience.
Elegant Pairings for Artistic Presentations
This vanilla whipped ganache frosting is truly the crown jewel of any dessert table. Its ivory color and black vanilla specks look stunning against dark cocoa sponges or vibrant red velvet cakes. For a truly professional presentation, use a large star tip to pipe "ruffles" along the edges of your cake.
Because this frosting is so stable once properly chilled and whipped, it is the best whipped ganache for cupcakes that need to travel to a party. It won't slide off like a standard whipped cream might. Pair it with fresh raspberries or a sprig of mint for a rustic, botanical look that feels both modern and timeless. If you are in a rush and just need a quick treat, it even pairs beautifully as a dip for a 5 Minute Vanilla Mug Cake.

Recipe FAQs
What is whipped ganache frosting?
It is a light, airy aerated version of standard ganache. By chilling the mixture until the cocoa butter crystallizes and then whipping it, you transform a dense glaze into a stable, pipeable frosting that mimics the texture of whipped cream.
Is whipped ganache better than buttercream?
It depends on your preference for mouthfeel. Whipped ganache offers a smoother, silkier melt on the tongue because it relies on cocoa butter rather than sugar, whereas buttercream is structurally firmer and significantly sweeter.
What is the difference between whipped ganache and regular ganache?
The primary difference is aeration. Regular ganache is an emulsion of chocolate and cream used primarily for glazes or truffles, while whipped ganache is chilled for six hours or overnight and then beaten until it reaches a stable, fluffy, pipeable consistency.
Is there such a thing as vanilla ganache?
Yes, vanilla is the primary flavor profile when using white chocolate. By infusing the cream with vanilla bean paste and avoiding darker chocolates, you create a rich, floral frosting that serves as a versatile base for many desserts.
How to ensure the ganache reaches a stable, pipeable consistency?
Chill the mixture for at least six hours or overnight before whipping. This allows the cocoa butter in the white chocolate to fully crystallize. If you enjoyed mastering texture control through aeration here, the same principle of temperature dependent stability applies to the mascarpone layers in our Tiramisu recipe.
How to fix a ganache that won't whip into stiff peaks?
Ensure the mixture is sufficiently cold before starting. If it is still too warm, the fats will remain liquid rather than emulsifying into a structure; simply return it to the refrigerator for another hour and try whipping on medium high speed again.
How to prevent a rubbery skin from forming while the ganache chills?
Press plastic wrap directly against the surface of the ganache. This barrier eliminates air contact, which is the specific cause of that unwanted, tough texture developing during the long refrigeration process.
Vanilla Whipped Ganache Frosting

Ingredients:
Instructions:
Nutrition Facts:
| Calories | 200 kcal |
|---|---|
| Protein | 2g |
| Fat | 16g |
| Carbs | 13g |
| Fiber | 0g |
| Sugar | 12g |
| Sodium | 26mg |
