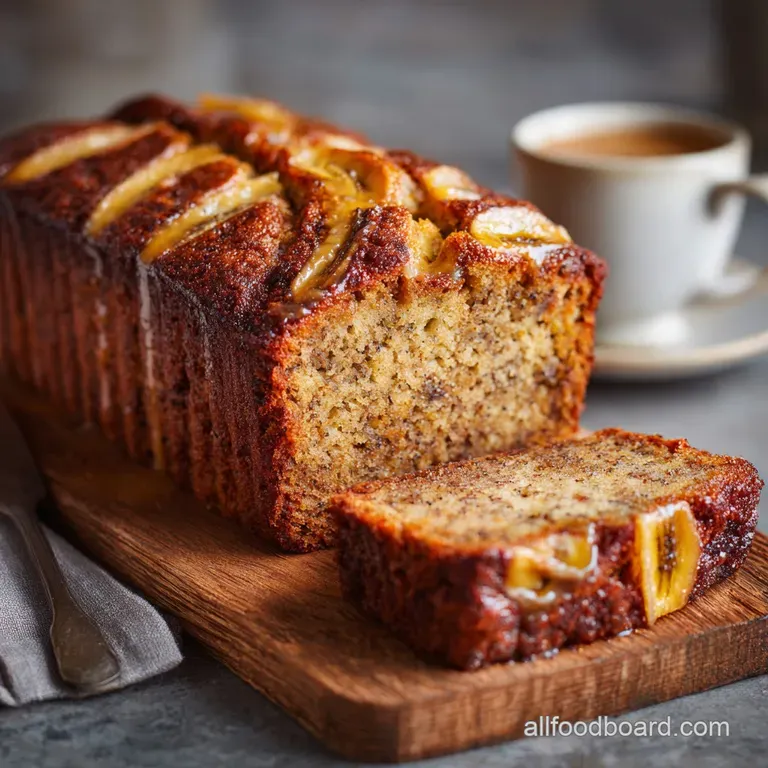
The Ultimate Bakers Dozen Banana Bread Moist and Spiced
- Guaranteeing Happiness: Why This Is Your New Favorite Banana Bread Recipe
- Gathering the Essentials: Pantry Staples for Baking Success
- Secrets of Expert Bakers: Ingredient Temperature Checks
- Step-by-Step Guide: Crafting the Perfect Banana Bread Batter
- Oven Time: Achieving That Deep Golden Crust
- Troubleshooting and Pro Tips From My Kitchen
- Keeping It Fresh: Storage and Longevity
- Recipe FAQs
- 📝 Recipe Card
Guaranteeing Happiness: Why This Is Your New Favorite Banana Bread Recipe
The moment you catch that warm, spicy fragrance drifting out of the oven, you know everything is going to be alright. For me, banana bread isn't just a recipe; it’s a promise of comfort, a hug wrapped in a golden crust.
I have baked literally hundreds of loaves over the years, testing every variant from oil to butter, smooth mash to chunky, and I can tell you: this is the best ever banana bread recipe because it nails the trifecta of flavor, moisture, and structure.
We are aiming for a moist, tender crumb that still has enough structure to hold up beautifully under a thick swipe of salted butter. Forget those dense, gummy, or dried out loaves.
This recipe balances richness from the butter with just enough acid from the buttermilk to tenderize the gluten, resulting in a lofty, flavorful bake every single time.
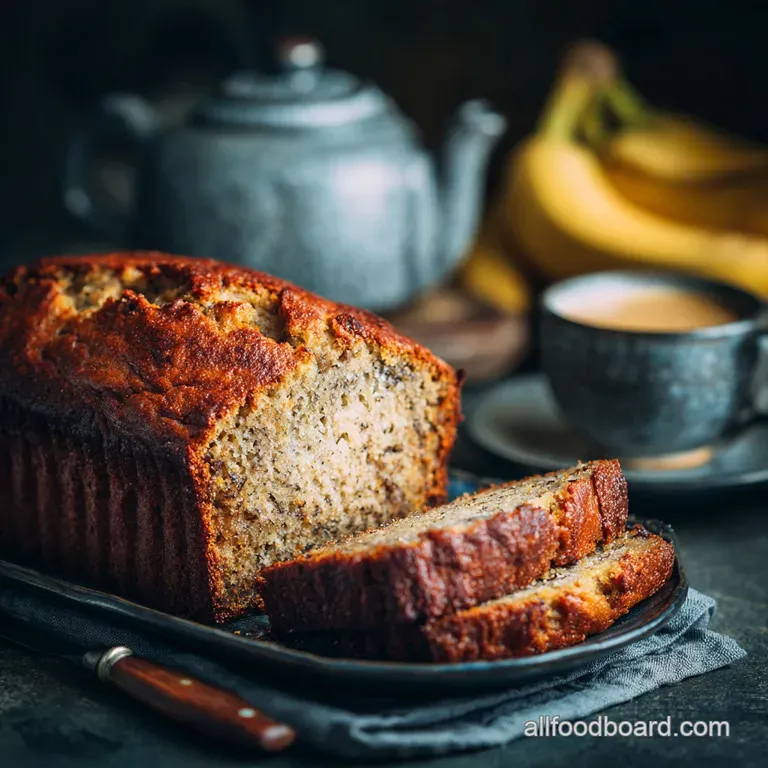
The Magic of Overripe Bananas (And Why They Matter)
If your bananas are yellow, walk away. Seriously. The secret to a phenomenal banana bread recipe is waiting until the peels are mottled, spotted, or, ideally, entirely black. Why? As the banana ripens, the starch converts into simple sugars, increasing sweetness exponentially.
Crucially, the ripening process also breaks down the fruit’s structure, releasing maximum moisture. Using overly ripe bananas means we need less added sugar and achieve that signature banana bread stickiness without turning the loaf into a sugar bomb.
A Classic Loaf Structure: The Quest for Perfect Moisture
Achieving that perfectly moist banana bread recipe depends on two factors: fat and liquid. We use a combination of rich, flavorful butter and buttermilk in this loaf. The butter provides structure and flavor depth, while the buttermilk, an acidic dairy product, reacts with the baking soda to give a beautiful rise and keeps the overall texture incredibly tender.
This balance prevents the loaf from becoming heavy while ensuring it stays fresh for days. If you’ve struggled with dry cakes before, I promise you, paying attention to ingredient temperature and the buttermilk step here will change your baking life.
Quick Prep, Maximum Comfort: Setting the Stage for Baking
Baking should feel restorative, not rushed. Before you even pull out the flour, take five minutes to truly set the stage. Get your apron on, put on some music, and preheat that oven.
Gathering all your ingredients the fancy French term for this is mise en place —calms the process and prevents that frantic moment when you realize you’re out of baking soda mid-mix. This simple step turns baking from a chore into a confident, joyful process.
Gathering the Essentials: Pantry Staples for Baking Success
One of the great joys of baking quick bread is that you likely have everything you need already tucked away in your pantry. We rely on standard all-purpose flour, both white and brown sugar for depth, and humble spices like cinnamon and nutmeg to complement the tropical sweetness of the banana.
The simplicity of these ingredients means their quality really shines through. If you can, use good quality vanilla extract; it makes a huge difference in the final aroma.
Secrets of Expert Bakers: Ingredient Temperature Checks
I cannot emphasize this enough: professional bakers obsess over temperature. Cold ingredients are stiff and resist mixing; they won’t combine smoothly with soft fats, resulting in a lumpy, uneven batter that produces a tough, coarse loaf.
When everything is at room temperature the butter, the eggs, and the buttermilk they emulsify beautifully. This means the fats and liquids blend into a homogenous, creamy structure that traps air, guaranteeing a light crumb. Aim for about 70°F (21°C) across the board.
Must Have Tools: Preparing Your Baking Station
You don't need a fancy stand mixer, although they certainly speed things up. A sturdy handheld electric mixer or even just a robust whisk and spatula will absolutely get the job done.
Here are the essentials I always have lined up:
- A silicone or rubber spatula for scraping down the bowl (nothing is worse than streaks of unmixed butter).
- A reliable measuring cup and spoons set.
- Two large mixing bowls (one for dry, one for wet/creaming).
- The thin skewer or long toothpick for testing doneness.
The Precise Measurements for a Fluffy Crumble
Getting the right amount of flour is the most common pitfall in quick bread baking. Most home cooks scoop the measuring cup directly into the bag, which compresses the flour and adds 20 30% too much by weight. That excess flour instantly sucks up moisture, turning your loaf into a sandy brick.
Always spoon the flour lightly into your measuring cup, then use the back of a knife or a flat edge to level it off without tapping or shaking the cup. This method ensures accuracy and lightness, guaranteeing that fluffy crumble we're after.
Mastering the Bananas: The Right Mash Consistency
Should you mash your bananas completely smooth, or leave them chunky? I fall into the camp that prefers mostly smooth with just a few small, pea-sized lumps remaining.
The smooth portion blends entirely into the batter, providing moisture and flavor, while those small remaining lumps melt slightly during baking, contributing delightful little pockets of concentrated banana flavor and sticky texture throughout the loaf.
Use a fork, not a food processor, to control the mash consistency perfectly.
Why Room Temperature Eggs Make a Difference
Eggs that are too cold cause the beautifully creamed butter and sugar mixture to seize up and curdle. When you add a cold egg to warm, fluffy butter, the fat hardens instantly, collapsing the air pockets you worked so hard to create.
Bringing the eggs to room temperature which takes about 30 minutes on the counter, or a quick five minute bath in warm (not hot) tap water ensures they blend seamlessly, stabilizing the emulsion and retaining that critical aeration for a high rising loaf.
Choosing the Ideal Loaf Pan Size (8x4 vs. 9x5 Debate)
The standard loaf pan size is 9x5 inches (23x13 cm). This is what the provided timing is based on. If you use the slightly smaller 8x4 inch pan, your batter will be much deeper.
WARNING: Using an 8x4 inch pan requires adding 10 to 15 minutes to the baking time and increases the likelihood that the outside will burn before the centre is cooked. Always check the centre temperature (200-205°F/93-96°C internal temp is ideal) if using a smaller pan.
Related Recipes Worth Trying
- Juicy Turkey Burgers The PubStyle Recipe That Never Dries Out — Stop eating dry poultry This is the best turkey burger recipe using chef secrets like grated onion and a binder for truly juicy flavourful patties Perfect...
- Mums Best Ever Moist Banana Bread Recipe Golden Syrup Secret — The ultimate easy banana bread recipe Our famous loaf uses a Golden Syrup secret for unparalleled sticky moisture Perfect for using up ripe fruit Homemade...
- Easy Christmas Crockpot Recipes Glazed Ham with Zesty Orange Ginger — Ditch the oven stress this year This foolproof Christmas Crockpot Recipes ham guarantees impossibly tender meat and a sticky zesty orangeginger crust The...
step-by-step Guide: Crafting the Perfect Banana Bread Batter
Mixing this batter is all about sequencing. We use the creaming method first to build structure, and then we introduce the liquids and dry ingredients in alternating steps to maintain tenderness.
Don't rush these transitions; take the time to scrape down the bowl after every addition to ensure everything is evenly incorporated.
This meticulous approach ensures that when you finally pour the batter into the pan, it is smooth, light, and perfectly consistent, setting you up for success before it even hits the oven. The final texture of the raw batter should be thick, loose enough to pour, and wonderfully glossy.
Oven Time: Achieving That Deep Golden Crust
There's nothing quite like watching the loaf rise and deepen in color through the oven door. The goal is a deep, burnished gold brown crust that signifies the caramelization of the sugars. This flavor layer is crucial; a pale loaf usually tastes underwhelming.
Remember, quick breads often require 50– 70 minutes of baking, and opening the door too early can cause a dramatic drop in oven temperature, leading to a collapsed centre. Trust the process and wait until the final 10- 15 minutes to check on it.
Creaming the Sugar and Fat: Achieving Lightness
The creaming method is a mechanical process designed to incorporate tiny air bubbles into the butter. When you beat softened butter with sugar, the sharp edges of the sugar crystals slice into the fat, trapping air.
We beat the butter and sugar for a full 3– 5 minutes until the mixture turns pale yellow and becomes genuinely fluffy like thick whipped cream. This captured air expands rapidly in the heat of the oven, resulting in a tender, light final product.
If you skip this, your bread will be dense.
Integrating the Wet and Dry Components Gently
Once the butter and eggs are successfully emulsified, we alternate adding the dry ingredients with the buttermilk and banana mash. The general rule here is to start and end with the dry ingredients.
Adding a portion of flour first helps coat the fat particles and prevents the batter from breaking, while ending with the dry ingredients ensures we minimize the time the gluten is exposed to liquid, thus preventing toughness.
The Critical No-Overmixing Rule
This is the rule that separates great quick breads from mediocre ones. Once you add the flour to the wet ingredients, you must mix it only until the ingredients are just combined. The moment flour meets liquid, gluten strands begin to form.
Stop the mixer the second you see no more dry streaks of flour. Overmixing develops tough, stretchy gluten, which results in a disappointingly dense, chewy, and rubbery loaf instead of the desired tender crumb. Use the lowest speed or finish combining gently by hand with a spatula.
The Skewer Test: Knowing When Your Loaf Is Truly Done
Judging doneness is crucial. The edges should pull slightly away from the pan, and the top should spring back lightly when pressed. However, the true test is the skewer.
Insert a thin skewer into the deepest part of the center. If it comes out clean or with a few moist, sticky crumbs clinging to it, you are done. If it comes out covered in wet, uncooked batter, give it another 5 to 10 minutes and test again.
Cooling Methods for Optimal Slicing
Your loaf continues to cook and set its structure even after it leaves the oven. This is why immediate cooling is vital. Leave the loaf in the pan for 10– 15 minutes; the warmth helps the exterior set without drying out.
Then, lift the loaf using the parchment sling and transfer it immediately to a wire cooling rack. The rack allows air to circulate around the entire bottom, preventing steam from collecting and creating a dreaded soggy bottom. I know it's hard, but wait at least an hour before slicing!
Troubleshooting and Pro Tips From My Kitchen
If your loaf sank in the middle, it was likely due to one of three issues: too little baking soda, the oven temperature being too low, or removing it from the oven too soon. Next time, be absolutely sure your baking soda is fresh, and rely on that skewer test before turning off the heat.
If the crust looks fantastic but the center is raw, your oven likely runs hot, forming a hard crust too early and trapping the steam inside. Reduce your oven temperature by 15°F next time, and tent the loaf with foil halfway through baking.
Keeping It Fresh: Storage and Longevity
This best ever banana bread recipe is so moist that it actually improves on the second day as the flavors fully marry. I recommend wrapping the completely cooled loaf tightly in plastic wrap, then placing it inside a zip-top bag to prevent any air exposure.
Store it at cool room temperature (like on the counter or in a bread box) for up to four days. Avoid refrigerating it, as the cold air will quickly dry out the starches and make the loaf stale faster.
How to Prevent a Soggy Bottom (The Ultimate Fix)
A soggy bottom is often caused by steam being trapped underneath the loaf during the cooling phase. If you notice this happening, ensure you remove the loaf from the pan after 15 minutes and immediately transfer it to a wire rack.
For an extra layer of prevention, once the loaf is fully cooled, store it standing up on its short end rather than lying flat. This allows any residual moisture to escape naturally.
Simple Swaps: Making This a dairy-free Banana Bread Recipe
If you need to adjust this recipe for dietary needs, the substitutions are simple, though they will slightly alter the final texture. Specifically, replacing butter with oil tends to result in a slightly denser, yet still incredibly moist loaf.
| Standard Ingredient | dairy-free Swap | Notes |
|---|---|---|
| Unsalted Butter | Plant based baking stick or Refined Coconut Oil | If using oil, skip creaming; whisk with sugar and eggs. |
| Buttermilk | dairy-free milk (e.g., almond/soy) + 1 tsp lemon juice | Let sit 5 minutes to curdle slightly before adding. |
Elevating the Flavor: Adding Nuts or Chocolate Chips
If you want to fold in additions like chopped walnuts, pecans, or chocolate chips, a simple trick ensures they don’t all sink to the bottom. Once you’ve mixed the wet and dry ingredients (Step 7), gently fold in your chosen addition about 1 cup total but first, toss the chips or nuts with 1 teaspoon of the reserved dry flour.
This light coating of flour helps them stay suspended evenly throughout the batter, giving you perfect distribution in every slice.
Freezing Your Loaf for Future Indulgence
One of the greatest gifts you can give your future self is a slice of homemade banana bread. To freeze, allow the loaf to cool completely. Double wrap it tightly in plastic cling film, ensuring no surface is exposed, and then wrap it again in a layer of aluminum foil or place it in a freezer bag.
The loaf can be frozen for up to three months. To thaw, simply unwrap it and let it come to room temperature on the counter for several hours. It will taste nearly as fresh as the day it was baked!
Nutritional Overview and Serving Suggestions
While this isn't a "healthier banana bread" recipe designed for low sugar or high protein, it is made with wholesome ingredients and real butter, which I personally find infinitely preferable to highly processed mixes. The satisfaction of a small slice with your morning coffee is pure joy.
Serve it warm, sliced thick, and always with a sprinkle of flaky sea salt on top of your butter spread. It’s the perfect simple pleasure for a rainy afternoon. Go forth and bake, friend!

Recipe FAQs
How dark should the bananas really be for the ultimate moist result in this Banana Bread Recipe?
They should be black, like they’ve just come back from a sunny holiday! Maximum ripeness converts starch to sugar, which not only sweetens the loaf but also provides the essential moisture needed for that gorgeous, tender texture.
My loaf turned out a bit like a brick how do I avoid the dreaded dense banana bread?
The culprit is usually overmixing the flour; once you add the dry ingredients, mix only until the flour disappears treat the batter gently, like a sleeping baby, to ensure a light and tender crumb.
I fancy jazzing it up a bit. What are some easy variations or additions (like nuts or choc chips)?
Absolutely! A proper British bake benefits from additions, so fold in about 1 cup of chopped walnuts, pecans, or semi sweet chocolate chips (a popular choice!) just before pouring the batter into the tin.
How long will this lovely loaf keep fresh, and what’s the best way to store it without it going stale?
Keep the loaf well wrapped in an airtight container at room temperature for up to 4 days, or for longer storage, freeze individual slices wrapped tightly for up to three months perfect for defrosting quickly when the kettle goes on.
I'm counting calories can I make this recipe a bit healthier without losing the flavour?
You can successfully reduce the sugars by about 25% without much flavour impact, and substituting half the butter with neutral oil or Greek yoghurt will also lighten the calories while maintaining a wonderfully moist texture.
The Best Moist Banana Bread Recipe

Ingredients:
Instructions:
Nutrition Facts:
| Calories | 8047 kcal |
|---|---|
| Protein | 32.7 g |
| Fat | 98.9 g |
| Carbs | 445.8 g |
| Fiber | 17.0 g |
| Sugar | 97.8 g |
| Sodium | 1464 mg |
