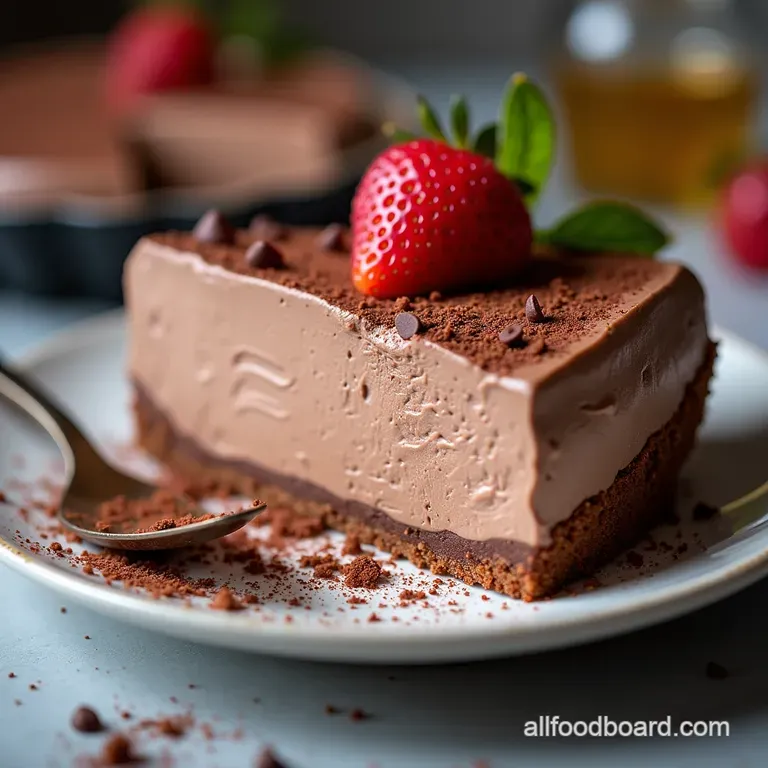
The Decadent Dream Easy Nobake Chocolate Silk Mousse Pie
- The Ultimate Oven-Free Indulgence: Why This NoBake Chocolate Mousse Pie Shines
- Solving Your Summer Dessert Dilemma
- Assembling Your Components: What You Absolutely Need
- Step-by-Step Construction: Building Your NoBake Chocolate Mousse Pie
- Troubleshooting & Variation Station for Your Chocolate Creation
- Recipe FAQs
- 📝 Recipe Card
The Ultimate Oven Free Indulgence: Why This NoBake Chocolate Mousse Pie Shines
If the mere thought of turning on your oven during a heatwave sends shivers down your spine, or perhaps you simply lack the time for an elaborate baking project, then prepare to meet your new best friend: the NoBake Chocolate Mousse Pie .
This recipe transforms simple pantry staples into a sophisticated dessert that looks like it took hours of meticulous effort but, in reality, comes together with minimal fuss. We are creating a true Chocolate Mousse Pie Recipe Easy version, focusing on maximizing that intense, velvety chocolate flavor without ever needing to preheat.
It’s an architectural marvel of texture a sturdy, satisfying crust cradling a filling so light it practically floats off the spoon.
Solving Your Summer Dessert Dilemma
There are certain times of the year, or certain busy weekends, when the goal is maximum impact with minimum heat expenditure. This Chocolate No Bake Pie is the definitive answer.
It requires only a microwave or a stovetop for melting chocolate, and the rest is assembly and patience in the refrigerator. It’s the perfect crowd pleaser, slicing cleanly and always drawing immediate compliments.
Unveiling the Secrets to Effortless Chocolate Decadence
The magic behind this incredible Chocolate Mousse Pie Recipe Easy lies in the quality of the dark chocolate and the technique used to incorporate air. We aren't relying on eggs or gelatin for structure; instead, we harness the natural stabilizing power of chilled, high fat heavy cream and, optionally, a small amount of room temperature cream cheese to ensure neat slicing later.
When done correctly, you achieve that signature, luxurious mouthfeel that defines the finest mousse preparations.
Perfect For Parties: Setting Expectations for this Creamy Delight
When you present this dessert, guests will assume it came straight from a high end patisserie. The richness of the dark chocolate paired with the crunchy No Bake Chocolate Mousse Pie Oreo Crust (or graham cracker variation) provides a beautiful textural contrast.
Because this dessert must chill for at least six hours, it forces you to plan ahead, which is actually a blessing it means the host isn't scrambling for dessert when guests arrive. It is consistently impressive.
Why 'No-Bake' Means Maximum Flavor in Minimum Time
The "no-bake" aspect doesn't mean we skip flavor development. On the contrary, by melting high-quality dark chocolate gently and allowing it to cool to just the right temperature before folding it into the whipped components, we preserve the chocolate's inherent depth.
On top of that,, the long, cool setting time allows the flavors in the filling to meld together, deepening the taste profile far beyond what a quick baked dessert can achieve. This Choc Mousse Pie tastes even better the day after it’s made.
Related Recipes Worth Trying
- Easy NoBake Dark Chocolate Mousse Pie Recipe — Forget the oven This rich easy Chocolate Mousse Pie sets up beautifully with a buttery Oreo crust and impossibly smooth filling Pure decadence ready tonight
- Easy Chocolate Oatmeal Lace Cookies Recipe Decadent Crispness — Master these rich Chocolate Oatmeal Lace Cookiesthey bake up unbelievably thin and crispy balancing deep dark chocolate with toasted oats A truly easy...
- The Best Upgraded Boxed Chocolate Cake Recipe — Tired of dry cake Learn what to add to chocolate box cake mix to create a moist fudgy masterpiece that tastes homemade The ultimate chocolate cake mix upgrade
Assembling Your Components: What You Absolutely Need
To achieve this flawless Easy No Bake Chocolate Mousse Pie , we divide our efforts into two critical parts: the sturdy base and the ethereal filling. For the crust, you’ll want about two cups of finely crushed chocolate biscuits think Oreos (cream removed) or rich digestive cookies bound together with about six tablespoons of melted unsalted butter and a tiny pinch of salt to enhance the chocolate notes.
Sourcing the Silkiest Ingredients for Maximum Mousse Impact
The success of the filling hinges on quality components. You’ll need 8 ounces of excellent dark chocolate, ideally 70% cocoa solids for that deep, slightly bitter counterpoint to the sweetness.
The dairy component is vital: 1 ½ cups of heavy whipping cream, which must be thoroughly chilled, and if you are aiming for supreme stability and a creamy texture that rivals the best No Bake Chocolate Mousse Pie Cool Whip versions, 4 ounces of softened cream cheese will be your secret weapon.
Don’t forget the powdered sugar (sifted!) and pure vanilla extract to round out the flavor profile.
The Crunchy Foundation: Securing Your Perfect Crust Mixture
When preparing the crust mixture, the goal is consistency, often described as "wet sand." The crushed biscuits must be uniform in size so they pack tightly. Once you’ve introduced the melted butter, ensure every crumb is coated.
This thorough mixing prevents a dry, crumbling base that collapses under the weight of the mousse.
Essential Dairy and Chocolate Ratios for Fluffy Mousse
The key to the airy texture is the ratio between the melted chocolate mixture and the stiffly whipped cream. We must first incorporate the melted chocolate (which must be cooled so it doesn't melt the cream) into the sugar/vanilla/cream cheese base. Then, the remaining, fully whipped cream is folded in.
This careful layering ensures the mousse remains light and voluminous, rather than dense and fudgy.
Optional Garnishes to Elevate Your Masterpiece
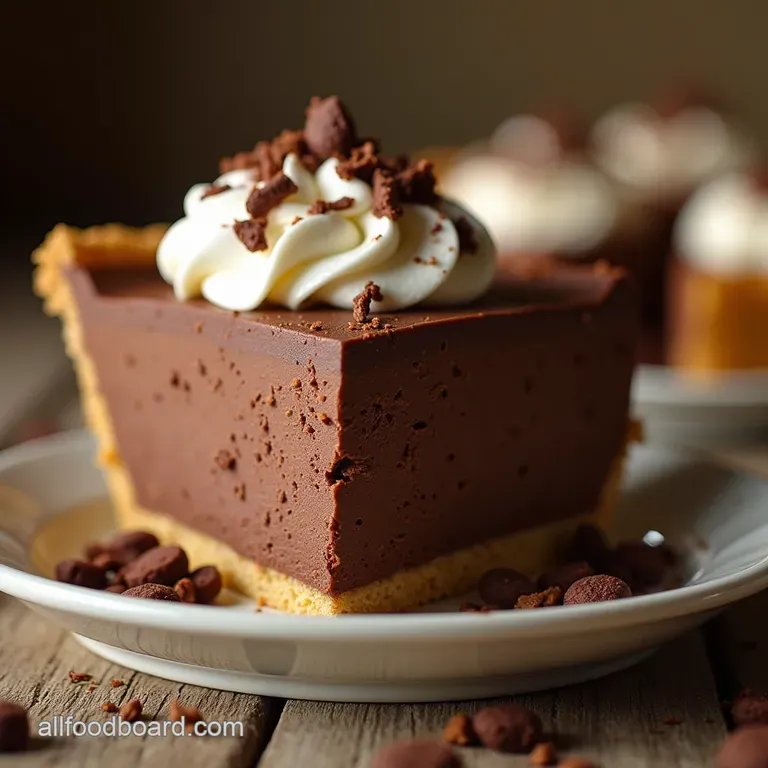
While the pie stands beautifully on its own, a touch of presentation elevates the experience. We suggest a light dusting of cocoa powder, which adds a slight bitterness to the first bite, or delicate curls of shaved dark chocolate. A generous swirl of freshly whipped cream piped around the edge also signals decadence.
step-by-step Construction: Building Your NoBake Chocolate Mousse Pie
Crafting this incredible No Bake Chocolate Mousse Pie Recipe begins, perhaps surprisingly, with the base. Once the crust is ready, the focus shifts entirely to perfecting the airy chocolate core. This process demands gentle hands and attention to temperature.
Achieving That Signature Cloud Like Texture: Whipping Techniques
The heavy cream must be whipped until firm, stiff peaks form. Use a very cold bowl and beaters. Stop just before it looks dry or grainy; those stiff peaks are what provide the body and lift for the entire filling.
Simultaneously, if using cream cheese, beat it until it is absolutely smooth with the powdered sugar and vanilla before incorporating the cooled, melted chocolate.
Pressing Perfection: Crafting the Unbeatable Biscuit Base
Select a 9 inch pie plate or a springform pan for easier removal. After mixing your crumbs and melted butter, distribute the mixture evenly across the bottom and firmly up the sides. Use the flat bottom of a measuring cup to press down hard.
This step is non-negotiable for structural integrity, ensuring your No Bake Chocolate Mousse Pie Graham Cracker Crust (or biscuit version) holds firm when sliced. Pop this base into the refrigerator for at least 30 minutes to set while you tackle the filling.
Folding Gently: Incorporating Air Into the Rich Chocolate Filling
This is the moment of truth. You cannot stir vigorously. Take about a third of your stiffly whipped cream and mix it thoroughly into the chocolate mixture this lightens the base and makes the rest of the folding easier.
Then, gently scoop the remaining whipped cream on top and use an under and-over sweeping motion with a rubber spatula to fold it in. Stop the moment you no longer see streaks of white. Overmixing will deflate the air you just worked so hard to whip into the cream.
The Crucial Chill Time: Ensuring Structure in Your Cold Dessert
Once the luxurious mousse is spooned into the chilled crust, smooth the top. Cover loosely with plastic wrap, making sure the plastic doesn't touch the surface of the filling. Place the Chocolate Mousse Pie Recipe Easy in the refrigerator for a minimum of six hours.
Overnight is truly superior, allowing the fats to solidify and the entire pie to set into a beautifully sliceable, yet still soft, structure.
Troubleshooting & Variation Station for Your Chocolate Creation
Sometimes, even the best plans hit a snag. If your mousse seems too soft, it usually means the chocolate was too warm when mixed, or the cream wasn't whipped stiff enough. If this happens, simply return the entire pie to the fridge for a few more hours.
This recipe is highly adaptable for different preferences and needs.
Ingredient Swaps for Allergy Friendly Deliciousness
For those navigating dietary restrictions, this dessert is relatively easy to adapt. You can replace the standard digestive biscuits with gluten-free chocolate wafers for a No Bake Chocolate Mousse Pie gluten-free option.
While traditional recipes rely heavily on dairy, whipping full fat coconut cream instead of heavy cream provides a beautiful, rich base suitable for vegan alternatives, though chilling times might need slight adjustment for firmness.
Elevating the Presentation: Toppings That Pop
To take this No Bake Chocolate Mousse Pie presentation up a notch, consider a dramatic sprinkle of flaky sea salt just before serving to enhance the dark chocolate flavor profile.
Alternatively, a light drizzle of salted caramel sauce across the top creates a stunning visual contrast and adds another layer of complex flavor.
Maximizing Shelf Life: The Best Way to Keep This NoBake Treat Overnight
Because this recipe relies on whipped dairy products, the texture is best within the first two days. Store leftovers tightly covered in the refrigerator. If you are making the pie more than 24 hours in advance, it is best to prepare the crust a day ahead, store it airtight, and only make and fill the mousse just before the required 6-hour chilling time to maintain peak freshness.

Recipe FAQs
Can I make this NoBake Chocolate Mousse Pie ahead of time, or does it need to set right before serving?
Absolutely! This pie is best made ahead of time; in fact, it needs it. We recommend chilling it for a minimum of 6 hours, but frankly, leaving it overnight in the fridge is the golden rule for achieving that perfect, firm, sliceable texture.
My whipped cream deflated when I folded it in! What did I do wrong with the mousse filling?
That’s a common stumble, often caused by the melted chocolate being too hot or folding too vigorously. Ensure your melted chocolate has cooled down significantly it should just be warm, not hot, when you incorporate it.
Also, always gently "lighten" your chocolate base by folding in one-third of the cream first before adding the rest, using a rubber spatula in figure eight motions.
What’s the best way to cut clean slices of this silky pie without making a mess?
Ah, the eternal struggle for a perfect wedge! Before each slice, dip a long, sharp knife into a tall glass of hot water, wipe it completely dry with a paper towel, and then slice. Repeating this process ensures a clean cut through the rich mousse every single time.
I don't have digestive biscuits; what other crust options work well for this NoBake Chocolate Mousse Pie?
Don't fret if you can't get hold of digestives; a good substitution would be classic Graham Crackers if you're in the US, or even plain shortbread cookies will do the trick nicely. Just ensure you crush them finely and mix them thoroughly with the melted butter until it resembles wet sand for a solid base.
Can I make this recipe lighter or use a different type of chocolate?
For a lighter texture, you can skip the optional cream cheese, though it might need a bit more chilling time to set up properly. If you prefer less intensity, swapping out half of the dark chocolate (70%) for a good quality milk chocolate is an easy switch, though the final result will be sweeter!
Nobake Chocolate Mousse Pie
Ingredients:
Instructions:
Nutrition Facts:
| Calories | 790 kcal |
|---|---|
| Protein | 4.2 g |
| Fat | 32.1 g |
| Carbs | 22.2 g |
| Fiber | 2.2 g |
| Sodium | 294 mg |
