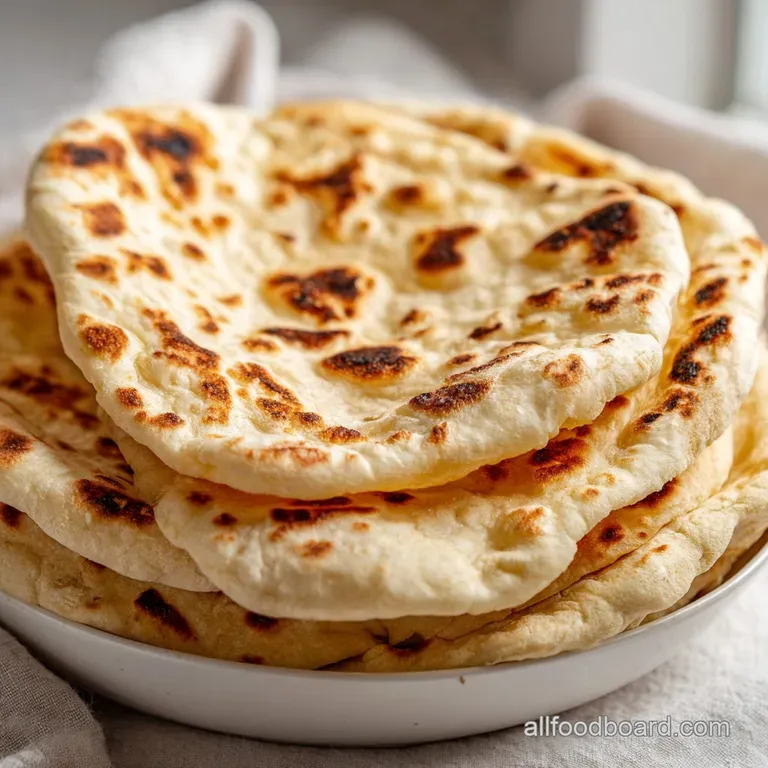
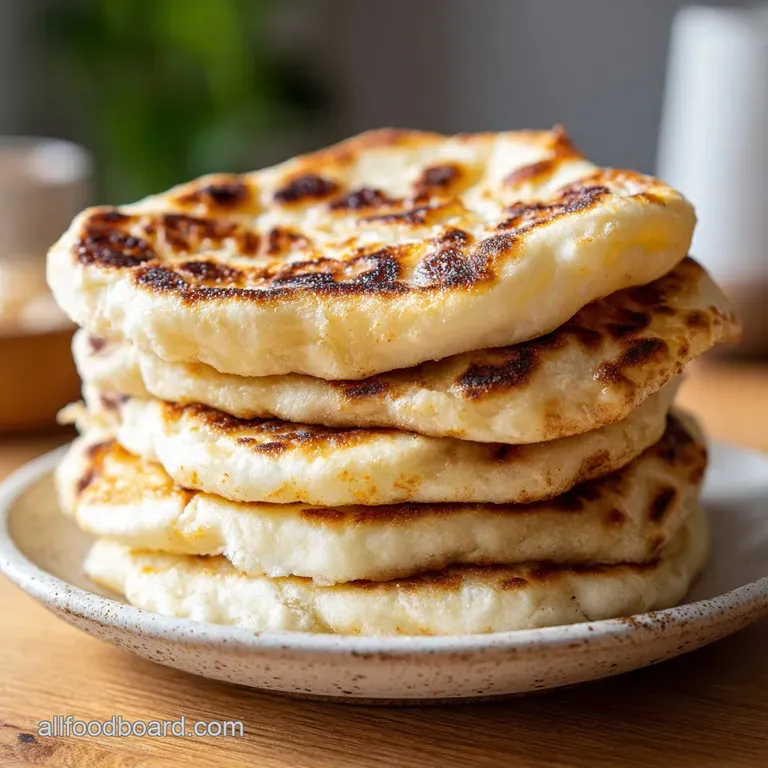
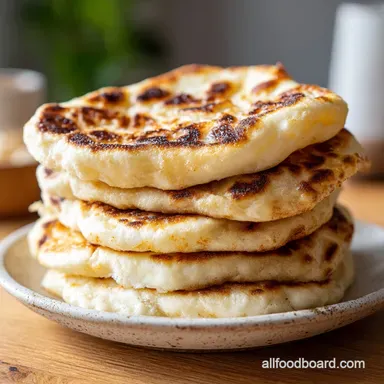
Homemade Pita Bread: Soft and Pillowy
- Time: Active 60 minutes, Passive 15 minutes, Total 75 minutes
- Flavor/Texture Hook: Pillowy, flour dusted rounds with a delicate, nutty char.
- Perfect for: Weekend baking projects or a fresh Mediterranean dinner.
- Mastering the Pocket Secret in Homemade Pita Bread
- How Steam Creates the Internal Pocket
- Key Component Analysis
- Precise Ingredients and Substitutes
- Crafting Your Homemade Pita Bread
- Solving Common Baking Problems
- Adapting the Batch Size
- Debunking Common Flatbread Myths
- Storing and Reheating for Future Meals
- Finishing Touches and Color Accents
- Recipe FAQs
- 📝 Recipe Card
Mastering the Pocket Secret in Homemade Pita Bread
There is a specific, quiet magic that happens in a flour dusted kitchen when the scent of blooming yeast begins to drift through the air. It’s a smell that takes me straight back to my childhood, standing on a stepstool and watching my mother’s hands move with rhythmic grace over a shaggy mound of dough.
When you make this authentic Greek pita bread, you aren't just making a side dish; you are participating in a tradition that spans centuries. The moment that flat, unassuming disc of dough hits the searing heat of a cast iron skillet and begins to billow upward into a golden, steam filled balloon is nothing short of artistic.
It’s a visual reward for your patience and a sensory delight that no store-bought bag could ever replicate.
We have all been there tearing into a dry, cardboard like store-bought pita only to have it crumble before it can even hold a spoonful of hummus. This homemade pita bread recipe is the antidote to those disappointing experiences.
We are looking for a texture that is supple enough to wrap around a skewer of grilled meat but sturdy enough to maintain its structural integrity. It should have those beautiful, rustic charred spots that tell a story of high heat and quick timing.
The internal pocket should be a clean, open space, ready to be stuffed with vibrant greens and creamy sauces.
But what about the dreaded "no puff" flatbread? We’ve all had those batches where the bread stays stubbornly flat, more like a cracker than a cloud. Don't worry, we are going to walk through exactly why that happens and how to ensure your pitas inflate like a dream.
We will focus on the elasticity of the gluten and the precision of your stovetop temperature. By the time we’re finished, your kitchen will smell like a Mediterranean bakery, and you’ll have a stack of warm, pillowy bread that is as beautiful to look at as it is to eat.
Let's get our hands floury and start this artisan journey.
How Steam Creates the Internal Pocket
The success of this Mediterranean flatbread recipe hinges on a few fundamental principles of baking that I’ve learned through trial and error over the years. It isn’t just about mixing ingredients; it’s about managing the physical state of the dough to allow for a dramatic reaction once it hits the heat.
- Thermal Expansion: When the high moisture in the dough meets the intense heat of the skillet, it turns into steam almost instantly. This rapid phase change creates internal pressure that forces the two layers of the dough apart, creating the pocket.
- Gluten Elasticity: Without a strong but flexible gluten network, the steam would simply leak out through tiny tears in the dough. Proper kneading ensures the dough can stretch like a balloon without popping.
- Surface Sealing: The quick sear on the outside of the pita creates a thin, flexible "skin." This skin traps the steam inside, ensuring the bread puffs upward rather than just drying out.
- Hydration Balance: The specific ratio of water to flour keeps the dough soft and tacky. This moisture is the fuel for the steam, ensuring the bread remains tender even after it cools.
| Method | Cook Time | Texture | Best For |
|---|---|---|---|
| Cast Iron Skillet | 1-2 mins per side | Soft with charred spots | Traditional soft wraps |
| Baking Steel/Stone | 2-3 mins total | Crispier exterior | Dipping into olive oil |
| Air Fryer | 3-4 mins | Very puffed/hollow | Making pita chips later |
Choosing the right method depends on your desired outcome. I personally swear by the cast iron skillet for that authentic Greek pita bread look the direct contact with the heavy metal creates those gorgeous, irregular brown spots that look so professional on a serving platter.
The cast iron also holds heat better than almost any other material, which is vital for the thermal shock needed to get that initial puff. If you're feeling adventurous, you can try the oven method, but it often yields a slightly drier crust compared to the supple, foldable nature of the stovetop version.
Key Component Analysis
Understanding the "why" behind your homemade pita bread ingredients helps you become a more intuitive baker. You start to recognize when the dough needs a splash more water or a few extra minutes of rest just by the way it feels under your palms.
| Ingredient | Science Role | Pro Secret |
|---|---|---|
| Active Dry Yeast | Leavening agent | Bloom it in 105°F water; too hot kills it, too cold stalls it. |
| Extra Virgin Olive Oil | Tenderizes the crumb | Use a high-quality oil for a subtle, peppery finish. |
| All Purpose Flour | Provides structure | Weigh your flour (approx. 125g per cup) for total consistency. |
When you are whisking your flour and salt together, think of it as building the foundation. The salt isn't just for flavor; it actually helps to tighten the gluten strands, making the dough more resilient.
It’s a small detail that makes a massive difference when you’re rolling the dough out to that critical 1/4 inch thickness.
Precise Ingredients and Substitutes
To make the most authentic pita bread for shawarma or falafel, you need to stick close to these measurements. I’ve tested various ratios, and this specific balance of 3 cups of flour to 1 cup of water creates a dough that is manageable without being overly dry.
- 1 cup warm water (105°F–110°F)
- Substitute: Milk for a richer, softer "naan like" texture. Why this? Yeast needs warm liquid to activate effectively.
- 2 tsp granulated sugar
- Substitute: Honey or maple syrup. Why this? Provides quick food for the yeast to kickstart fermentation.
- 2.25 tsp active dry yeast
- Substitute: 2 tsp instant yeast (skip the 5 minute bloom time). Why this? Creates the carbon dioxide needed for the dough to rise.
- 3 cups all purpose flour
- Substitute: Bread flour for a chewier, more elastic pita. Why this? The protein content is perfect for a soft yet strong dough.
- 1 tsp fine sea salt
- Substitute: Kosher salt (increase to 1.5 tsp). Why this? Regulates yeast activity and enhances every other flavor.
- 2 tbsp extra virgin olive oil
- Substitute: Avocado oil or melted butter. Why this? Adds fat to the dough, ensuring a velvety mouthfeel.
Getting the water temperature right is the most common hurdle for beginners. I always use a digital thermometer because "warm to the touch" is subjective. If it’s over 120°F, you risk killing the yeast, and your pitas will stay as flat as a pancake.
Conversely, if it's too cold, the yeast will stay dormant, and you'll be waiting hours for a rise that never comes. It's these little precision points that turn a good cook into a great baker.
Crafting Your Homemade Pita Bread
This process is about feel. Don't rush the kneading or the resting. The dough needs time to develop its personality.
- Bloom the yeast. Combine the warm water (105°F–110°F), sugar, and yeast in a small bowl. Note: This ensures the yeast is alive and ready to work.
- Wait for the foam. Let it sit for 5-8 minutes until a thick, frothy foam forms on the surface.
- Prepare the dry base. Whisk the all purpose flour and sea salt in a large bowl and create a well in the center.
- Incorporate the liquids. Pour the yeast mixture and olive oil into the well. Mix with a wooden spoon until a shaggy, messy dough forms.
- Knead the dough. Turn it onto a floured surface and knead for 5-7 minutes until smooth, elastic, and slightly tacky.
- First rise. Place in an oiled bowl, cover with a damp cloth, and let rise for 45 minutes until doubled in size.
- Portion the dough. Punch it down and divide into 8 pieces (approx. 75g each). Roll into smooth balls.
- Brief rest. Cover the balls and let them rest for 10 minutes. Note: This relaxes the gluten for easier rolling.
- Roll the discs. Use a rolling pin to flatten each ball into a 1/4 inch thick disc.
- Sear and puff. Heat a cast iron skillet over medium high heat. Cook each pita for 1-2 minutes per side until puffed and lightly browned.
During the kneading phase, I often think about how this process is so much faster than something like an artisan sourdough bread. While sourdough takes days, you can have these pitas on the table in just over an hour. As you knead, you'll feel the dough transform from a sticky, lumpy mess into a silky, bouncy ball. That change is the gluten strands aligning, creating the structural "mesh" that will later trap the steam.
Solving Common Baking Problems
Even the most seasoned home cooks have days where the dough doesn't cooperate. If your kitchen is particularly cold or humid, you might need to make small adjustments on the fly.
Why Your Pita Didn't Puff
If your pitas are coming out flat, the most likely culprit is either the thickness of the dough or the temperature of your pan. If you roll the dough too thin, there isn't enough internal moisture to create steam. If you roll it too thick, the steam can't lift the weight of the dough.
A consistent 1/4 inch is the sweet spot. Plus,, if your pan isn't hot enough, the "skin" won't set quickly enough to trap the air.
Managing a Brittle Crust
Pitas should be soft and pliable. If yours are coming out crunchy like a cracker, you are likely cooking them for too long or at too low a temperature. You want a fast, aggressive sear. As soon as they come off the pan, stack them and wrap them in a clean kitchen towel.
The residual steam will soften the crust, making them perfectly foldable.
| Problem | Root Cause | Solution |
|---|---|---|
| Dough won't stretch | Gluten is too tight | Let it rest for 10-15 more minutes before rolling. |
| No pocket forms | Pan is too cold | Increase heat to medium high; wait for the pan to smoke slightly. |
| Dough is too sticky | Too much water | Add flour 1 tablespoon at a time during kneading. |
Common Mistakes Checklist:
- ✓ Never skip the 10 minute rest after portioning the dough; it’s the difference between a round pita and a frustrated baker.
- ✓ Don't overcrowd the skillet cook one at a time to maintain the pan's temperature.
- ✓ Use a damp cloth during the rise to prevent a dry "skin" from forming on the dough.
- ✓ Avoid using too much "bench flour" during rolling, which can lead to a dusty, burnt flavor.
- ✓ Keep the finished pitas wrapped in a towel immediately to trap moisture.
Adapting the Batch Size
Whether you are cooking for a crowd or just for two, this soft pita bread dough is incredibly forgiving when it comes to scaling.
Scaling Down (Making 4 pitas) If you only need a few pitas, you can easily halve the recipe. Use 1.5 cups of flour and 1/2 cup of water. Since it’s hard to halve a single packet of yeast precisely, just use 1 rounded teaspoon.
Keep your pan size the same, as you’ll still be cooking them one-by-one.
Scaling Up (Making 16+ pitas) When doubling the recipe, I recommend doubling the spices and salt by 1.5x rather than a full 2x to avoid over seasoning. You’ll need a much larger bowl for the rise, and you might want to run two skillets simultaneously to speed up the cooking process.
Be sure to keep the finished pitas well covered so the first ones don't get cold while you finish the batch.
If you enjoy the process of making dough from scratch, you might also find success with a moist applesauce bread, which uses a similar "well" method but offers a completely different, sweet flavor profile for breakfast.
Debunking Common Flatbread Myths
There’s a lot of misinformation out there about what it takes to get a "perfect" pita. Let's clear some of that up so you can bake with confidence.
Myth: You need a specialized pizza oven for the puff. This is simply not true. While a 500°F oven is great, a heavy cast iron skillet on a standard stovetop provides more than enough direct heat to create the steam pocket.
In fact, many people find the stovetop method more consistent because you can see exactly when to flip the bread.
Myth: Sugar is only for flavor. In this easy pita bread recipe, sugar acts as a primary fuel source for the yeast. While you can omit it, the yeast will take significantly longer to produce the carbon dioxide needed for a light, airy crumb.
It also helps with the browning (caramelization) on the outside of the bread.
Storing and Reheating for Future Meals
Once you've mastered the pita bread from scratch, you'll likely want to make large batches. These pitas store beautifully if you follow a few simple rules.
Storage Guidelines Fresh pitas will stay soft at room temperature for about 2 days if kept in an airtight bag. If you aren't going to eat them within 48 hours, move them to the fridge for up to 5 days, or the freezer for up to 3 months.
When freezing, I like to place a small piece of parchment paper between each pita so they don't stick together. This makes it easy to grab just one for a quick lunch.
Zero Waste Tips Never throw away "failed" pitas that didn't puff. They make incredible homemade pita chips! Just brush them with a little olive oil, sprinkle with sea salt and za'atar, and bake at 375°F until they are "shatter crispy." You can also use slightly stale pitas for a traditional Fattoush salad, where the bread is toasted and tossed with fresh veggies and a sumac dressing. It's much like the way you'd use leftovers in a classic bread and butter pudding — turning something old into something completely new and delicious.
Finishing Touches and Color Accents
The final presentation of your pita bread for shawarma or dips is where you can let your inner artist shine. A stack of plain bread is fine, but a thoughtfully garnished platter is an experience. To achieve a professional, artistic look, focus on color balance.
The Golden Accents Just before serving, brush the warm pitas with a very light coating of high-quality extra virgin olive oil. This gives them a lustrous, amber glow that catches the light and makes them look incredibly appetizing. It also adds a final layer of silken texture to the crust.
- 1. Fresh Parsley (Green)
- Finely mince flat leaf parsley and sprinkle it over the top of the oiled pitas just before they hit the table.
- 2. Sumac (Deep Red)
- A light dusting of this tart, citrusy spice adds a pop of rich color and a bright flavor note that cuts through the richness of the bread.
- 3. Flaky Sea Salt (White)
- Large crystals of salt like Maldon provide a structural element and a bright white highlight that signals "freshness."
If you want a rustic look, use a linen towel. Serving pitas tucked inside a wrinkled linen napkin or towel not only keeps them warm but also adds to the "bakery fresh" aesthetic. It feels intentional and warm, evoking that childhood sense of home baked comfort.
Whether you are serving these with a bowl of silky hummus or using them as a base for a hearty wrap, the effort you put into the dough will shine through in every bite. Enjoy the process, embrace the flour on your apron, and celebrate the magic of the puff!

Recipe FAQs
Is pita bread healthier than bread?
It depends on your nutritional goals. Pita bread is generally lower in calories per serving than many commercial loaves, but because it is made with all-purpose flour, it shares a similar glycemic profile to standard white bread.
What is pita bread?
It is a yeast leavened flatbread. The signature pocket forms when the high moisture content of the dough creates steam in the hot skillet, causing the internal layers to separate.
Is pita bread a bad carb?
No, carbohydrates are not inherently bad. Like any bread made from refined flour, it provides quick energy, and you can easily balance your meal by pairing it with protein rich fillings.
Is pita bread Indian or Greek?
It is neither exclusively; it is a staple across the Mediterranean and Middle East. While commonly associated with Greek cuisine, variations of this flatbread appear throughout many cultures in the region.
How to keep pita bread soft after cooking?
Stack the cooked pitas inside a clean kitchen towel immediately after removing them from the skillet. The trapped residual steam keeps them supple, preventing the edges from becoming brittle or dry.
How to fix pita bread that does not puff up?
Roll the dough to an even 1/4 inch thickness and ensure your skillet is fully heated to medium high. If the dough is too thick or the pan is cool, the steam cannot build up fast enough to separate the layers, a principle of dough handling you can also apply to our quick and easy no knead bread.
How to store pita for later?
Place parchment paper between each pita before sealing them in an airtight freezer bag. This prevents them from sticking together during freezing, allowing you to pull out individual pieces for up to 3 months.
Homemade Pita Bread Recipe
Ingredients:
Instructions:
Nutrition Facts:
| Calories | 207 kcal |
|---|---|
| Protein | 5.2 g |
| Fat | 3.9 g |
| Carbs | 37.1 g |
| Fiber | 1.3 g |
| Sugar | 1.1 g |
| Sodium | 288 mg |
