Velvet Crimson Dream Fudge Rich Creamy and Effortlessly Festive
- The Allure of Southern Comfort: Introducing Your Crimson Confection
- Why This Red Velvet Fudge Outshines Traditional Baking
- The Essential Pantry Stock for Perfect Fudge Texture
- Mastering the Measurements: Achieving That Signature Velvet Consistency
- The Step-by-Step Method to Solidify Your Dreamy Red Velvet Fudge
- Perfecting the Finish: Cooling, Setting, and Slicing Techniques
- Troubleshooting Common Fudge Failures: Troubleshooting Your Batch
- Creative Variations on the Classic Red Velvet Fudge Formula
- Recipe FAQs
- 📝 Recipe Card
The Allure of Southern Comfort: Introducing Your Crimson Confection
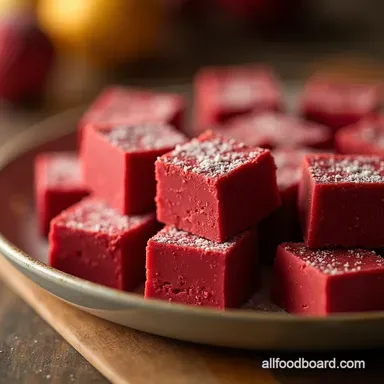
There are desserts that whisper comfort, and then there are those that shout joyous indulgence. Our Red Velvet Fudge falls firmly into the latter category, offering all the iconic flavor profile of the beloved Southern cake that delicate dance between tangy buttermilk and rich cocoa but condensed into a pure, luxurious block of confectionary heaven.
This recipe, which we call the "Velvet Crimson Dream Fudge," strips away the fuss of baking layers and frosting techniques, presenting you instead with a deeply satisfying, melt-in-your mouth experience.
It’s decadent enough for a celebratory spread yet simple enough for a mid-week treat when only intense sweetness will suffice. Get ready to transform a few simple pantry staples into an astonishing Red Velvet Dessert Idea that will have everyone asking for your secret.
Why This Red Velvet Fudge Outshines Traditional Baking
When you think of Red Velvet, you might picture an elaborate, multi layered Red Velvet Cake Recipe requiring careful frosting and assembly. Our approach to Red Velvet Fudge bypasses all that complexity.
This version is about maximizing flavour impact with minimal active effort. It’s a truly Easy Homemade Fudge Recipe that relies on the magic of melted chocolate and sweetened condensed milk, resulting in a texture that is far denser and creamier than any baked good.
This recipe proves that the most memorable treats are often the simplest to execute.
Unlocking the Essence of Buttermilk and Cocoa
The signature taste of Red Velvet comes from a historical reaction between acidic ingredients (like buttermilk) and baking soda, which traditionally gave the cocoa powder a reddish tint.
While we are bypassing the actual buttermilk here, we capture that subtle tang and depth by using just a whisper of unsweetened cocoa powder alongside the vibrant colouring. This small addition is the key to ensuring your Homemade Fudge Recipe tastes authentically like the cake it’s inspired by, rather than just sweet white chocolate.
A Decade Defining Dessert for Any Gathering
Whether you are curating a holiday platter or looking for an impressive, ready-to-go favour, this confection fits the bill. Because it sets so beautifully, it mimics the luxurious quality of a high end Red Velvet Candy Bar , making it an incredible gift.
Its stunning crimson colour naturally lends itself to Valentine’s Day or Christmas celebrations, yet its straightforward elegance makes it appropriate year round.
Effortless Elegance: Minimal Mixing, Maximum Impact
The active time required for this Easy Red Velvet Fudge is astonishingly short barely twenty minutes. The magic happens in the gentle heating stage where all the components fuse into a homogenous, glossy base.
The only real skill required is patience during the cooling phase, allowing the fats and sugars to solidify into that perfect, sliceable block.
The Essential Pantry Stock for Perfect Fudge Texture
To achieve that coveted, smooth, and non-gritty fudge consistency, stocking the right components is paramount. This recipe leans heavily on high-quality melting ingredients. We rely on twelve ounces of good quality white chocolate chips ensure they are chips or wafers designed for melting, not baking discs which can contain stabilizers that inhibit smooth blending.
Crucially, you will need a full 14-ounce can of full fat sweetened condensed milk; this provides the necessary sugar and dairy solids that structure the fudge without requiring the cooking of sugar syrups.
Don't overlook the four tablespoons of unsalted butter, which lend richness and help prevent the final product from being too brittle.
Mastering the Measurements: Achieving That Signature Velvet Consistency
Precision matters when working with fudge, as the balance between sugar, fat, and dairy dictates whether your result is creamy or crumbly. We are aiming for a rich, dense chew reminiscent of a Red Velvet Fudge Brownies texture, but ultimately smoother.
The Core Components: Sweeteners, Fats, and Flavor Agents
Beyond the main structural ingredients, the supporting cast brings the characteristic flavor profile to life. We incorporate just one teaspoon of unsweetened cocoa powder to introduce that faint cocoa undertone central to Red Velvet.
Vanilla extract is essential for rounding out the sweetness, and a tiny pinch of salt is necessary to keep the flavour dynamic, preventing it from tasting flatly sweet.
Tool Kit Essentials for Seamless Fudge Preparation
For this no-fuss recipe, you won’t need complex candy thermometers. The primary requirement is an 8x8 inch square baking pan, which we will line completely with parchment paper, ensuring there are plenty of overhangs these become your essential handles for lifting the set fudge out later.
A heavy bottomed saucepan is advisable for the gentle heating stage; this material distributes heat evenly, minimizing the risk of scorching the delicate white chocolate.
Sourcing high-quality Colouring for True Red Hue
The visual impact of this Red Velvet Fudge Recipe hinges on achieving a vibrant, deep crimson. Liquid food colouring, while accessible, often requires so much volume that it can disrupt the fudge's density.
For the most impactful and reliable colour saturation, invest in high-quality gel food colouring. You will gradually introduce this ingredient until the mixture achieves a colour that truly echoes its cake namesake.
Related Recipes Worth Trying
- Easy Buttered Pepperoni Pizza Sliders Recipe Crowd Pleaser — Whip up these Ultimate Buttered Pepperoni Pizza Sliders They are the easiest party appetizers that taste better than takeout Get the recipe
- The Protein Powerhouse Velvety Cottage Cheese Chocolate Smoothie — This Cottage Cheese Chocolate Smoothie tastes like a decadent dessert but packs 30g of protein Its thick easy and perfect for a healthy breakfast drink
- Best Smoky Roasted Red Pepper Hummus Recipe Easy Smooth — Ditch the jarred stuff This Roasted Red Pepper Hummus recipe delivers smoky luxurious texture using chef secrets Make the best homemade hummus tonight
The step-by-step Method to Solidify Your Dreamy Red Velvet Fudge
The active stage of creating this velvety dream is surprisingly swift. Begin by preparing your 8x8 pan by lining it meticulously with parchment paper, leaving sufficient overhang on opposite sides.
In your heavy bottomed pan over the lowest heat setting possible, combine the white chocolate chips, the can of sweetened condensed milk, and the cubed butter. Stir this combination constantly with a heatproof spatula until it becomes entirely smooth and glossy.
Remove the pan from the heat immediately upon melting do not allow it to simmer or boil.
Once off the heat, swiftly stir in the pinch of salt, the vanilla extract, and the small measure of cocoa powder until just combined. Now, add your red gel colouring drop by drop, stirring thoroughly between additions until you reach that perfect, uniform crimson.
Pour this mixture directly into your prepared pan and level the surface gently.
While the base sets slightly, quickly whip up the cream cheese swirl. Using a separate bowl, beat four ounces of softened cream cheese until completely smooth. Gradually beat in half a cup of sifted powdered sugar and a half teaspoon of vanilla until the mixture is light and creamy.
Dollop this light mixture randomly over the warm fudge base. Take a butter knife or a skewer and gently draw swirls through the cream cheese dollops, creating a marbled effect. Remember, less is more here; over swirling will result in a uniform pink rather than the desired contrast.
Perfecting the Finish: Cooling, Setting, and Slicing Techniques
The transition from liquid base to perfectly sliceable confection requires attention during the cooling phase. This stage solidifies the fats and creates that dense, luxurious mouthfeel essential to great fudge.
Melting Magic: Combining Dairy and Chocolate Base
When melting your base components the white chocolate, butter, and condensed milk the paramount consideration is temperature control. White chocolate scorches easily, leading to a grainy, unusable texture. The goal is gentle, pervasive warmth that encourages the fats to emulsify completely.
If you notice any resistance or thickness forming before everything is melted, remove the pan from the heat entirely and continue stirring until the residual warmth finishes the job.
Incorporating Flavor and Color Without Over Stirring
Once the base is smooth, you introduce the flavourings and colour. Stirring too vigorously or for too long after adding the colour can sometimes introduce excess air or alter the emulsion slightly.
Incorporate the colour until the shade is consistent, then immediately stop stirring and proceed to the pan to maintain that silky texture.
Achieving the Ideal Temperature for Setting Success
After swirling the cream cheese, allow the fudge to sit on the counter for about half an hour until it has cooled slightly but is still somewhat pliable. Then, cover it gently and transfer it to the refrigerator.
A minimum of four hours is required for the structure to firm up sufficiently, though chilling it overnight will yield the absolute best results for clean cutting.
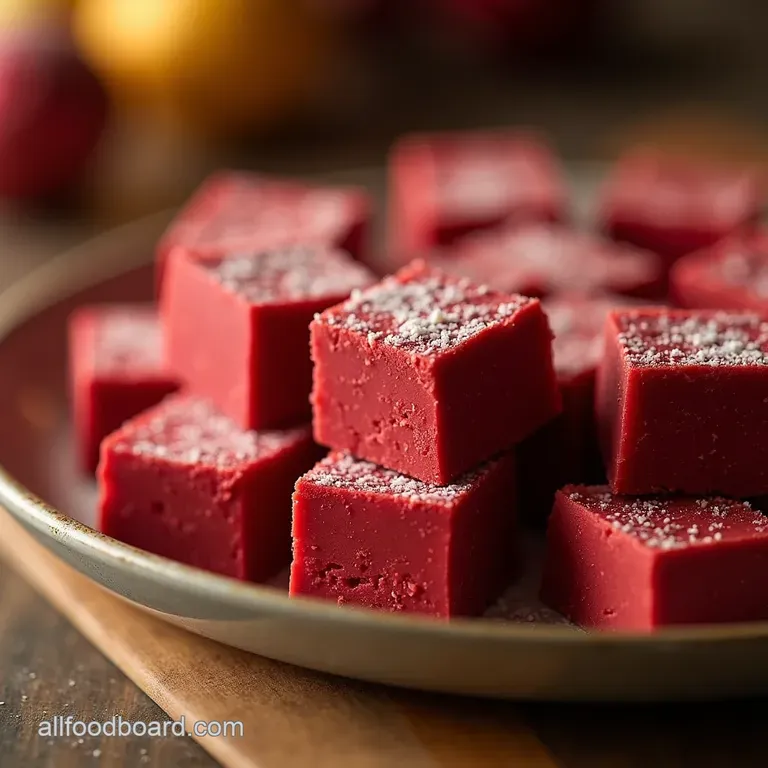
The Art of the Clean Cut: Presentation Pointers
The final presentation elevates this simple treat. Once the Red Velvet Fudge is completely chilled and firm, utilize the parchment overhangs to lift the entire block onto a cutting board. Use a very large, sharp knife a chef's knife works best.
For the absolute cleanest edges, which showcase the swirl beautifully, briefly dip the blade of your knife into a glass of hot water and dry it completely before making each cut. This small trick ensures the fudge releases cleanly without dragging.
Troubleshooting Common Fudge Failures: Troubleshooting Your Batch
Even with an Easy Homemade Fudge Recipe , slight variances can occur. If your fudge appears too soft or oily after chilling, it usually means there was too much fat or insufficient sugar/dairy solids, or that the heat during melting was too high.
Conversely, if the fudge is hard or crumbly (sugary), it may indicate that the mixture was overheated and crystallized. Should the cream cheese swirl look streaky or separate, it was likely added when the base was too hot, ‘cooking’ the dairy components.
Creative Variations on the Classic Red Velvet Fudge Formula
While this recipe stands powerfully on its own, its rich foundation invites creative enhancements. Many people adore topping this treat, often searching for ways to replicate the frosting found on a traditional Red Velvet Fudge Cake Recipe .
Optimal Storage Conditions for Longevity and Freshness
Due to the inclusion of cream cheese, proper storage is key. Store your finished Red Velvet Candy Bar pieces in an airtight container in the refrigerator. They will maintain their pristine texture and colour for up to two weeks, though they rarely last that long!
If freezing, wrap tightly in plastic wrap and foil; thaw overnight in the refrigerator before serving.
Enhancing the Experience: Cream Cheese Frosting Toppings
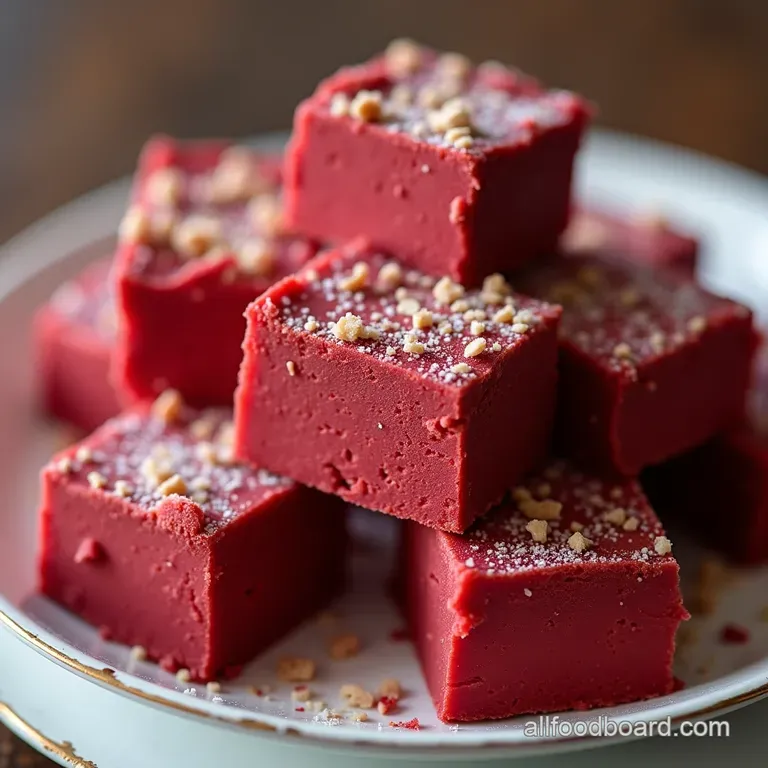
For those who truly crave that quintessential Red Velvet experience, you can certainly top this fudge. After slicing, pipe or spread a thin layer of standard cream cheese frosting (made with softened cream cheese, butter, powdered sugar, and vanilla) over the top of each square.
A small dusting of red velvet cake crumbs over the frosting provides a final flourish.
Nutritional Snapshot: Indulgence in Moderation
It’s important to approach this Homemade Fudge Recipe with an understanding of its richness. Given the white chocolate and condensed milk content, this is a definite indulgence, best enjoyed in moderation.
Expect a caloric density reflective of its pure, creamy composition, making those small, clean cut squares the perfect portion size.
Elevating the Cocoa Profile with Alternative Extracts
To subtly deepen the chocolate flavour without adding more cocoa, consider substituting the standard vanilla extract with a high-quality almond extract. A small half teaspoon of almond extract works wonderfully with the cocoa and vanilla notes already present, providing a sophisticated depth that moves this confection beyond simple sweetness into truly complex territory.
Recipe FAQs
Can I make this Red Velvet Fudge without using white chocolate chips?
While white chocolate is the cornerstone for that signature smooth texture and sweetness, you could try substituting it with high-quality melting wafers or a dairy-free white chocolate alternative.
Just be mindful that using dark or milk chocolate will drastically change the flavour profile, turning it away from the classic Red Velvet taste.
My fudge base seems grainy after heating what went wrong?
That’s usually a sign that the heat was too high, causing the chocolate to scorch, or perhaps the condensed milk boiled. Remember, this should be a very gentle melt over low heat think warm butter, not a rolling boil. Keep stirring constantly until everything is silky smooth before taking it off the stove.
How should I store my homemade Red Velvet Fudge to keep it fresh?
For the best texture, store the fudge in an airtight container at room temperature for up to a week, though you might want to eat it sooner! If your kitchen is particularly warm or you want it to last longer, the fridge is fine, but let it sit on the counter for about 15 minutes before serving so it softens up nicely.
The cream cheese swirl is lumpy; what’s the trick for a smooth marble effect?
The trick, my friend, is temperature. Your cream cheese absolutely must be softened to room temperature think squishy soft, not just slightly cool. Beat the cream cheese on its own until it’s fluffy before adding the icing sugar to ensure you get that smooth, luxurious texture for the swirl.
Can I make the Red Velvet Fudge ahead of time for a party?
Absolutely! This fudge is fantastic for making in advance; in fact, it tastes even better the next day once it's fully set. You can easily prepare the entire batch a couple of days before your event, slice it, and keep it chilled until you’re ready to serve.
Easy Red Velvet Fudge