The Ultimate 3Ingredient Midnight Marvel Truffles Nobake Magic
- Why These Midnight Marvels Outshine Other Desserts
- The Simplicity Secret Behind Incredible Oreo Truffles
- Gathering Your Few Essential Components
- The Process: Transforming Cookies into Rolling Perfection
- Pro Baker Secrets for Next-Level Results
- Variations and Customization for Every Craving
- Frequently Asked Questions
- 📝 Recipe Card
Why These Midnight Marvels Outshine Other Desserts
If you are searching for that singular dessert that manages to be deeply satisfying, incredibly easy to construct, and perpetually popular at every gathering, look no further than the humble Oreo Truffles.
These little spheres of pure chocolate joy bypass the oven entirely, making them the ultimate shortcut to decadent desserts. Unlike complex layered cakes or temperamental pastries, these Oreo Truffles No Bake treats rely on a brilliant alchemy of just a few pantry staples.
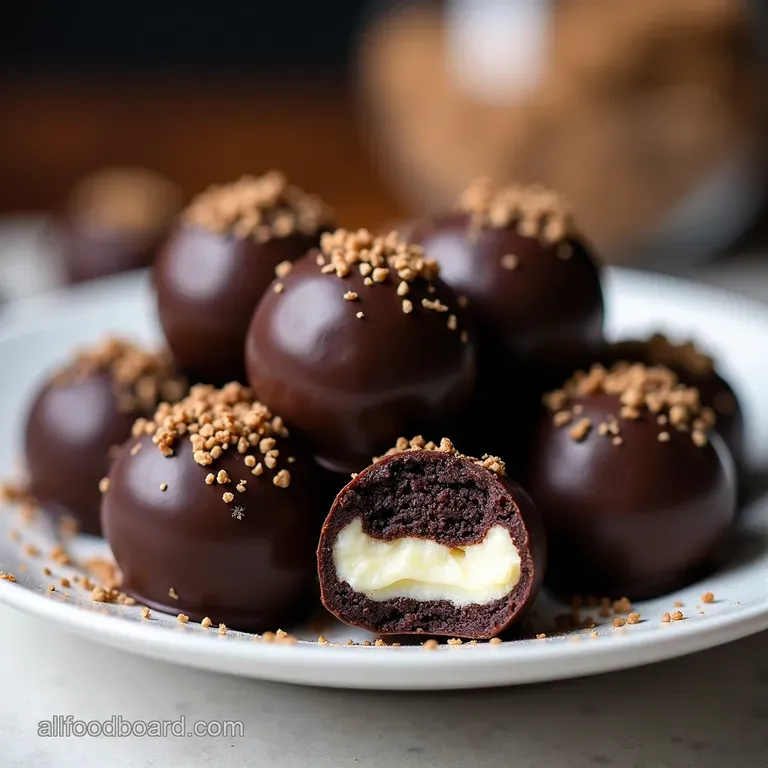
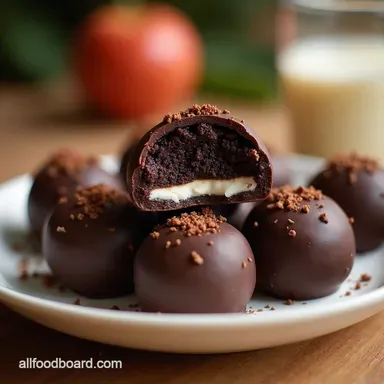
They deliver an intensely rich, fudgy centre wrapped in a crisp chocolate shell, earning their reputation as a must have for busy hosts and casual sweet toothed friends alike. We are diving into the secrets behind mastering these marvelous bites today.
The Simplicity Secret Behind Incredible Oreo Truffles
What makes this particular recipe so beloved across the baking (or rather, non-baking) community? It’s the streamlined approach that guarantees success, even if your kitchen skills are novice level.
An Introduction to No-Fuss Decadence
This recipe, often celebrated as one of the best Oreo Truffles 3 Ingredients wonders when omitting the coating, proves that complexity doesn't equate to flavour.
The beauty of these No Bake Truffles Easy preparation lies in eliminating the variables associated with traditional baking no leavening agents, no precise oven temperatures, and no worry about dry crumb.
We are simply binding crushed cookies with a rich dairy component to create an intensely flavourful base that requires only chilling time to firm up.
The Magic Ratio: Achieving Peak Richness
The structural integrity and phenomenal taste of these Cookies And Cream Truffles hinge on getting the core ingredients just right. The standard package of Oreo cookies, when paired with one full block of full fat cream cheese, creates a pliable yet firm dough.
This ratio ensures the final product isn't too soft or crumbly once chilled, providing that signature dense, almost ganache like texture when you bite in.
A Guaranteed Hit for Parties and Weeknights
Whether you are preparing for a large family gathering or simply need a quick, impressive treat after dinner, these are your go-to. They transition seamlessly from simple after school snacks to elegant additions on a Holiday Oreo Truffles platter.
Because they require zero oven time, they save precious energy and, more importantly, free up your oven for other cooking tasks when hosting.
Gathering Your Few Essential Components

Creating these fantastic Easy Oreo Truffles is less about a long shopping list and more about selecting the right quality for the few items you do need. Our goal is maximum flavour payoff with minimal effort.
The Core Trio: Oreos, Cream Cheese, and Coating Chocolate
For the truffle base, you will need approximately one standard package of original Oreo cookies and this is key you must use the entire cookie, cream filling included! This filling acts as a crucial binder and flavour enhancer. Next, softened, full fat cream cheese is non-negotiable.
Softening the cream cheese fully is vital; hard cream cheese will not mix properly, resulting in a lumpy, uneven base that fights you during the rolling stage. Finally, the chocolate for dipping provides the necessary contrasting shell.
Choosing the Ideal Dipping Chocolate for a Flawless Finish
The coating is what elevates these from simple balls to polished confectionery. While standard chocolate chips will melt, using high-quality semi sweet or dark chocolate (either good chips or a finely chopped bar) yields the best shine and snap.
To prevent the chocolate from seizing up or cracking upon setting, consider adding a small measure about a teaspoon of coconut oil or vegetable shortening to your melted batch. This addition lowers the melting point slightly, resulting in a silkier coating that adheres beautifully to the cold centre.
Equipment Checklist: What You Absolutely Need
While you don’t need specialized confectionery gear, a food processor is your best friend here; it pulverizes the cookies into the necessary fine crumb consistency in seconds. If you lack one, a sturdy zip-top bag and a rolling pin will serve as your manual grinder.
Beyond that, you’ll need a large mixing bowl, a baking sheet lined with parchment paper for setting, and a small fork or specialized dipping tool for maneuvering the balls in the melted chocolate.
Related Recipes Worth Trying
- Proper Showstopper Easy NoChurn Oreo Ice Cream Cake Recipe — Forget fiddly baking This ultimate NoChurn Oreo Ice Cream Cake is the easy dessert cake showstopper you need Dense Oreo biscuit crust and velvety fillinga...
- Bakery Style Chocolate Chip Cookies Oreo Copycat — Craving bakerystyle chocolate chip cookies These double chocolate chip cookies are like a gourmet Oreo but BETTER Easy recipe dark chocolate heaven Get baking
- Easy Vegan Oreo Truffles in 20 Minutes — Make delightful Vegan Oreo Truffles in just 20 minutes! These no-bake treats feature Oreos and vegan cream cheese. Perfect for dessert lovers!
The Process: Transforming Cookies into Rolling Perfection
The journey from crumbly ingredients to perfectly shaped spheres requires a methodical approach, prioritizing chilling time above all else.
Crushing Technique: From Cookie to Fine Crumb Base
The first active step involves thoroughly crushing those Oreos. Aim for a texture reminiscent of coarse sand or fine gravel. If the pieces are too large, they won't integrate smoothly with the cream cheese, leading to weak points in your truffle structure. Ensure every bit of the cookie and cream is finely processed.
Mixing Consistency: The Key to Non-Sticky Dough
Once the crumbs are ready, introduce the softened cream cheese. Mix this thoroughly either by hand or with a stand mixer fitted with the paddle attachment until the mixture transforms into a cohesive, uniform "dough." You should be able to press a handful together, and it should hold its shape without crumbling apart or sticking excessively to your hands.
This is the point where proper chilling becomes critical.
Rolling Firmly: Shaping Uniform, Professional Looking Spheres
Take the chilled dough (which should be much firmer now) and scoop uniform portions, usually about one tablespoon each. Roll these quickly and firmly between your palms to create smooth balls, aiming for consistency in size so they all look polished when finished.
Place these perfectly shaped balls onto your parchment lined sheet.
The Quick Chill: Ensuring Proper Setup Before Dipping
Before these little dough balls meet the warm chocolate, they absolutely must be cold. Return the tray of shaped truffles to the refrigerator for at least 30 minutes.
This ensures that when they enter the melted coating, the temperature difference is significant, causing the chocolate to set rapidly and thinly around the cold centre.
Pro Baker Secrets for Next Level Results
Mastering these Cream Cheese Oreo Truffles involves a few insider tips that elevate the final presentation from homemade to gourmet. The secret lies in temperature management and handling the chocolate correctly. When melting your coating chocolate, do so slowly.
If microwaving, use short 15-second bursts, stirring thoroughly between each interval. You want the chocolate perfectly smooth, without any scorching. When dipping, work quickly, submerging the cold ball completely, then lifting it out and gently tapping the fork against the side of the bowl.
This gentle agitation encourages excess chocolate to drip away, leaving a beautiful, thin shell rather than a thick, gloppy coating.
Variations and Customization for Every Craving
While the classic Oreo Truffles Recipe is divine in its simplicity, these treats are wonderfully adaptable, allowing you to tailor them for different seasons or personal preferences.
Troubleshooting: Why Your Truffle Mixture Might Be Too Soft
If your base dough seems too soft or oily after mixing, it generally means one of two things: either your cream cheese wasn't cold enough when you started (leading to premature melting) or you didn't chill the dough long enough before rolling.
The solution is simple: return the entire bowl of mixture to the refrigerator for another 45 minutes to an hour. Cold is your friend; the colder the base, the easier it is to handle and dip.
Optimal Storage: Keeping These Treats Fresh for Days
These truffles store incredibly well, making them perfect for making ahead of time. Store the finished, set Oreo Truffles in an airtight container. They can be kept in the refrigerator for up to two weeks, where they firm up even further, becoming wonderfully dense.
For long term storage, they freeze beautifully for up to three months; just ensure they are sealed well to prevent freezer burn.
Creative Coatings Beyond Plain Chocolate (Sprinkles & Drizzles)
While the dark chocolate exterior is stunning, feel free to experiment. Melted white chocolate or peanut butter baking chips make fantastic alternate coatings. Once dipped, you can instantly apply finishing touches.
Consider rolling the wet chocolate in finely crushed pecans, using coloured sanding sugar for a festive flair, or, for a truly professional look, letting the primary coating set halfway, then drizzling contrasting melted chocolate over the top using a fork or piping bag before the final chill.

Frequently Asked Questions
My Oreo Truffles mixture is too crumbly to roll into balls what went wrong?
This usually happens if your cream cheese wasn't fully softened, or perhaps your Oreo crumbs were too dry. Make sure the cream cheese is genuinely pliable, almost room temperature.
If it's still too dry, try adding just a tiny splash (half a teaspoon at a time) of milk or softened butter until it just holds together when squeezed.
How long do these Oreo Truffles last, and should I keep them in the fridge?
Since they contain cream cheese, they absolutely need to be stored in an airtight container in the refrigerator. They’ll keep perfectly well for about 10 to 14 days, though they rarely last that long in our house!
For the best texture, take them out about 15 minutes before serving so the chocolate shell isn't rock hard.
Why is my melted chocolate coating cracking when it hardens?
The primary culprit is temperature shock! Make sure your chilled truffle balls are extremely cold when they hit the melted chocolate; this helps the coating set quickly. Also, adding a tiny bit of coconut oil or shortening (as mentioned in the recipe) helps keep the chocolate flexible and less prone to cracking as it shrinks.
Can I freeze leftover Oreo Truffles, and what’s the best way to do it?
Yes, these freeze brilliantly, making them fantastic for prepping ahead for parties! Simply place the finished, set truffles on a parchment lined tray and freeze until solid, then transfer them to a freezer safe bag or container.
They should be good for up to three months, tasting just as brilliant as the day you made them.
I’m not a massive fan of dark chocolate; what’s a good alternative coating?
You’re in luck, as these are rather versatile! White chocolate provides a lovely sweet contrast, especially if you drizzle them with a bit of melted dark chocolate afterwards for decoration.
Alternatively, melted peanut butter baking chips make a fantastic, decadent coating that pairs beautifully with the Oreo base.
Easy 3ingredient Oreo Truffles
Ingredients:
Instructions:
Nutrition Facts:
| Calories | 33 kcal |
|---|---|
| Protein | 0.4 g |
| Fat | 2.4 g |
| Carbs | 2.8 g |
| Fiber | 0.4 g |
| Sodium | 45 mg |
