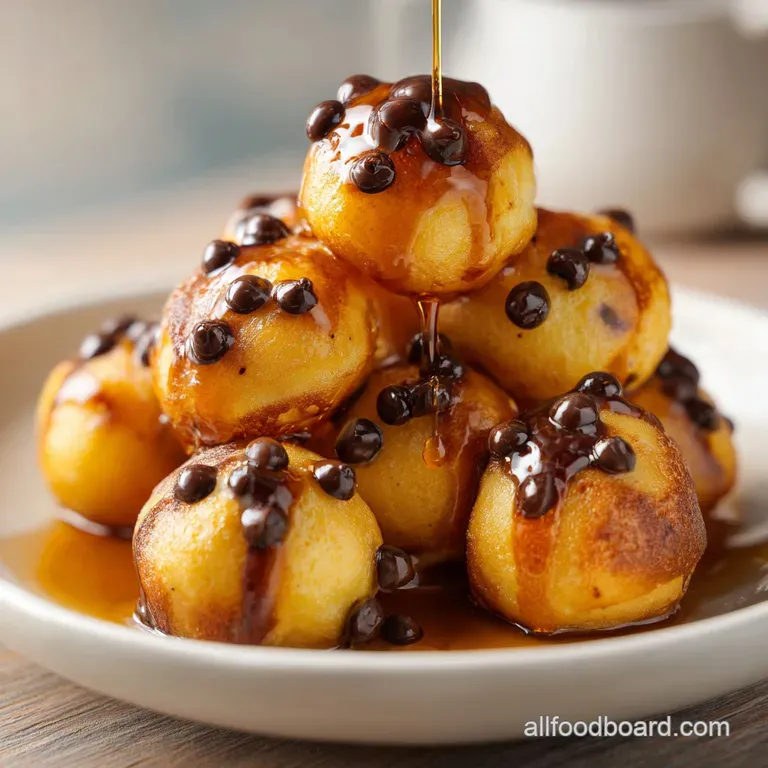
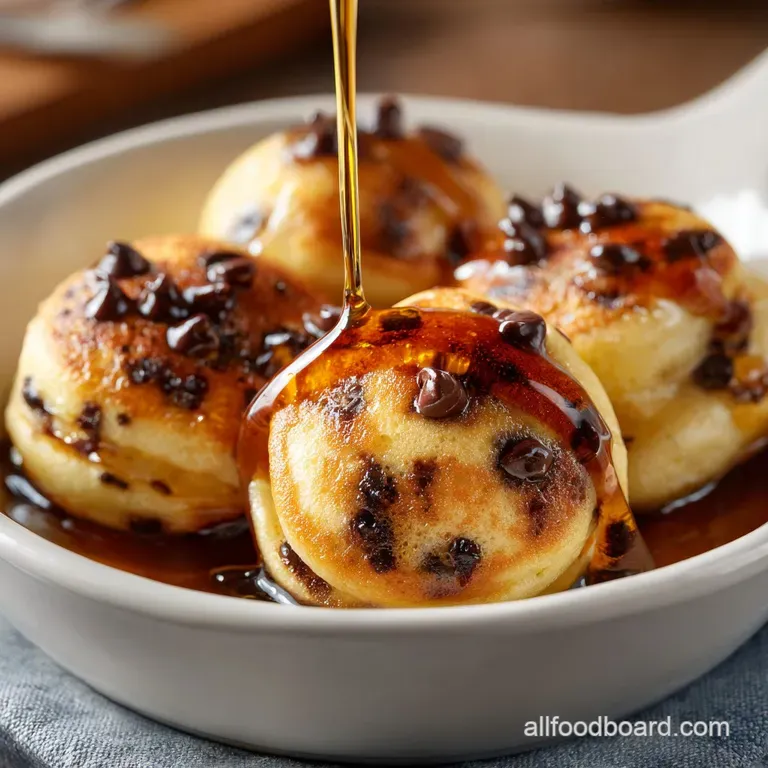
Chocolate Chip Pancake Poppers: Better-Than-Brunch
- Time:10 minutes active + 15 minutes baking = Total 25 minutes
- Flavor/Texture Hook: Buttery, springy crumbs with molten chocolate pockets
- Perfect for: Lazy Sunday brunches, kid friendly snacks, or a quick sweet treat
Chocolate chip pancake poppers recipe
The smell of melted butter and warm vanilla hitting a hot oven is honestly my favorite part of the morning. I remember the first time I tried to make these for a family brunch, and it was a total disaster. I wanted the batter to be "smooth," so I whisked it until it was completely silky. The result?
Rubbery, dense little discs that felt more like erasers than pancakes. I actually had to hide the plate so no one would see my failure.
That mistake taught me the most important lesson about pancake batter: lumps are your best friend. Once I stopped overworking the dough and let the baking soda do the heavy lifting, these things turned into fluffy, golden clouds.
This chocolate chip pancake poppers recipe is the fix for anyone who has struggled with heavy, flat pancake bites in the past. We're going for a texture that's light, springy, and just barely set in the middle.
You can expect a treat that's easy to grab and go, without the mess of flipping twenty individual tiny pancakes on a griddle. It's the same comforting flavor of a classic stack, but in a bite sized form that's way more fun to eat.
Right then, let's get into how to make these without the rubbery texture I suffered through.
The Secret to Success
The real trick here isn't the ingredients, but the handling. When you mix flour and liquid, gluten starts to develop. Too much mixing means too much gluten, which is why my first batch felt like rubber. You want to stir just until the flour streaks vanish. If you see a few lumps the size of a pea, leave them alone!
They'll disappear during the bake, leaving you with a tender crumb.
For the best results, I always suggest checking Food Network’s baking essentials to make sure your baking powder and soda are still active. Old leaveners are the number one reason these poppers stay flat. Since we're using buttermilk, we have a natural acid that reacts with the baking soda to create those tiny air bubbles. This is very similar to the logic behind my homemade pancakes, but the oven environment changes how the heat hits the batter.
Let's look at how the cooking method changes the vibe of the final bite.
| Method | Time | Texture | Best For |
|---|---|---|---|
| Oven (Muffin Tin) | 15 mins | Springy, cake like | Large batches, parties |
| Stovetop (Griddle) | 8 mins | Crispy edges, flat | Small servings, traditional feel |
| Air Fryer | 10 mins | Slightly charred, dense | Ultra fast single servings |
Quick Recipe Specs
Before we dive into the gear, let's talk about the "why" behind the ingredients. I'm a curious cook, and I've found that understanding the mechanism helps me fix things on the fly.
- The Magic of the Rise
- - Acid Base Reaction
- The lactic acid in buttermilk reacts with baking soda to create carbon dioxide bubbles instantly.
- - Steam Power
- The melted butter and egg create steam in the 375°F oven, pushing the batter upward.
- - Protein Structure
- The egg binds everything together so the popper doesn't collapse once it leaves the heat.
- - Sugar Caramelization
- A small amount of sugar ensures the edges get that golden, shatter crisp finish.
And since we're talking about the build, here is how the main components actually behave in the pan.
| Ingredient | Science Role | Pro Secret |
|---|---|---|
| Buttermilk | Acidic tenderizer | Use full fat for a more velvety crumb |
| Baking Soda | Immediate lift | Sift it if you see clumps to avoid bitter spots |
| Mini Chips | Flavor pockets | Use mini chips so they don't weigh down the batter |
| Melted Butter | Fat/Moisture | Let it cool slightly so it doesn't scramble the egg |
What You'll Need
I've kept this list simple. Don't bother with expensive organic flours here, as standard all purpose is exactly what you need for that classic pancake structure.
- 1 cup (125g) all purpose flour Why this? Provides the necessary structure without being too heavy
- 2 tbsp (25g) granulated sugar Why this? Helps with browning and balances the buttermilk tang
- 1 tsp (5g) baking powder Why this? Gives a secondary, slower lift during baking
- 1/2 tsp (3g) baking soda Why this? Reacts with buttermilk for immediate fluffiness
- 1/4 tsp (1.5g) salt Why this? Cuts through the sweetness of the chocolate
- 3/4 cup (180ml) buttermilk Why this? Adds tang and activates the leavening
- 1 large (50g) egg Why this? Adds richness and helps the poppers hold their shape
- 2 tbsp (28g) melted unsalted butter Why this? For that classic buttery pancake flavor
- 1/2 tsp (2.5ml) vanilla extract Why this? Deepens the chocolate notes
- 1/2 cup (90g) mini semi sweet chocolate chips Why this? Mini size prevents the batter from sinking
If you're out of buttermilk, don't panic. You can make a quick version by adding a tablespoon of lemon juice to regular milk and letting it sit for 5 minutes. It's not quite the same, but it works in a pinch.
| Original Ingredient | Substitute | Why It Works |
|---|---|---|
| Buttermilk (3/4 cup) | Milk + Lemon Juice | Mimics the acidity. Note: Slightly less creamy |
| All Purpose Flour | 1:1 gluten-free Blend | Works well for structure. Note: Texture is slightly grainier |
| Butter (2 tbsp) | Coconut Oil (melted) | Similar fat content. Note: Adds a subtle coconut hint |
| Mini Chocolate Chips | Chopped Dark Chocolate | High cocoa content. Note: Larger chunks may sink more |
Required Kitchen Gear
You don't need a professional kitchen for this, but a few specific tools make it a breeze. I use a standard 24 count mini muffin tin. If you don't have one, you can use a regular muffin tin, but you'll have to increase the bake time by about 5-7 minutes and the texture will be more like a muffin than a popper.
I highly recommend using a silicone spatula for the folding process. A whisk is great for the initial wet ingredients, but once the flour goes in, put the whisk away. Using a spatula allows you to gently "fold" the chocolate chips in without deflating the air bubbles we just worked so hard to create.
Also, grab some non stick spray. Even if your pan is "non stick," these little guys have sugar and chocolate that can caramelize and stick to the edges. A quick spray ensures they pop right out.
The Cooking Process
Right then, let's get these in the oven. Follow these steps closely, especially the part about the lumps!
- Preheat oven to 375°F (190°C) and grease a 24 count mini muffin tin with non stick spray or melted butter. Note: Preheating is key for the immediate rise.
- In a medium bowl, whisk together the flour, sugar, baking powder, baking soda, and salt.
- In a separate bowl, whisk together the egg, buttermilk, melted butter, and vanilla extract.
- Pour the wet ingredients into the dry ingredients and stir with a spatula just until the flour streaks disappear, leaving a few lumps. Note: Do not overmix or they will become rubbery!
- Gently fold in the mini semi sweet chocolate chips using a spatula.
- Spoon the batter into the mini muffin tins, filling each approximately 3/4 full.
- Bake for 12–15 minutes until the edges are light golden brown and the tops spring back when touched.
- Allow to cool in the pan for 5 minutes before removing.
Chef's Note: If you want a really professional look, toss the mini chocolate chips in a tiny bit of flour before folding them in. This stops them from migrating to the bottom of the popper.
Mistakes and Troubleshooting
Even with a simple chocolate chip pancake poppers recipe, things can go sideways. Usually, it's a temperature or mixing issue. If your poppers are flat, you might have waited too long to put them in the oven.
The reaction between the buttermilk and soda starts the second they touch, so once you mix, get them in the heat!
If you find the chocolate is leaking out and burning on the bottom of the pan, you're likely filling the tins too high. Stick to that 3/4 mark to give the batter room to climb. For more precision on baking times, America’s Test Kitchen often emphasizes that oven hotspots can affect small bakes, so rotate your pan halfway through.
| Issue | Solution |
|---|---|
| Why Your Poppers Are Rubbery | This happens when you overmix the batter. The gluten develops too much, turning a fluffy pancake into a chewy bread. |
| Why Your Poppers Sank | This is usually due to too large chocolate chips or too much leavening. The batter can't support the weight of big chunks. |
| Why They Stuck to the Pan | Either the pan wasn't greased enough, or you tried to remove them while they were still piping hot. |
- ✓ Use a spatula, not a whisk, for the final mix.
- ✓ Ensure buttermilk is room temperature for a better rise.
- ✓ Don't peek in the oven for the first 10 minutes.
- ✓ Let them cool for 5 mins to set the structure.
Fun Flavor Twists
Once you've mastered the base, you can really play around with this. If you want to go wild, you can check out this guide on pancake fillings for inspiration, though for poppers, it's easier to mix the fillings directly into the batter.
For a fruity version, swap half the chocolate chips for fresh blueberries. Just be careful not to overmix, or your poppers will turn a strange shade of purple. If you're feeling extra decadent, you could try making air fryer chocolate chip cookies as a side treat for a full blown dessert brunch.
Using a Shortcut Mix
If you're in a huge rush, you can use a pancake mix. Just subtract the flour, sugar, baking powder, and salt from the recipe. Use the mix as the base and still add the egg, buttermilk, and butter to make them "popper style" rather than just thin pancakes.
Transitioning to gluten-free
Use a high-quality 1:1 gluten-free flour blend. You might notice the batter is a bit thicker, so add an extra tablespoon of buttermilk if it feels like paste.
Storage and Leftovers
These are great because they don't go stale as quickly as a giant stack of pancakes.
Storage: Keep them in an airtight container in the fridge for up to 4 days. I find they stay surprisingly springy if kept sealed.
Freezing: You can freeze these for up to 2 months. Place them on a baking sheet to freeze individually first, then toss them into a freezer bag. This prevents them from clumping into one giant pancake ball.
Reheating: To get that "just baked" feel, pop them in the oven or toaster oven at 350°F for 3-5 minutes. Avoid the microwave if you can, as it can make them a bit gummy.
Zero Waste: If you have leftover batter, don't throw it away! Fry it in a small skillet as "silver dollar" pancakes for a quick snack. If you have leftover buttermilk, use it as a marinade for chicken the acid tenderizes the meat beautifully.
Serving Ideas
While these are great on their own, a little extra effort makes them feel special. I love serving them with a small bowl of warm maple syrup for dipping. It's much cleaner than pouring syrup over everything and making a mess.
Another pro move is to dust them with powdered sugar through a fine mesh sieve. It gives them a snowy, bakery style look that's a hit with kids. If you want something more sophisticated, serve them with a side of fresh raspberries and a dollop of whipped cream.
Because they're bite sized, they also work great on a brunch platter. Just arrange them in a circle around a bowl of syrup and some fresh fruit. Trust me, they'll disappear in minutes.
It's the kind of easy, family friendly food that makes you look like you spent hours in the kitchen when you actually just spent 25 minutes.
Recipe FAQs
Can I freeze these pancake poppers for later?
Yes, they freeze for up to 2 months. Freeze them individually on a baking sheet first before transferring them to a freezer bag to prevent clumping.
How to reheat pancake poppers to keep them fresh?
Pop them in the oven or toaster oven at 350°F for 3 5 minutes. This method restores the "just baked" feel much better than using a microwave.
Do I need to whisk the batter until it is completely smooth?
No, this is a common misconception. Stir only until flour streaks disappear and leave a few lumps for a tender texture. If you enjoyed mastering this gentle mixing technique here, see how it also ensures a soft crumb in our moist yellow cake.
How to prepare the mini muffin tin for baking?
Grease the tin with non-stick spray or melted butter. This ensures the poppers release easily after they have cooled in the pan for 5 minutes.
Can I use regular chocolate chips instead of mini chips?
Yes, but mini chips are recommended. Standard chips are heavier and more likely to sink to the bottom of the small tins during baking.
How to tell when the poppers are fully baked?
Look for light golden brown edges and tops that spring back when touched. They typically reach this state after 12 15 minutes at 375°F.
Is it true these go stale as quickly as a traditional stack of pancakes?
No, this is a common misconception. These poppers stay surprisingly springy for up to 4 days if kept in an airtight container in the fridge.
Chocolate Chip Pancake Poppers

