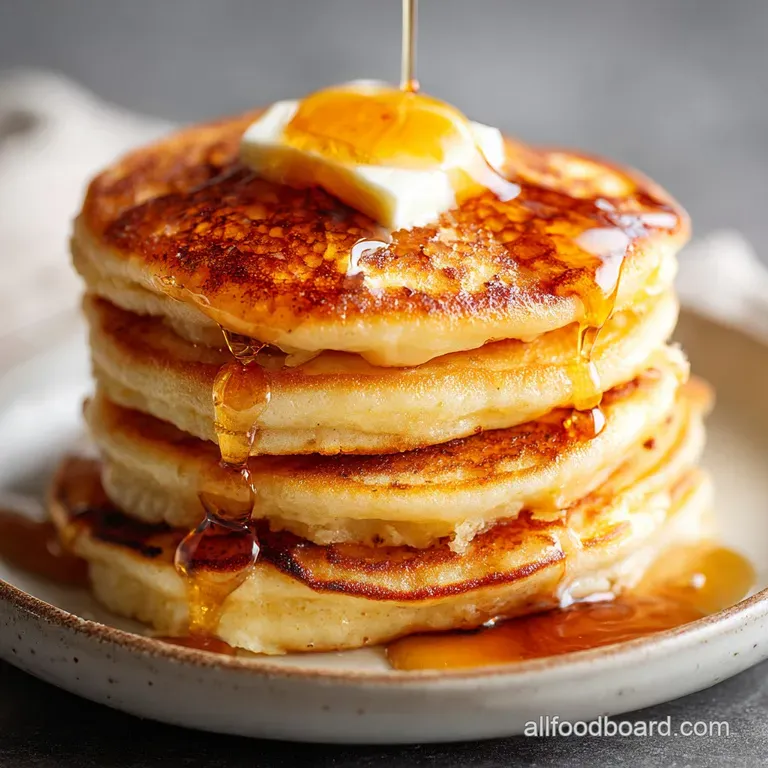
Homemade Pancakes: Fluffy and Golden
- Time:10 minutes prep + 15 minutes cook = Total 25 minutes
- Flavor/Texture Hook: Golden brown edges with a velvety, tender center
- Perfect for: Lazy Sunday mornings or a quick family treat
- Making Fluffy Homemade Pancakes Every Time
- What Makes Them Truly Fluffy
- Cooking Method Comparison
- The Pantry Essentials List
- Tools for the Best Sizzle
- The Step-by-Step Cooking Flow
- Fixing Common Batter Blunders
- Easy Flavor and Diet Swaps
- Keeping Leftovers Fresh
- Best Sides for Breakfast
- High in Sodium
- Recipe FAQs
- 📝 Recipe Card
Making Fluffy Homemade Pancakes Every Time
That first sssss sound when the batter hits the hot, buttered skillet is practically a morning alarm for my whole house. There's something about that specific sizzle that just screams "weekend," regardless of what day it actually is.
I remember the first time I tried making these. I was so worried about the batter being "messy" that I whisked it until it was completely smooth, like a thick paint. The result? Rubber discs. They weren't pancakes; they were basically savory frisbees.
It took a few ruined breakfasts to realize that the lumps are actually your best friend.
Once I learned to just stop mixing, everything changed. These Homemade Pancakes became my go to because they don't require fancy equipment or weird ingredients. It's just simple pantry staples handled with a bit of patience and a lot of butter.
Trust me, once you get that first golden brown flip right, you'll never go back to the boxed stuff.
What Makes Them Truly Fluffy
Right then, let's talk about what's actually happening in the pan. It's not magic, just a few simple tricks that keep things from getting dense.
- Air Trapping: Leaving the batter lumpy prevents too much gluten from developing, which keeps the texture tender.
- Bubble Action: Baking powder creates carbon dioxide gas, which expands when it hits the heat to lift the batter.
- Fat Barrier: Melted butter coats the flour particles, ensuring the crumb stays velvety instead of chewy.
- Temperature Shock: A hot pan instantly sets the bottom, creating those tiny internal pockets of air.
Cooking Method Comparison
Before you start, you might wonder if the stove is the only way. I've tried a few things, and here is how they stack up.
| Method | Time | Texture | Best For |
|---|---|---|---|
| Stovetop | 15 min | Crispy edges | Daily breakfast |
| Oven | 20 min | Uniform rise | Large crowds |
| Griddle | 12 min | Perfectly round | Batch cooking |
It's a bit more effort to preheat an oven, but for a party, it's a lifesaver. For most of us, the skillet is where the magic happens.
The Pantry Essentials List
For the best Homemade Pancakes, the quality of your butter and milk really matters. I always use full fat milk because the extra fat contributes to that rich, melt in-your mouth feel.
The Dry Base
- 1 ½ cups (190g) all purpose flour Why this? Provides the necessary structure without being too heavy
- 3 tbsp (38g) granulated sugar Why this? Helps with the golden brown color through caramelization
- 1 tbsp (12g) baking powder Why this? The primary lift for that cloud like height
- ½ tsp (3g) salt Why this? Balances the sweetness and enhances all flavors
The Wet Mix
- 1 ¼ cups (300ml) milk Why this? Hydrates the flour and creates the batter consistency
- 1 large egg Why this? Acts as a binder and adds a bit of richness
- 3 tbsp (42g) melted butter, slightly cooled Why this? Adds a nutty flavor and prevents sticking
- 1 tsp (5ml) vanilla extract Why this? Adds a warm, aromatic depth to the scent
Ingredient Swaps
| Original Ingredient | Substitute | Why It Works |
|---|---|---|
| All purpose Flour | Whole Wheat Flour | Heartier flavor. Note: Makes a denser, less fluffy pancake |
| Milk | Almond Milk | dairy-free. Note: Slightly thinner consistency and nuttier taste |
| Melted Butter | Melted Coconut Oil | Vegan friendly. Note: Adds a subtle tropical hint |
Choosing the right substitute depends on your goal. If you're looking for a more hearty version, whole wheat works, but you'll lose some of that signature airiness.
Tools for the Best Sizzle
You don't need a professional kitchen, but a few specific tools make the process a lot smoother. I personally swear by a heavy bottomed non stick skillet, as it distributes heat more evenly than thin pans.
A large mixing bowl is essential so you have plenty of room to fold the wet and dry ingredients without splashing. I also recommend a small jug for the wet ingredients; it makes pouring them into the flour much cleaner.
For flipping, a thin, flexible spatula is a must so you can slide under the pancake without breaking the surface.
If you have an electric griddle, that's even better for making a big batch of Homemade Pancakes at once. Otherwise, a 12 inch skillet is the sweet spot for size. Just make sure your heat source is steady.
The step-by-step Cooking Flow
Right then, let's get into the actual process. I like to think of this in three phases: the prep, the mix, and the sizzle. This flow ensures you aren't rushing when the pan is hot.
Phase 1: The Rapid Prep
- Whisk the all purpose flour, granulated sugar, baking powder, and salt in a large bowl until combined. Note: This ensures the baking powder is evenly distributed so you don't get giant holes in some pancakes and flat spots in others.
- In a separate small jug or bowl, whisk together the egg, milk, melted butter, and vanilla extract.
Phase 2: The Minimalist Mix
- Pour the wet ingredients into the dry ingredient mixture.
- Use a whisk or spatula to fold the mixture together until just combined. Stop immediately when flour streaks disappear, leaving the batter slightly lumpy to ensure fluffiness. Note: Over mixing creates gluten, which makes the pancakes tough.
Phase 3: The Sizzle & Flip
- Heat a 12 inch non stick skillet or electric griddle over medium heat.
- Pour ¼ cup of batter per pancake onto the hot surface.
- Wait for bubbles to form on the surface and the edges to look set and matte, then flip once. until you see bubbles popping and edges drying
- Cook for another 1-2 minutes until golden brown on both sides.
Chef's Note: To get that perfectly round shape, pour the batter from a height of about 3 inches directly into the center of the pan. Let it spread naturally rather than pushing it around with a spoon.
Fixing Common Batter Blunders
Even experienced cooks hit a snag occasionally. Usually, the issue is either temperature or timing. If you've ever had a pancake that looked burnt on the outside but was raw in the middle, your pan was likely too hot.
Solving Flat Pancakes
If your Homemade Pancakes aren't rising, your baking powder might be old. Check the expiration date or try the "hot water test" by adding a pinch of powder to boiling water; if it doesn't fizz instantly, toss it.
Solving Rubbery Texture
This almost always comes from over mixing. If the batter is perfectly smooth, you've gone too far. The goal is a "shaggy" batter that just barely holds together.
Solving Uneven Browning
This usually happens when the pan isn't preheated properly or you're using too little fat. Make sure the pan is hot before the first pour.
| Problem | Root Cause | Solution |
|---|---|---|
| Burnt outside, raw inside | Heat too high | Lower heat to medium low |
| Pancakes sticking | Pan not hot enough | Wait for oil to shimmer |
| Too thin/spreading | Batter too wet | Add 1 tbsp flour at a time |
Preventive Success Checklist
- ✓ Check baking powder freshness before starting.
- ✓ Use a medium heat setting; avoid "high" to prevent scorching.
- ✓ Stop mixing the moment the flour streaks vanish.
- ✓ Use a medium sized scoop (1/4 cup) for consistent sizing.
- ✓ Flip only once per pancake to preserve air pockets.
Easy Flavor and Diet Swaps
One of the best things about Homemade Pancakes is how easy they are to customize. You can keep the base the same and just add a handful of blueberries or chocolate chips directly onto the batter after you pour it into the pan.
For a bit more depth, I sometimes add a pinch of cinnamon or nutmeg to the dry ingredients. If you want a more indulgent treat, try replacing a tablespoon of the sugar with a drizzle of maple syrup inside the batter.
If you're looking for a different breakfast vibe, these pair perfectly with my homemade breakfast biscuits, creating a full on brunch spread. For those wanting a healthier twist, you can swap the sugar for a mashed ripe banana, though the pancakes will be slightly more moist and less browned.
Keeping Leftovers Fresh
Believe it or not, Homemade Pancakes actually reheat quite well if you do it right. The biggest mistake is putting them in the microwave for too long, which can make them rubbery.
Fridge and Freezer
Keep any leftovers in an airtight container in the fridge for up to 3 days. For longer storage, freeze them in a single layer on a baking sheet first, then transfer them to a freezer bag. They'll stay fresh for up to 2 months.
Reheating Tips
To bring back that golden brown exterior, use a toaster or a dry skillet over medium heat. This crisps up the edges while heating the center. If you must use a microwave, wrap them in a damp paper towel and heat in 15 second bursts.
Zero Waste Ideas
If you have a bit of leftover batter, don't throw it away! You can add an extra tablespoon of melted butter and a pinch of baking powder to turn it into waffle batter. Or, just fry the remaining bits as "pancake chips" for a fun snack for the kids.
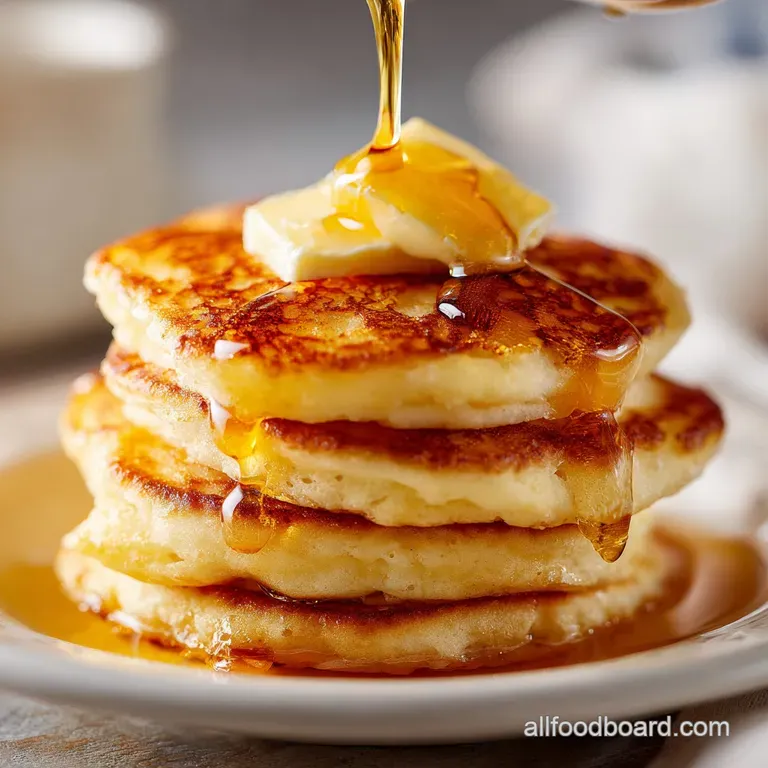
Best Sides for Breakfast
While maple syrup is the classic choice, you can really change the mood of the meal with a few different toppings. I love a dollop of Greek yogurt and a drizzle of honey for a tangier start to the morning.
For something more savory, try serving them with crispy bacon or sautéed spinach. The saltiness of the meat cuts through the sweetness of the batter beautifully. If you're feeling fancy, some macerated strawberries (just berries and a bit of sugar sitting for 10 minutes) add a fresh, acidic pop.
If you find yourself craving more sweets, you can check out a fluffy pancake recipe that focuses on different additions. The key is to balance the rich, buttery taste of the pancake with something bright or salty.
High in Sodium
1073 mg 1073 mg of sodium per serving (47% 47% of daily value)
The American Heart Association recommends a daily limit of 2,300 mg of sodium to help manage blood pressure and heart health.
Tips to Reduce Sodium
-
Eliminate Added Salt-25%
Remove the ½ tsp of salt entirely. In sweet recipes, the flour and butter provide enough structure and flavor that salt is often optional.
-
Use Sodium Free Baking Powder-20%
Replace standard baking powder with a sodium free baking powder alternative to cut a significant amount of hidden sodium.
-
Switch to Unsalted Butter-15%
Use unsalted butter instead of salted butter to ensure you have total control over the sodium content.
-
Choose Low-Sodium Milk-5%
Opt for skim milk or an unsweetened almond milk, which can sometimes have lower natural sodium levels than whole milk.
-
Boost Flavor with Spices
Add a pinch of cinnamon or ground nutmeg to enhance the aromatic profile of the batter without adding any sodium.
Recipe FAQs
What are the ingredients for pancakes made from scratch?
Flour, sugar, baking powder, salt, milk, egg, melted butter, and vanilla extract. These simple pantry staples combine to create a classic, fluffy breakfast.
How to make pancakes at home with 3 ingredients?
Use the full list of provided ingredients for the best results. Omitting the baking powder or egg removes the necessary leavening and structure, resulting in flat pancakes.
How do I make basic pancakes?
Whisk dry ingredients, fold in the wet mixture, and cook on a medium heat skillet. Pour 1/4 cup of batter and flip once bubbles form and the edges look matte.
Can heart patients eat pancakes?
Consult a doctor first. Because the recipe includes butter and milk, a medical professional should advise on portion sizes based on specific dietary needs.
Why are my pancakes flat?
You likely overmixed the batter. Overworking the flour develops too much gluten, which prevents the baking powder from creating a light, airy lift.
When is the best time to flip the pancake?
Flip once bubbles form on the surface and the edges look set and matte. This ensures the first side is fully cooked and golden brown before turning.
Is it true that whisking the batter until completely smooth makes them fluffier?
No, this is a common misconception. Overmixing creates dense, rubbery textures; leaving the batter lumpy traps the air. If you enjoyed mastering this texture control, see how the same principle of minimal handling works in our no knead bread.
Fluffy Homemade Pancakes

