Brown Butter in 14 Minutes

- Time: 2 min active + 12 min cooking
- Flavor & Texture: Nutty, rich, and slightly grainy from toasted solids
- Perfect for: Thanksgiving menu additions or quick baking upgrades
Imagine a chilly November evening with the house full of family. You're putting the final touches on your Thanksgiving sides, and the kitchen starts to smell like toasted hazelnuts. It's the kind of scent that makes everyone wander into the room to see what's happening.
This process is quick and doesn't require any fancy tools. Using this brown butter in your cooking adds a layer of complexity that normally takes hours to develop.
It works perfectly for everything from cookies to roasted vegetables. You'll end up with a chestnut brown liquid that transforms a basic recipe into something that tastes professional.
Key Techniques Explained
- Toasting Solids: Heating the milk solids in the butter creates a nutty aroma and a darker color.
- Water Evaporation: As water leaves the butter, the fats concentrate. This creates a rich, velvety mouthfeel.
| Method | Time | Texture | Best For |
|---|---|---|---|
| Stovetop (Classic) | 12 mins | Nutty with toasted bits | Baking, sauces, sides |
| Microwave (Fast) | 4 mins | Smooth and oily | Quick melting, basic richness |
It's a trade-off. The stovetop method gives you the actual "browned" flavor from the toasted solids, while the microwave is mostly for speed and doesn't brown the solids nearly as well.
What You'll Need
| Ingredient | Role | If You Don't Have It |
|---|---|---|
| Unsalted Butter | Provides fat and milk solids | Salted butter (Works, but you can't control the salt level) |
I prefer unsalted butter here so the salt doesn't burn or overpower the nutty notes.
- 1 cup (227g) unsalted butter Why this? Unsalted butter allows you to season the final dish exactly how you like.
Recipe Specs
- Prep time: 2 minutes
- Cook time: 12 minutes
- Total time: 14 minutes
- Yield: ¾ cup (12 servings)
Equipment Needed
- Light-colored saucepan (makes it easier to see the color change)
- Whisk or heat-resistant spatula
- Heatproof jar or bowl
Step-by-step Instructions
Melting the Butter
Place 1 cup (227g) unsalted butter in a light-colored saucepan over medium heat. Allow the butter to melt completely, stirring occasionally to ensure the edges do not overheat.

Managing the Foam
As the butter reaches its boiling point and begins to foam heavily, whisk or stir constantly. Note: This prevents the milk solids from clumping or burning in one spot.
Achieving the Deep golden brown Hue
Continue cooking as the bubbling subsides and the liquid turns golden yellow, then rich brown brown. Cook until the aroma smells like toasted hazelnuts.

Stopping the Process
Immediately pour the butter, including all toasted brown bits, into a heatproof jar or bowl. This stops the cooking process and prevents the butter from burning.
Avoiding Common Pitfalls
When it burns
If the butter smells acrid or the solids turn black, it's overcooked. Burnt flavor cannot be removed. Throw it out and start again using a slightly lower heat to give yourself more time.
Lack of color
If the butter is yellow but doesn't smell nutty, it hasn't reached the right temperature. Keep stirring and wait for the foam to settle. The color change happens quickly at the end.
Managing excessive foam
The foaming is just water evaporating. If it bubbles over, just turn the heat down slightly. Constant whisking keeps the foam under control.
Keeping It Fresh
To keep it fresh for up to 2 weeks, place the butter in an airtight glass jar and refrigerate. It will harden into a block, so just melt it gently on the stove when you need it.
For longer storage, pour it into ice cube trays and freeze for up to 3 months. This is a wonderful way to prep for a big holiday meal. Use low heat when reheating to prevent burning the toasted solids.
Pairing Ideas

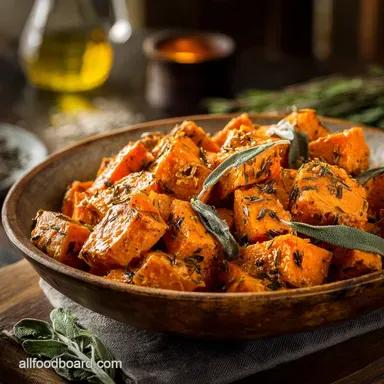
I love using this for "Elegant Sweet Potatoes with brown butter and Pecan Crumble". It also works brilliantly drizzled over steamed fish or tossed with sage and pasta.
Make It Your Own
To transform this into a brown butter sauce, simply stir in a bit of lemon juice or a dash of cinnamon at the final stage. For baking, incorporating this brown butter into chocolate chip cookies will provide a richer, deeper flavor.
Before You Start Cooking
Why make brown butter?
It adds a rich, nutty flavor to your cooking.
Tip: use it in cookies or sauces for a deeper taste.
What is its traditional name?
It is known as beurre noisette in French.
Tip: this translates literally to hazelnut butter.
How long does it stay fresh?
Keep it in the refrigerator for up to two weeks.
Tip: store it in a glass jar to preserve the aroma.
Can you purchase it pre-made?
Some specialty stores sell it, though making it is faster.
Tip: check the gourmet butter section of your grocer.
How do I brown the butter?
Melt unsalted butter in a light-colored saucepan over medium heat.
Tip: whisk constantly once it foams to prevent burning.
Does the butter always foam?
The butter foams as the water evaporates from the fat.
Tip: this is the sign that the milk solids are beginning to toast.
Which pan works best for this?
A light-colored saucepan allows you to see the color change clearly.
Tip: avoid dark pans as they hide the browning process.
Brown Butter in 14 Minutes