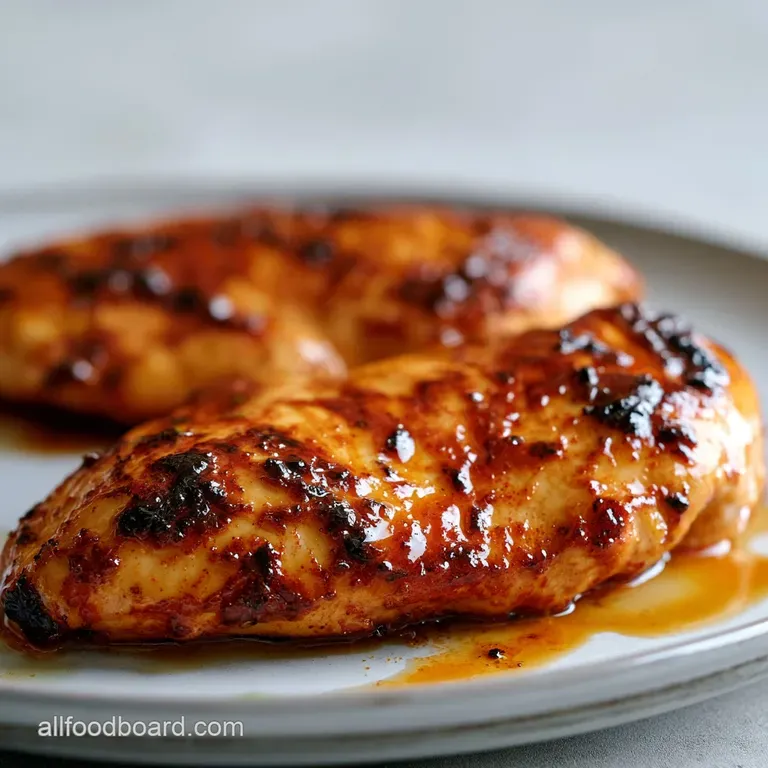
Air Fryer Chicken Breasts: Juicy and Tender
- Time: 5 min prep + 15 min cook + 5 min rest = Total 25 mins
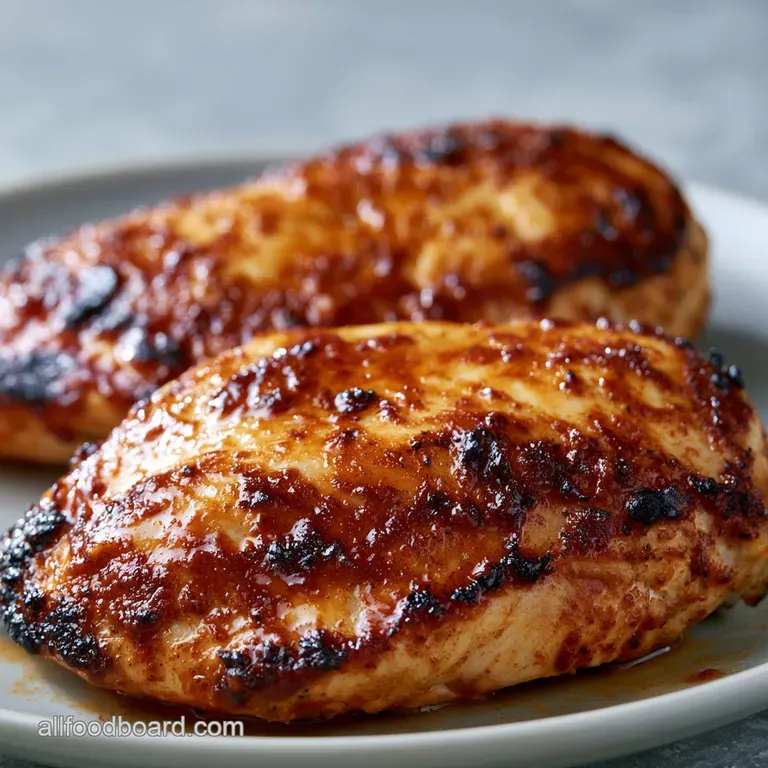
- Flavor/Texture Hook: Golden brown exterior with a velvety, juicy center
- Perfect for: Healthy weeknight dinners, high protein meal prep, and beginners
- Juicy Air Fryer Chicken Breasts
- Stop Overcooking Your Chicken
- Component Analysis
- The Budget Ingredient List
- Essential Kitchen Gear
- Step-by-Step Cooking Guide
- Fixing Common Cooking Errors
- Troubleshooting Common Issues
- Tasty Flavor Twist Ideas
- Fridge and Freezer Tips
- Best Side Dish Pairings
- Recipe FAQs
- 📝 Recipe Card
Ever wonder why restaurant chicken feels like it's melting in your mouth while the stuff we make at home often feels like chewing on a rubber band? I used to think it was some secret brine or a fancy oven, but it actually comes down to one annoying thing: the shape of the chicken.
I remember one Tuesday night when I just tossed two massive, uneven breasts into my fryer. The thin end was practically a charcoal briquette, but the thick part was still practically raw.
I almost gave up on the machine entirely until I realized that the air fryer is basically a high powered convection oven, and it doesn't play nice with uneven thickness.
Once I started flattening the meat, everything changed. Now, I can get a sizzle on the outside and a tender interior every single time. These Air Fryer Chicken Breasts are my go to because they're budget friendly and take almost no effort, but they taste like you actually spent an hour in the kitchen.
Juicy Air Fryer Chicken Breasts
Most people treat their air fryer like a microwave, just tossing things in and hoping for the best. But if you want a result that isn't dry, you have to treat the meat with a bit of respect. The secret isn't in a fancy marinade, it's in the prep.
When you use an air fryer, the heat is intense and focused. If your chicken is thick in the middle and thin at the edges, those edges are going to overcook long before the center hits a safe temperature. That's where the "pounding" comes in.
By leveling the meat to a uniform thickness, you're ensuring every single fiber of the protein cooks at the exact same rate.
But it's not just about the shape. A lot of people forget to pat the meat dry. If there's moisture on the surface, the air fryer spends the first five minutes steaming the chicken instead of searing it. You lose that golden crust and end up with something pale and rubbery.
Trust me on this, grab a paper towel and dry those breasts like your dinner depends on it.
Stop Overcooking Your Chicken
I've noticed a lot of "easy" recipes just tell you to cook for 20 minutes and call it a day. That's a recipe for disaster because every air fryer brand is slightly different. Some run hot, some run cool. The only way to guarantee a juicy result is to rely on the internal temp, not the timer.
- Uniform Thickness
- Pounding the meat prevents the edges from drying out while the center cooks.
- Surface Dryness
- Removing moisture allows the oil and spices to sear immediately, creating a crust.
- over High heat Circulation
- The rapid air movement mimics deep frying but uses a fraction of the oil.
- Carryover Cooking
- Resting the meat allows the temperature to stabilize, keeping the juices inside.
| Prep Style | Cook Time | Texture | Best For |
|---|---|---|---|
| Fresh (Pounded) | 12-15 mins | Velvety & Juicy | Daily meals |
| Shortcut (Sliced) | 8-10 mins | Firmer/Tighter | Salads/Tacos |
| Frozen (Thawed) | 15-18 mins | Slightly drier | Emergency meals |
Component Analysis
I don't use fancy ingredients here because this is a budget friendly meal, but each one has a job to do.
| Ingredient | Science Role | Pro Secret |
|---|---|---|
| Olive Oil | Heat Conductor | Helps the paprika bloom and stick to the meat |
| Paprika | Color & Flavor | Use smoked paprika for a "grilled" taste |
| Salt | Moisture Control | Draws out proteins to create a better sear |
| Garlic Powder | Flavor Depth | Doesn't burn as fast as fresh garlic in high heat |
The Budget Ingredient List
Right then, here is what you'll need. I've kept this simple so you can probably find everything in your pantry right now.
- 1.5 lb boneless skinless chicken breasts Why this? Lean protein that's affordable in bulk
- 1 tbsp olive oil Why this? High smoke point and neutral taste
- 1 tsp garlic powder Why this? Even coating and punchy flavor
- 1 tsp paprika Why this? Gives that deep golden color
- 1/2 tsp salt Why this? Essential for flavor penetration
- 1/4 tsp black pepper Why this? Adds a subtle bite
Smart Swaps for Your Budget:
| Original Ingredient | Substitute | Why It Works |
|---|---|---|
| Olive Oil (1 tbsp) | Avocado Oil (1 tbsp) | Higher smoke point. Note: Virtually tasteless |
| Paprika (1 tsp) | Chili Powder (1 tsp) | Similar color. Note: Adds a slight spicy kick |
| Salt (1/2 tsp) | Sea Salt (1/2 tsp) | Same function. Note: Coarser grains for texture |
If you're looking to switch things up, you might find that these breasts pair great with a side of roasted sweet potatoes, which adds a nice sweetness to balance the savory garlic rub.
Essential Kitchen Gear
You don't need a professional setup, but a couple of tools make this way easier. First, a meat mallet is your best friend. If you don't have one, a heavy rolling pin or even a sturdy skillet works. Just be gentle so you don't tear the meat.
Second, get yourself a digital meat thermometer. It's the only way to stop the guesswork. I've seen people lose a whole meal because they "felt" it was done, only to find out it was still raw in the middle. According to USDA food safety guidelines, poultry must reach 165°F to be safe.
Finally,, use parchment paper or a silicone liner if you hate cleaning the basket. Just make sure you don't cover the entire bottom, as the air needs to flow underneath the chicken to get that bottom side sizzle.
Step-by-step Cooking Guide
Let's crack on with the actual cooking. Follow these steps and you'll never have dry chicken again.
- Place the chicken breasts between two sheets of plastic wrap and use a meat mallet or rolling pin to gently pound the thicker end until it is a uniform thickness of about 3/4 inch. Note: This prevents the thin ends from overcooking
- Pat the chicken completely dry with paper towels. In a small bowl, mix the olive oil, garlic powder, paprika, salt, and black pepper.
- Rub the spice mixture evenly over all sides of the chicken to create a seal.
- Preheat the air fryer to 375°F (190°C). Place chicken breasts in the basket in a single layer without overlapping.
- Air fry for 12-15 minutes, flipping halfway through, until you see a golden brown crust and hear a slight sizzle.
- Use a thermometer to check that the internal temperature reaches exactly 165°F (74°C).
- Transfer chicken to a plate and cover loosely with foil.
- Let the meat rest for 5 minutes before slicing. Note: This keeps the juices from running out on the cutting board
Fixing Common Cooking Errors
Even the best of us mess up occasionally. The most common issue I see with Air Fryer Chicken Breasts is "The Paradox" - where the outside is burnt but the inside is cold. This almost always happens because the chicken wasn't pounded thin enough.
Troubleshooting Common Issues
| Issue | Solution |
|---|---|
| Chicken still dry | Usually, this is because it was cooked for too long or not rested. When you cook meat, the fibers tighten and push the juices to the center. If you cut it immediately, those juices just spray out, lea |
| Why didn't I get a golden crust | This happens if the chicken was damp when you added the oil. Moisture creates steam, and steam is the enemy of a crust. Always pat dry first. |
| I'm cooking from frozen | It's possible, but it's not the best way. I recommend thawing them in the fridge overnight. If you must go from frozen, lower the temp to 350°F and increase the time by about 5-8 minutes, but be warne |
Common Mistakes Checklist:
- ✓ Did I pound the chicken to 3/4 inch?
- ✓ Is the surface completely dry before oiling?
- ✓ Did I leave space between breasts for air flow?
- ✓ Did I let the meat rest for a full 5 minutes?
- ✓ Did I check the internal temp instead of relying on the timer?
Tasty Flavor Twist Ideas
Once you've got the basic technique down, you can basically put anything on these. Since we're keeping it budget friendly, you can use spices you already have.
The Lemon Pepper Twist: Swap the paprika for 1 tsp of cracked black pepper and squeeze half a lemon over the chicken immediately after it comes out of the fryer. The acidity cuts through the oil and makes the whole dish feel lighter.
The Buffalo Kick: Skip the paprika and garlic. Instead, toss the cooked chicken in a mixture of melted butter and hot sauce. It's basically a healthier version of wings. If you love a breaded feel, you can try making homemade chicken nuggets using a similar air fryer method.
The Sweet Glaze: Mix 1 tbsp of honey with a pinch of cayenne pepper. Brush this on for the last 2 minutes of cooking. The honey will caramelize under the high heat, giving you a sticky, sweet, and spicy crust that's absolutely addictive.
Fridge and Freezer Tips
If you're using this for meal prep, you're in luck. These breasts hold up surprisingly well. Store them in an airtight container in the fridge for up to 4 days.
To reheat without turning them into leather, don't use the microwave if you can help it. Pop them back in the air fryer at 350°F for 3-4 minutes. This refreshes the crust without overcooking the center.
For the freezer, you can freeze the cooked breasts for up to 3 months. Wrap them tightly in foil and then a freezer bag to prevent freezer burn. Thaw them in the fridge overnight before reheating.
Zero Waste Tip: Don't throw away the leftover spice rub in the bowl. If there's a bit left, toss it into some roasted cauliflower or potatoes. It's a great way to use every drop of oil and spice.
Best Side Dish Pairings
Since the chicken is quite lean, I like to pair it with something that has a bit more richness or a bright, fresh pop. A simple arugula salad with a lemon vinaigrette is great for a light lunch.
For a more filling family dinner, try a creamy mash or some steamed broccoli. If you're feeling fancy, a wild rice pilaf adds a nutty flavor that complements the garlic and paprika rub perfectly.
Decision Shortcut:
- If you want a light meal → Pair with a garden salad and lemon.
- If you want comfort food → Pair with mashed potatoes.
- If you're meal prepping → Pair with quinoa and steamed greens.
Recipe FAQs
How long should you do chicken breast in an air fryer?
Air fry for 12 15 minutes. Flip the chicken halfway through and ensure the internal temperature reaches exactly 165°F.
Can a diabetic eat baked chicken?
Yes, it is an excellent choice. Lean protein paired with simple spices helps maintain stable blood sugar levels.
How long should you air fry chicken at 375 degrees?
Air fry for 12 15 minutes. Pound the meat to a uniform 3/4 inch thickness first to ensure the center cooks without burning the edges.
Is air fried chicken good for cholesterol?
Yes, it is healthier than deep frying. Using olive oil significantly reduces saturated fat intake while keeping the meat moist.
Why is my air fryer chicken coming out dry?
You likely overcooked it or skipped the resting period. Let the chicken rest for 5 minutes under foil so the juices redistribute.
Is it true that pounding the chicken is unnecessary for even cooking?
No, this is a common misconception. Pounding the thicker end to 3/4 inch is the only way to prevent thin edges from overcooking.
What side dishes pair best with this chicken?
Fresh steamed greens or crispy potatoes work best. This pairs perfectly with loaded steak fries for a complete meal.
Air Fryer Chicken Breasts

