Mm Cookie Bars Ultimate Chewy Noroll Mm Bar Recipe
Unlocking the Secret to Perfectly Chewy MM Cookie Bars
I’m going to be straight with you: while I love a classic drop cookie, I think cookie bars are superior. They are less fuss, they travel better, and frankly, they guarantee that beautiful, thick, slightly gooey centre that we all crave. You know the part?
The bit right next to the crisp edge, but before the middle? That sweet spot.
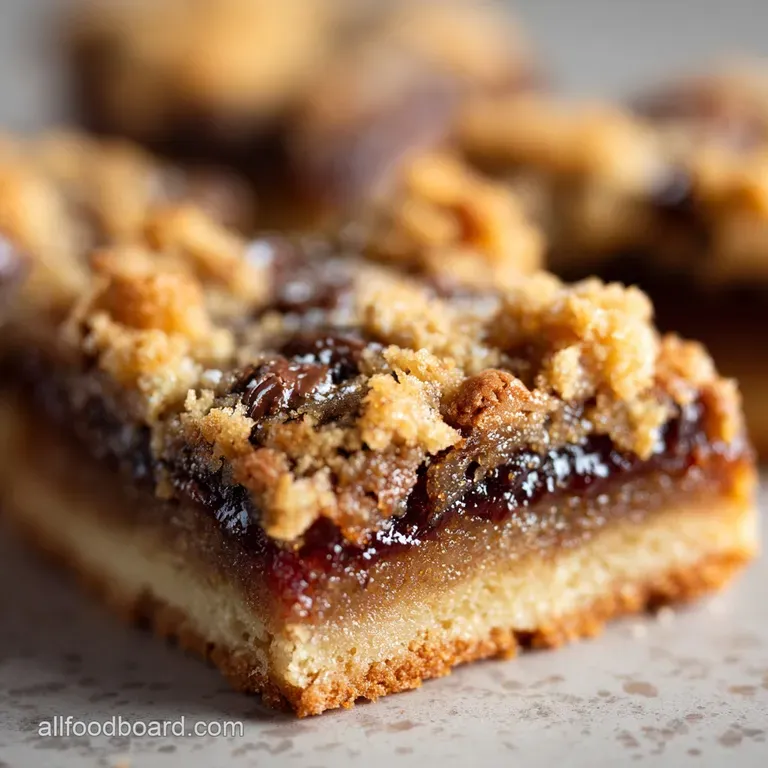
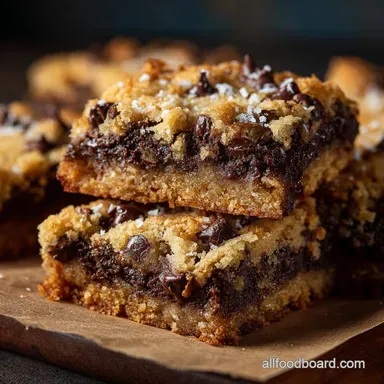
These MM Cookie Bars hit that spot every single time. We are talking about a rich, buttery base loaded with molasses flavour, absolutely packed with colourful, satisfying chocolate crunchies, and baked just until the point of perfection.
No rolling, no chilling for hours, no worrying about ten batches coming out unevenly baked. It's brilliant.
A Nostalgic Treat for Modern Bakers
MM Cookie Bars are the definition of bake sale nostalgia, but they fit perfectly into a busy weeknight kitchen. Maybe you’ve got a party coming up, or perhaps you just need a proper comfort food hit after a long day. This recipe is your reliable friend.
It asks for basic pantry ingredients butter, sugar, flour and the minimal effort is rewarded tenfold.
I stopped making individual cookies for gatherings years ago. Why? Because you spend an hour rotating trays, and the last batch always turns out burnt or underdone. Bars are easy. You press, you bake, you wait (the hardest part, trust me), and then you slice up instant joy. Right then, let’s crack on.
The Key Difference Between Bars and Traditional Drop Cookies
It all comes down to architecture. When you bake a single drop cookie, it spreads out, maximizing the surface area exposed to the heat. This often means you get crisp edges, but the centre might only be chewy if you pull it really early.
With bars, we are deliberately limiting the spread. By pressing the dough into a rectangular pan (especially a 9x13), the dough is forced to bake upwards and inwards. This creates a thermal barrier.
The edges set first, giving structure, but the dense centre takes longer to heat, allowing it to remain softer and moister while the sugar concentrates. That dense, moist middle is why MM Cookie Bars always win the chewy and texture battle.
Essential Ingredients for the Best Bar Base

Baking is chemistry, yes, but it’s also about treating your ingredients right. Temperature is everything here. Your butter must be soft not melted, not cold from the fridge, but room temperature.
If you can easily push your finger into it and make an indent without squishing it to mush, you’re ready.
Why We Insist on Using Brown Sugar
If you skimp on the brown sugar, you are sacrificing the chewy texture. It’s that simple. Granulated sugar provides crispness and structure, which we need for the edges. But brown sugar (which is just white sugar with molasses added) is essential for moisture.
The molasses is slightly acidic and retains water, which means your baked goods stay softer and chewier for longer.
Crucial Tip: Don’t even think about substituting all white sugar here. I tried that once for a batch meant for a potluck and ended up with hard, sandy, vaguely rectangular biscuits. Disaster. Stick to the ratio: 2 parts brown to 1 part white. It works.
Sourcing the Perfect M&M Candies (Baking vs. Standard)
Honestly, unless you are baking high altitude or dealing with extremely high heat, the standard M&Ms work perfectly fine. Don’t pay extra for "Baking M&Ms." They are usually smaller, which is great if you want maximum distribution, but the regular kind give you that nostalgic, satisfying crunch.
However, here’s a quick tip for maximum prettiness: Divide your candies. Mix 3/4 of the total required M&Ms into the dough (this is your structural chocolate).
Save the remaining 1/4 cup and press them gently right into the surface of the dough before baking. This ensures you have bright, vibrant colour visible on top and prevents them from all sinking to the bottom.
Quick Checklist of Required Kitchen Tools
- 9x13 Pan: This is non and negotiable for the required thickness.
- Parchment Paper: Use the overhang method! Seriously, it makes cleanup a one and second job and guarantees you can lift the entire slab out cleanly for slicing.
- Electric Mixer: You can mix by hand, but you need significant force and 10 minutes to properly cream the butter and sugar. A hand mixer or stand mixer is your friend.
- Spatula: For folding in those M&Ms at the end gently, so you don't overwork the gluten.
Related Recipes Worth Trying
- The Ultimate Chewy Caramel Pecan Turtle Cookies Recipe — Forget average biscuits These chewy Caramel Pecan Turtle Cookies boast a fudgy chocolate base and gooey caramel filling Perfect for holiday baking or a posh...
- The Ultimate Chewy MM Cookies Recipe Bake Sale Approved — Stop making flat biscuits This is the definitive homemade MM cookies recipe for a thick chewy centre Our scratch method ensures perfection every time
- Guaranteed Chewy MM Cookies Recipe The Secret Soft Bake — The ultimate Homemade MM Cookies are thick gloriously chewy and never cakey Our simple recipe uses brown sugar and crucial chilling for perfect texture Bake...
The Exact Timeline for Baking MM Cookie Bars
Baking these bars isn't hard, but timing is everything. Pay attention to the first step (creaming) and the last step (cooling). Everything in between is just mixing.
Achieving the "Fluffy" Creamed Butter Stage
When step 3 says "beat the butter and sugar until pale, light, and fluffy," it means it. This is not about mixing until combined. This is about incorporating air, which is the only leavening (lift) agent in many bar recipes.
What to look for:
- It should take 3 to 4 minutes on medium speed.
- The colour will noticeably lighten from deep yellow to almost pale cream.
- The mixture will increase in volume and look truly airy, like dense whipped cream. If you skip this, your bars will be dense and flat. They won't have that perfect thickness.
Pressing the Dough Uniformly into the Pan
Once the dough is mixed, it will be thick. Really thick. Transfer it all to your prepared 9x13 pan. Do not try to spread it with a spoon you will pull the parchment paper up.
The easiest way to get that perfect, even layer is to use lightly floured hands. Press the dough right into the corners and ensure the surface is completely level. If one side is thicker than the other, the thicker side will undercook, and the thinner side will turn tough. Uniformity is key for that perfect slice.
Visual Cues: Knowing When Your Bars Are Done
This is where people mess up. They wait for the whole thing to be golden brown, like a cake. If you wait that long, your delicious MM cookie bars will be dry and crumbly once cooled.
Pull them out when:
- The very edges are set, golden brown, and slightly crispy looking.
- The centre looks set and matte (no wet, glossy spots).
- The very middle still looks slightly lighter in colour than the edges and, if you jiggle the pan lightly, it might have the slightest wobble.
The residual heat will continue cooking the centre after you pull it out. Trust the process. I pull mine right at the 28 minute mark, without fail.
Customizing Your Batch: Exciting Bar Variations
These bars are an excellent canvas for customization. The base dough is incredibly forgiving. Once you master the technique, you can throw almost anything in there!
How Long Do MM Cookie Bars Last at Room Temperature?
These store really well. Because of the high sugar and fat content (which preserves moisture), they stay fantastic in an airtight container at cool room temperature for 4 to 5 days.
I actually prefer them on day two. The flavours deepen, and the chewiness seems to improve slightly overnight as the residual moisture redistributes. Just make sure they are completely cooled before storing, or condensation will make them soggy.
Swapping Out Candies: Peanut Butter Cups and Chocolate Chips
If you don't have M&Ms, or you just fancy something else, go for it!
| Candy Swap | Prep Requirement | Best Tip |
|---|---|---|
| Peanut Butter Cups | Coarsely chop them (quarter size). | Use miniature cups for easier distribution. |
| Toffee Bits (Skor/Heath) | Use straight from the bag. | Add 1/2 tsp of instant coffee grounds to enhance the toffee flavour. |
| Chocolate Chips | Use standard semi and sweet or milk chocolate. | Double the chocolate! Use a full 2 cups. |
Fixing Bars That Turned Out Dry or Crumbly
If your finished bar feels dry, tough, or crumbly, there are usually two culprits, and both are common rookie mistakes:
- Too Much Flour: Did you scoop the flour straight from the bag? That packs it down, and you could be using up to 25% more flour than required. Always spoon the flour lightly into the measuring cup, then level it off. Too much flour guarantees dryness.
- Overbaked: If you left them in past the 30 minute mark, the moisture evaporated, and the sugars began to caramelize too much, leading to that brittle, crumbly texture. Remember the visual cues above: pull them when they look almost done in the middle.
If you’ve made one of these mistakes, don’t panic! Cut the bars and store them with a small piece of fresh bread in the airtight container overnight. The bread will slowly give up its moisture, softening the bars slightly. It’s a genius trick.

Recipe FAQs
My cookies sometimes come out cakey, not chewy. What’s the secret to getting truly brilliant MM Cookie Bars?
The secret is twofold: using more brown sugar than white, and crucially, pulling the bars from the oven when the centre still looks slightly matte and soft, just before they look "fully set." The residual heat, known as carry over cooking, finishes them off beautifully, ensuring that coveted chewy middle.
Why do I have to wait nearly two hours before slicing them? I’m dying to tuck in!
Patience is key, I'm afraid! If you attempt to slice the bars while they are still warm, the melted butter and soft sugar haven’t properly re-solidified, meaning they will inevitably crumble and be a right mess. Cooling allows the fats to firm up, guaranteeing clean, sturdy slices worthy of any bake sale.
I fancy changing things up a bit. Can I swap the M&Ms for other sweets or chocolate chunks?
Absolutely, this base recipe is spot on for mixing and matching! Feel free to swap the M&Ms for Rolo candies, mini Reese’s cups, chunks of honeycomb, or even seasonal chocolate like Cadbury Mini Eggs for Easter. Just aim for a similar total volume of mix-ins.
Can I make the dough ahead of time, and how should I store these once they’re baked?
Yes, you can prep the dough up to 3 days in advance; just wrap it tightly in cling film and chill it, allowing it to soften slightly before pressing it into the pan. Once baked and completely cooled, store the bars in a well sealed, airtight container at room temperature for up to 5 days, or freeze individual slices for future cravings.
I need to serve someone gluten-free. Is this recipe suitable for an easy flour swap?
Converting these bars is straightforward; use a high-quality 1:1 gluten-free baking blend that already contains xanthan gum, which replaces the structure usually provided by traditional flour. The texture will be surprisingly similar, making it easy peasy for dietary accommodations.
Ultimate Chewy Mm Cookie Bars
Ingredients:
Instructions:
Nutrition Facts:
| Calories | 300 kcal |
|---|---|
| Fat | 15 g |
| Fiber | 1 g |
