Quick Gluten Free Brownies: Fudgy & Fast
- Time: Active 10 mins, Passive 22 mins, Total 32 mins
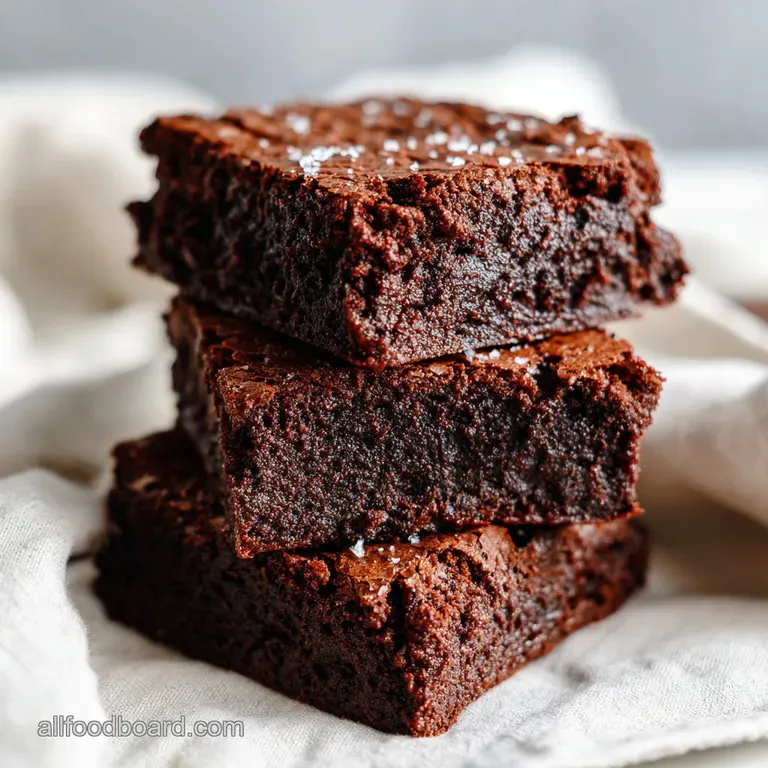
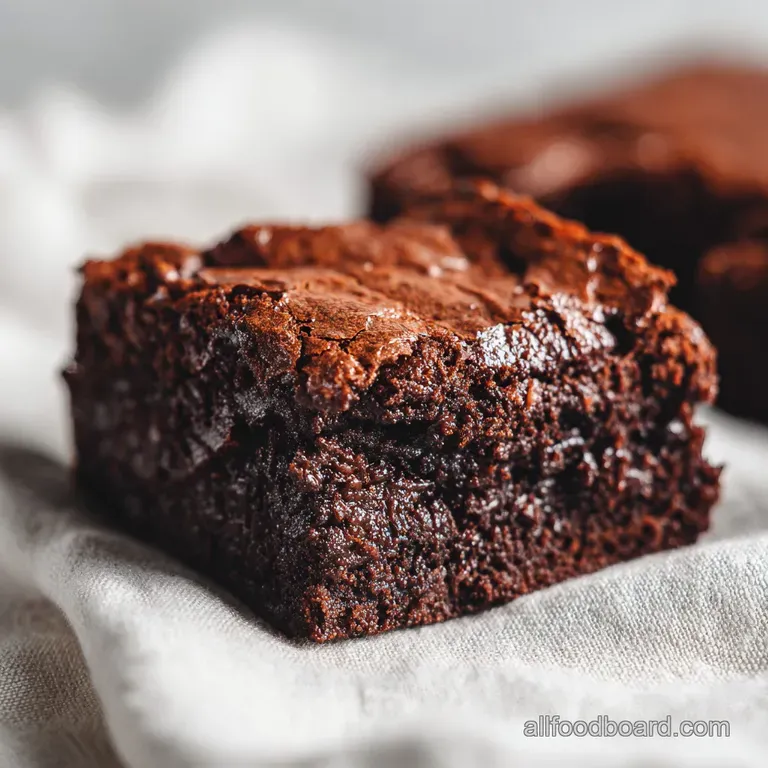
- Flavor/Texture Hook: Intense dark chocolate with a shattered glass crust and fudgy center.
- Perfect for: Last minute guests, school bake sales, or satisfying a late night chocolate craving.
- Achieving Success with Quick Gluten Free Brownies
- Critical Timing and Baking Metrics
- Selecting Ingredients for Fudgy Texture
- Essential Gear for Seamless Baking
- Mixing Steps for Velvety Batter
- Solutions for Gluten Free Mishaps
- Versatile Variations and Ingredient Swaps
- Guidelines for Maintaining Lasting Freshness
- Perfect Pairings for Every Occasion
- Recipe FAQs
- 📝 Recipe Card
Achieving Success with Quick gluten-free Brownies
Imagine the sound of a sharp knife slicing through a thin, papery crust, followed by the sight of a dense, dark chocolate interior that looks almost like fudge. That’s exactly what happens every time I pull these quick gluten-free brownies out of the oven.
I remember the first time I tried GF baking; I used a gritty rice flour that made the brownies feel like they were full of sand. It was a disaster, and honestly, I almost gave up on the idea of a decent treat entirely.
But after experimenting with different blends and temperatures, I finally cracked the code for a brownie that nobody even realizes is gluten-free.
The secret isn't some expensive, hard to find flour; it’s all about the temperature of your fat and how you treat the cocoa. When that hot, melted butter hits the unsweetened cocoa powder, you'll hear a slight sizzle and smell the most incredible, deep chocolate aroma.
It blooms the cocoa, releasing flavors that cold mixing just can't touch. We've all been disappointed by dry, cakey brownies that crumble the moment you pick them up, but this method ensures a moist, stable structure that holds together beautifully.
We are going for a specific texture here: the kind where the edges are slightly chewy and caramelized, while the middle remains soft and rich. You won't need a stand mixer or any complicated gadgets for this one.
It’s a simple, one bowl process that I’ve refined through years of family birthdays and Tuesday night cravings. Whether you are a veteran baker or just starting out with gluten-free alternatives, this recipe is designed to be foolproof and fast.
Let's get into the details so you can have a tray of these cooling on your counter in less than 40 minutes.
Critical Timing and Baking Metrics
Getting the timing right is the difference between a velvety brownie and a dry brick. I always set my timer for the minimum cook time because carryover heat is a real thing in baking. If you wait until the middle looks completely solid, you’ve probably overbaked them.
Use these specific benchmarks to guide your process.
| Cook Method | Optimal Time | Visual Cue | Best Result |
|---|---|---|---|
| Standard Oven (180°C) | 22 minutes | Edges set, center slightly soft | Fudgy and moist |
| Convection Oven (160°C) | 18 minutes | Faster rise, crispy edges | Chewy and firm |
| Toaster Oven (180°C) | 20 minutes | Watch for dark spots | Quick small batch |
It's important to note that the type of pan you use will shift these numbers slightly. A metal pan conducts heat much faster than glass or ceramic. I prefer a light colored metal pan for this recipe because it prevents the bottom from burning before the center is set.
If you only have glass, you might need to add 3 to 5 minutes to the total time.
Selecting Ingredients for Fudgy Texture
When we talk about the chemistry of these brownies, it comes down to the ratio of fat to flour. Since we aren't relying on gluten for structure, we use eggs and a quality GF flour blend to provide the necessary "glue."
The Chemistry of the Crinkle Top
Sugar Dissolution: The crinkle top is actually a thin layer of meringue. By whisking the sugar into the hot butter and then adding eggs, we dissolve the sugar crystals enough to create that shiny, paper thin crust that shatters when bitten.
Cocoa Blooming: Using hot butter (113g) allows the fat soluble flavor compounds in the cocoa powder (50g) to release fully. This provides a more intense chocolate profile than simply mixing dry cocoa with cold ingredients.
| Ingredient | Science Role | Pro Secret |
|---|---|---|
| Unsalted Butter (113g) | Provides fat for tenderness and carries chocolate flavor. | Use hot melted butter to bloom the cocoa powder instantly. |
| Granulated Sugar (200g) | Sweetens and helps create the shiny, crackly top layer. | Whisk vigorously with eggs to ensure a "meringue" effect. |
| Large Eggs (2) | Act as the primary binder and provide lift without gluten. | Ensure they are room temp to prevent the butter from seizing. |
| GF Baking Flour (65g) | Provides the starch base for the brownie structure. | Must contain xanthan gum to mimic the elasticity of gluten. |
Choosing a 1 to-1 gluten-free baking flour is non negotiable here. I’ve tried making my own blends with almond flour or coconut flour, but for that classic "boxed mix" texture that we all grew up loving, a starch heavy blend works best.
If your flour doesn't have xanthan gum listed on the bag, you’ll need to add 1/4 teaspoon yourself, otherwise, the brownies will be far too crumbly.
Essential Gear for Seamless Baking
You don't need a professional kitchen, but a few specific items make this much easier. I always use a 20x20 cm (8x8 inch) square pan. If you use a larger pan, the brownies will be thin and likely to overcook.
A whisk is actually better than a spoon here because we want to incorporate a little bit of air into the eggs to help with that crust we talked about.
- 20x20 cm Baking Pan: Metal is best for even heat distribution.
- Parchment Paper: Essential for lifting the brownies out cleanly.
- Large Glass Bowl: Great for melting butter and mixing everything in one go.
- Digital Scale: For the most accurate results, weigh your 65g of flour.
- Fine Mesh Sieve: Cocoa powder is notoriously lumpy; sifting it makes a difference.
Chef's Tip: Always leave a "sling" of parchment paper hanging over the sides of the pan. This allows you to lift the entire block of brownies out once they’ve cooled, making those clean, sharp squares much easier to cut.
Mixing Steps for Velvety Batter
Let's walk through the process. The order of operations matters more than you might think when you're working without gluten. We want to build the emulsion before adding the dry ingredients to keep things smooth.
- Prep the oven. Preheat your oven to 180°C (350°F) and line your 20x20 cm pan with parchment paper. Note: Preheating is vital for the initial rise.
- Melt the butter. Place 112g of unsalted butter in a microwave safe bowl and heat until bubbling and hot.
- Bloom the cocoa. Whisk in 50g of unsweetened cocoa powder and 200g of sugar into the hot butter until the mixture looks dark and glossy.
- Incorporate the eggs. Add 2 large room temperature eggs and 2 tsp of vanilla extract to the bowl.
- Whisk for emulsion. Beat the mixture vigorously for about 1-2 minutes until the batter is thick and smooth. Note: This creates the crinkle top.
- Fold in drys. Gently stir in 65g of GF flour and 1/4 tsp of sea salt using a spatula.
- Add the chips. Fold in 90g of semi sweet chocolate chips until evenly distributed through the batter.
- Spread and level. Pour the batter into the prepared pan, smoothing the top with your spatula.
- Bake the batch. Place in the center of the oven for 22 minutes until the edges are firm but the middle still has a slight wobble.
- Cool completely. Leave the brownies in the pan for at least 30 minutes before slicing. Note: They continue to set as they cool.
When you pull them out, don't be tempted to cut into them immediately. I know the smell is tempting, but gluten-free fats need time to solidify. If you cut them hot, they’ll just fall apart. Similar to how we let meat rest, these brownies need that cooling time to develop their final fudgy texture. If you’re looking for a quick meal to serve before dessert, this Creamy Tuscan Gnocchi recipe is a great savory companion that keeps the comfort food theme going.
Solutions for gluten-free Mishaps
The most common issue I hear about is the "gritty" texture. This usually happens if the flour isn't hydrated properly or if the sugar didn't dissolve. If your brownies feel like they have tiny beads of sand in them, you likely didn't whisk the wet ingredients long enough.
Fixing Sinking Brownie Centers
If the middle of your batch dips significantly, it’s usually because the eggs were beaten too much at the very end or the oven temperature was too low. While a little bit of a dip is normal for fudgy brownies, a deep crater means the structure collapsed before it could set.
Make sure your eggs are room temperature so they incorporate easily without needing excessive whisking.
Fixing Dry and Crumbly Edges
This is almost always a result of overbaking. Because GF flour doesn't hold moisture as well as wheat flour, even two extra minutes can turn a fudgy brownie into a dry one. Always check them at the 20 minute mark. The "toothpick test" should come out with a few moist crumbs attached, not completely clean.
| Problem | Root Cause | Solution |
|---|---|---|
| Gritty texture | Flour or sugar not fully hydrated. | Whisk sugar and eggs longer before adding flour. |
| Greasy surface | Butter was too hot when eggs were added. | Let butter cool slightly if it's boiling, or whisk faster. |
| Too cakey | Too much flour or too many eggs. | Measure flour by weight (65g) and avoid extra large eggs. |
Common Mistakes Checklist
- ✓ Using cold eggs (this causes the melted butter to clump and results in an uneven bake)
- ✓ Skipping the parchment paper (GF brownies are stickier than regular ones)
- ✓ Over mixing after adding the flour (this can make the brownies tough)
- ✓ Cutting them while they are still hot (they will lose their structure)
- ✓ Using a dark colored non stick pan without lowering the temperature (this burns the bottom)
Versatile Variations and Ingredient Swaps
I love a classic brownie, but sometimes you want to dress things up. If you are a fan of that salty sweet combo, you should definitely try a Peanut Butter Cup recipe twist by swirling some creamy peanut butter into the batter before baking. It creates these beautiful marbled patterns and adds a rich, nutty depth.
| Original Ingredient | Substitute | Why It Works |
|---|---|---|
| Unsalted Butter | Melted Coconut Oil | Same fat ratio. Note: Adds a slight coconut flavor and a more tropical aroma. |
| Granulated Sugar | Coconut Sugar | Lower glycemic index. Note: Resulting brownie is much darker and has a caramel like taste. |
| Chocolate Chips | Chopped Walnuts | Adds crunch and healthy fats. Note: Changes the texture from smooth to chunky. |
For a quick gluten-free brownies mix hack, you can actually use this base recipe and add a tablespoon of espresso powder. It doesn't make the brownies taste like coffee; instead, it intensifies the chocolate and makes it taste more "expensive." If you’re out of eggs, a flax egg (1 tbsp ground flax + 3 tbsp water) can work, though the brownies will be significantly denser and won't have that shiny crinkle top.
Guidelines for Maintaining Lasting Freshness
Storage is where many people go wrong. Because these are so moist, they can actually get soggy if you put them in a plastic bag while they are still even slightly warm. Always wait until they are stone cold before wrapping them up.
- Fridge: Keep in an airtight container for up to 5 days. I actually think they taste better on day two because the flavors have more time to meld.
- Freezer: Wrap individual squares in plastic wrap, then place them in a freezer bag. They stay perfect for up to 3 months. To eat, just let them thaw on the counter for 20 minutes.
- Zero Waste Tip: If you end up with edges that are a bit too crispy, don't throw them away! Crumble them up and use them as a topping for vanilla ice cream or mix them into a batch of Homemade Blueberry Muffins recipe batter for a "chocolate chip muffin" vibe. You can also dry them out further in a low oven to make "brownie brittle."
Perfect Pairings for Every Occasion
While these are incredible on their own, a little bit of contrast goes a long way. I personally love serving these with a cold glass of almond milk or a dollop of unsweetened whipped cream to balance out the sugar.
If you're hosting a dinner party, a sprinkle of flaky sea salt on top right as they come out of the oven makes them look and taste professional.
For a Restaurant Quality Plating
Warm a single brownie in the microwave for 10 seconds, place it in the center of a white plate, and add a scoop of raspberry sorbet. The tartness of the berries cuts through the richness of the Dutch process cocoa perfectly.
It’s a simple trick that makes a basic weeknight dessert feel like something you’d pay $15 for at a bistro.
For an Afternoon Pick Me-Up
Pair a small square with a double shot of espresso. The bitter notes of the coffee highlight the vanilla and salt in the brownie. It’s the ultimate "reset" button for a busy workday. Just remember, these are rich, so a little goes a long way!
Handling the Myths
One big myth is that gluten-free brownies have to be "healthy" or taste like cardboard. That’s simply not true. We aren't using kale or black beans here (though those have their place!). By using real butter and sugar, we are making a real brownie that happens to be safe for those with gluten sensitivities.
Another myth is that you need a special "brownie flour." Any high-quality 1 to-1 blend will do the trick as long as it has that xanthan gum to hold everything together. Trust the science, trust the ratios, and you'll end up with a tray of chocolate bliss every single time.

Recipe FAQs
How to make brownies with 3 ingredients?
No, this recipe requires at least six core ingredients. While some viral recipes use nut butter, eggs, and cocoa, those result in a dense truffle, not a true brownie structure with a crinkle top.
What's the secret to fudgy gluten-free brownies?
Bloom the cocoa powder with hot melted butter. Heating the fat activates the cocoa solids, releasing deep flavor compounds, which is the key to richness without needing dense flour structure.
What is the best binder for gluten-free brownies?
Use a 1-to-1 gluten-free baking blend that contains xanthan gum. The gum mimics the elasticity lost by removing wheat flour, preventing the final product from crumbling immediately after slicing.
Can I have a brownie as a diabetic?
Consult your doctor, but this recipe uses high amounts of refined sugar. If you are managing blood sugar, you can swap the granulated sugar for a granulated sugar substitute, similar to how sugar reduction is often employed in our Banana Bread Recipe.
How to ensure a shiny, crinkly top crust forms?
Whisk the sugar into the eggs vigorously for at least one full minute. This process dissolves the sugar crystals, allowing them to form a light meringue layer on the surface as the brownie bakes and cools.
Why did my gluten-free brownies turn out cakey instead of fudgy?
You likely added too much flour or baked them too long. If you enjoyed mastering the temperature control required to achieve a fudgy center here, apply that same sensitivity to carryover heat when making something like our Bangin Lorne Sausage recipe to prevent drying out.
Is it true that chilling the batter before baking helps GF brownies?
No, chilling the batter is counterproductive for this specific recipe. We rely on the hot butter and high sugar content to set the structure quickly; chilling would solidify the butter and result in a dense, unevenly baked product.
Quick gluten-free Brownies

Ingredients:
Instructions:
Nutrition Facts:
| Calories | 158 kcal |
|---|---|
| Protein | 1.8 g |
| Fat | 8.3 g |
| Carbs | 21.2 g |
| Fiber | 1.4 g |
| Sugar | 15.8 g |
| Sodium | 38 mg |
