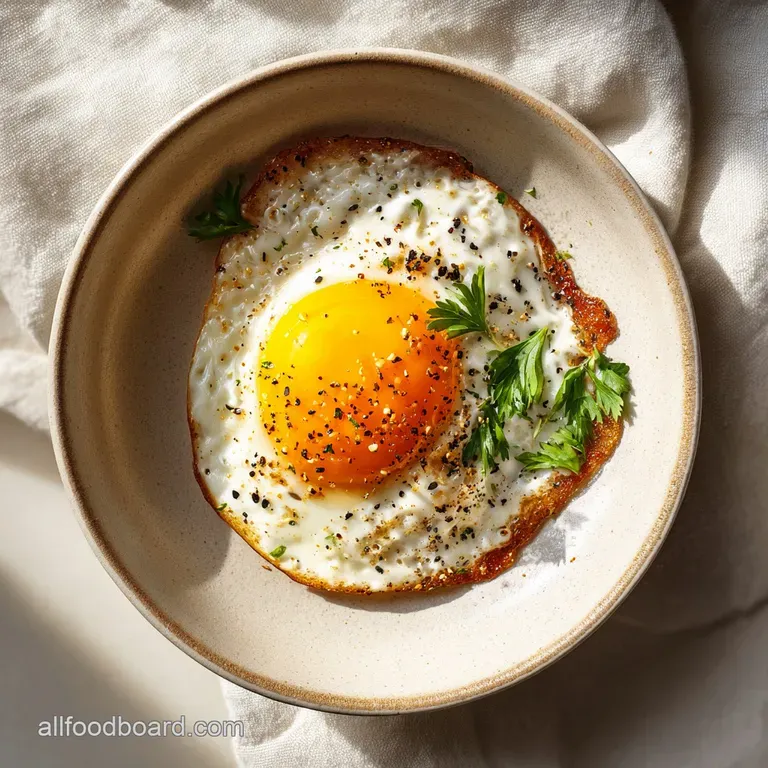
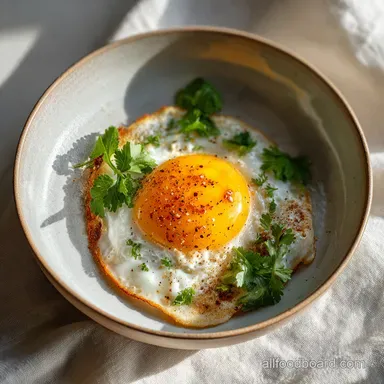
Sunny Side Up Eggs: Set Whites, Liquid Yolk
- Time: Active 1 minute, Passive 2 minutes, Total 3 minutes
- Flavor/Texture Hook: Velvety liquid gold yolk with tender, butter kissed whites
- Perfect for: Busy weekday mornings or a slow, lazy Sunday brunch
- Mastering Perfectly Set Sunny Side Up Eggs
- Quick Specs and Timing
- Simple Ingredients for Success
- Simple Ingredients and Substitutes
- Best Tools for Easy Cooking
- Simple Steps to Golden Yolks
- Troubleshooting Tips and Fixes
- Easy Swaps and Variations
- Storage and Waste Tips
- Best Serving and Enjoying Tips
- Kitchen Myths Debunked
- Recipe FAQs
- 📝 Recipe Card
Mastering Perfectly Set Sunny Side Up Eggs
There is nothing quite like the gentle sizzle of butter hitting a warm pan on a quiet Tuesday morning. I remember the first time I tried to make these for my partner. I wanted that picture book look, but I ended up with a literal mess.
The whites were still clear and wobbly, looking a bit too much like something from a cold medicine commercial, and when I tried to cook them longer, the bottom turned into a piece of brown leather. It was frustrating because it seems so simple, right? It is just an egg.
But that is the thing about the kitchen. The simplest things often require the most specific tricks. I spent a whole week cracking through dozens of eggs, much to my family's amusement, until I found the balance. I realized that heat is actually your enemy if you use too much of it.
You want a whisper of heat, not a shout. Now, when I see that vibrant yellow yolk sitting on a cloud of white, I don't feel stressed. I just feel hungry.
We are going to skip the fancy equipment and the stressful "flip" that always seems to go wrong. If you have ever felt personally victimized by a broken yolk, you are in the right place. We are going to use a little bit of water and a lid to do the heavy lifting for us.
It is efficient, it is reliable, and it makes you look like a pro even if you are still in your pajamas.
Quick Specs and Timing
Before we get into the pan, we need to understand the timing. Precision is what separates a rubbery egg from a velvety one. You are looking at a very fast process, so have your plate ready before you even turn on the stove.
The Physics of the Steam Fry: The lid traps moisture, creating a steam chamber that cooks the top of the egg whites without over hardening the yolk. This ensures the "snotty" texture disappears while the center remains liquid gold.
- Low Heat Control: Keeping the flame low prevents the proteins from tightening too quickly, which causes that "rubbery" mouthfeel.
- Hybrid Fat Approach: Using both oil and butter gives you the flavor of the dairy with the higher smoke point and glide of the oil.
- The Water Catalyst: Adding a single teaspoon of water creates the exact amount of vapor needed to set the top layer of albumin.
- Carryover Warmth: The egg continues to cook for about 30 seconds after it hits the plate, so we pull it just before it looks "done."
Cook Method Comparison
| Method | Time | Texture | Best For |
|---|---|---|---|
| Open Pan | 4 minutes | Crispy edges, raw tops | Those who like "lace" |
| Steam Fry | 2 minutes | Silky, fully set whites | A consistent, clean finish |
| Basted | 3 minutes | Cloud like, buttery top | Decadent weekend brunch |
Getting the temperature right is the biggest hurdle for most home cooks. If the pan is too cold, the egg sticks. If it is too hot, it bubbles and gets tough. You want a gentle "shhh" sound when the egg hits the fat, not a loud crackle.
Simple Ingredients for Success
You only need six things, and most of them are already in your cupboard. Since we are using so few items, the quality of your eggs really matters. Fresh eggs have stronger protein bonds, which means the white won't spread across the entire pan like a puddle.
Component Analysis
| Ingredient | Science Role | Pro Secret |
|---|---|---|
| 2 Large Eggs | Protein structure | Use room temp eggs to prevent the pan temp from dropping. |
| 1 tsp Unsalted Butter | Flavor and browning | Adds the nutty aroma that oil lacks. |
| 1 tsp Water | Steam generation | The "secret" to cooking the top without flipping. |
Simple Ingredients and Substitutes
- 2 large eggs: The star of the show. Why this? Fresh eggs have a thicker "inner white" that stays tight around the yolk.
- Substitute: Duck eggs work beautifully but take about 45 seconds longer to cook.
- 1 tsp unsalted butter: Provides the classic breakfast flavor. Why this? It contains milk solids that help signal when the pan is at the right temperature.
- Substitute: Ghee or clarified butter if you want a higher heat tolerance.
- 0.5 tsp neutral oil: Prevents the butter from burning too quickly. Why this? It acts as a lubricant to ensure the egg slides out easily.
- Substitute: Avocado oil or light olive oil.
- 1 tsp water: The steam agent. Why this? Just enough to create vapor without boiling the egg.
- Substitute: A small ice cube if you want a slower release of steam.
- 1 pinch flaky sea salt: For texture and pop.
- Substitute: Standard table salt, but use half the amount.
- 1 pinch freshly cracked black pepper: For a bit of earthy heat.
- Substitute: White pepper for a cleaner look.
If you find yourself making breakfast for a crowd, you might want to compare this to my Fluffy Cloud recipe which handles bulk cooking a bit more gracefully than individual fried eggs.
Best Tools for Easy Cooking
You don't need a copper pan or a chef's kit for this. Honestly, a simple non stick skillet is your best friend here. I usually use an 8 inch pan for two eggs. If the pan is too big, the water evaporates too fast before it can steam the top of the eggs.
You will also need a lid that fits. If you don't have a matching lid, a large dinner plate or even a flat baking sheet works in a pinch. The goal is just to trap that heat. A thin silicone spatula is also helpful. It lets you get under the edges without tearing the delicate whites.
Chef's Tip: If you are worried about the eggs being fresh, crack them into a small ramekin first. This lets you check for shells and ensures the yolk is intact before it hits the heat.
Simple Steps to Golden Yolks

- Prep the eggs. Crack 2 large eggs into separate small bowls. Note: This prevents yolk breakage during the "drop" into the pan.
- Heat the fats. Place 1 tsp unsalted butter and 0.5 tsp neutral oil in a non stick skillet over medium low heat.
- Wait for the foam. Let the butter melt until the foam subsides and it starts to smell nutty.
- Add the eggs. Gently slide the eggs into the pan. Note: Keep them separate so they don't fuse into one giant egg monster.
- Initial set. Cook for 30 seconds until the edges of the whites are opaque.
- The steam trick. Pour 1 tsp water into an empty spot in the pan and immediately cover with a tight lid.
- Steam fry. Keep the lid on for about 60 to 90 seconds. Check until the whites over the yolk are no longer clear.
- The slide test. Remove the lid and gently shake the pan. The eggs should slide freely.
- Seasoning. Sprinkle 1 pinch flaky sea salt and 1 pinch freshly cracked black pepper over the yolks.
- Plating. Slide the eggs onto a warm plate immediately to stop the cooking process.
If you love the precision of timing your eggs, you should check out my Perfectly Hard Boiled Eggs recipe for another way to get that yolk exactly how you like it.
Troubleshooting Tips and Fixes
Why Your Eggs Stick
If your eggs are clinging to the pan like their life depends on it, your heat was likely too low when you started, or your pan's coating is worn out. A non stick pan needs a little bit of thermal energy to create that "slick" surface. Always wait for that butter to stop bubbling before sliding the eggs in.
Why Your Yolks Are Cloudy
If the yellow part looks pink or white, you steamed them for too long. The steam cooks the very thin layer of protein that sits on top of the yolk. It is still safe to eat, but you lose that vibrant "sunny" look. Next time, pull the pan off the heat 10 seconds earlier.
| Problem | Root Cause | Solution |
|---|---|---|
| Rubbery bottom | Heat was too high | Use medium low and a mix of oil/butter |
| Snotty whites | Not enough steam | Ensure the lid fits tightly and use a full tsp of water |
| Broken yolk | Dropping from too high | Crack into a bowl first and slide them in gently |
Common Mistakes Checklist
- ✓ Using cold eggs directly from the fridge (causes uneven cooking).
- ✓ Walking away from the stove (eggs go from perfect to overdone in 15 seconds).
- ✓ Forgetting the lid (the top will never cook before the bottom burns).
- ✓ Using a fork to lift the egg (always use a wide, thin spatula).
- ✓ Adding salt too early (it can cause little white spots on the yolk).
Easy Swaps and Variations
Adopting a Mediterranean Profile
Instead of butter, use a high-quality extra virgin olive oil. Don't use the steam method here; instead, spoon the hot oil over the whites (this is called "basting"). Finish with a dusting of za'atar and a squeeze of lemon. It is bright, acidic, and feels much lighter than the buttery version.
Infusing with Chili Crunch
If you like heat, skip the black pepper and drizzle a spoonful of Sichuan chili crisp over the eggs right as you put the lid on. The steam carries the spicy aroma into the whites, and the oil creates a beautiful marbled effect on the plate.
Scaling the Recipe
- For One (1/2): Use a very small 6 inch pan. If the pan is too large, the single egg will spread too thin and become crispy rather than tender.
- For Four (2x): Do not try to crowd four eggs into one small pan. Use two separate skillets or work in batches. If working in batches, keep the first set in a warm oven (60°C) on a heated plate.
- Spices: When doubling, keep the salt to 1.5x. It is easy to over salt eggs because they have very little surface area to absorb the granules.
Storage and Waste Tips
Storage: Fried eggs are best eaten immediately. If you must store them, they will last in the fridge for about 24 hours. However, the yolk will likely solidify during reheating. To reheat, place them in a pan with a drop of water and a lid over very low heat for 60 seconds.
Do not microwave them, or they might literally explode.
Zero Waste: Don't throw those eggshells away! I crush mine up and put them in my garden soil tomatoes love the calcium. If you have leftover egg whites from another recipe (like making mayo), you can actually "fry" just the whites using this same steam method for a high protein snack.
Best Serving and Enjoying Tips
The classic way to eat these is on a thick slice of sourdough toast. You want something sturdy enough to soak up that liquid yolk without turning into mush. I also love serving these over a bowl of hot rice with a dash of soy sauce it is the ultimate comfort meal when the fridge is empty.
But what about the "side" items? These eggs are the perfect crown for a hash brown stack or a pile of sautéed spinach. The richness of the yolk acts like a natural sauce for whatever is underneath it.
If you are feeling fancy, a few shavings of parmesan cheese right at the end will melt into the whites and add a savory punch that salt alone can't provide. Just remember, the yolk is the star, so don't bury it under too many toppings!
Kitchen Myths Debunked
One big myth is that you need a "screaming hot" pan to get a good fried egg. High heat actually causes the proteins to seize and go from liquid to "plastic" too fast, which is why you get that chewy, unpleasant texture. Gentle heat is always better for eggs.
Another thing people say is that you must "baste" the egg with fat to cook the top. While basting with butter is delicious, it adds a lot of extra fat and can be tricky for beginners. The steam fry method gives you the exact same result a perfectly set top with much less mess and effort.
Trust the vapor! It's been my go to trick for years, and it never fails.

Recipe FAQs
What does it mean to be sunny side up?
It means the egg is cooked only on one side. The white should be fully set and opaque, while the yolk must remain completely liquid and bright yellow or orange.
How to properly cook sunny side up eggs?
Heat a nonstick pan over medium low heat with a mix of butter and oil. Gently slide the eggs in and cook until the whites set slightly, then add one teaspoon of water, cover immediately, and steam for 60 90 seconds until the top whites are opaque.
What does keep your sunny side up mean?
No, this is an idiom unrelated to cooking. It means to remain cheerful, optimistic, and positive, regardless of bad circumstances.
Is Sunny Side Up part of a series?
No, it is not part of a formal recipe series. However, achieving a perfectly set white without flipping is a core technique shared across many egg preparations, much like the temperature control needed for How to Make recipe.
Why are my sunny side up egg whites runny on top?
You did not use sufficient steam or heat cover to cook the top layer. The steam created by adding water and covering the pan cooks the top of the whites gently without solidifying the yolk.
Can I substitute butter with just oil when cooking sunny side up eggs?
Yes, you can, but you sacrifice flavor. Oil has a higher smoke point, preventing burning, but butter adds the signature nutty, rich taste associated with this preparation.
What temperature should my pan be for this method?
Medium low heat is crucial for success. Too high, and the bottom burns before the top cooks; too low, and the eggs stick to the pan.
Perfect Sunny Side Up Eggs
Ingredients:
Instructions:
Nutrition Facts:
| Calories | 198 kcal |
|---|---|
| Protein | 12.6 g |
| Fat | 15.7 g |
| Carbs | 0.9 g |
| Fiber | 0 g |
| Sugar | 0.4 g |
| Sodium | 295 mg |
