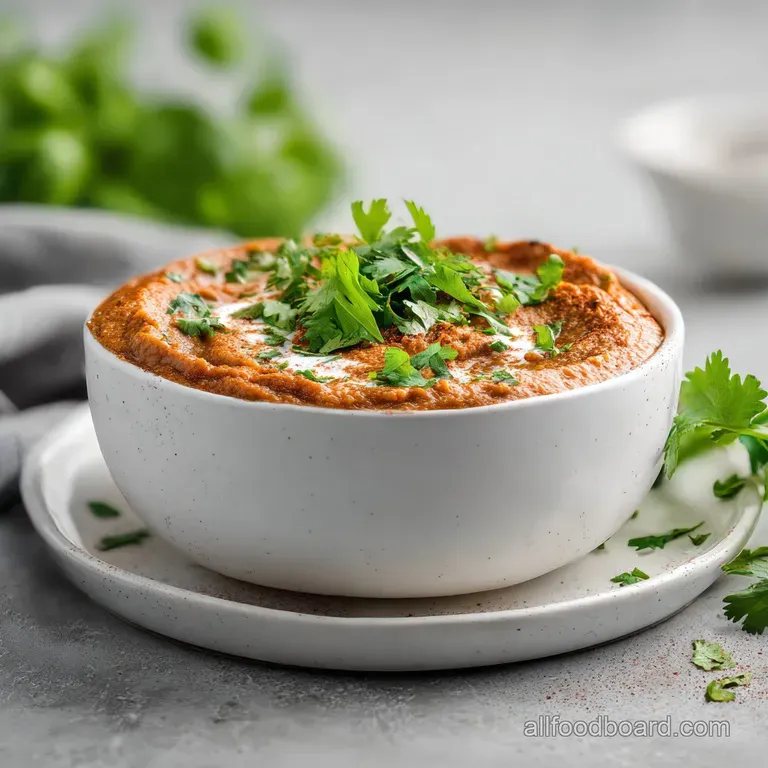
Refried Beans: Velvety Smooth
- Time: Active 10 mins, Passive 10 mins, Total 20 mins
- Flavor/Texture Hook: Earthy, smoky, and incredibly velvety
- Perfect for: Taco Tuesdays, quick meal prep, or beginner cooks
- Mastering Silky Smooth Refried Beans
- Vital Stats for the Dish
- Essential Items for Rich Flavor
- Minimal Tools for Best Results
- The Path to Creamy Success
- Fixing Common Kitchen Mistakes
- Exciting New Flavor Variations
- Storing and Freezing Your Batch
- Best Ways to Serve Them
- Understanding Kitchen Myths
- Refried Beans FAQs
- 📝 Recipe Card
Mastering Silky Smooth Refried Beans
Have you ever stood over a pan, watching beans turn into a dry, pasty clump that looks more like mortar than a side dish? I’ve been there. The sizzle of the lard hitting the pan should be the start of something beautiful, not a kitchen tragedy.
I remember trying to make these for a big family dinner years ago, thinking I could just mash them up and call it a day. The result was so thick and bland we actually needed extra salsa just to swallow it.
But then I learned the secret of the "liquid gold" (the reserved bean water) and the magic of properly bloomed spices. When the aroma of sautéing white onion and minced garlic fills your kitchen, you know you're on the right track.
This recipe isn't about fancy gadgets; it’s about treating simple ingredients with a bit of respect to get that rich, buttery mouthfeel we all crave at our favorite Mexican spots.
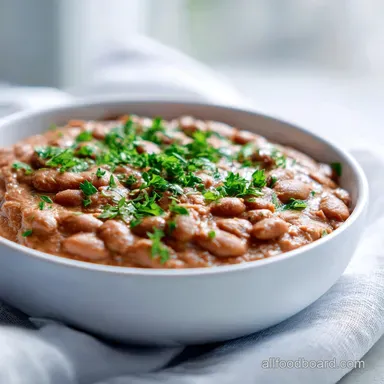
We are going for a texture that is spreadable but holds its shape, with a smoky undertone from the paprika that makes people ask for your "secret ingredient." It’s a staple in my house now, and honestly, once you see how easy it is to do from scratch using canned beans, you’ll never look at the pre mashed stuff the same way again.
It's about taking ten minutes to turn "okay" into "spectacular."
Vital Stats for the Dish
The Chemistry of Creamy Legumes: Simmering the beans in their own starchy liquid allows the starches to swell and bind with the added fat. This creates a stable emulsion that results in a velvety texture rather than a grainy paste.
- Fat Infusion: Using lard or bacon grease provides a higher smoke point and a deeper, savory profile than butter.
- Starch Suspension: The reserved bean liquid contains released starches that act as a natural thickener and binder.
- Aromatic Layering: Sautéing onions until translucent creates a sweet base that balances the earthy pinto flavors.
| Fresh vs. Shortcut | Preparation Time | Texture Result | Flavor Depth |
|---|---|---|---|
| Dried Beans | 8-12 hours | Ultra creamy, skinless | Intense, natural bean flavor |
| Canned Beans | 20 minutes | Soft, slightly more texture | Great, relies on seasonings |
| store-bought Mash | 2 minutes | Often grainy or stiff | Flat, metallic aftertaste |
While starting with dried beans is traditional, using canned beans is the ultimate weekday win. If you find yourself enjoying the process of working with preserved ingredients, you might find my My Grandmother's Dehydrated recipe quite useful for long term pantry planning. The goal here is efficiency without sacrificing that home cooked soul.
Essential Items for Rich Flavor
| Ingredient | Science Role | Pro Secret |
|---|---|---|
| Pinto Beans | Primary starch and protein structure | Rinse half the cans, keep liquid from the other half for better control. |
| Lard | Emulsifying fat and flavor carrier | Use leaf lard for a neutral taste or bacon grease for a smoky kick. |
| White Onion | Provides sweetness through caramelization | Mince extremely fine so it melts into the bean base during the mash. |
| Reserved Liquid | Viscosity regulator and binder | Never toss it; it contains the protein and starch needed for silkiness. |
For this recipe, you'll need 2 (15 oz) cans Pinto Beans and 1/2 cup reserved bean liquid or vegetable broth. We aren't just heating them up; we are building layers. The 2 tbsp lard or bacon grease acts as the vehicle for the 1/2 white onion (finely minced) and 3 cloves garlic (minced).
To round out the profile, grab 1 tsp ground cumin, 1/2 tsp smoked paprika, 1/2 tsp sea salt, and 1/4 tsp cracked black pepper. Why this? Smoked paprika mimics the flavor of beans simmered over an open flame for hours. If you want to swap the pinto beans for black beans, it works perfectly just know the texture will be slightly denser.
Minimal Tools for Best Results
You don't need a pantry full of specialized equipment to make a stellar batch. A simple cast iron skillet (like a Lodge) or a heavy bottomed non stick pan is your best friend here. The heavy base ensures even heat distribution so you don't scorch the starches at the bottom of the pan while you're busy mashing.
Speaking of mashing, a sturdy potato masher is the traditional choice, but a heavy fork works in a pinch for a more rustic, chunky texture. If you prefer that glass smooth restaurant style, a silicone spatula is great for "folding" the beans as they simmer.
Just avoid using a blender unless you want a bean purée, which loses the character of the dish.
| Method | Time | Texture | Best For |
|---|---|---|---|
| Skillet/Masher | 15 mins | Rustic, varied | Everyday tacos and sides |
| Instant Pot | 10 mins | Very soft, uniform | Large batches and meal prep |
| Stovetop/Immersion | 12 mins | Silky, purée like | Bean dips and spreading |
The Path to Creamy Success

- Drain the 2 (15 oz) cans Pinto Beans, reserving 1/2 cup of the liquid. Note: This liquid is packed with starch that prevents the beans from separating.
- Heat 2 tbsp lard in a large skillet over medium heat until it shimmers and wisps of smoke appear.
- Add 1/2 finely minced white onion. Sauté for 5 minutes until translucent and soft.
- Stir in 3 cloves minced garlic, 1 tsp cumin, and 1/2 tsp smoked paprika. Note: "Blooming" spices in fat releases fat soluble flavor compounds.
- Cook for 1 minute until the kitchen smells intensely fragrant.
- Pour in the pinto beans and 1/4 cup of the reserved liquid.
- Use a potato masher to crush the beans until your desired level of smoothness is reached.
- Add the remaining 1/4 cup liquid if the mixture looks too stiff or dry.
- Season with 1/2 tsp sea salt and 1/4 tsp cracked black pepper.
- Simmer for 3-5 minutes until the mixture bubbles and thickens slightly.
Chef's Tip: If you want an even deeper flavor, add a teaspoon of soy sauce or Worcestershire sauce. It adds a background "meatiness" that complements the lard perfectly without making it taste like a different dish.
When you're mashing, remember that the beans will continue to thicken as they cool. You want them to look just a little bit wetter in the pan than you want them on your plate. This technique is similar to how we handle the liquid in our & Sautéed Escarole Beans recipe, where the broth creates a luxurious sauce for the legumes.
Fixing Common Kitchen Mistakes
Why Your Beans Feel Chalky
If your beans have a dry, grainy mouthfeel, it usually means the starches didn't hydrate enough or there wasn't enough fat to coat the particles. Canned beans can sometimes be a bit firm straight from the tin. Adding a splash more of that reserved liquid and a teaspoon of butter at the very end can fix this instantly.
Why the Flavor is Flat
Legumes are notorious salt absorbers. If you've followed the recipe and it still feels like it's missing "something," it’s likely an acid or salt issue. A tiny squeeze of lime juice or a dash of hot sauce can brighten the entire profile.
| Problem | Root Cause | Solution |
|---|---|---|
| Stiff/Dry Texture | Evaporation or lack of fat | Stir in extra broth or a knob of butter. |
| Bland Taste | Undersalted or cold spices | Add a pinch of salt and a squeeze of lime. |
| Burnt Bottom | Heat was too high | Transfer to a new pan; do not scrape the burnt bits. |
Common Mistakes Checklist
- ✓ Never discard all the bean liquid before you start cooking.
- ✓ Don't skip sautéing the onions; raw onion provides a harsh bite that ruins the mellow bean flavor.
- ✓ Avoid mashing the beans while they are cold; heat them through first to soften the skins.
- ✓ Keep the heat at medium or medium low once the beans are added to prevent scorching.
- ✓ Rest the beans for 2 minutes after cooking to let the texture set.
Exciting New Flavor Variations
Making a Vegan Batch
To keep this plant based, swap the lard for a high-quality avocado oil or refined coconut oil. If you miss that smoky "bacon" vibe, add a drop of liquid smoke or double the smoked paprika. You can also use vegetable broth instead of the bean liquid for a cleaner finish.
Using the Black Bean Twist
Refried black beans are a staple in Southern Mexico and Guatemala. They tend to be earthier and slightly more "inky" in flavor. Follow the same steps, but consider adding a pinch of dried epazote or oregano to complement the black bean profile.
They look stunning on a plate when topped with a crumble of bright white cotija cheese.
Crafting Instant Pot Refried Beans
If you're using dried beans in the pressure cooker, you'll need to sort and rinse 1 lb of beans. Cook them with 6 cups of water and your aromatics for 45 minutes on high pressure.
Once the pressure releases, drain (save the liquid!) and follow the mashing steps in the skillet for the best flavor development.
- Extra Spicy: Fold in a finely chopped chipotle chili in adobo sauce.
- Cheesy Delight: Stir in 1/2 cup of shredded Monterey Jack right before serving.
- Fresh Finish: Top with a handful of chopped cilantro and pickled red onions.
If you enjoy the snap of a well cooked bean dish, you might also like The Proper Takeaway recipe for a completely different texture profile that still focuses on high impact aromatics.
Storing and Freezing Your Batch
Refried beans are the ultimate meal prep champion. They actually taste better the next day because the flavors have time to meld and the spices fully permeate the starches. You can store them in an airtight container in the fridge for up to 5 days. Just be aware they will firm up significantly when cold.
When reheating, you'll almost certainly need to add a tablespoon or two of water or broth. Heat them over low power in the microwave or in a small saucepan, stirring frequently. For long term storage, these freeze beautifully. I like to freeze them in muffin tins first, then pop the "pucks" into a freezer bag.
This way, you can grab exactly what you need for a single burrito or a side dish.
Zero Waste Tip: If you have leftover sautéed onions or garlic from another recipe, throw them into the bean base! Also, don't toss the very last bits of the bean liquid; it can be used to thicken soups or stews later in the week.
Best Ways to Serve Them
These beans are a versatile workhorse in the kitchen. My favorite way to serve them is in a shallow bowl, topped with a generous swirl of Mexican crema and a dusting of queso fresco. The contrast between the warm, smoky beans and the cool, tangy cream is heavenly.
If you're making tacos, use these as the "glue" on the tortilla before adding your protein. It prevents the taco from falling apart and adds a layer of richness to every bite. They are also the backbone of a great bean dip just stir in some extra lime juice and top with melted cheddar.
- Tostada Base: Spread a thick layer on a crispy corn tortilla.
- Breakfast Companion: Serve alongside fried eggs and corn tortillas for Huevos Rancheros.
- Burrito Filler: Adds moisture and structure to handheld meals.
Understanding Kitchen Myths
Myth: Searing the onions at high heat adds better flavor. Actually, for this dish, you want a slow sweat. High heat creates bitter, charred notes that clash with the creamy beans.
Sautéing them slowly allows the natural sugars to release, providing a mellow sweetness that acts as a backdrop for the spices.
Myth: You must soak beans even if they are canned. There is no need to soak canned beans. They are already fully cooked and hydrated. Any extra soaking will just make them waterlogged and dilute the flavor you are trying to build.
Simply rinsing them to remove the excess sodium from the canning liquid is enough.
Myth: Lard is "unhealthy" compared to all oils. In moderation, lard has less saturated fat than butter and no trans fats. It provides a specific texture and flavor that vegetable oils simply cannot replicate.
While you can substitute, the traditional "refried" taste comes directly from the use of animal fats which help the beans achieve that iconic velvety finish.

Refried Beans FAQs
How are refried beans made from scratch?
Start by cooking dried pinto beans until tender. Then, drain them, reserving some cooking liquid. Sauté aromatics like onion and garlic in lard or oil, add the cooked beans, spices, and a portion of the reserved liquid.
Mash until desired consistency is reached, adding more liquid as needed for creaminess.
What's the secret to good refried beans?
Use good quality fat and don't skimp on sautéing aromatics. Lard provides unparalleled richness and helps emulsify the beans. Slowly sautéing onions and garlic until soft and sweet forms the flavor base, which is crucial for that restaurant style depth. If you enjoy mastering flavor foundations, the same principle of slow sautéing applies to our WokKissed Chinese Garlic Green Beans Recipe.
Why do restaurant refried beans taste so good?
Restaurants often use animal fats like lard and cook beans from scratch for better flavor control. They also carefully balance seasonings and often achieve a perfect creamy texture through a combination of mashing and simmering with reserved bean liquid.
This technique ensures a smooth, rich mouthfeel that canned versions can't replicate.
Why are refried beans considered unhealthy?
Traditional preparation can be high in saturated fat and sodium. Refried beans are often made with lard or bacon grease, which increases the saturated fat content, and canned versions can be high in sodium.
However, homemade versions can be made healthier by using less fat or leaner options like olive oil and controlling the salt.
Can I use canned beans instead of dried?
Yes, absolutely, it's a great shortcut! Canned beans are already cooked, significantly reducing your prep time to about 20 minutes. Just drain and rinse them well, reserving some of the liquid as instructed in scratch recipes for best results.
What's the best fat to use for refried beans?
Lard is traditionally preferred for its flavor and texture contribution. It creates an authentic richness and helps achieve a smooth, emulsified consistency. Bacon grease is another excellent option for a smoky flavor boost, or you can use a neutral oil like vegetable or canola oil for a leaner alternative.
How do I make refried beans creamy and not watery or dry?
Control the liquid and fat ratio carefully. Use reserved bean cooking liquid (or broth) sparingly, adding it a little at a time while mashing. Too much liquid will make them watery, while too little will result in a dry, pasty texture. Proper mashing and a final simmer help thicken them to the perfect consistency, similar to how we achieve a luxurious sauce in our Chuckwagon Cowboy Beans: Hearty & Easy Recipe! by managing the liquid.
Homemade Refried Beans
Ingredients:
Instructions:
Nutrition Facts:
| Calories | 147 kcal |
|---|---|
| Protein | 5.7 g |
| Fat | 5.4 g |
| Carbs | 17.6 g |
| Fiber | 5.1 g |
| Sugar | 1.2 g |
| Sodium | 530 mg |
