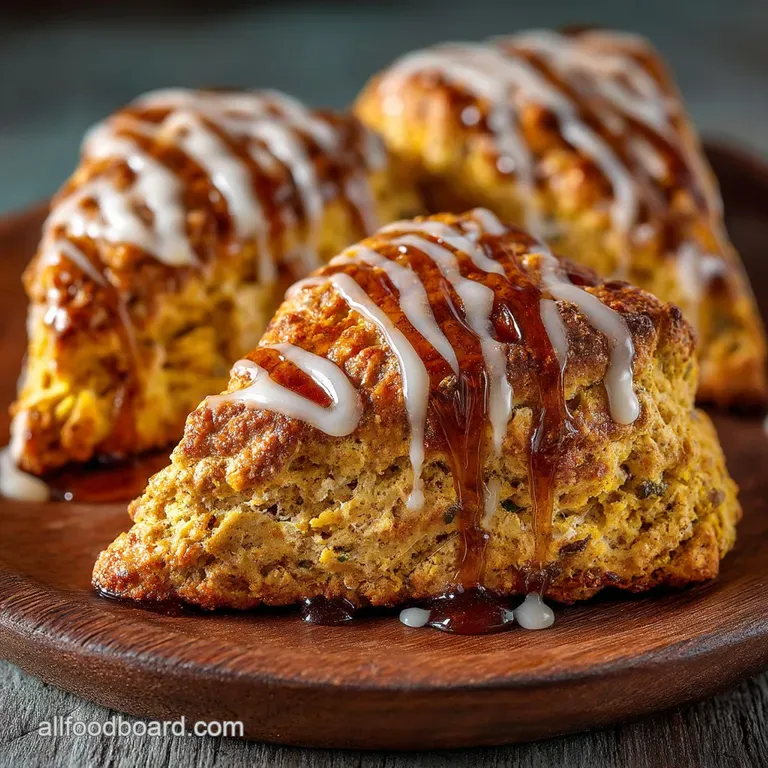
Spiced Pumpkin Scones with Brown Butter Maple Glaze
The Autumnal Art of Flaky Scones: A Promise of Perfect Crumb
If you are seeking the ultimate fall treat, look no further than this definitive Pumpkin Scones Recipe . This recipe guarantees a delicate, light crumb, a significant departure from the dry or dense results often found in commercial bakes.
While the process itself requires only about 15 minutes of active prep time, the key to success lies in mastering a few simple techniques, bringing the total time to roughly 65 minutes, including the critical chilling stage.
The final result is eight generous, perfectly wedge shaped Homemade Scones that are subtly spiced and ready for their maple crown.
The Secret Weapon: Icy Butter and Gentle Hands
The texture of any scone rests entirely on the state of the fat used. For a truly light and Flaky Scone Recipe , we rely on 8 tablespoons (one full stick) of unsalted butter that has been cut into small cubes and thoroughly frozen.
When these icy butter pieces hit the high heat of the oven, the water trapped within them rapidly evaporates, creating pockets of steam. This steam separates the layers of dough, resulting in the desired high rise and tender, splintered crumb.
You must work quickly when incorporating the butter to prevent it from melting; warm butter absorbs into the flour, leading to a flat, dense texture instead of the airy lift we crave.
Why Canned Pumpkin Puree is Your Best Friend Here
We incorporate 1/2 cup of pure, canned pumpkin puree not the pre-spiced pie filling to provide rich moisture, a lovely hue, and an authentic seasonal flavor without introducing too much liquid.
Unlike many baking recipes where pumpkin can weigh down the dough, the richness of the puree here works synergistically with the leavening agents (1 tablespoon of baking powder is used for maximum lift) to keep the scones tender.
This base ensures a superior texture compared to dense commercial imitations, such as attempting a direct Starbucks Pumpkin Scones Recipe copycat.
Elevating Tradition: The Brown Butter Maple Glaze Difference
While the spiced pumpkin scone is fantastic on its own, the finishing touch transforms it into an elegant dessert. Our unique Pumpkin Scones with Maple Glaze utilizes 2 tablespoons of butter browned until nutty and golden.
This deep, caramelized flavor is combined with 1 cup of sifted powdered sugar and 2 tablespoons of high-quality dark Grade A maple syrup. This yields a glaze that is thicker, richer, and far more complex than simple powdered sugar icing, balancing the warmth of the cinnamon, ginger, and nutmeg baked into the scone.
Gathering Your Tools and Treasures for Ideal Pumpkin Scones
Successful baking begins with meticulous ingredient preparation and the right equipment. Our recipe requires precision due to the delicate nature of scone dough.
Dry Ingredients: The Foundation of Fluffiness
The bulk of the structure comes from 2 1/4 cups of all-purpose flour. It is essential to measure this by spooning the flour gently into the cup and leveling it off, as scooping directly compacts the flour, resulting in a heavier, drier final product.
We combine this with 1/3 cup of granulated sugar for subtle sweetness, 1 tablespoon of baking powder, 1/2 teaspoon of fine sea salt, and 2 teaspoons of pumpkin pie spice, which builds the immediate autumnal aroma and flavor.
Wet Components: Ensuring Moisture and Flavor Depth
To bind our dry mixture and activate the leavening, we require cold liquid. In addition to the aforementioned 1/2 cup of pumpkin puree, we use one large, lightly beaten egg and 3 tablespoons of cold buttermilk.
The slight acidity in the buttermilk reacts perfectly with the baking powder, promoting excellent rise, while also tenderizing the dough, which is why this Pumpkin Scones Buttermilk approach yields such soft results. Keep all wet ingredients chilled until the moment they are added to the dry mix.
Essential Kitchen Gear for Scone Success
While a large mixing bowl and a standard baking sheet lined with parchment paper are non-negotiable, the primary tool for blending the butter is crucial. I highly recommend a pastry blender, although a food processor set to pulse can work swiftly.
For shaping, a sharp chef’s knife or a 2.5 inch diameter scone cutter is needed. A small saucepan is required for carefully browning the butter for the glaze, and a wire rack must be ready for quick cooling.
Related Recipes Worth Trying
- Healthy Pumpkin Mousse Recipe Light Spiced Naturally Sweetened — Craving pumpkin pie without the heaviness Try this easy Healthy Pumpkin Mousse made with Greek yogurt A light fall dessert recipe ready in minutes
- Creamy Pumpkin Cottage Cheese Breakfast Bowl in 10 Mins — Upgrade your mornings with this 10minute Pumpkin Cottage Cheese Breakfast Bowl High Protein Breakfast Bowls never tasted so much like pie Get the easy recipe
- Best Homemade Pumpkin Spice Milkshake Recipe Easy Creamy — Tired of watery shakes This easy Pumpkin Spice Milkshake recipe guarantees a thick creamy autumn hug in a glass with real pumpkin and warming spices
Method Mastery: Baking Flawless Spiced Pumpkin Scones

The medium difficulty level of this recipe stems entirely from mastering the delicate mixing stages. Following these steps precisely ensures an Easy Pumpkin Scones experience with professional results.
Building the Dough: Incorporating Cold Butter Perfectly
After combining the dry ingredients, the frozen butter cubes are added. Using your pastry blender, quickly cut the butter into the flour mixture until the pieces resemble coarse breadcrumbs or small peas. The mixture should feel gritty, not smooth.
Next, quickly whisk the wet ingredients (puree, buttermilk, egg) and pour them all at once into the dry ingredients. Use a spatula or wooden spoon to mix minimally. Stop as soon as the mixture starts to come together into a shaggy dough; any remaining pockets of dry flour should disappear when the dough is pressed during shaping.
The Patty and-Fold Technique for Maximum Lift
Turn the shaggy dough out onto a lightly floured surface. Resist the urge to knead! Instead, use your hands to gently press the dough into an even circle, approximately 1 inch thick. This soft manipulation is key to achieving a beautifully layered interior.
Using a sharp knife, cut the circle into eight equal wedges, similar to slicing a pizza. If using a round cutter, press straight down and lift straight up twisting the cutter seals the dough edges and restricts the rise.
Shaping and Freezing: The Critical Pre-Bake Chill
Transfer the cut wedges onto the prepared baking sheet. This step is absolutely critical: refrigerate the shaped scones for a full 30 minutes. This chilling period allows the gluten strands to relax and, more importantly, ensures the frozen butter is rock solid before it hits the heat.
This guarantees the maximum lift and flakiness during baking.
Achieving the Golden Edge: Oven Temperature and Timing
Preheat your oven to a high temperature of 425°F (220°C). The high heat is required to rapidly activate the cold butter. Bake the chilled scones for 18 to 20 minutes, rotating the pan halfway through for even color development.
They are done when the edges are deep golden brown and a toothpick inserted into the centre comes out clean. Transfer them immediately to a wire rack to cool completely before applying the glaze.
The Expert Baker’s Troubleshooting Guide
Most issues in scone baking trace back to temperature control and overmixing. If your scones are spreading too much, your butter was too warm when they entered the oven, or you accidentally used too much liquid.
If the final product is tough or chewy, you overdeveloped the gluten by mixing the dough for too long after the liquids were added. Remember the golden rule: mix until just combined.
Another common mistake is inaccurately measuring the flour; always use the spoon and-level technique to avoid adding excess dry ingredients, which invariably results in dry, crumbly scones. Finally, ensure your baking powder is fresh, as its potency directly impacts the scone’s vertical rise.
Beyond the Basic Batch: Storage and Variations
Once you master the foundational technique for these spiced pumpkin delights, you can easily adapt the recipe for different dietary needs or flavors.
Preventing Tough Scones: Common Mistakes to Avoid
Beyond temperature and mixing, two small errors can ruin the flaky texture. First off,, never twist your cutter when shaping; the sealed edges will "glue" the layers together, preventing proper rise. Next,, always ensure the scones are fully cooled before glazing.
Applying the glaze while they are still warm causes it to melt and absorb unevenly, resulting in a soggy exterior rather than a clean, set finish.
Glazing and Serving: Best Practices for Presentation
Once the scones are completely cool, prepare the glaze by browning 2 tablespoons of butter, then whisking it with the powdered sugar, maple syrup, vanilla extract, and adding just 1 to 2 tablespoons of milk or cream until the desired thick, yet pourable, consistency is reached.
Drizzle the glaze liberally over the cooled scones and allow it to set for 10– 15 minutes. Serve these best Homemade Scones alongside a robust English Breakfast tea or a homemade chai latte.
For an extra rich experience, skip the glaze and pair them with clotted cream and spiced apple butter.
make-ahead Magic: Freezing Dough for Later Enjoyment
These wedges freeze exceptionally well, making them ideal for quick weekend baking. After cutting the dough into 8 wedges and placing them on the baking sheet, freeze them until solid (about 2 hours). Once solid, transfer the unbaked wedges to a freezer safe bag or container.
When ready to bake, place the frozen scones directly onto a parchment lined sheet and bake them immediately, adding 3– 5 minutes to the total baking time (approx. 22– 25 minutes total).
Flavor Switches: Vegan and gluten-free Pumpkin Scone Adaptations
The core structure of this recipe allows for wonderful adaptations. For Pumpkin Scones gluten-free , substitute the all-purpose flour with a high-quality 1:1 gluten-free baking blend that contains xanthan gum. The method remains identical, but handle the dough even more gently.
For a vegan approach, replace the dairy butter with a solid, frozen vegan butter stick (avoid tubs, which have too much water) and use a plant based alternative such as oat milk mixed with a little vinegar to mimic the buttermilk needed for effective leavening.
If you are aiming for slightly Healthy Pumpkin Scones , replace up to half of the all-purpose flour with whole wheat pastry flour for added fiber while retaining a tender crumb.

Recipe FAQs
I keep getting tough, dense scones. What's the secret to making these Pumpkin Scones light and flaky?
The golden rule for achieving a proper, flaky crumb is keeping everything incredibly cold. Ensure your butter is frozen solid and your wet ingredients are chilled, as cold fat creates steam for lift.
The second crucial tip is handling the dough as little as possible; mix until just combined otherwise, you’ll develop the gluten, resulting in a rubbery brick instead of a delicate scone.
These sound perfect for a weekend brunch. Can I prepare the Pumpkin Scones dough ahead of time, or freeze them?
Absolutely! Scones are brilliant for batch baking. The best method for prepping ahead is to cut the scones into their final shapes and then freeze them on a baking sheet until solid.
Once frozen, transfer them to an airtight container and bake them straight from the freezer (adding about 5 minutes to the overall baking time) whenever a sudden craving strikes. They are best baked fresh rather than refrigerating the raw dough overnight.
I don't have buttermilk or canned pumpkin puree. Are there any reliable store cupboard swaps?
If you’re out of buttermilk, don't fret! You can easily make a substitute by mixing regular whole milk with half a teaspoon of lemon juice or white vinegar and letting it stand for five minutes to curdle slightly.
For the pumpkin, it must be thick and dense; if using fresh pumpkin, make sure to roast and thoroughly drain it to avoid adding too much moisture, which could make the dough too sticky to handle.
That Brown Butter Glaze sounds delicious, but can I serve them plain, perhaps with jam and clotted cream?
You certainly can! While the maple glaze makes these feel like a decadent autumnal dessert, a truly traditional scone is served plain or dusted with sugar, meant to be split and enjoyed with fruit preserves and proper clotted cream the Cornish or Devonshire way!
If skipping the glaze, consider brushing the tops with an egg wash before baking to ensure a lovely, deep golden crust.
How do I lighten these up? Are Pumpkin Scones terribly unhealthy with the glaze?
As a treat, they’re perfectly fine, but the glaze does add a fair amount of sugar and calories. To lighten them, you can halve the amount of glaze or skip it entirely, instead sprinkling a tiny bit of coarse sugar on the tops before baking.
You can also substitute up to half of the all-purpose flour with whole wheat pastry flour to boost the fibre without compromising that delicate texture too much.
Flaky Pumpkin Scones With Maple Glaze

Ingredients:
Instructions:
Nutrition Facts:
| Calories | 678 kcal |
|---|---|
| Protein | 4.6 g |
| Fat | 26.7 g |
| Carbs | 68.6 g |
| Fiber | 3.6 g |
| Sodium | 5105 mg |
