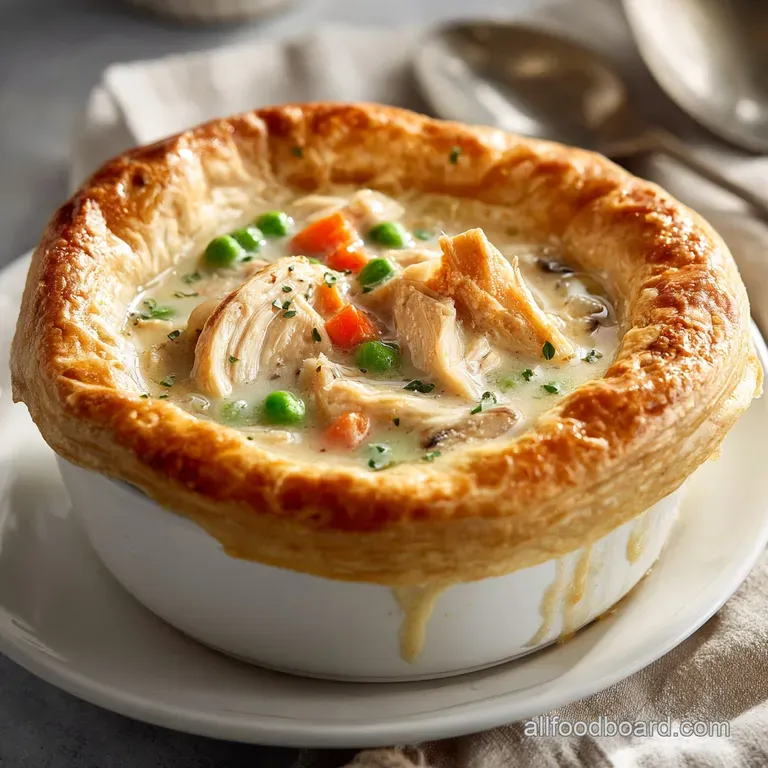
Easy Chicken Pot Pie Chicken Recipe
- Time: Active 15 minutes, Passive 30 minutes, Total 45 minutes
- Flavor/Texture Hook: Flaky, buttery crust over a silky, herb flecked gravy
- Perfect for: Cozy Sunday family dinners or an impressive weeknight treat
- Mastering the Savory Foundation of Chicken Pot Pie Chicken
- Essential Specifications for Success with this Dish
- Analyzing the Science Behind the Primary Components
- Necessary Tools for a Streamlined Cooking Experience
- Step by Step Progression from Preparation to Plate
- Expert Strategies to Avoid Common Culinary Mishaps
- Customizing Your Meal for Every Family Member
- Common Misconceptions About Pot Pie
- Maintaining Freshness with Proper Storage and Use
- Complementary Sides to Round Out Your Dinner
- Recipe FAQs
- 📝 Recipe Card
Mastering the Savory Foundation of Chicken Pot Pie Chicken
The first thing you hear is that high pitched crackle when the knife tip hits the pastry. It's not a thud; it's a shatter. Last Sunday, my kitchen smelled like a rainy day cure all because I finally nailed the ratio for this specific filling.
I used to just throw everything in a pot and hope for the best, but the result was always a bit sad - usually a soggy bottom and meat that felt like rubber.
We've all been there, standing over a stove wondering why the sauce looks like dishwater instead of that glossy, thick gravy we see in magazines. After a few years of trial and error (and more than one burnt crust), I figured out that the secret isn't a fancy ingredient.
It’s the way you treat the chicken pot pie chicken before it ever sees the oven. We're going for deep browning and a velvety sauce that clings to the spoon.
You don't need a massive array of pots or a culinary degree to get this right. We are keeping things simple with minimal tools but maximum flavor. Trust me, once you see those first bubbles of gravy peeking through a golden brown crust, you’ll never go back to the frozen stuff.
Let’s get into the details so you can recreate this in your own kitchen tonight.
Essential Specifications for Success with this Dish
The Searing Principle: Browning the cubed meat creates a Maillard reaction, which develops complex, savory flavors that raw poaching simply cannot match.
Starch Gelatinization: Cooking the flour in butter for at least two minutes allows the starch granules to swell and burst, ensuring a thick sauce without a raw flour taste.
Thermal Shock Crust: Using chilled puff pastry against a hot filling (or a very hot oven) causes the water in the dough layers to turn into steam instantly, creating maximum lift and flakiness.
Osmotic Balance: Salting the mirepoix (onions, carrots, celery) early draws out moisture, allowing the vegetables to soften in their own juices and concentrate their natural sweetness.
| Thickness of Meat | Internal Temp | Rest Time | Visual Cue |
|---|---|---|---|
| 1 inch cubes | 165°F (74°C) | 5 minutes | Juices run clear, no pink center |
| 0.5 inch dice | 165°F (74°C) | 3 minutes | Opaque throughout, firm texture |
| Shredded (pre cooked) | N/A | 2 minutes | Fully coated in bubbling sauce |
When you are deciding on the protein, you have a few choices that will change the final texture. While some prefer the lean profile of breasts, many home cooks swear by the extra moisture found in thighs.
Actually, the way you prep the meat is similar to the technique I use in my How To Roast recipe, where browning the skin is the absolute key to flavor. For this pie, we are browning the cubes to build that same savory base.
Analyzing the Science Behind the Primary Components
Choosing the right parts for your chicken pot pie chicken is like building a house; you need a solid foundation. We use bone broth here instead of standard stock because the extra collagen provides a silkier mouthfeel that coats the back of a spoon beautifully.
| Component | Science Role | Pro Secret |
|---|---|---|
| Unsalted Butter | Fat medium for roux | Melt until it stops foaming to ensure water has evaporated before adding flour. |
| All Purpose Flour | Thickening agent | Toast it until it smells like popcorn to remove the "cereal" flavor. |
| Chicken Bone Broth | Flavor and Body | Use room temp broth to prevent the roux from clumping into small balls. |
| 2% Milk | Emulsification | Adds calcium and fat to create a creamy "liaison" without the heaviness of cream. |
Every ingredient has a job to do. The dried sage and fresh thyme aren't just for decoration; they provide volatile oils that cut through the richness of the butter and pastry. I usually lean toward unsalted butter so I have total control over the seasoning, especially since bone broth can vary wildly in salt content.
| Original Ingredient | Substitute | Why It Works |
|---|---|---|
| 1.5 lb Chicken Breast | Chicken Thighs | More fat and connective tissue; stays juicier during the long bake. |
| 2 cups Bone Broth | Vegetable Stock | Lighter flavor profile; Note: May lack the "velvety" mouthfeel of collagen. |
| 1 sheet Puff Pastry | Refrigerated Pie Crust | Sturdier and less airy; results in a traditional, denser "pie" texture. |
| 1/2 cup 2% Milk | Heavy Cream | Much richer and thicker; Note: Increases calories significantly. |
You'll notice we are using frozen peas and corn. This is a deliberate choice. Frozen vegetables are blanched at peak ripeness, and they hold their shape and bright color much better than canned versions, which can turn to mush in the heat of the oven.
Necessary Tools for a Streamlined Cooking Experience
To get that perfect sizzle, you really only need a few basic items. I recommend a heavy bottomed skillet something like a Lodge cast iron or a thick stainless steel pan. This ensures the heat is distributed evenly so your onions don't burn while your carrots are still crunchy.
Chef's Tip: Freeze your butter for 10 minutes before starting the roux. Cold fat hitting a hot pan helps control the melting rate, which I find gives a smoother start to the sauce.
You will also need a solid wooden spoon for scraping the "fond" (those little brown bits) off the bottom of the pan. That fond is where all the concentrated flavor lives! Finally, a simple pastry brush will help you get that glossy, mahogany finish on the puff pastry.
If you don't have one, the back of a small spoon works in a pinch, though it’s a bit messier.
step-by-step Progression from Preparation to Plate
- Prep the protein. Pat 1.5 lb chicken pot pie chicken (cubed) completely dry with paper towels. Note: Moisture is the enemy of a good sear; wet meat will steam instead of brown.
- Sear the chicken. Heat 1 tbsp vegetable oil in a large skillet over medium high heat. Add chicken cubes in a single layer and cook for 5 minutes until a golden crust forms on at least two sides.
- Sauté the aromatics. Remove chicken and add 3 tbsp unsalted butter to the same pan. Stir in 1 diced yellow onion, 2 sliced carrots, and 2 diced celery ribs. Cook for 6 minutes until the onions are translucent and fragrant.
- Create the roux. Sprinkle 1/3 cup all purpose flour over the vegetables. Stir constantly for 2 minutes until the flour smells slightly toasted.
- Build the sauce. Slowly pour in 2 cups chicken bone broth and 1/2 cup 2% milk while whisking or stirring briskly. Cook for 4 minutes until the liquid thickens into a velvety gravy.
- Fold in extras. Return the seared chicken to the pan. Add 1 cup frozen peas, 1 cup frozen corn, 1 tbsp fresh thyme, 1 tsp dried sage, 0.5 tsp salt, and 0.5 tsp black pepper.
- Prepare the pastry. Unfold 1 sheet of puff pastry (approx. 250g) on a lightly floured surface. Roll it out slightly so it’s about 1 inch wider than your baking dish.
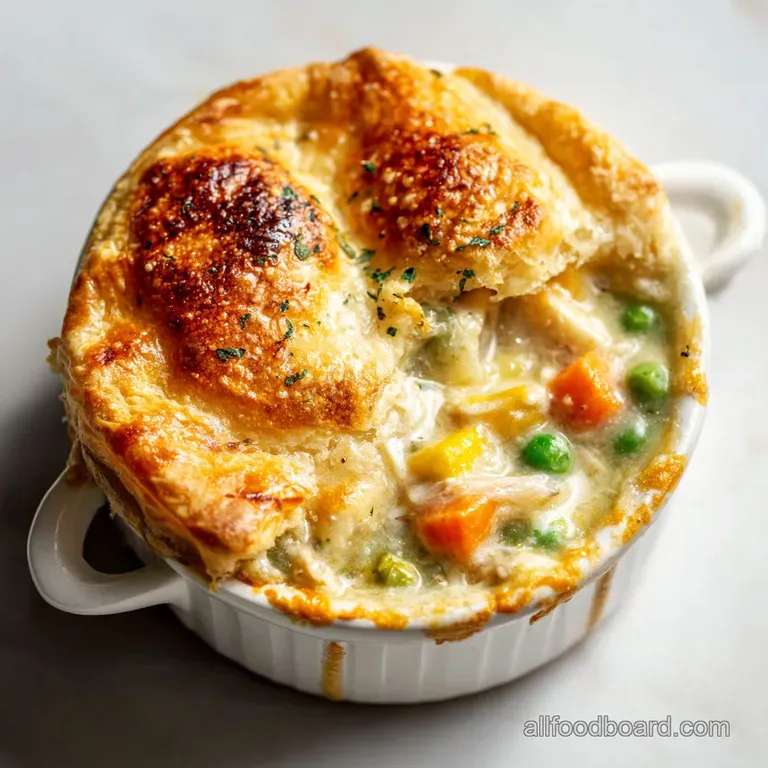
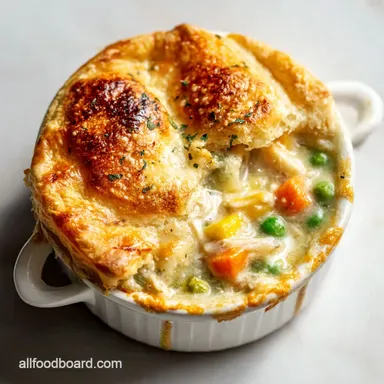
- Assemble the pie. Pour the filling into a 9 inch pie dish or deep dish pan. Drape the pastry over the top, crimping the edges to seal. Cut three small slits in the center to let steam escape.
- Apply the wash. Whisk 1 large egg with 1 tsp water. Brush the mixture generously over the entire pastry surface until every corner is lightly coated.
- Bake to finish. Place in a 400°F (200°C) oven for 25-30 minutes until the pastry is puffed high and turns a deep golden brown.
This process ensures that every bite has a mix of textures. The chicken stays tender because it finishes cooking inside the gravy, while the vegetables retain just enough bite to be interesting.
If you find yourself loving these types of stovetop to oven transitions, you might also enjoy my Garlic Butter Chicken recipe, which uses a similar velvety sauce technique but focuses on a faster stovetop finish.
Expert Strategies to Avoid Common Culinary Mishaps
The most common heartbreak with any pie chicken is a runny filling. It looks great when it comes out of the oven, but as soon as you cut into it, the gravy runs everywhere like a soup. Usually, this happens because the roux wasn't cooked long enough or the ratio of liquid to flour was slightly off.
To Fix a Runny Filling
If you notice the sauce is too thin before you put the pastry on, don't panic. You can simmer it for an extra 5 minutes uncovered to reduce the liquid. If it's still too thin, mix a teaspoon of cornstarch with a tablespoon of cold water and stir it in.
It will tighten up almost instantly once it hits the boil.
To Prevent a Soggy Pastry
The steam trapped inside the dish is the enemy of a crisp crust. If you don't cut those slits in the top, the moisture will settle on the underside of the dough, making it gummy. Make sure your oven is fully preheated to 400°F (200°C) before the pie goes in; that high heat is what makes the butter in the pastry explode into those flaky layers.
| Problem | Root Cause | Solution |
|---|---|---|
| Filling is bland | Not enough salt or acidity | Add a tiny splash of lemon juice or extra 0.5 tsp salt at the end. |
| Pastry is dark but raw inside | Oven temp too high | Tent with foil and lower heat to 375°F (190°C) for the last 10 mins. |
| Chicken is dry | Overcooked during searing | Only sear for 2 mins per side; it will finish cooking in the gravy. |
Common Mistakes Checklist
- ✓ Pat chicken dry before searing to ensure a golden crust rather than grey, steamed meat.
- ✓ Don't skip the "egg wash" step; it's the only way to get that professional, shiny finish.
- ✓ Let the filling cool for 5-10 minutes before adding the pastry if you have time; it prevents the dough from melting too early.
- ✓ Always place the baking dish on a rimmed baking sheet to catch any gravy overflows.
- ✓ Use a sharp knife for the steam vents to avoid squashing the delicate pastry layers.
Customizing Your Meal for Every Family Member
Scaling this recipe is fairly straightforward since the filling is cooked in one pan. If you are cooking for a larger crowd, you can easily double the ingredients. Just be sure to use two separate pie dishes rather than one giant one, as the pastry in the middle of a massive dish often struggles to cook through before the edges burn.
For a crowd (12 servings): Use 3 lb chicken and double all vegetable and liquid amounts. Increase salt/spices to only 1.5x the original amount (spices can become overwhelming when doubled perfectly). Work in batches when searing the chicken to avoid overcrowding the pan.
For a small household (3 servings): Cut all ingredients in half. Use a smaller 6 inch oven safe skillet to bake it directly, saving on cleanup. Reduce baking time by about 5-7 minutes.
If you are looking for a different flavor profile, try a "Teriyaki twist" by swapping the herbs for ginger and soy, similar to the flavor base in a Teriyaki Chicken Stir recipe. It's not traditional, but it’s a fun way to use up leftover vegetables in the fridge.
Common Misconceptions About Pot Pie
One major myth is that you need heavy cream to make the filling "creamy." In reality, a well made roux with milk and high-quality bone broth creates a much more balanced texture. Heavy cream can sometimes feel too "heavy" or greasy, masking the delicate flavor of the thyme and sage.
Another misconception is that the chicken must be fully cooked before it goes into the oven. If you cook it 100% on the stove, it will almost certainly be dry and stringy after 30 minutes in a 400°F oven.
You only want a good sear on the outside; let the ambient heat of the gravy do the rest of the work.
Maintaining Freshness with Proper Storage and Use
This dish is a meal prep dream. You can store the cooked pie in the fridge for up to 3 days. To reheat, I highly recommend using the oven rather than the microwave. A microwave will make the pastry soft and sad, but a 350°F (180°C) oven for 10-15 minutes will bring that "shatter" back to the crust.
Freezing: You can freeze the unbaked pie! Assemble everything, wrap it tightly in plastic wrap and then foil, and freeze for up to 2 months. Bake it directly from frozen at 400°F (200°C), adding about 15-20 minutes to the total bake time.
Zero Waste Tip: Don't throw away the celery leaves or the onion ends. Toss them into a freezer bag. Once you have a full bag, boil them with water and chicken bones to make your own homemade broth for the next time you make this recipe.
Complementary Sides to Round Out Your Dinner
Since this chicken pot pie chicken is quite rich, I usually pair it with something bright and acidic. A simple green salad with a sharp lemon vinaigrette is usually enough to balance the buttery pastry.
If you want something heartier, roasted balsamic Brussels sprouts or steamed green beans with a bit of garlic work beautifully.
If you are in the mood for a different kind of comfort, this filling is actually very similar to a thickened version of a Cream of Chicken Soup recipe. Sometimes, if I have leftover filling but no pastry, I’ll just thin it out with a little extra broth and serve it in bowls with crusty bread on the side. It's the ultimate "two for-one" kitchen hack that keeps dinner interesting without extra work.

Recipe FAQs
What part of the chicken is best for chicken pot pie?
Chicken thighs offer the best result for moisture retention. Thighs have more intramuscular fat, which prevents them from drying out during the long bake required for the pastry to crisp.
Should you cook chicken before putting it in a pie?
No, only sear it partially before adding it to the filling. Fully cooking the chicken beforehand guarantees a dry, stringy texture after the 30-minute bake time; it should finish cooking gently in the simmering gravy.
How to prep chicken breast for pot pie?
Cube the breast into uniform 1 inch pieces and pat them completely dry. Sear the cubes vigorously in hot oil for only 2 minutes per side to achieve a golden crust, then remove them before making the roux.
What are some common mistakes to avoid when making chicken pot pie?
Avoid skipping the roux cooking step and neglecting the steam vents. Cooking the flour in butter for at least 2 minutes ensures the sauce thickens properly and prevents a raw flour taste, while vents stop the pastry from becoming soggy.
Is it true that you must use heavy cream for a rich filling?
No, this is a common misconception. A well made roux using whole milk and good quality chicken bone broth provides plenty of silkiness without the heavy, sometimes greasy mouthfeel of pure cream.
How can I ensure my puff pastry crust is flaky and not soggy?
Brush the pastry thoroughly with an egg wash and ensure your oven is fully preheated to 400°F (200°C). The high initial heat causes thermal shock, maximizing the lift of the butter layers. If you master this high heat technique here, you can apply the same principle when baking our Shepherds Pie recipe.
How do I make sure the vegetables don't turn to mush?
Use frozen vegetables and add them near the end of the gravy preparation. Frozen peas and corn are blanched at peak freshness, helping them retain texture; if you prefer a heartier vegetable mix, consider a recipe like Chicken and Dumplings recipe which cooks ingredients slightly differently.
Easy Chicken Pot Pie Chicken
Ingredients:
Instructions:
Nutrition Facts:
| Calories | 601 kcal |
|---|---|
| Protein | 42.5 g |
| Fat | 27.1 g |
| Carbs | 39.9 g |
| Fiber | 2.5 g |
| Sugar | 3.2 g |
| Sodium | 650 mg |
