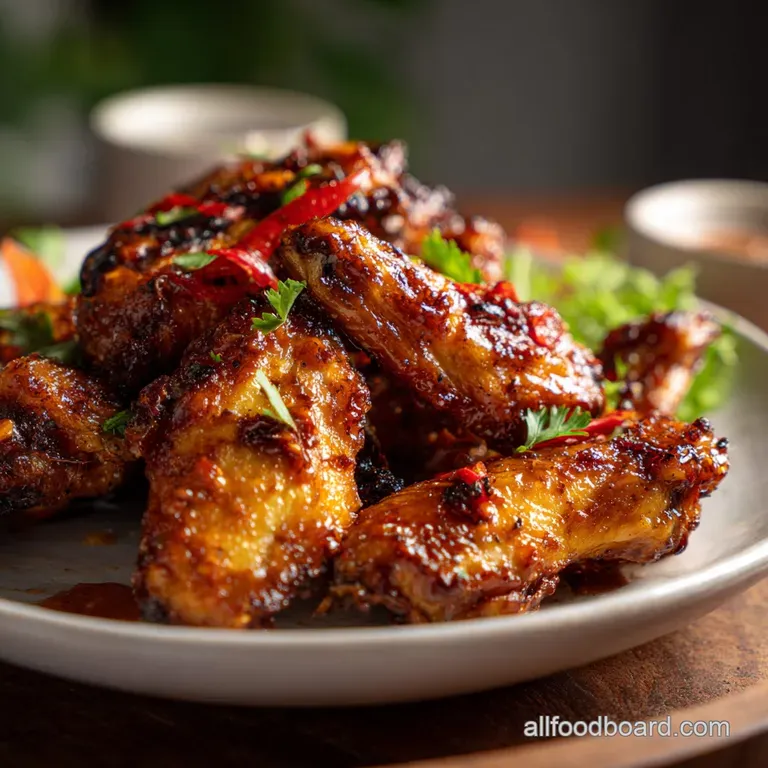
Baked Chicken Wings Recipe: Ultimate Crispy Skin
- Time: Active 10 mins, Passive 45 mins, Total 55 mins
- Flavor/Texture Hook: Shatteringly crispy skin with a smoky, savory bite
- Perfect for: Game day snacks or easy weeknight protein
- Achieving a Perfect Baked Chicken Wings Recipe
- The Physics of the Crunch
- Component Analysis for Chicken Success
- Crucial Success Measurements
- Essential Kitchen Elements
- Precise Step-by-Step Cooking
- Common Wing Texture Fixes
- Flavor Profile Variations
- Safe Handling and Storage
- Pairing and Plating Ideas
- Recipe FAQs
- 📝 Recipe Card
Achieving a Perfect Baked Chicken Wings Recipe
The first time I tried to make wings at home, I ended up with a kitchen full of smoke and a pile of rubbery, sad chicken. I was using a recipe that promised "crispy" results but ignored the basic reality of how poultry skin behaves in a standard oven.
I almost gave up and went back to the local sports bar, but I knew there had to be a way to get that snap without the vat of bubbling oil.
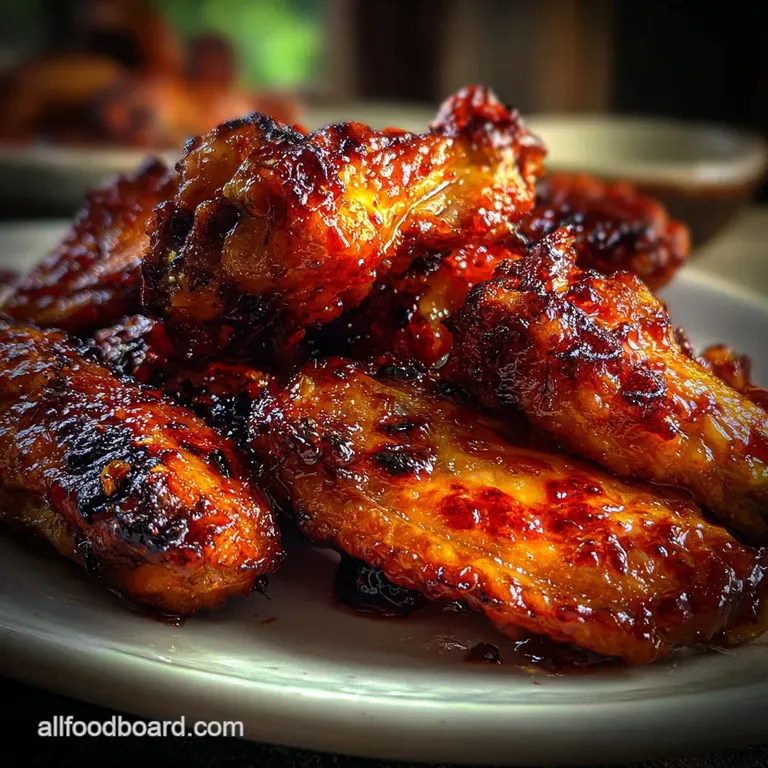
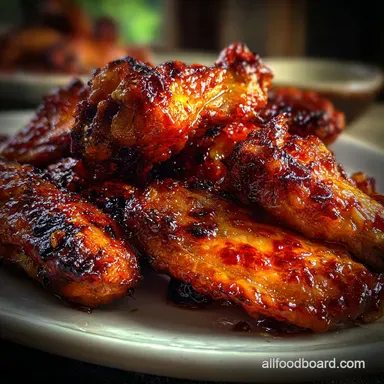
Now, every time I hear that distinct sizzle when the tray comes out of the oven, I smile. These aren't just "good for being baked" - they are genuinely better than most fried versions.
The aroma of toasted garlic and smoked paprika fills the house, and when you pick one up, the skin literally crackles under your fingers. It's the kind of sound that makes everyone in the room stop talking and just start eating.
We are going to skip the complicated breading and the messy cleanup. This method relies on simple pantry staples and a few specific techniques that I've refined over dozens of batches.
Whether you're hosting a crowd or just want a solid dinner for two, this approach delivers a velvety interior and a golden, brittle exterior every single time.
The Physics of the Crunch
Moisture Evaporation: Cornstarch acts as a desiccant, drawing moisture out of the skin to allow the fat to render and crisp. The Maillard Reaction: High heat combined with the proteins in the chicken creates a complex brown crust and deep savory flavor.
| Wing Part | Internal Temp | Rest Time | Visual Cue |
|---|---|---|---|
| Flat (Wingette) | 165°F | 3 mins | Skin pulled back from bone |
| Drumette | 170°F | 5 mins | Juices run clear when pierced |
| Jumbo Wing | 175°F | 5 mins | Skin is deeply bronzed and tight |
Component Analysis for Chicken Success
If you're looking for a kid friendly alternative to these wings, you might want to try this Foolproof Juicy Flavorful recipe for homemade patties. However, for the true wing experience, we have to look at how each ingredient interacts with the heat. The cornstarch is the MVP here because it raises the pH of the skin, which accelerates the browning process while creating a physical barrier that stays brittle even after the meat sits for a few minutes.
| Ingredient | Science Role | Pro Secret |
|---|---|---|
| Cornstarch | Moisture Absorber | Essential for a thin, brittle crust |
| Smoked Paprika | Color Developer | Adds a "fried" hue without the oil |
| Sea Salt | Protein Denaturant | Tightens the skin for better snap |
Crucial Success Measurements
- 2 lbs party wings (flats and drums): Why this? Pre separated pieces ensure even heat distribution and better airflow. [Substitute: Whole wings, but cut them yourself to save money.]
- 1 tbsp cornstarch: Why this? Creates the characteristic "shatter" texture without a thick batter. [Substitute: Potato starch for a similar crisp.]
- 1 tsp garlic powder: Why this? Provides savory depth that survives high oven temperatures. [Substitute: Onion powder if you prefer a milder bite.]
- 1 tsp onion powder: Why this? Adds sweetness and complexity to the dry rub. [Substitute: Granulated garlic for a sharper finish.]
- 1/2 tsp smoked paprika: Why this? Imparts a wood fired aroma and deep red color. [Substitute: Sweet paprika for less smoke.]
- 1 tsp sea salt: Why this? Draws out moisture while seasoning the meat deeply. [Substitute: Kosher salt.]
- 1/2 tsp cracked black pepper: Why this? Provides a sharp contrast to the rich fat. [Substitute: White pepper for a subtle heat.]
Essential Kitchen Elements
You don't need a deep fryer or an expensive air fryer to make this Baked Chicken Wings Recipe work. A standard rimmed baking sheet is the foundation. I always suggest using a wire cooling rack set inside that baking sheet.
This allows the hot air to circulate under the wings, preventing the bottom from sitting in rendered fat and getting soggy. It turns your oven into a giant convection machine.
Paper towels are actually your most important "tool" here. Any surface moisture is the enemy of crispiness. If the skin is wet, it will steam rather than sear. For those who love a sticky glaze, you'll enjoy this Sweet and Savory recipe for glazed chicken, but for these wings, dry is better. Make sure your oven is fully preheated before the tray goes in, as that initial blast of heat is what sets the crust.
Precise step-by-step Cooking
- Preheat oven to 425°F. Note: This high heat is necessary to render fat quickly.
- Pat 2 lbs party wings dry with paper towels. until no moisture remains on the skin.
- Combine cornstarch, garlic powder, onion powder, paprika, salt, and pepper in a large bowl.
- Toss wings in the spice mixture. Note: Ensure every nook and cranny is lightly coated.
- Set a wire rack over a large baking sheet.
- Arrange wings in a single layer. until they are not touching each other.
- Bake for 20 minutes. Note: This starts the fat rendering process.
- Flip wings using tongs. until you hear a faint sizzle from the rack.
- Bake 25 mins more until skin is golden brown and bubbling.
- Rest 5 minutes. until the crust hardens and stabilizes.
Common Wing Texture Fixes
Why Your Wings Aren't Crispy
The most frequent culprit is overcrowding. When you pack the wings too tightly, they release steam that gets trapped between the pieces, effectively poaching the skin instead of roasting it. Another common issue is skipping the drying step. Similar to the skin on a How To Roast recipe, drying the surface is key to a golden finish.
| Problem | Root Cause | Solution |
|---|---|---|
| Soft, flabby skin | Low oven temp | Ensure your oven is at least 425°F |
| Sticking to rack | Lack of fat rendering | Lightly oil the rack before placing wings |
| Salty aftertaste | Too much fine salt | Use coarse sea salt or reduce amount |
Common Mistakes Checklist
- ✓ Pat chicken completely dry before seasoning (prevents steaming)
- ✓ Do not skip the cornstarch (it's the secret to the crunch)
- ✓ Use a wire rack to allow 360 degree airflow
- ✓ Ensure the oven is fully preheated before starting
- ✓ Avoid saucing the wings before they are fully cooked
Flavor Profile Variations
When you need to adjust this for a larger crowd, scaling is straightforward. For 4 lbs of wings, you can double the dry ingredients, but don't just double the salt blindly. Stick to 1.5x the salt to prevent them from becoming over seasoned. You'll likely need two separate baking sheets to maintain the airflow.
If you're using two racks in the oven, rotate them halfway through the cooking time to account for any hot spots.
| Option | Fresh | Pre Cut Shortcut | Impact |
|---|---|---|---|
| Preparation | Whole Wings | Party Wings | Save 10 mins of prep time |
| Quality | Intact Skin | Consistent Sizes | More even cooking across the tray |
| Cost | Lower | Higher | Pay for the convenience of butchery |
If you want a different vibe, try these three adjustments: If you want a citrus kick, add 1 tbsp lemon zest to the dry rub. If you want it spicy, add 1/2 tsp cayenne pepper to the cornstarch mix. If you want it earthy, swap the paprika for dried oregano and cumin.
Safe Handling and Storage
- Fridge: Store leftovers in an airtight container for up to 4 days.
- Freezer: Wings can be frozen for 2 months, though the skin will lose some crispiness.
- Zero Waste: Don't toss the wing tips if you bought whole wings! Save them in a freezer bag to make a rich chicken stock later. You can also use any leftover meat for a quick buffalo chicken salad the next day.
Pairing and Plating Ideas
Searing meat does not "seal in juices." This is a common misunderstanding in the kitchen. Moisture loss happens as the protein fibers contract under heat. The real reason we use high heat and cornstarch is to create a Maillard reaction and a physical barrier that mimics a fried crust.
Another myth is that you need to boil wings before baking. While this renders some fat, it also waterlogs the skin, making it much harder to get that "shatter" texture we want. Trust the dry rub and the high heat to do the work.
For serving, I love a cold, creamy dip to balance the heat. A classic blue cheese or a herb heavy ranch is perfect. If you want to go the extra mile, serve them with some crisp celery sticks and carrot ribbons.
If you're feeling adventurous, toss half the batch in a lemon pepper butter sauce immediately after they come out of the oven. The heat from the wings will melt the butter and create a glossy, zesty coating that is absolutely addictive.

Recipe FAQs
What is the best method for cooking wings in the oven?
Use a wire rack set over a baking sheet. This elevates the wings, allowing hot air to circulate completely around them, which is crucial for rendering fat and achieving even crispness on all sides.
Should chicken wings be at 350 or 400?
Aim higher, use 425°F (220°C). Wings require high heat to rapidly evaporate skin moisture and initiate the Maillard reaction, which creates the desired crunch; 350°F will primarily dry them out slowly.
What is the secret ingredient for crispy chicken wings?
Cornstarch is the non-negotiable secret. A small amount tossed with the dry rub absorbs surface moisture and helps create a thin, brittle crust that stays crisp longer than flour based coatings.
Should I bake my wings covered or uncovered?
Always bake them uncovered. Covering the wings traps steam, which will result in soft, soggy skin rather than the desired crispy texture.
Is it true that boiling wings before baking makes them crispier?
No, this is a common misconception. Boiling the wings first hydrates the skin, making it much harder for the oven heat to properly dry the surface and achieve a good snap.
How do I ensure the wings don't stick to the wire rack?
Lightly oil the rack before arranging the coated wings. This prevents the rendered fat from bonding the skin to the metal surface, ensuring easy release and minimal tearing when you flip them.
How do I get deep color on the wings without burning the spices?
Use smoked paprika and start baking immediately after tossing. The paprika imparts a deep, fried like color, and mastering the precise timing here is similar to controlling oven spring in your baking. If you enjoy mastering temperature control, you can apply these same sensory cues to our Ground Beef Stuffed recipe for perfect internal temperature.
Crispy Baked Chicken Wings 2
Ingredients:
Instructions:
Nutrition Facts:
| Calories | 243 kcal |
|---|---|
| Protein | 20.8 g |
| Fat | 16.3 g |
| Carbs | 3.1 g |
| Fiber | 0.4 g |
| Sugar | 0.2 g |
| Sodium | 615 mg |
