Velvety Rich Chocolate Cottage Cheese Ice Cream No Churn Option Included
- The Secret Weapon: Why Cottage Cheese Becomes Decadent Dessert
- Unlocking Creaminess: Beyond Traditional Dairy Bases
- Assembling Your Core Components for Chocolate Bliss
- Essential Toolkit for Achieving Ice Cream Dreams
- The Blending Blueprint: Creating the Perfect Base Mixture
- Freezing Fundamentals: Churning Versus the No-Churn Method
- Elevating Your Frozen Treat: Mix-Ins and Toppings Galore
- Nutritional Deep Dive and Storage Longevity
- Recipe FAQs
- 📝 Recipe Card
The Secret Weapon: Why Cottage Cheese Becomes Decadent Dessert
For years, cottage cheese has held a firm place in the realm of healthy eating, often relegated to simple snacks or post workout meals. But what if I told you this humble, high protein staple is the secret ingredient poised to revolutionize your freezer?
We are stepping away from traditional, heavy cream laden bases and unlocking a new frontier in frozen indulgence. This isn't just about making a healthier alternative; it’s about creating something genuinely luxurious.
The magic lies in its protein structure, which, when properly processed, emulsifies beautifully, providing body and incredible creaminess that rivals premium ice creams, all while keeping things wonderfully light.
Unlocking Creaminess: Beyond Traditional Dairy Bases
The pursuit of the perfect High Protein Desserts often leads to gritty textures or overly icy results when relying solely on skim milk or protein powders. The game changer here is the texture of the cottage cheese itself.
When you blend it down, the fine curds break apart, creating a smooth matrix that holds air and resists large ice crystal formation better than many other low-fat options. This allows us to create truly magnificent Healthy Ice Cream Recipes that satisfy deep cravings without the guilt associated with traditional desserts.
Introducing the Game Changing Chocolate Cottage Cheese Ice Cream
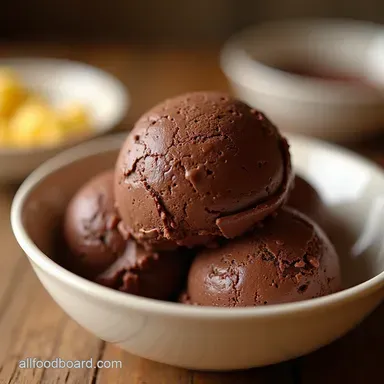
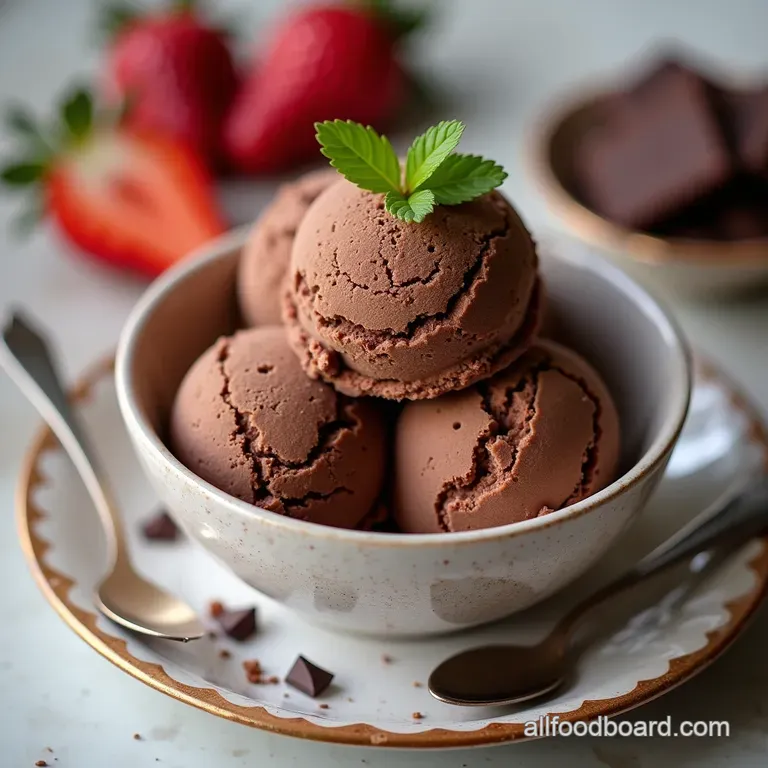
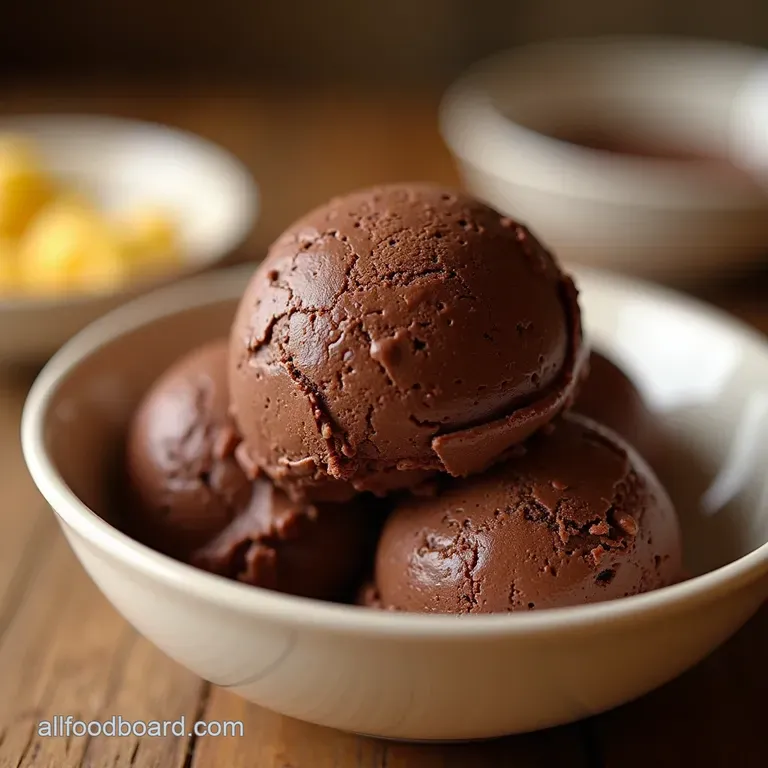
Prepare to meet your new favourite frozen confection: Chocolate Cottage Cheese Ice Cream . This recipe takes that smooth, protein rich base and infuses it with a deep, dark chocolate flavour, resulting in something sophisticated, rich, and utterly surprising.
It’s decadent, satisfying, and deceptively nutritious. Forget the chalky protein bars; this is dessert mastery at its finest, offering one of the most satisfying Cottage Cheese Dessert Recipes available.
Texture Transformation: From Curds to Silky Smooth Perfection
The success of this frozen treat hinges entirely on texture. Nobody wants a grainy mouthfeel when they anticipate creamy ice cream. To achieve that silky smooth perfection required for the Best Chocolate Cottage Cheese Ice Cream , we must commit fully to the blending stage.
We use a high speed blender, combining 16 ounces of full fat cottage cheese with just a splash of milk (about 1/2 cup) to encourage movement. The goal is to process it until it resembles thick, velvety yogurt no lumps allowed. This initial blending is non-negotiable for a smooth final product.
Protein Powerhouse: A Guilt Free Indulgence Explained
What makes this Chocolate Cottage Cheese Ice Cream Recipe so appealing is its inherent nutritional profile. By using cottage cheese as the primary volume driver, we naturally infuse every scoop with significant protein, often hitting double digits per serving.
This high protein content helps slow digestion, meaning you feel satisfied longer. This approach truly elevates Cottage Cheese Recipes Healthy to dessert status without sacrificing flavour integrity.
Assembling Your Core Components for Chocolate Bliss
Crafting exceptional flavour requires selecting high-quality components that work in harmony. For this rich chocolate experience, we need the right dairy structure, the correct level of sweetness, and a truly magnificent source of cocoa.
We start with 16 ounces of cottage cheese, ensuring it is full fat for the best melt and texture, supplemented by 1/2 cup of whole or 2% milk to aid the initial blending process.
Essential Toolkit for Achieving Ice Cream Dreams
While the ingredient list is straightforward, the right equipment ensures we transition from curds to cream flawlessly. This entire process hinges on achieving an utterly smooth blend before freezing commences.
Selecting the Right Cottage Cheese and Cocoa Powder Pairings
For the texture base, full fat cottage cheese is your best friend; the small amount of fat aids in richness. When it comes to chocolate, choose a high-quality, unsweetened cocoa powder, ideally a Dutch processed variety.
Dutch processing mellows the flavour and deepens the colour, giving your dessert that intense, dark profile we crave. We’ll use a generous 1/2 cup, sifted, to prevent any clumps from surviving the blend.
Sweeteners and Flavor Boosters: Crafting the Deepest Chocolate Profile
To balance the slight tanginess of the cheese and the bitterness of the cocoa, we incorporate about 1/2 cup of your preferred sweetener granulated sugar or maple syrup works beautifully.
Beyond the primary flavour, a teaspoon of quality vanilla extract and a tiny pinch of fine sea salt are crucial; that salt doesn't just enhance sweetness, it deepens the perception of chocolate flavour, making the final result far more complex.
Must Have Equipment: Blender Power for Ultra Smooth Results
If you take away only one piece of advice, let it be this: use the best blending tool available. A high speed blender is highly recommended over a standard food processor, as it can break down the milk proteins and curds more effectively, yielding a truly pourable, silken base ready for chilling.
Related Recipes Worth Trying
- Cloud Nine Cottage Cheese Vanilla Mousse NoBake High Protein Treat — Transform cottage cheese into a truly decadent light and airy dessert This nobake Cottage Cheese Vanilla Mousse is high protein and ready in minutes Find...
- Ruby Red Creamy Dream The Ultimate Beetroot and Cottage Cheese Salad — Forget boring lunches This Cottage Cheese and Beet Salad is vibrant creamy and packed with protein A smashing vegetarian option thats easier than baking...
- The Ultimate Stovetop Power Bowl Creamy Oatmeal Bowl Recipes — Tired of bland porridge Master these foolproof stovetop oatmeal bowl recipes for a creamy satisfying breakfast that keeps you full until lunch Get the base...
The Blending Blueprint: Creating the Perfect Base Mixture
The active preparation phase is fast, taking only about 15 minutes. First, blend the cottage cheese and milk until absolutely homogenous. Once smooth, introduce the sifted cocoa powder, sweetener, vanilla, and salt.
Blend again on high until the mixture is uniformly coloured and smooth no streaks allowed. If you are opting for a slightly richer texture, this is the moment to gently pulse in 1/2 cup of heavy whipping cream, ensuring you just incorporate it rather than fully emulsifying it into the base.
Freezing Fundamentals: Churning Versus the No-Churn Method
Once the base is perfectly blended, it must be thoroughly chilled at least two hours in the refrigerator. A cold base freezes faster and results in smaller ice crystals, which equals superior texture.
Step-by-step Guide to Silkening the Curds
If you are worried about residual texture, remember that the initial blending is the key to silkening the curds . Ensure the mixture passes the visual test for smoothness before moving to the freezing stage.
Mastering the Churn Cycle for Optimal Density
For the best, most authentic ice cream texture, use an ice cream maker. Pour the chilled base into your pre-frozen churning bowl and allow it to run according to the machine’s instructions, usually 20 to 30 minutes.
The goal is a consistency resembling thick soft serve ice cream straight from the machine.
Executing the Quick Freeze Technique (No Machine Necessary)
For those who don't own a machine, the no-churn method works well, though it requires vigilance. Pour the base into a shallow, freezer safe container (a loaf pan is ideal). Freeze for one hour, then remove and use a fork or whisk to vigorously break up the forming ice crystals.
Repeat this stirring process every 45 to 60 minutes for the first three to four hours. This constant agitation mimics the churning process, preventing large, icy layers from forming.
Achieving That Perfect Scoop Consistency
Regardless of the method chosen, the final step involves hardening. Transfer the partially frozen product to a final airtight container and freeze for an additional four hours, or preferably overnight.
If you are aiming for an extremely Keto Dessert Easy version, note that low-carb sweeteners can sometimes freeze harder, so temper it slightly longer on the counter before scooping.
Elevating Your Frozen Treat: Mix-Ins and Toppings Galore
This simple, dark chocolate base is a fantastic canvas for additions. For those craving texture, folding in ingredients right after churning (or just before the final stiffening in the no-churn method) is essential. Think about finely chopped dark chocolate, toasted nuts, or even a swirl of peanut butter.
The inclusion of actual dark chocolate pieces transforms this into a decadent Chocolate Chip Cottage Cheese Ice Cream .
Nutritional Deep Dive and Storage Longevity
Because this recipe relies on protein rather than a high volume of fat (unless you choose to add heavy cream), it freezes quite firm. This means proper storage is important to maintain ideal scoopability.
Variations on the Theme: Swirls and Crunchy Shell Inclusions
To add complexity, consider a ripple effect. Melt a small amount of dark chocolate (perhaps 2 ounces) with a teaspoon of coconut oil until smooth. Once your ice cream base is semi frozen (after churning or after the first stir in the no-churn method), drizzle the chocolate in stripes, swirl gently with a knife, and continue freezing.
This creates a satisfying crunch contrasting the creamy base.
Tips for Perfect Serving Temperature of Your Dessert Cream
For optimal enjoyment, allow the finished Chocolate Cottage Cheese Ice Cream to temper on the counter for about 5 to 10 minutes before attempting to scoop. This brief warming softens the structure just enough to highlight that silky texture created by the blended curds.
Maximizing Shelf Life: Keeping Your Dessert Freshly Frozen
Store your creation in a container that is filled as close to the top as possible, minimizing air exposure. Pressing a piece of plastic wrap directly onto the surface of the ice cream before sealing the lid is the absolute best way to prevent freezer burn and protect those wonderful flavors.
Making This Recipe Keto or Vegan Friendly (Ingredient Swaps)
For a Keto friendly variation, ensure you use a zero calorie sweetener like Erythritol or Monk Fruit blend, adjusting the quantity to your taste. While the cottage cheese base is inherently dairy, achieving a vegan version of this specific recipe is challenging; however, substituting the cottage cheese with a blend of soaked raw cashews and silken tofu, processed with an acid like lemon juice for tang, can mimic the effect, though the protein profile will shift significantly away from the classic concept.
Recipe FAQs
Why is my Chocolate Cottage Cheese Ice Cream grainy or chunky?
That’s usually down to the initial blending stage it’s absolutely vital! You must blend the cottage cheese and milk until it is utterly silken smooth, like thick cream, before adding the cocoa.
Any tiny curds remaining will freeze into unpleasantly hard little ice pebbles, so be patient with the blender!
Can I use low-fat cottage cheese for this recipe? I'm watching my figure.
While you certainly can use low-fat or non-fat cottage cheese, we strongly recommend sticking to full fat for the best results. The higher fat content from the full fat variety mimics heavy cream, which is key to achieving that desirable, decadent mouthfeel without relying too heavily on added ingredients.
How long will this Chocolate Cottage Cheese Ice Cream keep in the freezer?
Because this recipe has a lower overall fat content than traditional ice cream, it can freeze quite hard, much like a store-bought sorbet. Stored properly in an airtight container, it’s best eaten within 2 to 3 weeks. Always let it sit on the counter for about 10 minutes before scooping to soften up nicely.
I don’t have an ice cream maker; what’s the best approach for the no-churn option?
For the no-churn method, the key is beating the ice crystals out as they form. Pour the chilled mixture into a shallow, freezer safe dish and freeze for one hour. Then, take it out and aggressively stir or whisk it every 45 minutes for the first three hours this manually breaks up the ice and keeps the final product much creamier.
I can still taste the cottage cheese slightly how do I mask it completely?
If you're sensitive to the subtle tang, you need stronger flavours to overtake it. Try adding a teaspoon of instant espresso powder dissolved in the milk, or doubling the vanilla extract.
A generous pinch of flaky sea salt right before freezing also really helps balance and deepen the chocolate flavour, effectively masking any lingering savoury notes.
Can I swap the granulated sugar for a liquid sweetener like maple syrup?
Yes, you can absolutely swap sweeteners, but maple syrup is a liquid, so you’ll need to reduce the milk slightly to maintain the right consistency, or you risk a softer finish.
If you use a sugar substitute like Erythritol, the texture might be slightly icier, so a little optional splash of heavy cream helps mimic the body that sugar usually provides.
Chocolate Cottage Cheese Ice Cream