Cherry Pie Bars: Shortbread Crust
- Time: Active 15 minutes, Passive 45 minutes, Total 1 hours
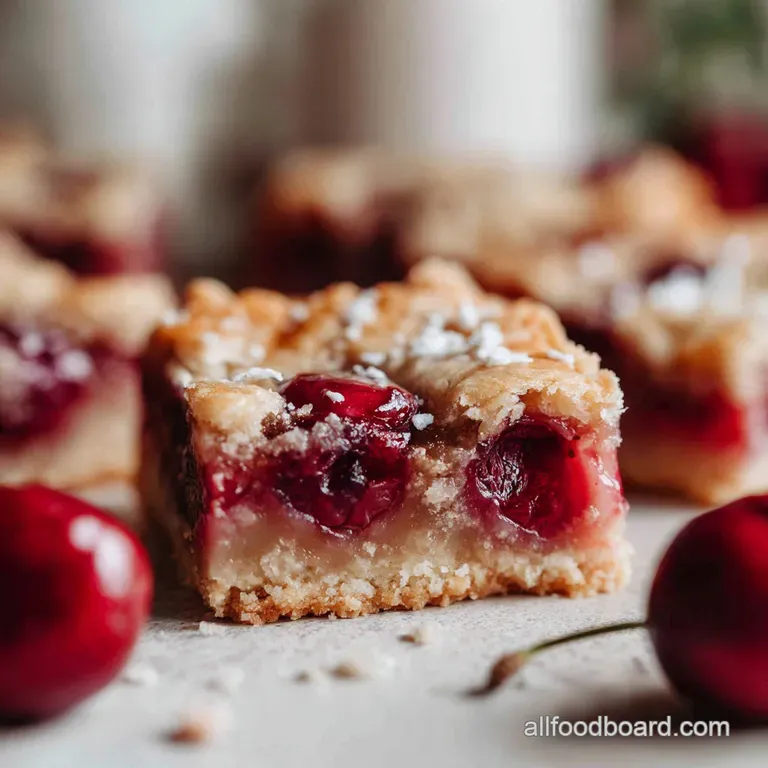
- Flavor/Texture Hook: A velvety, crimson center encased in a golden, melt in-your mouth shortbread crust.
- Perfect for: Potlucks, afternoon tea, or those moments when you crave pie but lack the patience for a lattice.
- The Nostalgic Perfection of Homemade Cherry Pie Bars
- Why These Buttery Bars Succeed
- Essential Timing and Temperature Specs
- Selecting Quality Rustic Baking Essentials
- Tools for Flour Dusted Kitchen Success
- Step-by-Step Layering and Baking
- Resolving Common Pastry Baking Hurdles
- Personalizing Your Rustic Fruit Bars
- Debunking Baking Misconceptions
- Storage Tips for Lasting Freshness
- Perfect Pairings for Sweet Treats
- Recipe FAQs
- 📝 Recipe Card
The Nostalgic Perfection of Homemade Cherry Pie Bars
The kitchen always feels a bit more like home when the scent of sweet almond and warm stone fruit begins to drift from the oven. I remember standing on a stool, watching my grandmother carefully tuck fruit into pastry, her hands flour dusted and sure.
These Cherry Pie Bars are my tribute to those quiet afternoons, designed for those of us who adore the shatter of a good crust but occasionally find traditional pie dough a bit temperamental to work with.
We have all been there, struggling with a dough that tears or a bottom that turns into a soggy mess. This recipe solves that by using a versatile dough that functions as both the base and the crumble topping. It creates a rustic, golden hued pastry that holds its shape beautifully while remaining incredibly tender.
It is a reliable friend in the kitchen, one that turns a simple can of fruit into something that looks like it belongs in a French patisserie window.
There is a specific joy in slicing into a pan and seeing those distinct layers the pale, buttery shortbread and the vibrant red filling. It is a visual promise of the textures to come. We are going for a balance here: enough sugar to satisfy the soul, but a touch of lemon and salt to keep things interesting.
Trust me on this, the addition of almond extract is not optional in my house; it is the secret that makes people ask for the recipe before they have even finished their first square.
Why These Buttery Bars Succeed
The magic of this bake lies in the ratio of fat to flour, creating a structure that is sturdy yet yielding. Unlike a traditional flaky pie crust which relies on distinct layers of cold fat, these bars use room temperature butter to create a sandy, tender crumb that absorbs just enough fruit juice to stay moist without losing its structural integrity.
- Fat Emulsification: Creaming the butter and sugar creates tiny air pockets that expand during baking, resulting in a lighter, more delicate shortbread texture.
- Starch Gelatinization: The flour granules absorb the moisture from the eggs and fruit filling, setting into a firm matrix that allows for clean, sharp slices once cooled.
- Flavor Synergy: Almond extract contains benzaldehyde, a compound that naturally occurs in stone fruits, which chemically bridges the flavor of the cherries to the buttery crust.
The choice of method can drastically change your afternoon in the kitchen. If you are in a rush, a high-quality canned filling is your best ally, but for those slow Sunday mornings, a stovetop reduction of frozen fruit offers a different kind of reward.
| Method | Time | Texture | Best For |
|---|---|---|---|
| Canned Filling | 10 minutes prep | Silky and consistent | Busy weeknights or beginner bakers |
| Frozen Cherries | 30 minutes prep | Chunky and tart | Controlling sugar levels and texture |
| Fresh Cherries | 1 hours prep | Firm and rustic | Peak summer harvest celebrations |
Taking the time to decide which path to follow ensures you aren't rushing through a process that should be therapeutic. I personally love the consistency of a high-quality canned filling for that old fashioned cherry pie bars feel, as it provides a predictable sweetness that pairs perfectly with the lemon juice we'll be adding.
Essential Timing and Temperature Specs
Precision is the quiet partner of every successful baker. While cooking a stew is an art of intuition, baking these bars is a minor science experiment where timing dictates the final mouthfeel.
I have found that a metal baking pan conducts heat more efficiently than glass, leading to those sought after crispy edges that everyone fights over.
| Thickness | Oven Temp | Bake Time | Visual Cue |
|---|---|---|---|
| 0.75 inch | 350°F | 40 minutes | Edges turn pale gold |
| 1 inch | 350°F | 45 minutes | Center is set but slightly jiggly |
| 1.25 inch | 350°F | 52 minutes | Top crumble is deeply bronzed |
Chef's Tip: Freeze your butter for just 10 minutes before grating it if your kitchen is particularly warm. This ensures the fat doesn't melt too quickly during the creaming process, preserving the integrity of the air pockets.
Selecting Quality Rustic Baking Essentials
When I look at my flour dusted counter, I see more than just ingredients; I see the building blocks of a memory. Using high-quality unsalted butter is paramount here because it allows you to control the exact salt content of your pastry.
A fine sea salt will dissolve more evenly into the dough than coarse kosher salt, ensuring you don't end up with salty "hot spots" in your sweet treat.
The almond extract is the aromatic heart of this recipe. It provides a floral, nutty backnote that makes the cherries taste more like "themselves." I always suggest using pure extracts over imitation ones; the depth of flavor is incomparable and provides that professional finish.
| Ingredient | Science Role | Pro Secret |
|---|---|---|
| Unsalted Butter | Provides tenderness and flavor | Use room temperature (65°F) for optimal creaming |
| Large Eggs | Bind the structure and add moisture | Whisk slightly before adding to prevent overmixing |
| All Purpose Flour | Forms the structural framework | Spoon and level your measuring cup to avoid dry bars |
The secret to a great bake is often the crust, much like the one in my Foolproof Classic Cherry recipe. Understanding how these components interact helps you troubleshoot on the fly.
The Foundation
- 1 cup unsalted butter: Must be room temperature for a smooth emulsion.
- 1.5 cups granulated sugar: Provides sweetness and helps with browning.
- 3 large eggs: These act as the glue for our shortbread.
- 1 tsp pure vanilla extract: A classic aromatic base.
- 0.5 tsp almond extract: The essential pairing for cherries.
- 3 cups all purpose flour: The skeleton of our bar.
- 0.5 tsp fine sea salt: To balance the sugar.
The Fruit Center
- 21 oz canned cherry pie filling: The star of the show.
- 1 tsp lemon juice: Adds necessary acidity to brighten the fruit.
The Sweet Glaze
- 1 cup powdered sugar: For a smooth, snow white finish.
- 2 tbsp whole milk: Adjusts the consistency of the drizzle.
- 0.25 tsp almond extract: Ties the glaze back to the crust.
| Original Ingredient | Substitute | Why It Works |
|---|---|---|
| Unsalted Butter | Vegan Butter Sticks | High fat content maintains the shortbread texture |
| Canned Filling | Frozen Cherries + Cornstarch | Offers a more tart flavor profile. Note: Requires pre cooking |
| Whole Milk | Lemon Juice | Creates a tangier, translucent glaze |
Tools for Flour Dusted Kitchen Success
You don't need a professional laboratory to make these, but a few specific tools make the process much more pleasant. A stand mixer or a sturdy hand mixer is vital for properly creaming the butter and sugar until the mixture looks pale and fluffy.
I also swear by parchment paper; it makes lifting the entire block of bars out of the pan a breeze, which is the only way to get those clean, sharp edges.
If you enjoy bars over traditional slices, you might also like to see How to Make recipe for pecans, which uses a similar pressing technique for the base. For these pie bars, a 9x13 inch metal baking pan is the gold standard for even heat distribution.
step-by-step Layering and Baking
- Preheat and Prep. Set your oven to 350°F and line a 9x13 pan with parchment paper, leaving an inch of overhang. Note: This creates a "sling" to remove the bars later.
- Cream the Base. Beat 1 cup unsalted butter and 1.5 cups granulated sugar for 3 minutes until pale and airy.
- Incorporate Aromatics. Add 3 large eggs one at a time, then stir in 1 tsp vanilla and 0.5 tsp almond extract.
- Fold in Flour. Gradually mix in 3 cups flour and 0.5 tsp salt until no white streaks remain.
- Set the Crust. Spread 3 cups of the dough into the bottom of the pan using a spatula. Note: The dough will be thick and sticky.
- Brighten the Fruit. Stir 1 tsp lemon juice into the 21 oz cherry pie filling.
- Layer the Center. Spread the cherry mixture evenly over the unbaked bottom crust until the edges are reached.
- Add the Crumble. Drop the remaining dough by the spoonful over the cherry layer. Note: It won't cover the fruit completely, which is fine.
- Bake to Gold. Bake for 45 minutes until the top is golden and the fruit bubbles.
- Finish and Glaze. Cool completely, then whisk 1 cup powdered sugar, 2 tbsp milk, and 0.25 tsp almond extract to drizzle over the top.
Resolving Common Pastry Baking Hurdles
Sometimes the kitchen throws us a curveball. The most common issue with cherry pie bars is a base that feels too soft or a filling that seems to vanish into the dough. Usually, this comes down to temperature either the oven or the butter was a bit off.
Preventing a Crumbly Bar Base
If your bars are falling apart when you lift them, the crust likely didn't hydrate enough or was overbaked. Ensure you are measuring your flour using the "spoon and level" method rather than scooping directly with the cup, which packs the flour and makes the bars dry.
Managing the Sticky Filling Overflow
If the cherry filling is bubbling up and drowning the top crumble, your dollops might have been too small. Aim for larger, flatter discs of dough on top to create a "shield" for the fruit.
| Problem | Root Cause | Solution |
|---|---|---|
| Soggy Bottom | Underbaked or warm filling | Bake on the lower rack for the last 10 minutes |
| Tough Crust | Overworking the dough | Stop mixing as soon as flour disappears |
| Sticky Slices | Cutting while warm | Chill for 1 hours before slicing for clean lines |
Common Mistakes Checklist:
- ✓ Cream the butter for at least 3 full minutes (don't skip this!).
- ✓ Ensure eggs are at room temperature to prevent the butter from curdling.
- ✓ Don't overbake; the bars will continue to firm up as they cool.
- ✓ Always add the lemon juice to the filling; it cuts through the cloying sweetness of canned fruit.
- ✓ Wait for the bars to be stone cold before applying the glaze, or it will simply melt into the crust.
Personalizing Your Rustic Fruit Bars
Scaling this recipe is straightforward because the dough is so forgiving. If you are baking for a smaller household, you can easily halve the ingredients and use an 8x8 inch square pan.
- Scaling Down (1/2): Use 1.5 cups flour and 1.5 eggs (beat one egg and use half). Reduce bake time by about 10 minutes.
- Scaling Up (2x): Use two separate 9x13 pans rather than one giant deep pan to ensure the center bakes through properly.
- Dietary Adjustments: For a gluten-free version, a 1:1 baking flour works well, though the bars will be slightly more delicate.
Chef's Tip: Add a tablespoon of bourbon to the cherry filling to deepen the flavor profile and give it a sophisticated, "grown up" edge.
Debunking Baking Misconceptions
There is a common belief that you must use fresh fruit for a "real" dessert. In reality, high-quality canned filling is often processed at the peak of ripeness, providing a consistent texture that fresh cherries which vary wildly in water content cannot always guarantee.
Using canned filling isn't "cheating"; it's an exercise in consistency.
Another myth is that you need to chill this specific shortbread dough before pressing it into the pan. While that is true for flaky pastry, this creamed butter dough is designed to be soft. Chilling it would actually make it harder to spread evenly across the bottom of the pan.
Storage Tips for Lasting Freshness
These bars are surprisingly hardy. You can keep them in an airtight container at room temperature for up to 2 days, though the crust will soften slightly as it absorbs moisture from the fruit. For the best texture, I recommend storing them in the fridge, where they will stay fresh and firm for up to 5 days.
Freezing and Waste: These freeze beautifully! Wrap individual squares in parchment paper and then foil. They will last for 3 months. For zero waste, if you have leftover cherry syrup from the can, simmer it down with a bit of sugar and water to create a topping for vanilla ice cream.
Perfect Pairings for Sweet Treats
While these bars are a triumph on their own, the way you present them can turn a simple snack into a centerpiece. I like to think of plating in three distinct levels depending on who I am serving.
| Level | Finishing Touch | Aesthetic Appeal |
|---|---|---|
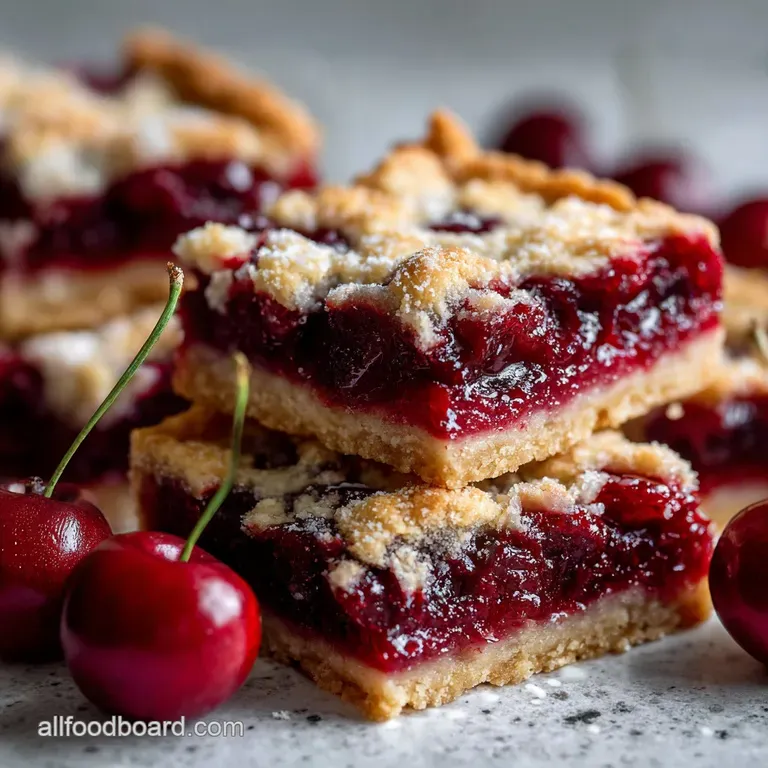
| Simple | Plain square on a wooden board | Rustic, "just baked" cottage vibes |
| Polished | Thick glaze drizzle and a dusting of zest | Elegant tea party or bake sale |
| Restaurant | Warm bar with a scoop of mascarpone | Sophisticated bistro style dessert |
For a Gourmet Platter
If you want to go the restaurant route, serve the bar slightly warm with a dollop of whipped cream that has been folded with a tiny bit of extra almond extract. Scatter some toasted slivered almonds over the top to provide a crunch that contrasts with the velvety fruit.
For the Perfect Afternoon Break
Pair a room temperature bar with a sharp, bitter espresso or a dark Earl Grey tea. The tannins in the tea or coffee help cleanse the palate between those sweet, buttery bites of easy cherry pie bars. This is how I most often enjoy them tucked away in a quiet corner of the kitchen while the house is still.

Recipe FAQs
Can I use fresh cherries instead of canned pie filling?
Yes, but with adjustments. Fresh cherries will need to be pitted, sweetened, and possibly cooked down slightly with a thickener like cornstarch to mimic the consistency of canned filling. This approach offers more control over tartness but requires extra prep time.
How long do cherry pie bars typically bake?
Bake for approximately 40-50 minutes. You're looking for the edges to turn a pale golden brown and the center to be set with perhaps a slight jiggle. For a deeper color, add a few extra minutes.
What is the best way to achieve clean slices?
Chill them thoroughly before slicing. Allowing the bars to cool completely and then refrigerating them for at least an hour will firm up the crust and filling, making for much cleaner cuts.
Can I make these cherry pie bars ahead of time?
Yes, they are excellent for making ahead. Baked and cooled bars can be stored in an airtight container at room temperature for up to two days, or refrigerated for up to five days. The crust will soften slightly over time.
Why did my crust turn out crumbly?
Likely due to too much flour or insufficient creaming. Make sure to measure flour accurately by spooning and leveling, and cream the butter and sugar until truly pale and fluffy for best results. This technique is similar to how we ensure a tender base in a Classic Southern Pecan Pie Recipe: Sweetness with a Crunch.
Can I freeze baked cherry pie bars?
Yes, they freeze exceptionally well. Wrap individual cooled bars tightly in parchment paper and then foil. They should last for up to 3 months in the freezer.
What can I do if my filling is too runny?
You can simmer the filling slightly before baking. If using canned filling that seems particularly liquidy, drain off some of the excess syrup or gently simmer it with a tablespoon of cornstarch slurry to thicken it. This helps prevent a soggy bottom, a common issue that can occur in recipes like this and even in a Shepherds Pie: The Traditional Lamb Recipe with Golden Creamy Mash.
Cherry Pie Bars
Ingredients:
Instructions:
Nutrition Facts:
| Calories | 275 kcal |
|---|---|
| Protein | 3.1 g |
| Fat | 10.1 g |
| Carbs | 43.5 g |
| Fiber | 1.0 g |
| Sugar | 28.4 g |
| Sodium | 75 mg |
