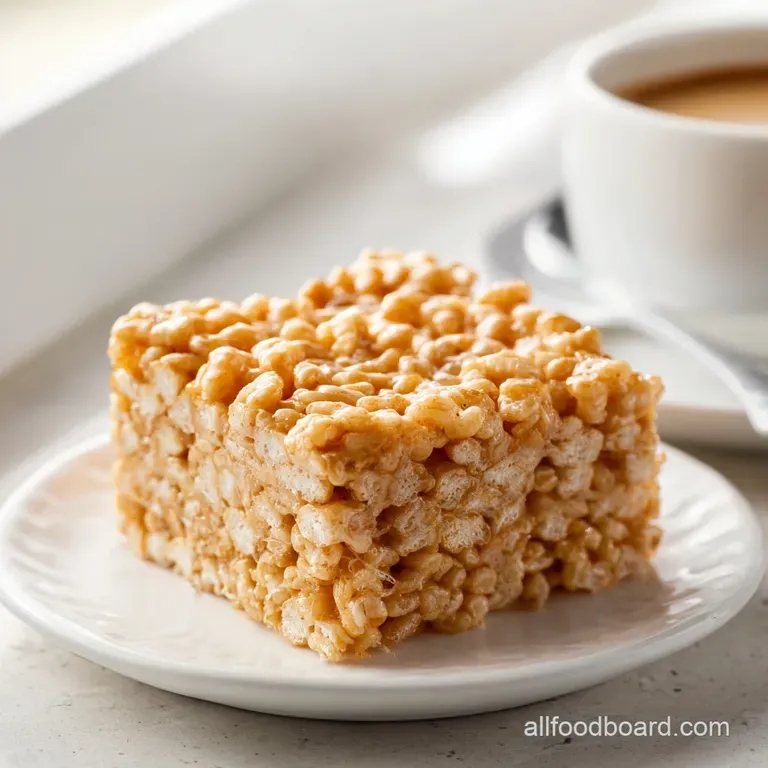
Brown Butter Crispy Rice Treat: Salted and Gourmet
- Time: Active 15 minutes, Passive 15 minutes, Total 30 minutes
- Flavor/Texture Hook: Toasted hazelnut notes with a shatteringly crisp finish
- Perfect for: Bake sales, rustic dinner parties, or rainy Sunday afternoons
Nailing the Perfect Texture
Most people rush the melting process, but the magic of this Brown Butter Crispy Rice Treat happens in the silence between the foam and the burn. When you cook butter, you are driving off water and browning the proteins. This creates a complex, toasted flavor that acts as a backbone for the entire dish.
Without this step, you just have a sugar bomb; with it, you have a gourmet dessert.
Milk Solid Toasting: Adding non fat dry milk powder increases the protein content, allowing for more "brown bits" and a deeper, more intense hazelnut aroma.
Residual Heat Control: Removing the pot from the flame before adding the final marshmallows ensures they soften into "clouds" rather than melting into a tough glue.
The Moisture Shield: A quick rest for the marshmallow mixture prevents the cereal from absorbing too much liquid, keeping the "snap" in every bite.
Gentle Compression: Pressing the mixture too firmly into the pan collapses the air pockets, turning a light treat into a dense, hard brick.
| Servings | Ingredient Adjustments | Pan Size | Cook Time |
|---|---|---|---|
| 8 people | 0.5 cup butter, 10 oz marshmallows | 8x8 inch | 15 minutes |
| 16 people | 1 cup butter, 20 oz marshmallows | 9x13 inch | 15 minutes |
| 32 people | 2 cups butter, 40 oz marshmallows | Two 9x13 inch | 25 minutes |
The choice of butter is perhaps the most critical decision you'll make in this process. European style butter has a higher fat content and less water than standard supermarket brands. This means more milk solids to brown and a richer, more velvety mouthfeel that lingers after the sweetness fades.
Essential Ingredient Analysis
When we look at the components of this recipe, it’s easy to see them as just "butter and sugar." But to a cook who loves the craft, these are tools of architecture. Each ingredient plays a specific role in ensuring the structure remains light while the flavor remains profound.
It's the difference between a grocery store square and something you'd find in a high end bakery.
| Ingredient | Science Role | Pro Secret |
|---|---|---|
| European Butter | Provides fat for the "snap" and milk solids for flavor | Use a light colored pot to see the color change clearly |
| Vanilla Bean Paste | Adds aromatic depth and visual "specks" | Add it at the very end to keep the oils from evaporating |
| Dry Milk Powder | Boosts browning potential | Whisk it in just as the butter starts to foam for maximum toastiness |
| Maldon Sea Salt | Balances sugar and enhances the nuttiness | Sprinkle from high up to ensure an even, shimmering coat |
I remember the first time I added dry milk powder to my butter. I was skeptical, thinking it might make the treats taste "dusty." Instead, it was as if someone had turned the volume up on the flavor.
The bits of browned protein clustered together, creating little pockets of savory saltiness that made the sugar stand out even more. It's a trick I learned from professional pastry chefs that works beautifully in a home kitchen.
Ingredients & Substitutes
To recreate this masterpiece, you will need to gather your elements with care. Ensure your marshmallows are fresh; stale ones won't melt into that silky, pull apart texture we crave.
- 1 cup (225g) Unsalted European style butter: Why this? Higher fat content means more flavor and a better brown butter base.
- Substitute: Standard unsalted butter (will have slightly less nutty depth).
- 20 oz (565g) Fresh mini marshmallows: Why this? They melt faster and more evenly than large ones.
- Substitute: Marshmallow fluff (note: this will result in a much softer, stickier treat).
- 1 tbsp Vanilla bean paste: Why this? Provides intense flavor and beautiful black flecks.
- Substitute: 1.5 tbsp pure vanilla extract.
- 0.5 tsp Fine sea salt: Why this? Dissolves into the marshmallow for even seasoning.
- Substitute: Kosher salt (increase to 0.75 tsp).
- 9 cups (250g) Toasted rice cereal: Why this? The structural heart of the treat.
- Substitute: Puffed quinoa for a nuttier, gluten-free variation.
- 1 tbsp Maldon flaky sea salt: Why this? Provides a clean, sharp crunch and visual beauty.
- Substitute: Fleur de sel.
- 1 tbsp Non fat dry milk powder: Why this? Creates extra browned bits for a more intense flavor.
- Substitute: Malted milk powder for a "malted shake" vibe.
Detailed Preparation Steps

- Melt the unsalted European style butter in a large heavy bottomed pot over medium heat. Whisk constantly as the butter foams and crackles. Note: This sound is the water evaporating, allowing the temperature to rise enough to brown the milk solids.
- Continue whisking until the milk solids at the bottom turn a deep amber brown and emit a toasted hazelnut aroma.
- Immediately whisk in the non fat dry milk powder and remove the pot from heat to prevent burning. Note: The powder will sizzle and turn brown almost instantly.
- Reduce heat to low and return the pot to the stove. Add 16 oz of the mini marshmallows and the fine sea salt.
- Stir gently until the marshmallows are completely melted and the mixture is smooth and velvety.
- Remove from heat and allow the marshmallow mixture to cool for exactly 60 seconds. Note: This protects the cereal from becoming soggy due to extreme heat.
- Fold in the toasted rice cereal, the vanilla bean paste, and the remaining 4 oz of whole mini marshmallows until the cereal is evenly coated and the whole marshmallows are slightly softened but not fully melted.
- Transfer the mixture into a 9x13 inch parchment lined baking pan. Press down very gently with a greased spatula; do not pack tightly.
- Sprinkle the top evenly with Maldon flaky sea salt until the surface looks like it’s dusted with diamonds.
- Allow the treats to set at room temperature for at least 1 hour before slicing into 16 squares.
Fixing Common Problems
Even with a simple recipe, things can go sideways if the heat is too high or the patience is too low. The most common heartbreak with a Brown Butter Crispy Rice Treat is a texture that feels more like a rock than a cloud. This usually happens during the marshmallow phase.
If you overheat the sugar in the marshmallows, it begins to reach the "hard ball" stage of candy making, which leads to a tooth breaking experience once cooled.
Why My Treats Harden
The culprit is almost always heat. If you boil the marshmallow mixture or keep it on the stove too long after it melts, the sugar crystallizes and hardens. You want to melt them just until they lose their shape, then pull them off the heat immediately. Think of it as a gentle warm bath, not a boiling cauldron.
Butter Not Browning Properly
If your butter is just bubbling away without changing color, your heat is likely too low. The water needs to cook off before browning can begin. Don't be afraid of the sizzle it's the sound of success. Just keep that whisk moving so the bits don't stick and burn to the bottom of the pot.
| Problem | Root Cause | Solution |
|---|---|---|
| Hard/Dense Squares | Packing too tightly in the pan | Use the "light touch" method with a greased spatula |
| Soggy Cereal | Cereal added to boiling hot mixture | Wait 60 seconds before folding in the rice cereal |
| Greasy Bottoms | Butter and marshmallows didn't emulsify | Whisk vigorously when marshmallows first melt |
Common Mistakes Checklist
- ✓ Never use an old bag of marshmallows (they don't melt, they just clump)
- ✓ Don't skip the parchment paper (this mixture is like liquid glue)
- ✓ Avoid the microwave for melting (it creates hot spots that harden the sugar)
- ✓ Let the treats set at room temperature (refrigeration makes them tough)
Exciting Flavor Variations
Once you have mastered the base, the kitchen becomes a playground. You can take the rustic foundation of the brown butter and lean into different flavor profiles. For a deeper, darker experience, I love folding in 0.5 cups of dark chocolate chips at the same time as the cereal.
Because the mixture is still warm, the chocolate swirls but doesn't fully melt, creating beautiful ribbons of cocoa throughout the mahogany base.
If you are feeling adventurous, you might consider a homemade peanut butter swirl. Simply warm 0.25 cups of creamy peanut butter and drizzle it over the cereal before the final press into the pan. This adds a salty, creamy dimension that pairs perfectly with the sea salt topping.
| Plating Level | Visual Tweak | Best For |
|---|---|---|
| Simple | Rustic, uneven 2 inch squares | Family snacks |
| Polished | Perfectly trimmed edges, heavy salt | Gift boxes |
| Restaurant | Drizzled chocolate, gold leaf, served with cream | Dinner parties |
dairy-free Swaps
If you need to avoid dairy, you can use a high-quality vegan butter stick. Note that vegan butter has a different protein structure, so it won't produce the same "milk solids" as European butter. To compensate, add a teaspoon of toasted sesame oil to the melted butter to mimic that nutty, toasted aroma.
Maintaining Maximum Freshness
Storing these treats is a bit of a delicate dance. You want to keep the air out to prevent the cereal from going stale, but you also want to avoid moisture, which makes the marshmallows gummy. I find that a heavy glass jar with a rubber seal is the gold standard for storage.
If you're stacking them, place a small square of parchment between each layer to prevent them from fusing into one giant block.
For long term storage, you can actually freeze them! Wrap individual squares tightly in plastic wrap and then place them in a freezer bag. They will keep for up to 2 months. When the craving hits, just let one sit on the counter for 15 minutes.
It will return to its perfectly chewy, rustling state without any loss in flavor.
Ideal Serving Combinations
When serving these at a gathering, I like to think about contrast. Because these are rich and buttery, they pair beautifully with something acidic or bitter. A strong cup of black coffee or a cold glass of whole milk is the traditional choice, but for a more sophisticated pairing, try serving them alongside skillet pork chops as a surprising dessert course. The shared note of brown butter bridges the gap between the savory meal and the sweet finish.
Stovetop vs Oven Method
| Method | Texture | Flavor Intensity |
|---|---|---|
| Stovetop (Recommended) | Soft, stretchy, chewy | High (better butter control) |
| Oven (Toasted) | Crispy, caramelized, firm | Moderate (risk of drying out) |
Ultimately, the best way to enjoy these is fresh, within a few hours of making them. There is a specific window where the marshmallows are still slightly "stretchy" and the salt hasn't fully dissolved into the surface. It's a fleeting, beautiful moment of culinary balance.
Scaling Guidelines
- To Half: Use an 8x8 inch pan. Reduce the cooling time for the marshmallow mixture to 30 seconds as smaller volumes lose heat faster.
- To Double: Use two 9x13 inch pans. Do not try to fit a double batch into one pan; the depth will prevent the center from setting correctly. Keep spices and salt to 1.5x the original amount to avoid over seasoning.
Kitchen Myths
- Myth: You must use a high heat to brown butter quickly. Truth: High heat often leads to "black butter," which tastes bitter and burnt. Medium heat provides the control needed for that perfect mahogany shade.
- Myth: Marshmallows should be cold from the fridge. Truth: Room temperature marshmallows melt much more evenly and create a more consistent emulsion with the butter.
As you wrap up your batch, take a second to look at the flecks of vanilla and the browned butter bits clinging to the cereal. It’s a rustic, beautiful sight. Baking is as much about the process as the result, and with this Brown Butter Crispy Rice Treat with Sea Salt, you’ve mastered a technique that turns a simple pantry staple into something truly evocative.
Enjoy the crunch, the salt, and the warmth of a kitchen well used.

Recipe FAQs
Is it true I must use the microwave to melt the marshmallows?
No, this is a common misconception. The microwave creates hot spots that harden the sugar, so you should always use a heavy bottomed pot over low heat for an even, smooth melt.
How to achieve the perfect brown butter flavor without burning it?
Whisk constantly over medium heat until you see deep amber solids and smell a toasted hazelnut aroma. If you enjoyed mastering the technique of browning for depth of flavor, you will appreciate how the same sensory cues indicate success here.
Should I store the finished treats in the refrigerator to keep them fresh?
No, keep them at room temperature. Refrigerating these treats will cause the texture to become tough rather than soft and chewy.
How to prevent the treats from becoming hard and brick like?
Press the mixture into the pan very gently with a greased spatula. Never pack the cereal mixture tightly, as this compression is the primary reason for a dense, hard final result.
Is it okay to use a bag of marshmallows that has been sitting in the pantry for months?
No, stick with a fresh bag. Old marshmallows often fail to melt properly and will result in stubborn, chewy clumps throughout your cereal mixture.
How to ensure the treats don't stick to the baking pan?
Line your 9x9 or 9x13 inch pan with parchment paper before starting. This mixture acts like liquid glue, making parchment an essential tool for clean removal.
How to maintain the texture of the toasted rice cereal?
Let the melted marshmallow mixture cool for exactly 60 seconds before folding in the cereal. This short rest protects the cereal from becoming soggy while ensuring it stays perfectly coated.
Brown Butter Crispy Rice Treats

Ingredients:
Instructions:
Nutrition Facts:
| Calories | 277 calories |
|---|---|
| Protein | 1.7g |
| Fat | 11.4g |
| Carbs | 42.1g |
| Fiber | 0.2g |
| Sugar | 20.3g |
| Sodium | 313mg |
