Best Breakfast Potatoes Ever: Crispy and Fluffy
- Time: Active 15 minutes, Passive 25 minutes, Total 40 minutes
- Flavor/Texture Hook: Deeply mahogany, shatter crisp crust with a buttery, fluffy interior.
- Perfect for: Slow weekend brunches, holiday mornings, or impressing houseguests.
- Achieving the Best Breakfast Potatoes Ever Every Morning
- Why These Potatoes Stay So Crispy
- Component Deep Dive Analysis
- Ingredients for a High Impact Skillet
- Essential Tools for Golden Potato Success
- Mastering Skillet Method Through Clear Steps
- Fixing Sogginess and Common Potato Problems
- Smart Ingredient Swaps for Every Need
- Keeping Leftover Breakfast Potatoes Crisp Longer
- Perfect Pairings to Complete Your Spread
- Recipe FAQs
- 📝 Recipe Card
Achieving the Best Breakfast Potatoes Ever Every Morning
Imagine the sound of a heavy cast iron skillet meeting a wooden spoon, that rhythmic clack clack clack as you turn over chunks of gold. The aroma of smoked paprika hits the heat and fills your kitchen with an earthy, woodsy scent that wakes everyone up before the coffee is even finished.
There is nothing quite like that first bite where the crust actually shatters against your teeth, revealing a center so soft it almost melts. For the longest time, I struggled with home fries that were either rock hard in the middle or a sad, greasy pile of mush.
It was frustrating because I knew what I wanted, but the potatoes just wouldn't cooperate.
Then I stopped treating them like a simple side dish and started looking at them like a project in texture. I realized that the secret to the best breakfast potatoes ever wasn't just about the heat or the oil, it was about what happens before they ever touch the pan.
We’ve all been there, staring at a pan of potatoes that are sticking or browning too fast on the outside while remaining raw in the center. I once served a batch that looked beautiful but tasted like crunchy cardboard.
That was the day I decided to fix my method for good, and honestly, the solution is so simple you'll wonder why you weren't doing it years ago.
This isn't just about cooking food; it’s about that feeling of family friendly comfort on a Sunday morning. You want something reliable that works every time, even if you’re still half asleep. We are going to use two specific tricks: a little splash of baking soda and a vigorous shake of the pot.
These steps might seem small, but they are the difference between "okay" potatoes and the kind that people talk about for weeks. Let's get into the "why" and the "how" so you can master this for your next family breakfast.
Why These Potatoes Stay So Crispy
Alkaline Breakdown: Adding baking soda to the boiling water raises the pH level, which breaks down the potato's pectin and creates a starchy slurry on the surface.
Surface Area Expansion: Shaking the parboiled potatoes creates "fuzz" or tiny ridges that, once hit with hot oil, dehydrate and transform into a thick, glass like crust.
Evaporative Cooling: Letting the potatoes steam dry for two minutes after draining ensures no excess water enters the skillet, preventing the dreaded "steaming" effect that causes sogginess.
Maillard Reaction Timing: Adding the dry spices only in the last two minutes prevents the garlic powder and paprika from burning and becoming bitter in the high heat.
| Method | Total Time | Texture | Best For |
|---|---|---|---|
| Stovetop Skillet | 40 minutes | Shatter crisp edges, deeply browned | Maximum crunch and traditional flavor |
| oven-roasted | 55 minutes | Uniformly golden, slightly drier | Hands off cooking for large groups |
| Air Fryer | 30 minutes | Very crispy, less oil used | Quick batches and easier cleanup |
While the oven is great for big crowds, nothing beats the stovetop skillet for that authentic diner style crust. Using a heavy pan allows for better heat retention, which is exactly what we need for that mahogany color. If you are planning a full spread, these potatoes go beautifully with Perfectly Hard Boiled Eggs for a protein packed morning that feels special but remains totally approachable.
Component Deep Dive Analysis
| Component | Science Role | Pro Secret |
|---|---|---|
| Yukon Gold Potatoes | Medium starch content provides the best balance of structure and fluffiness. | Don't use Russets; they fall apart too easily during the roughing stage. |
| Baking Soda | Weakens the exterior cell walls of the potato. | Only a teaspoon is needed to completely change the surface texture. |
| Extra Virgin Olive Oil | Acts as the heat transfer medium and adds a peppery richness. | Ensure the oil is shimmering before adding the potatoes to prevent sticking. |
| Smoked Paprika | Provides color and a deep, savory aroma without high heat. | Use high-quality Spanish pimentón for the most authentic smoky flavor. |
Ingredients for a High Impact Skillet
- 2 lbs Yukon Gold potatoes: Why this? They hold their shape while creating the creamiest interior texture imaginable. (Sub: Red potatoes, but they won't be quite as fluffy).
- 1 tsp baking soda: Why this? This is the "magic" ingredient that breaks down the surface starch for maximum crunch. (Sub: None, this is essential for this specific texture).
- 1 tbsp kosher salt: Why this? To season the potato from the inside out during the boiling process. (Sub: Sea salt, use slightly less).
- 3 tbsp extra virgin olive oil: Why this? Provides a high smoke point and excellent flavor for searing. (Sub: Ghee or clarified butter for a nuttier taste).
- 1 tsp smoked paprika: Why this? Adds that signature mahogany color and a hint of campfire smoke. (Sub: Regular sweet paprika if you prefer no smoke).
- 1 tsp garlic powder: Why this? Distributes flavor more evenly than fresh garlic, which often burns in the skillet. (Sub: Onion powder if you're out of garlic).
- 1/2 tsp onion powder: Why this? Provides a savory "base" note that rounds out the spices. (Sub: Dried shallots).
- 1/2 tsp dried thyme: Why this? Adds a subtle earthy floral note that cuts through the richness. (Sub: Dried rosemary).
- 1/2 tsp freshly cracked black pepper: Why this? To provide a sharp, spicy bite against the salty crust. (Sub: White pepper).
- 1/4 tsp flaky sea salt: Why this? Added at the very end for a satisfying crunch and bursts of saltiness. (Sub: Table salt, but you'll lose the texture).
- 1 tbsp fresh parsley: Why this? For a pop of color and a fresh, grassy finish to brighten the dish. (Sub: Fresh chives or scallions).
Essential Tools for Golden Potato Success

You don't need a kitchen full of gadgets to make the best breakfast potatoes ever, but a few specific items make the job much easier. First, a heavy 12 inch cast iron skillet (like a Lodge) is your best friend here.
It holds heat like a champion, which means when you drop those potatoes in, the temperature of the pan doesn't plummet. If you use a thin stainless steel pan, you might find the potatoes sticking or the heat fluctuating too much.
A good, sturdy metal spatula is also non negotiable. You want something with a thin edge that can slide right under the potato crust to flip them without tearing that beautiful "fuzz" we worked so hard to create. Finally,, a large colander for draining and a pot with a tight fitting lid are all you need.
This is everyday life cooking at its best simple tools, incredible results.
Mastering Skillet Method Through Clear Steps
- Prepare the potatoes. Peel the 2 lbs of Yukon Golds and cut them into uniform 3/4 inch cubes. Note: Keeping them the same size ensures they all finish cooking at the exact same moment.
- Start the parboil. Place the cubes in a large pot and cover with cold water by at least an inch. Add the 1 tbsp of kosher salt and 1 tsp of baking soda.
- Simmer until tender. Bring the pot to a boil, then immediately turn it down. Simmer for 8–10 minutes until the exteriors are soft and slightly fraying but the cubes haven't turned into mush.
- Drain and dry. Pour the potatoes into a colander. Let them sit and air dry for 2 minutes. Wait until the visible steam stops rising before moving to the next step.
- Rough the edges. Return the potatoes to the dry pot, put the lid on, and shake it vigorously for about 5 seconds. Note: You want them to look "fuzzy" or mashed on the corners; that's your future crunch.
- Heat the skillet. Add the 3 tbsp of olive oil to your 12 inch skillet over medium high heat. Wait 3 minutes until the oil is shimmering and thin like water.
- Sear the first side. Add the potatoes in a single layer. Do not crowd them! Let them sit undisturbed for 5 minutes until a deep golden crust forms.
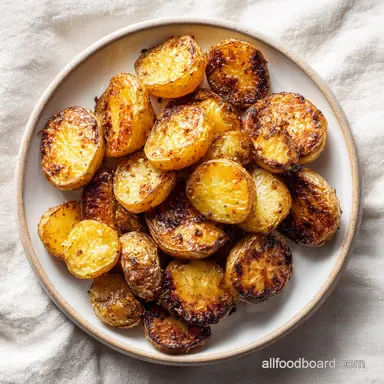
- Flip and finish. Use your metal spatula to turn the potatoes. Continue cooking for 15-20 minutes, turning every few minutes, until they are deep mahogany brown and shatter crisp.
- Season the crust. In the final 2 minutes, sprinkle in the smoked paprika, garlic powder, onion powder, thyme, and black pepper. Toss well. Note: Adding spices now prevents them from burning and tasting bitter.
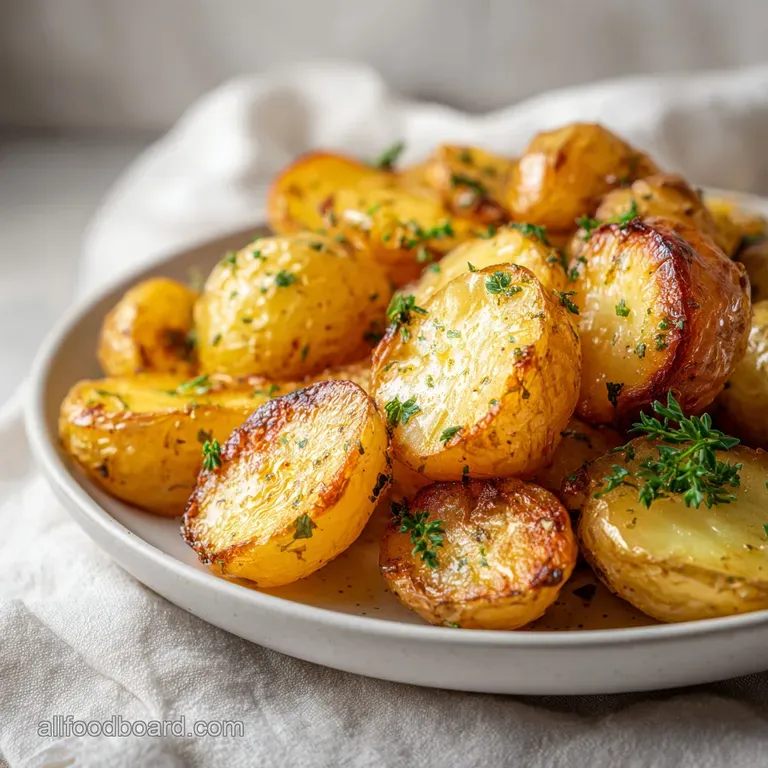
- Final touch. Remove from heat and finish with the 1/4 tsp of flaky sea salt and the fresh chopped parsley. Serve immediately while the sizzle is still audible.
Fixing Sogginess and Common Potato Problems
Why Your Potatoes Are Sticking
This usually happens for two reasons: the pan wasn't hot enough or you tried to flip them too early. When the potato hits the hot oil, it needs a few minutes to form a crust. That crust actually acts as a release mechanism.
If you try to move them before that "skin" forms, they will tear and leave half the potato stuck to the metal.
Why Your Potatoes Are Mushy
Sogginess is almost always caused by excess moisture. If you don't let the potatoes steam dry for those two minutes after parboiling, that water turns into steam in the skillet. Instead of frying, the potatoes end up steaming themselves.
Also, crowding the pan traps steam between the cubes, so work in batches if your skillet isn't big enough.
| Problem | Root Cause | Solution |
|---|---|---|
| Potatoes falling apart | Over boiling during parboil | Check at 8 minutes; they should be "fork tender" but not crumbling. |
| Bitter aftertaste | Spices burned in the oil | Only add dry spices in the last 2 minutes of the skillet time. |
| Greasy texture | Oil wasn't hot enough | Wait for the oil to shimmer or "dance" before adding the potatoes. |
Common Mistakes Checklist
- ✓ Pat the potatoes dry or let them steam dry for at least 2 minutes (moisture is the enemy of crunch).
- ✓ Use cold water to start the boiling process (this ensures even cooking from the center out).
- ✓ Don't skip the baking soda (it's the only way to get that specific "fuzzy" starch layer).
- ✓ Resist the urge to stir constantly; let the potatoes sit for 5 minutes to build the first layer of crust.
- ✓ Use a heavy pan like cast iron for the most consistent heat distribution.
Smart Ingredient Swaps for Every Need
If you're looking for a twist or need to work with what's in your pantry, there are plenty of ways to adapt this. I've often swapped the olive oil for bacon drippings when I'm making a full breakfast spread, which adds an incredible depth of flavor. If you want a different starch profile, you can even check out How to Cook Sweet Potatoes for a version that brings a bit of natural sweetness to the plate.
| Original Ingredient | Substitute | Why It Works |
|---|---|---|
| Olive Oil | Bacon Grease | Adds a smoky, salty depth. Note: Lower the heat slightly as it burns faster. |
| Smoked Paprika | Chili Powder | Gives a Southwestern vibe and a bit more heat. |
| Fresh Parsley | Dried Oregano | Provides a more Mediterranean, earthy finish. |
Scaling this recipe is fairly straightforward. If you need to cut it in half for a solo breakfast, just use a smaller skillet but keep the boiling times the same. If you're doubling it for a big family gathering, do not try to cram 4 lbs of potatoes into one pan.
You'll need to work in two separate skillets or cook in batches. For a 2x batch, you only need to increase the spices to about 1.5x the amount to avoid overwhelming the dish with salt and pepper.
Keeping Leftover Breakfast Potatoes Crisp Longer
These potatoes are best eaten straight out of the pan, but life happens, and sometimes you have leftovers. You can store them in an airtight container in the fridge for up to 4 days. Whatever you do, do not use the microwave to reheat them.
The microwave will turn that beautiful shatter crisp crust into a rubbery mess. Instead, throw them back into a hot, dry skillet for about 5 minutes, tossing them until they regain their crunch.
If you want to freeze them, do it after the parboiling and roughing stage, but before the frying. Freeze them in a single layer on a baking sheet, then transfer to a bag. When you're ready for breakfast, you can fry them directly from frozen it might just take an extra 5-10 minutes in the skillet.
For zero waste, if you have tiny potato scraps left over in the pot after roughing them up, don't throw them away! Fry those little "bits" up separately; they become the most amazing, crunchy potato croutons you've ever had.
Perfect Pairings to Complete Your Spread
When I think of a "complete" breakfast, these potatoes are the anchor, but they need some friends on the plate. A silky, soft scrambled egg or a sunny side-up egg with a runny yolk is the perfect partner. The yolk acts like a rich sauce that coats the crispy edges of the potatoes.
I also love serving these alongside some thick cut bacon or savory breakfast sausage.
If you're looking for something lighter, a side of fresh fruit or a bright avocado toast provides a nice contrast to the salty, smoky potatoes. Honestly, these are so good they can almost stand alone with just a little splash of hot sauce or a dollop of sour cream.
Whether it's a quiet Tuesday or a big holiday morning, this recipe brings that "homemade with love" feeling to every plate. It's about taking the time to do the small things like the baking soda and the pot shake to make an everyday ingredient feel extraordinary.

Recipe FAQs
What is the secret to great breakfast potatoes?
The secret is the alkaline parboil combined with the "roughing" technique. Adding baking soda to the water breaks down the potato exterior, and shaking the parboiled cubes creates a "fuzzy" surface that maximizes starch for a superior, shatter crisp crust.
Are breakfast potatoes ok for diabetics?
No, proceed with caution. Potatoes have a high glycemic index and contain significant carbohydrates, which can cause blood sugar spikes; it is best to consult your healthcare provider regarding portion sizes.
Are potatoes good for a cardiac diet?
Yes, in moderation, provided they are prepared with heart healthy fats. This recipe uses extra virgin olive oil and avoids excessive saturated fats, making it a better option than deep fried alternatives.
What are some common mistakes when making breakfast potatoes?
Crowding the skillet is the most frequent error. If you stack the potatoes, they steam rather than sear, which prevents them from achieving the necessary mahogany brown color; always cook in a single layer to ensure proper crisping.
How to ensure the centers are fluffy instead of raw?
Simmer the cubes for 8 10 minutes until the exteriors are fraying before draining. This initial cooking step ensures the interior is fully softened so that the final 15 20 minutes of skillet time can focus entirely on perfecting the exterior crust. If you appreciate this focus on texture, you can apply the same principle to our fluffy classic waffles to ensure a crisp, golden outside and airy middle.
Can I prepare these ahead of time?
Yes, parboil and "rough" the potatoes up to 24 hours in advance. Keep the prepared, raw-centered cubes in the refrigerator and simply proceed to the skillet frying step when you are ready to serve.
Is it true that I should wash the starch off the potatoes before boiling?
No, this is a common misconception. You want the surface starch to remain so it can react with the baking soda and oil to create that signature crispy exterior texture during the frying process.
Best Crispy Breakfast Potatoes
Ingredients:
Instructions:
Nutrition Facts:
| Calories | 264 kcal |
|---|---|
| Protein | 4.6 g |
| Fat | 10.6 g |
| Carbs | 39.8 g |
| Fiber | 5.4 g |
| Sugar | 1.8 g |
| Sodium | 485 mg |
