The Best Brownie Truffles: Rustic Bakery Bites
- Time: Active 20 minutes, Passive 25 minutes, Total 45 minutes
- Flavor/Texture Hook: Shattering dark chocolate shell meets a velvety, espresso spiked center
- Perfect for: Elegant holiday gifting, flour dusted dessert platters, or a quiet midnight indulgence
- Creating the Ultimate The Best Brownie Truffles
- The Secret to a Velvety Center
- Time and Yield for Artisan Treats
- Selecting Elements for a Rich Finish
- Necessary Tools for the Boutique Baker
- Steps for Hand Rolled Chocolate Perfection
- Technical Fixes for Flawless Finishes
- Artistic Flourishes for Flavor Customization
- Maintaining Freshness and Minimizing Waste
- Curating the Perfect Dessert Presentation
- Clarifying Details for the Home Confectioner
- Recipe FAQs
- 📝 Recipe Card
The aroma of molten cocoa and a whisper of vanilla always reminds me of my grandmother’s kitchen, where every surface was dusted with flour and love. There is something profoundly artistic about taking a simple tray of brownies and transforming them into shimmering, hand rolled gems.
These aren't just candies, they are miniature pastries designed to melt slowly, revealing layers of salt and dark espresso.
I've spent years obsessing over the architecture of a good truffle. I used to find them too sweet or, worse, grainy, like a mistake I once made with over beaten sugar. But after experimenting with different binders, I discovered that a small amount of full fat cream cheese creates an almost ganache like silkiness that stays supple even after the chocolate shell sets.
Honestly, don't even bother with low-fat alternatives here. We want that rich, dairy fat mouthfeel that makes the center feel like a secret. This recipe is your canvas, and once you master the snap of the dark chocolate coating, you'll never look at a box mix the same way again.
Let's get our hands a little messy and create something beautiful.
Creating the Ultimate The Best Brownie Truffles
The beauty of this method lies in the contrast between the rustic, crumbly brownie and the polished, sleek exterior. We aren't just mashing cake together, we are creating a sophisticated emulsion. By using a Seriously Fudgy Brownie Recipe as our inspiration, we ensure the base has enough structural integrity to hold its shape without becoming a heavy lump.
Many people skip the espresso powder, thinking it will make the truffles taste like coffee. It won't. Instead, it acts as a flavor catalyst, deepening the cocoa notes and cutting through the sugar. It’s the difference between a flat chocolate flavor and one that sings.
The Secret to a Velvety Center
Getting that specific "melt in-your mouth" quality requires a bit of science and a lot of patience. When we mix the warm, crumbled brownie with the cool cream cheese, we are performing a crude but effective form of lipid integration.
- Lipid Emulsification: The fat in the cream cheese coats the starch molecules of the brownie, preventing them from feeling dry or gritty on the tongue.
- Starch Retrogradation: Chilling the rolled centers allows the starch to firm up, ensuring the truffle doesn't dissolve when it hits the warm chocolate bath.
- Maillard Reaction: Even in a boxed mix, the browned edges of the brownie provide a complex, nutty bitterness that balances the sweet interior.
Component Analysis
| Ingredient | Science Role | Pro Secret |
|---|---|---|
| Cream Cheese | Binding Emulsifier | Use cold, block style cheese for a tighter, more stable crumb. |
| Espresso Powder | Flavor Enhancer | Bloomed in the vanilla, it intensifies the dark cocoa solids. |
| Coconut Oil | Viscosity Modifier | Adds a brilliant sheen and thins the dipping chocolate for a delicate snap. |
Time and Yield for Artisan Treats
Creating these truffles is a rhythmic process. You bake, you crumble, you roll. It’s the perfect afternoon project when the light is hitting your kitchen just right for a few photos.
- Prep Time: 20 minutes (rolling and dipping)
- Cook Time: 25 minutes (baking the base)
- Yield: 24 servings (standard 1 inch truffles)
Chef's Note: If you're in a humid environment, extend your chilling time by 10 minutes. Moisture is the enemy of a crisp chocolate shell, and we want that definitive "shatter" when you bite in.
Selecting Elements for a Rich Finish
I always reach for the highest quality fats I can find. For this recipe, the 0.5 cup vegetable oil provides a neutral, moisture heavy base that stays soft even when refrigerated. Unlike butter, which can make a brownie feel hard when cold, oil keeps our The Best Brownie Truffles feeling luxurious.
- 1 box (18 oz) Premium Fudgy Brownie Mix Why this? Provides the essential structural sugars and cocoa depth needed for a stable center.
- 2 large eggs
- 0.5 cup vegetable oil
- 0.25 cup water
- 1 tsp pure vanilla extract (I prefer Nielsen Massey)
- 0.5 tsp espresso powder
- 2 tbsp full fat cream cheese, softened Why this? The lactic acid adds a subtle tang that balances the sugar.
- 0.25 tsp fine sea salt
- 12 oz dark chocolate melting wafers (Ghirardelli works beautifully)
- 1 tsp coconut oil
- 1 tsp flaky sea salt (like Maldon) for topping
Substitutions for the Artistic Kitchen
| Original Ingredient | Substitute | Why It Works |
|---|---|---|
| Vegetable Oil | Melted Coconut Oil | Adds a very faint tropical note and a firmer bite at room temp. |
| Cream Cheese | Mascarpone | Offers a sweeter, more buttery finish for a truly decadent treat. |
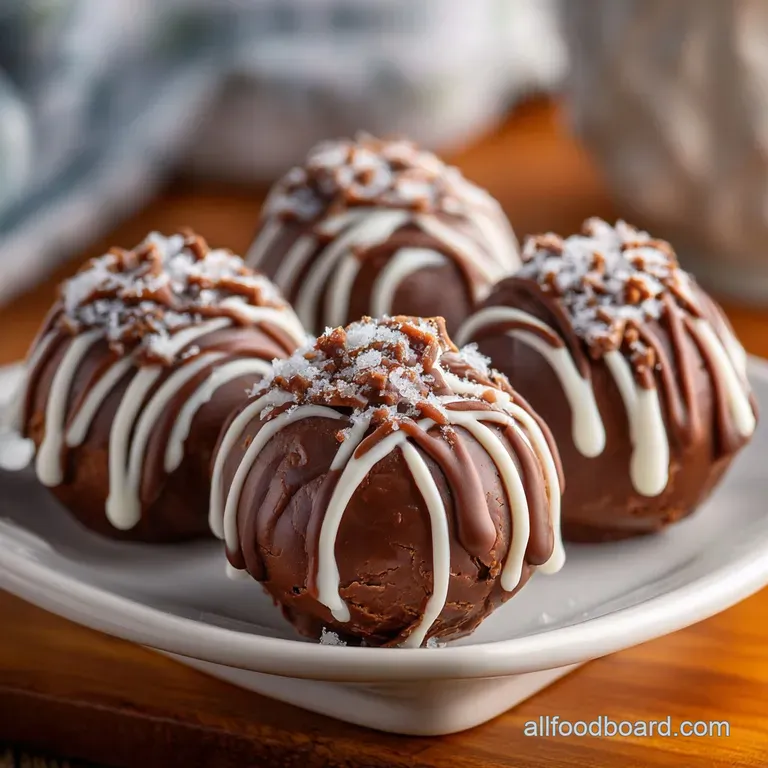
| Dark Chocolate | White Chocolate | Changes the aesthetic to a snowy, rustic look, though it is much sweeter. |
Necessary Tools for the Boutique Baker
You don't need a professional laboratory, but a few specific tools make the process feel more like an art form and less like a chore.
- KitchenAid Stand Mixer: Using the paddle attachment to incorporate the cream cheese ensures an even distribution without overworking the dough.
- Lodge Cast Iron Skillet (optional): If you bake the brownies in cast iron, you get incredible crispy edges that add texture to the truffle centers.
- Small Cookie Scoop: For that uniform, professional look, a 1 tablespoon scoop is your best friend.
- Dipping Tool or Fork: A dedicated chocolate fork helps the excess coating drain away, leaving a clean base.
Steps for Hand Rolled Chocolate Perfection
Phase 1: The Perfect Base
- Prep the oven. Preheat to 350°F and grease an 8x8 inch baking pan.
- Mix the batter. Combine the brownie mix, 2 large eggs, 0.5 cup vegetable oil, 0.25 cup water, 1 tsp vanilla, and 0.5 tsp espresso powder. Note: Don't overmix, we want fudgy, not cakey.
- Bake the brownie. Pour into the pan and bake for 25 minutes until the edges are set but the center still wobbles slightly.
- Cool completely. This is vital. If the brownie is warm, the cream cheese will melt and you'll have a greasy mess.
Phase 2: Forming the Truffle Centers
- Crumble the base. Transfer the cooled brownie to a bowl and break it into fine crumbs with your hands.
- Integrate the binder. Add 2 tbsp softened cream cheese and 0.25 tsp fine sea salt. Mix until it holds together like damp sand.
- Roll the spheres. Scoop 1 tablespoon portions and roll between your palms until smooth.
- Flash chill. Place the balls on a parchment lined tray and freeze for 15 minutes until firm to the touch.
Phase 3: The Chocolate Dip
- Melt the coating. Microwave 12 oz dark chocolate wafers with 1 tsp coconut oil in 30 second bursts.
- The Grand Dip. Submerge each ball in chocolate, lift with a fork, and tap off the excess.
- Final garnish. Sprinkle with flaky sea salt immediately before the chocolate loses its sheen.
Technical Fixes for Flawless Finishes
Sometimes the chocolate doesn't behave, or the centers feel a bit too soft. It happens to the best of us! I remember a batch where the chocolate seized because a single drop of water fell from my steamer. It was heartbreaking, but it taught me the importance of a dry workspace.
Fixing Cracked Chocolate Shells
If your shells crack after setting, your centers were likely too cold. As the brownie center warms up, it expands slightly, puting pressure on the rigid chocolate. Fix: Let the chilled balls sit at room temperature for 5 minutes before dipping.
Achieving a Stable Base
If the truffles are flat on the bottom, you likely didn't let enough chocolate drip off. Fix: Use a toothpick to gently move the truffle to a clean spot on the parchment paper about 30 seconds after dipping.
Troubleshooting Table
| Problem | Cause | Fix | Pro Tip |
|---|---|---|---|
| Lumpy Coating | Overheated chocolate | Stir in a teaspoon of room temp coconut oil. | Use a double boiler for more control. |
| Soft Centers | Too much cream cheese | Add more brownie crumbs or a tablespoon of cocoa powder. | Always measure your binder accurately. |
| Dull Shell | No fat in coating | Add coconut oil or cocoa butter to the melt. | Temper the chocolate if using bars instead of wafers. |
Artistic Flourishes for Flavor Customization
I love playing with the visual appeal of these treats. Depending on the occasion, you can adjust the "vibe" of the plating to suit a rustic tea party or a high end gala.
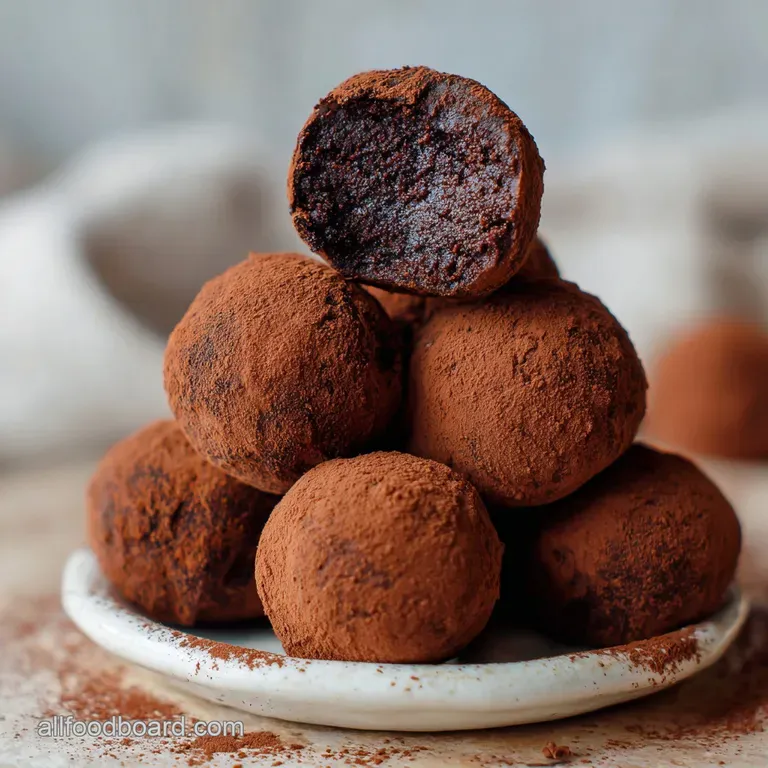
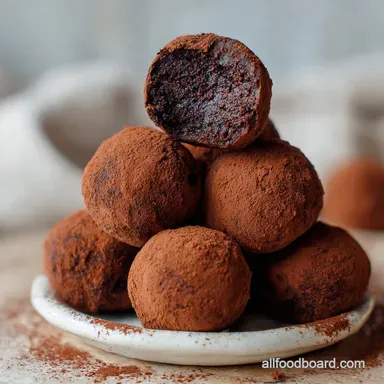
- Simple Plating: Pile the truffles in a rustic wooden bowl, letting the natural variations in the hand rolled shapes show through.
- Polished Plating: Use a sifter to lightly dust the tops with Dutch processed cocoa powder.
- Restaurant Plating: Draw a thin smear of chocolate ganache on a white plate, place three truffles on top, and add a single petal of edible gold leaf.
Plating Tweak Comparison
| Level | Finish | Best For |
|---|---|---|
| Simple | Flaky salt only | Casual family gatherings |
| Polished | Chocolate drizzle | Holiday gift boxes |
| Restaurant | Gold leaf + Ganache | Anniversary dinners |
For a fun variation, try incorporating elements from The Proper Fudgy recipe by adding crushed walnuts to the center for a crunch that mimics the crackly top of a fresh brownie.
Maintaining Freshness and Minimizing Waste
These truffles are surprisingly hardy. Because of the high sugar and fat content, they don't spoil easily, but the texture is best when managed carefully.
- Storage: Keep them in an airtight container in the fridge for up to 10 days. The cold helps maintain that snappy shell.
- Freezing: These freeze beautifully! Wrap them individually in foil and place in a freezer bag for up to 3 months. Thaw in the fridge overnight.
- Zero Waste: If you have leftover brownie crumbs that won't quite form a ball, use them as a topping for vanilla bean ice cream or fold them into a batch of cookies. Never throw away those chocolate "scraps" either remelt them for a quick fruit dip.
Curating the Perfect Dessert Presentation
When I serve these, I like to think about the entire sensory experience. A dark chocolate truffle needs a partner that can stand up to its intensity without being overwhelming.
The bitter notes of the dark chocolate pair wonderfully with a sharp espresso or a glass of tawny port. If you're hosting a larger crowd, they look stunning next to a Decadent Chocolate Brownie recipe trifle, providing a bite sized alternative to a heavy scooped dessert.
Comparison: Freshly Baked vs Boxed Shortcut
| Aspect | Freshly Baked Brownie | Boxed Mix Shortcut |
|---|---|---|
| Texture | Airy, cake like crumb | Dense, consistent fudge |
| Time | 1 hour 15 mins | 45 minutes |
| Result | Complex chocolate notes | Reliable, chewy sweetness |
- For a dark profile
- Use Ghirardelli 60% Cacao wafers.
- For smoother texture
- Double sift the dry mix before baking.
- For gift giving
- Chill for 2 hours before boxing to ensure the shell is fully set.
Clarifying Details for the Home Confectioner
Let's clear up some common misconceptions that often trip up new bakers. I used to think I had to use expensive tempered chocolate bars for everything, but the truth is often much simpler.
- Myth 1: You need to temper chocolate for a shiny shell. While true for pure chocolate bars, high-quality melting wafers are engineered with vegetable fats to stay shiny and snappy without the complex temperature work.
- Myth 2: Boxed mixes are "cheating." In truffle making, the boxed mix provides a consistent moisture level and density that is actually harder to achieve with some scratch recipes, which can be too airy.
- Myth 3: The truffles will melt at room temperature. Thanks to the coconut oil and the stability of the brownie center, these will hold their shape on a dessert table for several hours without issue.
- 1. Internal Temp
- Ensure the brownie base reaches 165°F (74°C) to ensure the eggs are safe.
- 2. Size
- Each ball should weigh approximately 20 grams for a uniform look.
- 3. Coating Temp
- Dip when the chocolate is roughly 90°F (32°C); too hot and it will run off, too cold and it will be clumpy.
These truffles are a testament to the fact that baking is as much about the feeling as it is the flavor. Every time I see the salt crystals sparkling on the dark surface, I'm reminded why I love this craft. It's about taking the time to make something by hand, flour dusted and imperfect, yet absolutely soul satisfying.
Happy rolling!

Recipe FAQs
Can I use store-bought brownie mix instead of baking from scratch?
Yes, absolutely. Boxed mixes provide a consistent, fudgy density that binds well with the cream cheese binder. This approach saves significant time and ensures a reliable texture, which is crucial for the truffle center.
How do I stop the chocolate shell from cracking when I dip the centers?
The centers must be completely frozen when dipped. If the truffle center is too cold, it causes expansion shock as it hits the slightly warmer chocolate, resulting in cracks.
What is the purpose of adding espresso powder to the mix?
It deepens the cocoa flavor dramatically without adding a coffee taste. Espresso powder acts as a flavor catalyst, enhancing the perception of richness. If you enjoy deep chocolate flavor, mastering this technique will elevate many of your bakes, similar to how we balance acidity in our Decadent Mocha Cocoa Swirl Brownies.
My truffle mix is too wet and won't roll into balls; what should I add?
Add more crumbled, fully cooled brownie base. The binder ratio is off, likely due to residual moisture in the crumbs. You need enough dry surface area to absorb the fat from the cream cheese.
How long can I store the finished brownie truffles?
Refrigerate in an airtight container for up to 10 days. The high fat content preserves them well, though the shell's "snap" is best within the first three days.
Can I use cream cheese alternatives to make this recipe dairy-free?
Yes, but mascarpone is the best direct substitute. Mascarpone offers a similarly high fat content and creamy texture needed for binding. If you are substituting fats in baking generally, understanding how fat ratios affect texture is key; see how we manage that in our Pecan Pie Brownies for structural guidance.
What temperature should my oven be to bake the base correctly?
Bake the base at 350°F (175°C). You want to underbake slightly pull them when the edges are set but the center still wobbles to ensure the resulting crumbs are fudgy, not dry.
Best Brownie Truffles Recipe
Ingredients:
Instructions:
Nutrition Facts:
| Calories | 224 kcal |
|---|---|
| Protein | 2.1 g |
| Fat | 13.2 g |
| Carbs | 25.4 g |
| Fiber | 1.1 g |
| Sugar | 18.8 g |
| Sodium | 96 mg |
