Perfect Chocolate Raspberry Truffle Cake Recipe with Ganache
- Time: Active 45 minutes, Passive 35 minutes, Total 1 hours 20 mins
- Flavor/Texture Hook: Velvety chocolate sponge paired with a tart, shatter crisp ganache shell
- Perfect for: Milestone birthdays, romantic anniversaries, or showing off at a dinner party
- Perfect Chocolate Raspberry Truffle Cake Recipe with Dark Chocolate Ganache
- Understanding the Baking Chemistry
- Core Components and Their Roles
- Ingredients and Smart Swaps
- Essential Tools for Bakers
- Step-by-Step Assembly Instructions
- Pro Troubleshooting Guide
- Adjusting Portions for Different Needs
- Debunking Traditional Baking Rumors
- Storage and Waste Prevention
- Best Serving Suggestions
- Recipe FAQs
- 📝 Recipe Card
Perfect Chocolate Raspberry Truffle Cake Recipe with Dark Chocolate Ganache
Have you ever walked past a high end bakery and wondered why their cakes look like polished mahogany while yours look, well, like home cooked bread? I spent years in that same boat.
My first attempt at a truffle cake was so dry it felt like eating a wool sweater, and my "ganache" was a lumpy mess that slid off the sides like a slow moving landslide. But then I discovered the trick of blooming cocoa in hot coffee, and everything changed.
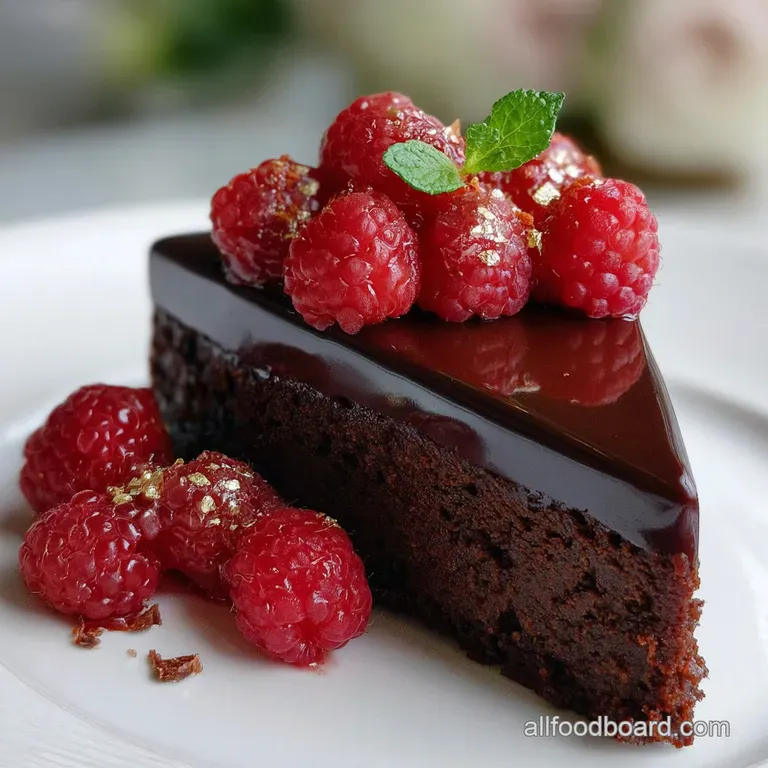
Indulge in this perfect chocolate raspberry truffle cake recipe, complete with a decadent dark chocolate ganache. The aroma that fills your kitchen when the hot coffee hits the Dutch processed cocoa is purely addictive. It’s an earthy, deep scent that promises a richness you just can't get from a box mix.
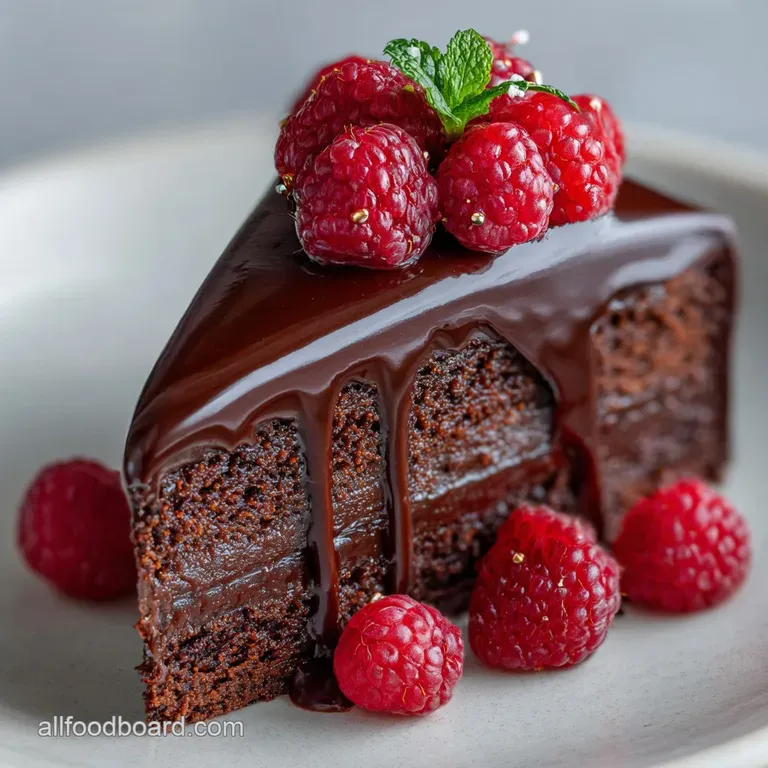
Trust me on this, once you see that first slice come out with the bright red raspberry layer peeking through the dark chocolate, you'll never go back to basic frosting.
We’re going to dig into the gritty details of how to make this work on a home cook budget. You don't need a professional pastry kitchen to get that velvety texture or the glossy snap of a perfect chocolate shell.
We’re using smart tricks, like a tiny bit of corn syrup for shine and a stovetop reduction to intensify the fruit flavor without spending a fortune on specialty extracts.
Understanding the Baking Chemistry
The Secret of Molecular Blooming: Hot brewed coffee dissolves the fat in the cocoa powder instantly, releasing trapped flavor compounds that cold liquids simply can't reach. This creates a more intense, chocolatey base without needing extra expensive chocolate bars in the batter.
The Acid Base Lift: The combination of lemon juice in the filling and baking soda in the sponge creates a controlled reaction that ensures the cake rises evenly while the tartness of the fruit cuts through the heavy fat of the ganache.
| Method | Time | Texture | Best For |
|---|---|---|---|
| Stovetop Reduction | 15 minutes | Thick, jam like, intense | Professional layering and bold fruit flavor |
| Microwave Burst | 6 minutes | Thinner, syrupy, light | Quick assembly or a lighter dessert feel |
| Freeze Dried Powder | 2 minutes | Concentrated, slightly gritty | Intense flavor without adding any extra moisture |
This comparison shows that while the microwave is faster, the stovetop reduction is the gold standard for that "truffle" feel. The heat breaks down the pectin in the raspberries, creating a natural thickener that stays put between your cake layers.
Core Components and Their Roles
| Ingredient | Science Role | Pro Secret |
|---|---|---|
| Dutch Processed Cocoa | Neutralized acidity for a darker color | Sift it twice to avoid "cocoa bombs" in the sponge |
| Hot Brewed Coffee | Hydrates starch and blooms cocoa fats | Use a dark roast to mimic expensive 80% cacao notes |
| Light Corn Syrup | Prevents sugar crystallization in ganache | This is the only way to get that mirror like shine |
| Vegetable Oil | Stays liquid at room temperature | Oil based cakes stay moist longer than butter based ones |
Using oil instead of butter is a classic home cook move that actually yields a better result for chocolate cakes. Butter is great for flavor in vanilla cakes, but in a heavy chocolate recipe, it can make the crumb feel tough once the cake cools down.
Ingredients and Smart Swaps
For the chocolate sponge: 2 cups (250g) All purpose flour ¾ cup (75g) Dutch processed cocoa powder Why this? It provides a darker color and smoother flavor than natural cocoa. 2 cups (400g) Granulated sugar 1 ½ tsp Baking powder 1 ½ tsp Baking soda 1 tsp Sea salt 1
cup (240ml) Whole milk, room temperature ½ cup (120ml) Vegetable oil 2 Large eggs, room temperature 2 tsp Pure vanilla extract 1 cup (240ml) Hot brewed coffee
For the raspberry truffle filling: 12 oz (340g) Fresh or frozen raspberries ¼ cup (50g) Granulated sugar 1 tbsp Fresh lemon juice 1 cup (225g) Heavy cream
For the dark chocolate ganache: 8 oz (225g) Semi sweet chocolate (60% cacao), finely chopped 8 oz (225g) Bittersweet chocolate (70% cacao), finely chopped 1 cup (240ml) Heavy whipping cream 1 tbsp Light corn syrup
| Original Ingredient | Substitute | Why It Works |
|---|---|---|
| Whole Milk | Buttermilk (1 cup) | Adds a slight tang and makes the crumb even more tender |
| Vegetable Oil | Melted Coconut Oil | Similar fat profile. Note: Adds a very faint tropical aroma |
| Raspberries | Blackberries | Similar pectin levels but provides a deeper, muskier sweetness |
| Corn Syrup | Honey | Provides the same glucose shine. Note: Will add a distinct floral flavor |
If you find yourself short on Dutch processed cocoa, you can use regular cocoa powder, but you might want to add an extra pinch of baking soda to help with the color. For more cocoa inspiration, my Homemade Chocolate Peppermint recipe uses similar blooming techniques to get that deep, dark finish.
Essential Tools for Bakers
You don't need a thousand dollar setup, but a few specific items make this much easier. A standard stand mixer is great, but a hand mixer works just as well for this fluid batter. You'll definitely want two 9 inch round cake pans and some parchment paper.
The real "secret weapon" here is a fine mesh strainer. When you're making the raspberry reduction, those tiny seeds can ruin the "velvety" feel of the truffle filling. Passing the fruit through a sieve is the difference between a rustic jam and a professional grade filling.
Also, an offset spatula will be your best friend when it comes to smoothing out that ganache.
step-by-step Assembly Instructions
1. Preparing the Infused Sponge
Preheat your oven to 350°F and grease your pans. Whisk the flour, cocoa, sugar, baking powder, baking soda, and salt together in a large bowl. Add the milk, oil, eggs, and vanilla, then beat on medium speed until the batter is smooth and shiny.
Slowly pour in the hot coffee and whisk by hand the batter will be very thin, but that’s exactly what we want for a moist crumb. Bake for 30-35 minutes until a toothpick comes out with just a few moist crumbs.
2. Reducing the Raspberry Essence
While the cakes cool, place your 12 oz of raspberries, sugar, and lemon juice in a small saucepan over medium heat. Simmer for about 15 minutes, stirring occasionally, until the mixture thickens and coats the back of a spoon. Strain out the seeds and let the liquid cool completely.
Fold this into your whipped heavy cream to create the truffle filling.
3. Assembling the Truffle Layers
Place the first cake layer on a plate. If the top is domed, slice it flat with a serrated knife. Spread the raspberry truffle cream evenly across the surface, leaving a half inch border at the edges. Top with the second cake layer.
Place the entire cake in the fridge for 30 minutes until the filling feels firm to the touch.
4. Finishing with the Ganache Drip
Heat the 1 cup of whipping cream and corn syrup in a pan until it just starts to simmer. Pour it over your chopped semi sweet and bittersweet chocolate. Let it sit for 5 minutes, then whisk gently starting from the center until the mixture is glossy and smooth.
Let the ganache cool to about 110°F (it should feel warm but not hot), then pour it over the chilled cake, letting it drip naturally down the sides.
Chef Tip: For the smoothest ganache, never use a whisk to stir the chocolate use a rubber spatula. A whisk incorporates air bubbles, but a spatula keeps the texture dense and glass like.
Pro Troubleshooting Guide
Why Your Cake Sinks
If your cake looks perfect in the oven but collapses as it cools, you likely over mixed the batter once the coffee was added. Over mixing develops gluten, which creates a structure that's too heavy for the air bubbles to support. Next time, use a gentle hand when stirring in the liquids.
Fixing a Broken Ganache
If your ganache looks oily or "split," don't panic. This usually happens if the cream was too hot. You can usually fix it by adding a tablespoon of cold heavy cream and whisking vigorously. It will bring the emulsion back together into a silky smooth state.
| Problem | Root Cause | Solution |
|---|---|---|
| Grainy Ganache | Chocolate scorched or poor quality | Melt over a double boiler slowly with a bit of butter |
| Sliding Layers | Filling was too warm during assembly | Chill the raspberry reduction for at least 2 hours before folding |
| Dry Sponge | Overbaked or skipped the coffee | Brush layers with a simple syrup (sugar + water) before filling |
A little trick for the filling: if it feels too soft, similar to the logic in my Homemade Chocolate Cream recipe, you can add a tablespoon of instant vanilla pudding mix to the whipped cream to act as a stabilizer.
Common Mistakes Checklist
- ✓ Don't skip the parchment paper; this cake is moist and will stick to the bottom of the pan.
- ✓ Ensure your eggs and milk are at room temperature to prevent the batter from curdling.
- ✓ Never pour hot ganache onto a room temperature cake; the cake must be cold to "set" the drip.
- ✓ Use a dark roast coffee; light roasts are too acidic and can make the chocolate taste sour.
- ✓ Sift the cocoa powder; those little lumps won't always dissolve in the oven.
Adjusting Portions for Different Needs
If you’re baking for a smaller group, you can easily halve this recipe. Use one 6 inch pan and reduce the baking time by about 8 minutes. For half an egg, just whisk one egg in a cup and pour out half by weight or volume.
When scaling up for a big party, you can double the recipe but don't double the baking soda use only 1.5x the amount. Baking at a large scale means the cake takes longer to heat through in the center, and too much leavening can cause it to rise too fast and then fail.
Also, work in batches when making the ganache; it’s much easier to manage 16 oz of chocolate than 32 oz at once.
Debunking Traditional Baking Rumors
Many people think you need expensive "baking chocolate" bars for the sponge. Honestly, a high-quality Dutch processed cocoa powder often provides a better structural result than melted chocolate in a fluid batter.
Melted chocolate contains cocoa butter which firms up when cold, potentially making your cake feel "hard" if it's been in the fridge.
Another myth is that you must "sift all dry ingredients together three times." While sifting the cocoa is vital because it clumps, modern all purpose flour is usually pre sifted. One quick whisking of the dry ingredients is usually plenty to distribute the leavening agents.
Storage and Waste Prevention
Storage: This cake lives its best life in the fridge. Because of the fresh raspberry filling and the cream in the ganache, it shouldn't sit out for more than two hours. It stays fresh in an airtight container for up to 4 days.
If you're freezing it, freeze the layers individually (wrapped in plastic) for up to 2 months, then assemble fresh.
Zero Waste: If you trimmed the tops off your cake layers to make them flat, don't throw those scraps away! Crumble them into a bowl, mix with a spoonful of leftover ganache, and roll them into "cake truffles." You can also use the leftover raspberry seeds (the ones you strained out) to flavor a morning yogurt or oatmeal they still have tons of flavor even if they aren't "silky."
Best Serving Suggestions
This cake is incredibly rich, so you don't need much to go with it. A simple dollop of unsweetened whipped cream or a few extra fresh raspberries is usually enough. If you really want to lean into the "truffle" theme, serve a small glass of ruby port or a very dark espresso alongside it.
For a summer gathering, a scoop of vanilla bean ice cream provides a temperature contrast that's really pleasant against the dense, room temperature ganache. The cold creaminess helps wash down the heavy cocoa notes.
Decision Shortcut
- If you want a deeper flavor, bloom your cocoa in hot coffee instead of water.
- If you want a shinier finish, add a teaspoon of corn syrup to your ganache.
- If you want a lighter cake, replace half the whole milk with buttermilk.
Quick Fix Table
| Problem | Cause | Fix |
|---|---|---|
| Grainy ganache | Overheated chocolate | Whisk in a splash of cold cream |
| Sinking cake | Too much baking soda | Measure precisely with level spoons |
| Sour filling | Too much lemon juice | Fold in 1 tbsp of powdered sugar |
Fast vs Classic Comparison
| Feature | Fast Method (store-bought) | Classic Method (This Recipe) |
|---|---|---|
| Fruit Flavor | Jam: Very sweet, one dimensional | Reduction: Tart, complex, fresh |
| Sponge Texture | Box Mix: Airy, crumbly, sweet | Scratch: Velvety, moist, dense |
| Ganache Finish | Frosting: Matte, buttery, soft | Truffle: Glossy, snapping, rich |
Precision Checkpoints
- Reduction Temp: Simmer raspberries until they reach 180°F for perfect thickening.
- Sponge Doneness: Pull the cake when the internal temperature hits 210°F.
- Ganache Pour: Wait until the chocolate mixture cools to 110°F for the perfect drip.

Recipe FAQs
Can I substitute vegetable oil with melted butter in the sponge?
No, stick with the oil for best results. Butter contains milk solids which can cause the heavy chocolate crumb to feel tough when chilled, whereas oil remains liquid for a longer lasting moist texture.
How do I ensure the dark chocolate ganache achieves a mirror like shine?
Incorporate one tablespoon of light corn syrup. This ingredient is crucial because it inhibits sugar crystallization in the chocolate, which is what creates that professional, glossy appearance.
What is the primary reason the cake layer sinks after baking?
You likely overmixed the batter after adding the hot coffee. Over developing the gluten structure creates a heavy network that collapses when the internal oven heat dissipates.
How should I manage the raspberry filling to avoid layers sliding apart?
Chill the raspberry truffle filling until it is firm to the touch before assembly. This stability is key, similar to ensuring proper setting time when working on a whipped cream based dessert like our Vanilla Pudding Recipe.
Why should I bloom the cocoa powder with hot coffee instead of just hot water?
Hot coffee deeply intensifies the chocolate flavor compounds. The heat dissolves the cocoa fats, releasing richer notes that cold liquids cannot activate, resulting in a deeper, earthier taste without adding extra chocolate mass.
Is it mandatory to strain the raspberry reduction before mixing it into the cream?
Yes, straining is mandatory for a velvety truffle texture. The tiny seeds will interfere with the smooth, decadent mouthfeel that defines a truffle filling.
How should I store the finished cake to maintain optimal texture?
Store the cake airtight in the refrigerator for up to four days. Because this recipe uses fresh fruit filling and a cream based ganache, keeping it cold prevents spoilage and keeps the layers firm.
Truffle Cake Recipe With Ganache
Ingredients:
Instructions:
Nutrition Facts:
| Calories | 688 calories |
|---|---|
| Protein | 8.4 g |
| Fat | 39.7 g |
| Carbs | 83.9 g |
| Fiber | 4.6 g |
| Sugar | 58.2 g |
| Sodium | 245 mg |
