The Autumn Crunch Perfectly Seasoned Roasted Pumpkin Seeds
- Ditching the Soggy Seed: Why This Recipe Guarantees Maximum Crunch
- Beyond Basic Snacking: The Appeal of Homemade Roasted Pumpkin Seeds
- Necessary Equipment and Simple Ingredients for Seed Perfection
- Sourcing and Selecting the Right Pumpkin Variety
- Step Zero: The Non-Negotiable Drying Phase
- Roasting the Seeds: Temperature, Timing, and Monitoring
- Troubleshooting and Extending the Shelf Life of Your Crunch
- Beyond Salt and Pepper: Innovative Flavor Variations
- Recipe FAQs
- 📝 Recipe Card
Ditching the Soggy Seed: Why This Recipe Guarantees Maximum Crunch
The great annual tradition of roasting pumpkin seeds often results in a frustratingly rubbery outcome. That slightly chewy texture is the culinary enemy, and it almost always stems from one simple mistake: insufficient drying.
To achieve that satisfying, loud snap that defines truly great Roasted Pumpkin Seeds , we must completely eliminate internal moisture before they ever enter the oven.
This method is meticulous about the prep work because we aren't just heating the seeds; we are dehydrating them slowly and then toasting them rapidly. By starting with bone dry seeds, we bypass the steaming stage entirely, ensuring that the low-and-slow roasting process converts the internal structure into a brittle, crunchy delight.
This dedication to dryness is the single most crucial differentiator between a successful autumn snack and a disappointing batch of warm, soggy kernels.
Beyond Basic Snacking: The Appeal of Homemade Roasted Pumpkin Seeds
Few things rival the simple satisfaction of transforming potential food waste into a delicious, nutrient dense treat. Creating Homemade Pumpkin Seeds Recipes allows you to control not just the quality of the ingredients, but the exact flavor profile and sodium levels, resulting in a superior product every single time.
These customized snacks are perfect for garnishing rich soups or providing a much needed texture contrast to winter salads.
Unlocking the Secret to Uniformly Crisp Seeds
The key to achieving uniformity lies in minimizing moisture transfer and maximizing heat exposure. Our low oven temperature of 300°F (150°C) is specifically chosen to finish the dehydrating process gently without scorching the outer shell.
Combined with the requirement of spreading the seeds in a thin, single layer, this technique guarantees that every seed, regardless of its size or position on the tray, achieves a golden brown hue and maximum crispness.
A Zero Waste Kitchen Goal: Utilizing Every Part of the Gourd
Whether you are carving jack-o'-lanterns or utilizing the flesh of a sugar pie pumpkin for a seasonal bake, the seeds offer an incredible opportunity for zero waste cooking. Our recipe utilizes the Roasted pumpkin seeds with shell , maximizing the yield from a single gourd.
By embracing this byproduct, we not only gain a fantastic snack but also honor the philosophy of using every edible part of the harvest.
Flavor Profile Blueprint: Sweet, Salty, or Spicy?
While store-bought seeds often stick to aggressive saltiness, a truly great seasoning should achieve balance. Our foundational flavour blueprint introduces a small measure of brown sugar alongside the fine sea salt and black pepper.
This subtle sweetness counters the earthy, sometimes bitter notes inherent in the seed itself, making the Roasted pumpkin seeds seasoning wonderfully complex and highly addictive. Of course, this base is merely a starting point, easily customized to be spicy or savory depending on your preference.
Necessary Equipment and Simple Ingredients for Seed Perfection
The beauty of this recipe lies in its simplicity. We require only standard kitchen equipment and minimal ingredients to execute perfection. The ingredients needed include freshly scooped raw seeds, a neutral high heat oil like olive oil (which serves as the essential binder), fine sea salt, and optionally, a touch of light brown sugar and freshly ground black pepper for depth of flavour.
The brown sugar is recommended as it helps achieve a lovely caramelization and rich color during the low-temperature roast.
Sourcing and Selecting the Right Pumpkin Variety
While any pumpkin variety will yield seeds, larger seeds often found in traditional carving pumpkins are easier to handle and separate from the pulp, making the initial preparation stage quicker.
Generally, the size of the seeds dictates the final texture and seasoning adherence, so aim for medium to large gourds if possible.
Essential Tools for Cleaning and Drying Your Seeds
The cleaning phase requires only a colander and strong running water. For drying, a clean kitchen towel or paper towels are vital for the initial pat-down. Post patting, a sturdy baking sheet is required not just for roasting, but for the crucial air-drying period.
Mastering How To Clean Pumpkin Seeds efficiently saves significant time and ensures a better final product.
The Oil Debate: Which Fat Delivers the Best Finish?
We opt for olive oil because its mild, fruity flavor complements the earthiness of the seeds and it performs admirably at our chosen roasting temperature. Oil is non-negotiable; it helps the seasoning adhere evenly to the slick surface of the seeds and promotes the necessary browning and crisping during the bake.
For a strictly neutral profile, a high heat vegetable oil can be substituted effectively.
Seasoning Strategy: Mastering the Salt-to-Seed Ratio
Our strategy uses a 1:1 ratio of salt to pepper (one teaspoon of each for approximately two cups of seeds), ensuring a robust, classic savoury profile. The key is to toss the seeds thoroughly in the oil first, before adding the dry seasoning.
This sequence ensures that the seasoning mixture, which includes the delicate brown sugar, creates an even, adhesive layer around each seed, preventing it from sinking to the bottom of the parchment paper and burning.
Related Recipes Worth Trying
- The Ultimate Roasted Tomato Soup Recipe Rich Velvety and Homemade — Forget the tin This Homemade Tomato Soup is rich and velvety made by roasting fresh tomatoes for deep sweetness Perfect alongside a proper grilled cheese...
- Flaky Pumpkin Scones Recipe with Brown Butter Maple Glaze — Say goodbye to dry bakes This easy Pumpkin Scones recipe uses frozen butter for a guaranteed flaky crumb every time Finished with a nutty brown butter maple...
- How To Roast The Perfect Lemon and Garlic Whole Roasted Chicken — Master this easy Lemon and Garlic Whole Roasted Chicken recipe Our method guarantees shatteringly crisp skin and juicy meat every time The essential whole...
Step Zero: The Non-Negotiable Drying Phase
Before we even consider heat, the seeds must be dry. After scooping the pulp and vigorously washing the seeds under cold water to remove all fibrous strands, we initiate the two-part drying process. First, the seeds are spread onto a double layer of paper towels and patted until they feel superficially dry.
Second, they are transferred to a dry sheet pan and allowed to air dry at room temperature for a minimum of 30 minutes, and ideally up to an hour. This extended, passive drying time is the fundamental step that guarantees the superior crunch inherent in this recipe.
Roasting the Seeds: Temperature, Timing, and Monitoring
The execution of How To Make Roasted Pumpkin Seeds requires precision in heat management. We use a moderately low temperature of 300°F (150°C) for 15– 20 minutes total.
This temperature is low enough to cook the seeds from the inside out without causing the surface seasoning to burn prematurely, resulting in perfectly toasted kernels.
Separation Anxiety: Cleaning the Strands and Pulp Away
The washing process must be aggressive. Any residual, slimy pulp or fibrous strands left clinging to the seeds will inhibit proper drying and roasting, leading to soft or unevenly cooked results.
Running them under cold water while rubbing them vigorously in the colander is the only way to ensure total purity before the drying phase begins.
Ensuring Bone Dry Results: Air Drying vs. Oven Prep
While some methods recommend using a very low oven to rapidly dry the seeds, we find that the dedicated 30- to 60-minute air dry at room temperature is superior, achieving a more consistent moisture reduction without prematurely heating the seeds.
For those interested in an accelerated method, adapting this recipe for the Roasted pumpkin seeds air fryer works exceptionally well for the final cooking phase, but remember: the cleaning and air-drying steps must still be completed first, regardless of the cooking mechanism used.
The Optimal Sheet Pan Layout for Even Toasting
Always line your sturdy baking sheet with parchment paper to prevent sticking and aid in heat distribution. Crucially, the seasoned seeds must be spread in a single, uncrowded layer. Overlapping seeds trap steam and moisture, sabotaging the desired crunchy texture.
Proper spacing ensures every single seed is fully exposed to the dry heat of the oven.
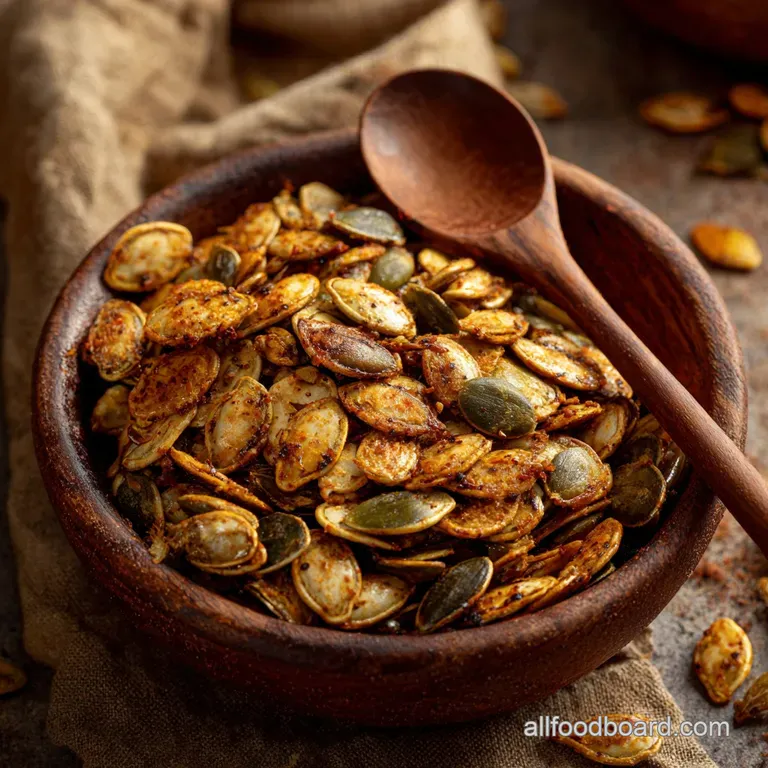
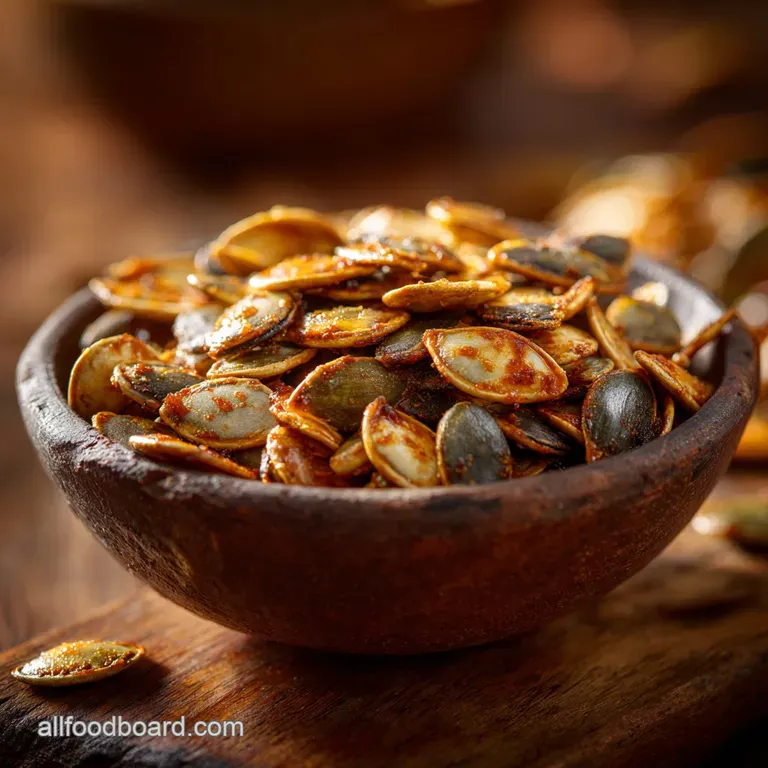
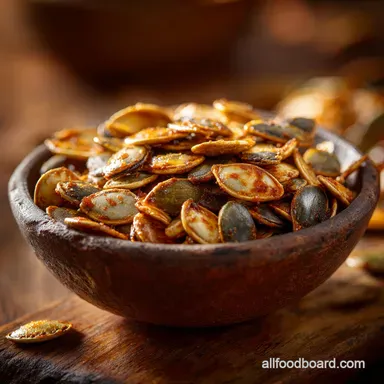
Visual Cues: Knowing Exactly When Your Roasted Pumpkin Seeds Are Done
You know the seeds are ready when they achieve a light golden brown colour, swell slightly, and emit a distinctly rich, nutty aroma not a scorched smell. Listen carefully: they should also begin to make a subtle crackling sound inside the oven.
As soon as these signs appear (usually between 15 and 20 minutes), pull them out immediately, as the cooling process will complete the final crisping.
Troubleshooting and Extending the Shelf Life of Your Crunch
The goal is long lasting crunch. If your seeds come out soft, it means you skipped the air-drying stage or your oven temperature was too high, causing them to steam internally before crisping.
If they are slightly soft after cooling, return them to a 250°F (120°C) oven for another five to eight minutes until they feel brittle.
Beyond Salt and Pepper: Innovative Flavor Variations
While our initial flavour base is stellar, exploring different Roasted pumpkin seeds seasoning opens up endless snacking possibilities. For a kick, try the Smoky Tex-Mex profile, incorporating smoked paprika and cumin.
Alternatively, for a truly decadent Italian treat, coat the seeds in melted butter, garlic powder, and a generous dusting of Parmesan cheese tossed in during the final minutes of roasting.
Preventing Burns: When Seeds Toast Too Quickly
Burning typically occurs when the temperature is too high or the seeds are left untouched. Our moderate 300°F temperature helps prevent this, but the required mid-roast stir (at the 8-minute mark) is essential.
Flipping the seeds ensures that the bottom surfaces, which are in direct contact with the hot metal tray, do not scorch while the top remains pale.
Long Term Storage Solutions: Keeping Roasted Seeds Fresh
Once completely cool and this is critical, as storing warm seeds introduces trapped moisture transfer your perfect Roasted Pumpkin Seeds to an airtight container.
Stored at room temperature, they will maintain their ultimate crunch and flavour for up to two weeks, though they rarely last that long.
Global Spice Blends for Roasted Pumpkin Seeds (Curry, Tajín, Za’atar)
For globally inspired flavours, experiment with different spice blends. A simple Madras curry powder mixed with the oil and a pinch of turmeric offers an Indian twist. For a tart, salty complexity, substitute the sugar and pepper for the Mexican chili lime blend, Tajín.
Or, for a Mediterranean profile, toss them with Za’atar a blend of thyme, sesame seeds, and sumac after roasting.
Nutritional Snapshot: Why This Snack Is Good for You
Beyond great flavour, Roasted pumpkin seeds benefits include excellent nutritional value. They are an impressive source of plant based protein, healthy unsaturated fats, and dietary fibre.
This rich nutrient profile makes them a fantastic, guilt free snack that supports satiety and energy levels throughout the day.

Recipe FAQs
Why are my roasted pumpkin seeds rubbery and not properly crunchy?
Ah, this is the most common disaster! It means you skipped the crucial drying stage. Moisture on the seeds turns the oven into a steamer, leaving you with chewy, rubbery seeds. You need to ensure they are absolutely bone dry after washing and after the crucial 30-60 minute air-drying period it's a bit of a faff, but essential for that satisfying snap we’re aiming for.
How long can I keep my crunchy Roasted Pumpkin Seeds once they’re cooked?
If you’ve followed the low-and-slow roasting method and achieved total crispness, they will last absolutely ages! Keep them in a proper airtight container a glass jar works perfectly at room temperature.
They should stay wonderfully crunchy for up to two weeks, making them a cracking good supply of snacks for when you’re watching the telly.
I’ve nailed the basic recipe; what are some fun alternative flavourings for these roasted pumpkin seeds?
That’s the spirit! The world is your oyster when it comes to seasoning. For a punchy savoury twist, try adding a generous dash of Smoked Paprika and a pinch of Cayenne for a proper Tex-Mex kick.
If you prefer something sweeter, toss them with ground cinnamon and 1 Tbsp of maple syrup added with the oil for an autumn pudding vibe.
Are the shells safe to eat, or should I try to remove them before roasting?
Don't fret, the shells are completely safe and surprisingly nutritious, containing a good amount of fibre! You roast them shell-on unless you bought pre-hulled seeds, known as pepitas.
The gentle heat of the oven is designed to dry out the shells completely, making them thin, crisp, and fully digestible for that satisfying crunch.
My seeds went from perfectly golden to slightly bitter and burnt in a blink. What went wrong?
Ah, the classic race against the clock! Burning usually means two things: either your oven temperature was a touch too high, or you forgot the vital mid-roast stir. The low temperature (300°F/150°C) is key to evaporating moisture slowly, so remember to give the tray a vigorous shake or stir after 8 minutes.
Also, don't skimp on the parchment paper; it provides a necessary heat barrier.
The Autumn Crunch Roasted Pumpkin Seeds
Ingredients:
Instructions:
Nutrition Facts:
| Calories | 874 kcal |
|---|---|
| Protein | 10.1 g |
| Fat | 35.8 g |
| Carbs | 45.2 g |
| Fiber | 7.6 g |
| Sodium | 10012 mg |
