The Ultimate Sturdy Savoury Homemade Bread Bowls Perfect for Soup
- The Quest for the Perfect Edible Vessel: Why This Recipe Wins
- Crafting 'Architecture You Can Eat': Understanding the Bread Bowl Mission
- Assembling Your Toolkit: What You Need for Superior Bread Bowls
- Mastering the Dough Components: Ingredient Deep Dive
- The Journey from Shaggy Mass to Satisfying Sphere: Mixing and Kneading
- Proofing Perfection: Guiding the Dough to Optimal Rise
- Shaping Your Edible Containers: Forming the Sturdy Shells
- Baking Secrets: Achieving the Golden Crust Without Burning
- From Hot Oven to Happy Table: Cooling and Serving Tactics
- Recipe FAQs
- 📝 Recipe Card
The Quest for the Perfect Edible Vessel: Why This Recipe Wins
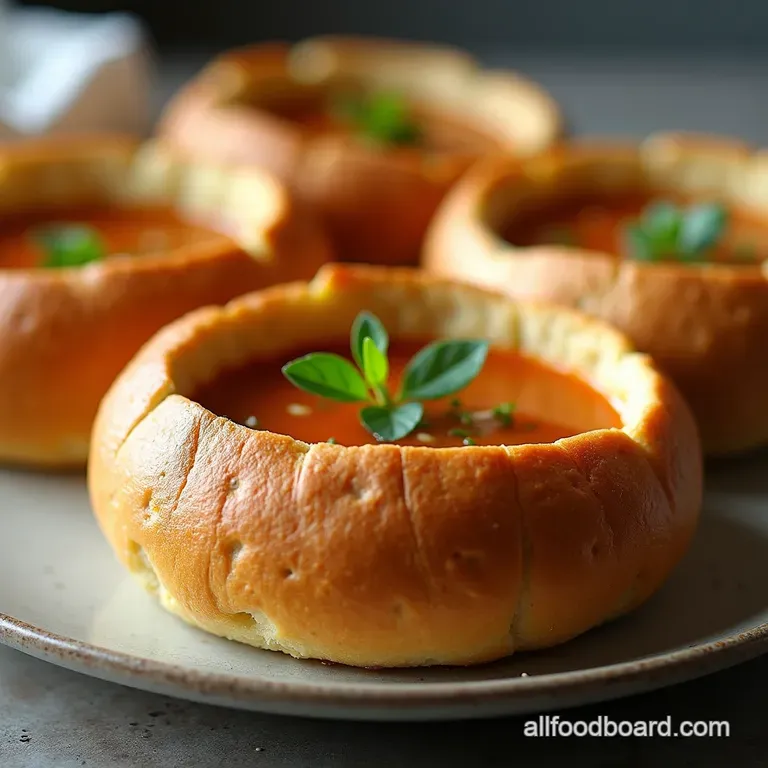
There is something undeniably magical about serving a thick, steaming soup or a rich, bubbling chili inside a freshly baked loaf of bread. It elevates the mundane to the magnificent.
While you can certainly purchase pre-made Edible Soup Bowls , they often lack the character, structure, and incredible aroma of a truly homemade creation. Our goal here is not just to bake bread, but to engineer edible architecture a sturdy, golden vessel capable of cradling your favourite hearty filling without succumbing to sogginess halfway through the meal.
This Homemade Bread Bowls Recipe delivers exactly that: a robust crust that offers resistance, and an interior crumb that is tender enough to happily absorb the delicious moisture of whatever you choose to pour inside.
Crafting 'Architecture You Can Eat': Understanding the Bread Bowl Mission
The fundamental difference between a standard rustic loaf and a successful bread bowl lies entirely in the dough's formulation and handling. We need a slightly leaner dough one with enough structure to hold its shape under pressure but still tender enough to chew pleasantly.
When mastering Homemade Bread Bowls , you are balancing strength with softness.
Beyond store-bought: Achieving Structural Integrity for Any Filling
When we talk about structural integrity, we are focused on minimizing large, open holes (or "tunnels") in the crumb, especially near the base. Large holes mean the broth will leak out prematurely. By ensuring proper kneading, which develops strong gluten networks, we create a tighter matrix within the dough.
This makes our Homemade Bread Bowls For Soup exceptionally resistant to premature saturation, ensuring they last until the last spoonful.
The Aroma Advantage: Inviting the Kitchen to Participate
The sheer fragrance released when baking these Yeast Bread Bowls is half the reward. As the dough begins to bake at 400° F ( 200° C), the starches caramelize, filling your home with that unmistakable, comforting smell of a true bakery.
This initial aromatic introduction sets the stage for the meal to come, far surpassing anything commercially produced.
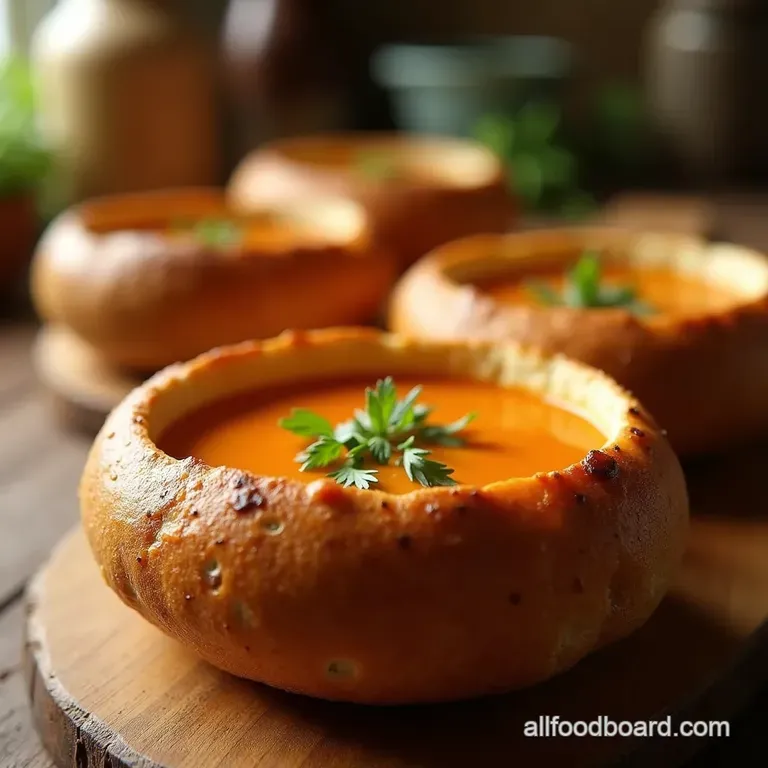
Why These Homemade Bread Bowls Make Any Meal an Event
Serving Homemade Bread Bowls For Chili or French Onion Soup transforms a simple dinner into a memorable experience. It’s interactive; you get to tear off chunks of the crusty edge to dip, and ultimately, you eat the bowl itself!
For those looking to bake a smaller batch, this method scales nicely, making these Homemade Bread Bowls For Two achievable for a cozy evening in.
Assembling Your Toolkit: What You Need for Superior Bread Bowls
The success of any good bread hinges on using the right ingredients in the right proportion. While the ingredient list is simple flour, water, yeast, salt, and a touch of fat the quality and temperature of those components are what differentiate a good bowl from a great one.
For our batch, yielding about 6 medium bowls, we rely on standard pantry staples combined with accurate measurement techniques.
Mastering the Dough Components: Ingredient Deep Dive
To guarantee a loaf that performs well as an Edible Soup Bowl , every ingredient plays a specific role. We use a standard ratio for a sturdy lean dough, rich enough to brown beautifully but lean enough to stay firm.
Essential Pantry Staples for Robust Bowl Baking
The foundation relies on all-purpose flour, which provides a reliable balance of protein for structure. We incorporate 2 teaspoons of fine sea salt, which is non-negotiable; it not only seasons the dough but critically regulates the speed of yeast activity, preventing an overly rapid, weak rise.
For richness and a tender crumb, we introduce 2 tablespoons of olive oil, giving our Bread Bowls With Instant Yeast a lovely mouthfeel when eaten.
The Hydration Equation: Why Water Temperature Matters
The hydration level the ratio of water to flour is crucial for texture, but the temperature of that liquid is key to activating our yeast. For our Easy Bread Bowls From Scratch using active dry yeast, the water must be pleasantly warm, ideally between 105° F and 115° F ( 40° C– 46° C).
If it’s too cool, the yeast will snooze; too hot, and the beneficial microorganisms will perish, resulting in a flat, lifeless dough.
Tools Required: From Stand Mixer to Baking Stone
While you can certainly mix and knead by hand, a stand mixer equipped with a dough hook makes developing the gluten significantly easier, especially for a dough this sturdy. You will need a large mixing bowl for the bulk fermentation, a baking sheet lined with parchment paper to prevent sticking, and a wire rack for proper cooling once baked.
Related Recipes Worth Trying
- The Best Crusty Bread Bowls Recipe for Hearty Soups — Ditch the storebought versions Master homemade bread bowls with a sturdy crust perfect for holding rich chili or chowder Get the foolproof recipe here
- Box Mix Cake Enhancements Make Cake Mix Taste Like Homemade — Unlock the secrets to super moist box cake recipe results Discover the best box mix cake enhancements that turn a simple mix into a gourmet dessert
- Simply Splendid Ultimate Homemade Butter Toffee Recipe — Master how to make toffee from scratch This easy recipe yields perfectly crunchy buttery homemade butter toffeea true showstopper for any occasion Get the...
The Journey from Shaggy Mass to Satisfying Sphere: Mixing and Kneading
The process begins by "proofing" the yeast. In your mixing bowl, combine the warm water (around 105° F) and 1 tablespoon of sugar this is the yeast's first meal.
After waiting about 5 to 10 minutes, you should see a frothy layer appear, confirming your yeast is active. Next, we introduce the salt, the oil, and about half of the 4 cups of flour. Once this is just combined, gradually add the remaining flour until a shaggy mass forms.
This is where the real work begins: kneading. Whether using a mixer's dough hook for 8 minutes or kneading by hand on a lightly floured surface for 10 minutes, the goal is the same: develop a smooth, elastic dough that passes the 'windowpane test' meaning you can gently stretch a small piece thin enough to see light through it without tearing.
Proofing Perfection: Guiding the Dough to Optimal Rise
Once kneaded, the dough is lightly oiled and placed into a bowl, covered, and left for its first rise, or bulk fermentation. This stage typically takes between 1 to 1. 5 hours in a warm spot, or until it has doubled in volume. This slow process builds flavour and structure.
Shaping Your Edible Containers: Forming the Sturdy Shells
After the first satisfying rise, gently deflate the dough to release trapped gases. Divide the entire mass evenly into 6 portions using a scale here ensures all your Homemade Bread Bowls bake uniformly.
Developing the Gluten: Techniques for a Non-Crumbly Interior
Each portion must be shaped into a tight, smooth ball. This final shaping is critical; you pull the edges underneath the ball repeatedly to create surface tension. This tight exterior shell will hold its shape better during baking and prevent the interior from collapsing into a dense mass.
Place these shaped rounds onto your prepared baking sheet, giving them ample room to expand.
The Second Proof: Ensuring Maximum Oven Spring
The second rise, or final proof, allows the yeast one last chance to create lift before the heat sets the structure. This takes about 45 to 60 minutes. The dough should look puffy and visibly increased in size by about 50%.
Rushing this step leads to dense bread, regardless of how well you kneaded initially.
Scoring for Style and Steam Release
Just before they enter the oven, give each loaf a shallow score a simple 'X' or a circle cut about half an inch deep across the top. This allows steam to escape in a controlled manner, ensuring the crust sets correctly and prevents the loaf from bursting unpredictably.
Baking Secrets: Achieving the Golden Crust Without Burning
Preheat your oven to 400° F ( 200° C). For that authentic bakery finish a deeply coloured, shatteringly crisp crust you need steam. Place an empty metal tray on the bottom rack while preheating.
As soon as you place your bread bowls inside, carefully pour about 1 cup of boiling water into that hot tray and quickly shut the door. This blast of steam keeps the crust soft initially, allowing for maximum oven spring, before setting into a perfect golden shell. Bake for 25 to 30 minutes.
They are done when the exterior is deep brown and they sound distinctly hollow when tapped on the bottom.
From Hot Oven to Happy Table: Cooling and Serving Tactics
Patience is required immediately after baking. Transfer the hot bread bowls to a wire cooling rack. It is vital that they cool completely at least an hour before you attempt to hollow them out.
Trying to cut or scoop warm bread often results in tearing and crushing the delicate interior structure, which compromises the vessel's ability to hold liquid.
Soup Pairings That Demand a Better Bread Bowl
These sturdy Homemade Bread Bowls For Chili are fantastic for any thick stew, beef pot roast filling, or creamy seafood chowder. They are sturdy enough for robust contents.
For a lighter option, consider filling them with a warm spinach and artichoke dip instead of soup, using the scooped out interior for dipping alongside.
Freezing Homemade Bread Bowls: A make-ahead Strategy
These loaves freeze beautifully. Once they are completely cooled, store them in an airtight bag for up to two months. To reheat, simply wrap them in foil and bake at 350° F ( 175° C) for about 15 minutes until warmed through.
You can hollow them after reheating if you plan to serve them immediately, though hollowing before freezing is easier for storage.
Creative Variations: Herb Infusions and Cheese Crusts
Don't be afraid to customize! For a savoury twist perfect for serving alongside tomato soup, incorporate 1 cup of sharp cheddar cheese and 2 teaspoons of dried rosemary into the dough during the last minute of kneading.
If you prefer a glossy, shiny exterior, swap the steam bath for a light wash of one whisked egg white mixed with a teaspoon of water brushed over the tops just before they enter the oven.
These simple customizations ensure your next batch of Homemade Bread Bowls is tailored perfectly to your taste.

Recipe FAQs
I'm worried my Homemade Bread Bowls will get soggy! What’s the secret to a sturdy base?
That’s the million dollar question! The key is achieving a good, thick crust. Make sure your oven is hot (400°F/200°C) and use steam for the first 15 minutes of baking this helps create that brittle exterior.
Also, always let the bread cool completely before hollowing it out; warm bread absorbs liquid far too quickly.
Can I make these ahead of time? How should I store the finished bread bowls?
Absolutely! You can bake the bread bowls up to two days in advance and store them tightly wrapped at room temperature. Do not refrigerate, as this dries them out faster. For best results, lightly refresh them in a 300°F oven for about 5 minutes just before filling to restore some crispness.
My dough isn't rising like yours did; what’s gone wrong with my yeast?
Nine times out of ten, it's the temperature of the water if it’s too hot, you've killed the yeast dead, bless its heart! Ensure your water is only lukewarm, around 105°F 115°F, just warmer than a pleasant bath.
Also, make sure your yeast is fresh and has been stored correctly; old yeast is famously lazy.
What can I use the scooped out bread 'insides' for? I hate waste!
Waste not, want not! That soft interior is perfect for making fantastic, crunchy croutons just toss with olive oil, salt, and dried herbs, then bake until golden. Alternatively, you can dry it out fully and blitz it into top-notch breadcrumbs for schnitzel or topping future casseroles.
I need a richer flavour. Can I substitute milk for the water in this recipe?
Go right ahead! Substituting milk for the water will certainly yield a richer, softer crumb, making the bowl feel more decadent. If you do this, you might notice the dough needs slightly less flour, as milk has a higher fat and moisture content than plain water.
It’s a brilliant change for a creamy soup filling like chowder!
Sturdy Homemade Bread Bowls

Ingredients:
Instructions:
Nutrition Facts:
| Calories | 598 kcal |
|---|---|
| Protein | 20.9 g |
| Fat | 18.3 g |
| Carbs | 47.9 g |
| Fiber | 5.4 g |
| Sodium | 6860 mg |
