The Festival Star Golden Honey Spice Hanukkah Challah
- Illuminating the Festival: Why This Star Challah Shines Brighter
- The Art of Centerpiece Baking: Crafting a Symbolic Loaf
- The Essential Pantry: Components for a Rich, Sweet Dough
- From Mix to Mingle: Detailed Dough Preparation Steps
- Sculpting the Magen David: Mastering the Six-Pointed Shape
- The Final Ascent: Proofing and Achieving Oven Readiness
- Maximizing Enjoyment: Storing and Refreshing Your Festive Bread
- Frequently Asked Questions
- 📝 Recipe Card
Illuminating the Festival: Why This Star Challah Shines Brighter
Hanukkah, the Festival of Lights, is a time for miracles, warmth, and gathering. While the traditional foods often focus on oil-fried delights, there is always room for a centerpiece bread that tells a visual story.
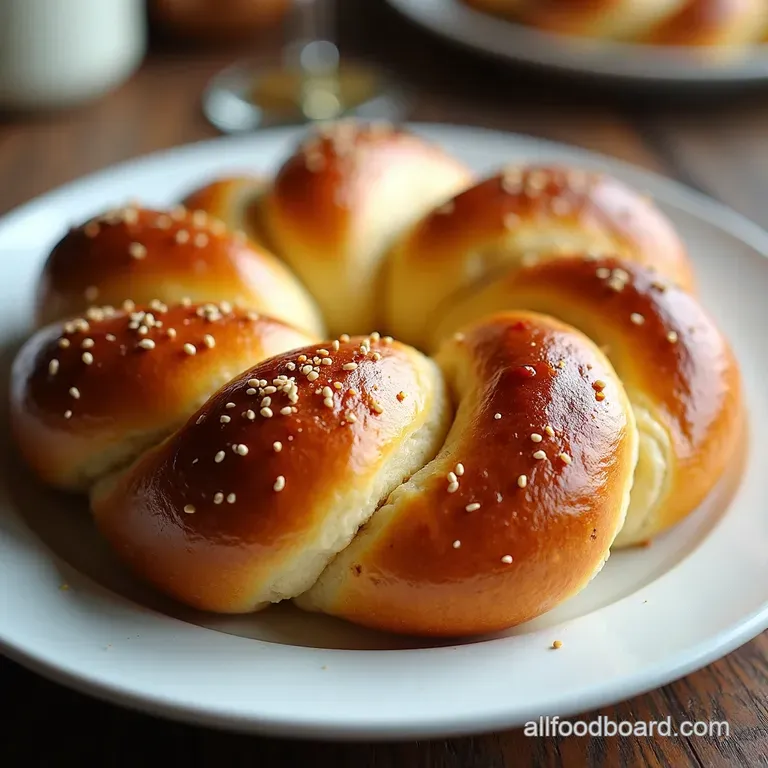
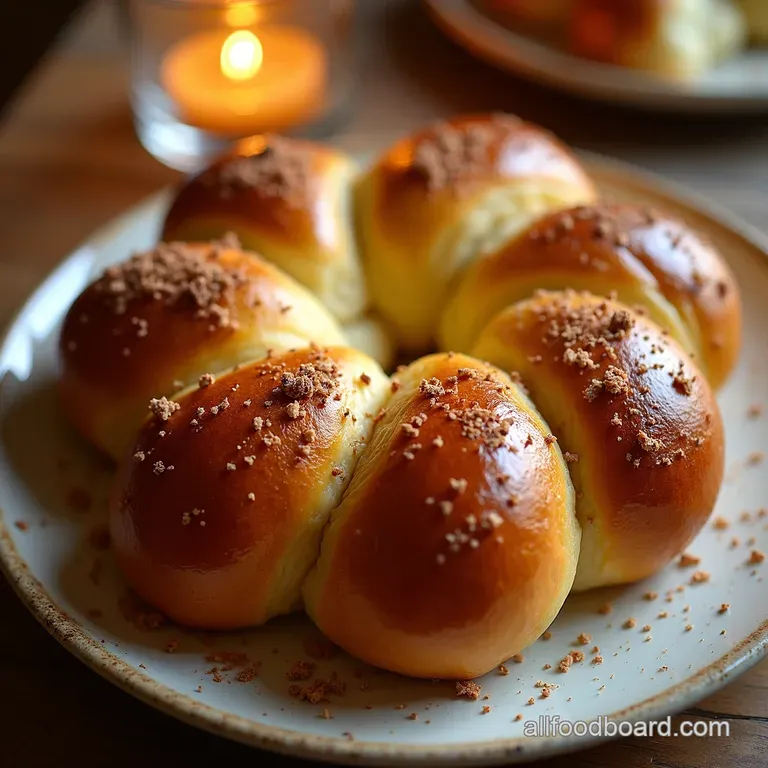
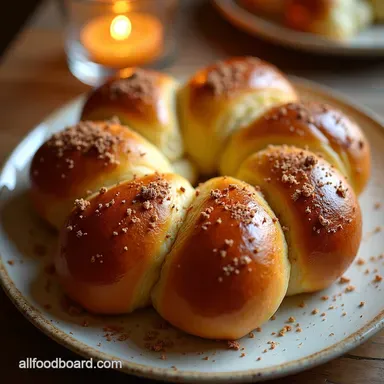
This Hanukkah Star Challah is more than just a delicious loaf; it’s an edible symbol of the holiday, perfectly positioned to grace your Hanukkah Dinner Ideas table.
We move beyond the classic braided oval to craft something truly magnificent: the Magen David, or Star of David, baked right into the dough. This recipe elevates the familiar comfort of a Challah Bread Recipe into a show stopping piece of art, promising both visual awe and unparalleled flavor.
The Art of Centerpiece Baking: Crafting a Symbolic Loaf
Baking an enriched bread like challah requires patience, but the payoff a soft, slightly sweet, and deeply yellow interior is unbeatable. For this special occasion, we are taking that perfect dough formula and giving it a festive architectural makeover.
More Than Bread: The Meaning Behind the Magen David Shape
The six-pointed star is perhaps the most recognizable symbol of Judaism, representing the connection between the divine and the mundane, and serving as a shield of protection. Incorporating this shape into our loaf transforms a simple baked good into a meaningful culinary statement for the holiday.
Crafting this Star of David Challah shows reverence for tradition while engaging in the joyous creativity inherent in holiday baking.
Achieving That Signature Golden Gloss: Our Secret Ingredient Blend
What separates a good challah from an unforgettable one is the crust. Our secret to achieving that deeply burnished, jewel toned sheen involves two key elements woven into this Hanukkah Challah Recipe : a generous amount of honey for sweetness and color, and a very specific final egg wash.
The honey not only sweetens the crumb beautifully but caramelizes spectacularly under high heat, providing the structure and color necessary for a truly professional finish.
Setting Expectations: Why This Hanukkah Star Challah is Worth the Effort
Be aware that creating the Jewish Star Challah shape is an intermediate step in baking. While the dough itself is simple, the shaping demands precision we are aiming for six perfectly proportioned points radiating from a central nexus.
This is a true labor of love, requiring about four hours total, but the visual impact when you present this centerpiece at your Hanukkah Food table makes every minute of kneading and shaping absolutely worthwhile.
The Essential Pantry: Components for a Rich, Sweet Dough
To achieve the characteristic richness of this bread, we rely on high-quality, room temperature ingredients. Cold ingredients are the enemy of yeast activation and proper gluten development in an enriched dough.
Precision Measurement: Dry Ingredients for the Perfect Rise
For our base, we start with 4 cups of all-purpose flour, or bread flour if you prefer a slightly chewier texture, whisked together thoroughly with 1 ½ teaspoons of fine sea salt and the majority of our granulated sugar 2 tablespoons.
Accuracy here ensures we don't impede the yeast's ability to work its magic later.
Liquid Gold Ratios: Eggs, Oil, and Honey Requirements
The color and tenderness come from the wet components. This batch calls for 3 large, room temperature eggs. Alongside these, we incorporate ¼ cup of rich honey, which we believe is essential for the deep, golden hue this Hanukkah Star Challah deserves.
We also add 4 tablespoons of softened, cubed unsalted butter, which will be added slowly after the initial mixing phase to enrich the structure.
Mastering the Wash: The Secret to a Deeply Caramelized Crust
The final visual touch relies entirely on the wash applied just before baking. We use a mixture of 1 large egg yolk whisked with 1 teaspoon of water or milk. This high yolk ratio creates a thick, opaque glaze that browns intensely. A final scattering of poppy or sesame seeds adds texture and classic visual appeal.
Related Recipes Worth Trying
- Eggs Over Easy Breakfast Salad Start Your Day Right — Ditch the toast This Eggs Over Breakfast Salad with crispy bacon creamy avocado a runny egg is a flavour explosion A healthy interesting full English
- Honey Mustard Chicken Tenders Cracking Crispy Recipe — Forget boring chicken These Honey Mustard Chicken Tenders are bursting with flavour so easy to make Perfect for a quick dinner Get the crispy tangy recipe
- Wakey Wakey Pesto Omelet with Veggies for a Power Start — Start your day right with this Pesto Omelet with Fresh Vegetables This Quick Breakfast Omelet is bursting with flavour Ready in minutes Get the veggie...
From Mix to Mingle: Detailed Dough Preparation Steps
The journey begins with waking up the yeast. Dissolve 2 ¼ teaspoons of active dry yeast (one standard packet) along with 1 teaspoon of the sugar into ½ cup of warm water, specifically held between 105° F and 115° F.
Allow this mixture 5 to 10 minutes until it foams vigorously, confirming your yeast is active and ready to work.
Once the yeast is blooming, combine the dry ingredients in your stand mixer bowl. Add the yeast mixture, the remaining 2 tablespoons of sugar, and the 3 room temperature eggs and the ¼ cup of honey. Begin mixing on low speed until a shaggy mass forms.
Now, introduce the softened butter, one cube at a time, ensuring each piece is mostly incorporated before adding the next. Transition the mixer to medium low and continue the process of step-by-step Challah baking for a full 8 to 10 minutes.
The goal is a smooth, pliant dough that easily clears the sides of the bowl. After the initial mixing, the dough needs a full 1. 5 hours in a lightly oiled, warm environment until it has doubled in size.
Sculpting the Magen David: Mastering the Six-Pointed Shape
This is where patience transforms dough into destiny. Gently deflate the risen dough and divide it precisely into six equal portions. If you have a kitchen scale, weighing the pieces is the best way to guarantee symmetry. Each portion must be rolled out firmly into a uniform log, aiming for a length of 14 to 16 inches.
The goal here is density we want tight, even ropes that will hold their form during the final proof.
The assembly requires visualization. First, arrange five of the logs onto your parchment lined baking sheet to form a perfect pentagon, ensuring the points where they meet are pinched together securely. This creates the base structure.
The sixth log is the magic piece: it must be carefully maneuvered through the center of the pentagon, weaving over and under the existing logs to connect the points and form the classic six-pointed structure. Tuck all ends neatly underneath the loaf to secure the shape before its final rest.
The Final Ascent: Proofing and Achieving Oven Readiness
The final rise is critical; it gives the dough the volume needed for a light crumb, but we must avoid over proofing, which leads to collapse during baking.
Activating the Yeast: Ensuring Maximum Loaf Volume
The initial rise builds the foundation, but the second proof the rest after shaping is what dictates the final loft. Cover the sculpted Hanukkah Star Challah loosely and let it sit in a warm spot for 45 to 60 minutes.
The dough should look visibly puffy but should not have quite doubled.
Kneading Mastery: Developing the Elasticity for Intricate Braids
While this loaf is pieced together rather than traditionally braided, the importance of proper kneading remains. Developing the gluten structure fully in the mixing stage (Step 6) ensures that the logs maintain their tension and don't slump while sitting on the tray.
The Tricky Technique: step-by-step Assembly of the Star Configuration
Remember, the success of this shape hinges on tight seams. When connecting the five logs into the pentagon base and then weaving the sixth log through, use firm pinches where the dough meets. Any loose seams will open up during baking, potentially distorting the star points.
Baking Temperatures: Tips for a Fully Cooked, Non-Soggy Interior
Preheat your oven to 375° F ( 190° C) during the last 15 minutes of the final proof. Brush the entire surface generously with the prepared yolk wash and sprinkle with seeds. Bake for 30 to 35 minutes.
To confirm it’s done a common fear with tall, enriched loaves the internal temperature must register 190° F ( 88° C). Rotate the tray halfway through to ensure even browning across all points of the star.
Maximizing Enjoyment: Storing and Refreshing Your Festive Bread
This magnificent bread is best enjoyed the day it's baked, still slightly warm. If you have leftovers, storing it correctly is key to maintaining its delicate texture. Keep it wrapped tightly in a clean kitchen towel, never plastic, at room temperature.
Serving Suggestions: Pairing Suggestions for Your Hanukkah Star Challah
The slight sweetness of this bread makes it incredibly versatile. It shines alongside savory mains try it accompanying rich brisket or as a delightful accompaniment to lighter fare like a smoked fish platter. It’s also superb toasted for breakfast.
Reheating Hacks: Bringing Day-Old Bread Back to Golden Glory
To recapture that fresh from-the-oven softness, lightly spritz the loaf with water and wrap it loosely in foil. Bake in a 300° F ( 150° C) oven for about 10 minutes. This steams the interior gently while re-crisping the crust.
Flavor Variations: Twists on the Traditional Star Challah Recipe
For bakers who like to experiment, consider introducing warmth beyond just the cinnamon mentioned in the base dough. A subtle infusion of cardamom or even a pinch of ground ginger can harmonize beautifully with the honey, adding another layer of complexity to your festive bread.
When the Star Deflates: Diagnosing Proofing Mistakes
If your Hanukkah Star Challah deflates significantly in the oven, it’s almost always due to over proofing during that second rise. The gas bubbles became too large and weak to support the dough’s structure once the heat hit them.
Next time, monitor the texture more closely; the dough should feel light and pillowy, but still have some resistance when gently poked.

Frequently Asked Questions
Why is my Hanukkah Star Challah dough so sticky and difficult to handle?
That's the nature of a truly rich, enriched dough it holds a lot of egg and honey, which are hydrating. If it’s truly unmanageable, add flour one tablespoon at a time during the kneading stage, but be careful not to add too much, or the final loaf will be tough.
Remember, a good 8-10 minute knead is crucial to develop the strength needed to hold that fancy shape.
Can I make the Hanukkah Star Challah dough ahead of time, perhaps the day before?
You certainly can! After the first rise (Step 6), you can place the dough in a lightly oiled, tightly covered bowl and refrigerate it overnight. The cold temperature slows the yeast down significantly.
Take it out about two hours before you plan to shape it so it can come back to room temperature before you attempt the intricate star assembly.
My star points sagged in the oven; how do I prevent this next time?
Sagging usually points to either under proofing or insufficient shaping tension. Make sure your second proof (resting time after shaping) is long enough the dough should look puffy and almost ready to burst before baking.
Also, ensure you pinch the seams where the six logs meet extremely tightly underneath; this structural support is what keeps your star standing proud like a proper beacon!
I’m not keen on poppy seeds; what other toppings work well on this festive bread?
Feel free to mix things up to suit your taste! Sesame seeds offer a slightly nuttier crunch, which pairs brilliantly with the honey. For a sweeter touch, you could use coarse sparkling sugar or even a sprinkle of flaky sea salt mixed with a tiny pinch of cinnamon right before it goes into the oven for a lovely caramelized crust.
How long will this gorgeous loaf stay fresh, and what's the best way to store leftovers?
Like most homemade enriched breads, the best texture is usually on the day it’s baked. Store any uneaten portion tightly wrapped at room temperature for up to three days avoid the fridge if you can, as it tends to dry bread out.
For longer storage, slice it first, then freeze it airtight; it defrosts beautifully for toast or French toast the following week.
Star Of David Challah
Instructions:
Nutrition Facts:
| Calories | 295kcal |
|---|---|
| Fat | 9g |
| Fiber | 1g |
