Southern Key Lime Pie: Silky and Tart
- Time: Active 25 minutes, Passive 4 hours 20 mins, Total 4 hours 45 mins
- Flavor/Texture Hook: A shattering graham cracker base paired with a tart, buttery smooth citrus curd.
- Perfect for: Summer dinner parties, celebratory desserts, or anyone craving a bright, tropical escape.
- Mastering The Tangy Soul Of Key Lime Pie
- Why This Custard Sets Perfectly
- Comparing Stovetop And Oven Methods
- Measuring The Golden Ratio
- Flour Dusted Essentials For Baking
- Choosing Your Artistic Tools
- Sculpting Each Velvety Layer
- Fixing Common Custard Mistakes
- Creative Tropical Flavor Variations
- Keeping Every Slice Flawless
- Elegant Finishing Touches
- Recipe FAQs
- 📝 Recipe Card
Mastering The Tangy Soul Of Key Lime Pie
Forget everything you have been told about needing a specific, rare fruit tree in your backyard to make a world class dessert. There is a persistent myth that if you aren't using tiny, yellow skinned Key limes hand picked in Florida, you might as well not bother. I'm here to tell you that is nonsense.
While the smaller limes have a beautiful floral aroma, the real magic of a Key Lime Pie lies in the chemistry of the filling and the structural integrity of that buttery crust.
I’ve spent years experimenting with different citrus ratios, and honestly, a mix of high-quality juice and fresh zest will get you that authentic zing every single time.
I remember the first time I tried to make this for a garden party. I was so worried about the "authenticity" that I spent three hours juicing those marble sized limes until my fingers were puckered and sore. The result?
It was good, but it wasn't any better than the version I made later using a clever blend of fresh limes. What actually matters is the fat content of your dairy and the way you treat your egg yolks. This isn't just a dessert; it’s a study in balance.
The sharp, almost aggressive citrus needs that heavy, sweetened milk to mellow it out, creating a flavor profile that dances across your palate.
When you pull this pie out of the oven, the kitchen fills with a scent that is both sugary and bracing. The crust should smell like toasted honey and warm butter. The filling, once chilled, becomes a dense, velvety dream that holds its shape against the fork.
We are aiming for a texture that isn't bouncy like gelatin but isn't soft like pudding. It should be substantial, rich, and unmistakably tart.
Why This Custard Sets Perfectly
Understanding the "why" behind this recipe makes the process so much more rewarding. It’s not just about mixing things in a bowl; it’s about a specific reaction that happens before the pie even hits the heat.
- Acidic Thickening: The high citric acid content in the lime juice reacts with the proteins in the sweetened condensed milk. This causes the proteins to denature and "clump" in a controlled way, thickening the liquid into a semi solid state even before baking.
- Yolk Emulsification: Egg yolks act as the glue. They contain lecithin, which helps the watery lime juice and the fatty milk stay bonded together, ensuring a silky finish rather than a grainy one.
- Zest Infusion: Whisking the zest with the yolks first is a vital step. The mechanical action breaks open the tiny oil sacs in the lime skin, bleeding that floral, aromatic oil directly into the fats of the yolk for a deeper flavor.
- The Chill Factor: Refrigeration allows the fat molecules to realign and solidify. Without a minimum four hour chill, the pie will collapse into a delicious but messy puddle the moment you cut it.
1. The Acid Driven Thickening Power
Most pies rely on flour or cornstarch to stand up straight. Not this one. The lime juice does the heavy lifting here. When the acid hits the condensed milk, it’s like a chemical handshake that creates an instant structural network.
This is why you'll notice the mixture getting thicker as you whisk it on the counter.
2. Egg Yolk Emulsification
The yolks provide the "mouthfeel." They add a richness that offsets the sharp acidity of the citrus. By whisking them vigorously for two minutes, you're not just mixing; you're aerating and preparing them to hold the heavy milk and juice in a stable suspension.
3. The Double Bake Technique
We bake the crust first to ensure it's "shatter proof" and doesn't get soggy. Then, we bake the filling at a lower temperature. This gentle heat sets the eggs without curdling them, preserving that signature velvety texture that defines a professional grade Lime Pie.
| Thickness | Internal Temp | Rest Time | Visual Cue |
|---|---|---|---|
| 2.5 cm (Filling) | 145°F (63°C) | 4 hours | Slight jiggle in the very center |
| 0.5 cm (Crust) | N/A | 15 mins | Golden brown and smells like toasted nuts |
| 3 cm (Topping) | N/A | Immediate | Stiff peaks that don't slump |
While the oven is the traditional choice for a set custard, some people swear by a stovetop "curd" method. However, the oven provides a more uniform, dense structure that is much easier to slice cleanly. Getting that bottom crust right is similar to the technique used in my flaky apple pie, where temperature control is everything.
Comparing Stovetop And Oven Methods
| Method | Time | Texture | Best For |
|---|---|---|---|
| Oven Bake | 20 minutes | Dense and velvety | Classic, clean slices |
| Stovetop | 15 minutes | Soft and spoonable | Tarts or pudding cups |
| No Bake | 0 minutes | Airy and mousse like | Hot days / quick prep |
The oven method wins every time if you want that iconic "stand up" slice. The gentle heat interacts with the egg yolks to create a structure that no bake versions just can't replicate. It transforms the mixture from a thick liquid into a stable, creamy solid that melts the moment it hits your tongue.
Measuring The Golden Ratio
Precision is your best friend when working with custards. If the ratios are off, you'll end up with something either too sour to eat or too sweet to enjoy. I always suggest using a kitchen scale for the dry ingredients like the graham cracker crumbs and the butter to ensure your base is sturdy enough to hold the weight of the filling.
| Ingredient | Science Role | Pro Secret |
|---|---|---|
| Egg Yolks | Emulsifier | Whisk for 2 full minutes to lighten the color |
| Lime Juice | Protein Denaturant | Use room temperature juice for better mixing |
| Condensed Milk | Structural Base | Don't use "low-fat" versions; the fat is needed for the set |
| Lime Zest | Flavor Carrier | Grate directly over the bowl to catch every drop of oil |
Using the right juice is paramount. If you can't find Key limes, use a blend of 75% Persian lime juice and 25% lemon juice to mimic that specific tartness. Never, ever use the bottled juice in the plastic lime it has a metallic aftertaste that will ruin the delicate balance of the Key Lime Pie.
Flour Dusted Essentials For Baking
Before we get our hands messy, let's look at the components. This homemade key lime pie recipe relies on high-quality, simple staples.
- 150g Graham cracker crumbs: These provide the rustic, sweet salty base.
- 65g Granulated sugar: Just enough to help the crust caramelize and stay crisp.
- 85g Unsalted butter, melted: This acts as the mortar for our graham cracker "bricks."
- 0.5 tsp Sea salt: Essential for cutting through the intense sweetness of the milk.
- 794g Sweetened condensed milk: Two standard cans. This is the body and the soul of the filling.
- 240ml Freshly squeezed Key lime juice: The star of the show.
- 2 tbsp Key lime zest: For that punchy, aromatic citrus hit.
- 4 large Egg yolks: For richness and structural stability.
- 240ml Heavy whipping cream: Cold, for the cloud like topping.
- 2 tbsp Powdered sugar: To stabilize the cream.
- 1 tsp Vanilla bean paste: Adds a sophisticated, rustic look with those tiny black specks.
- 1 Fresh lime: Sliced into rounds for that artistic garnish.
| Original Ingredient | Substitute | Why It Works |
|---|---|---|
| Graham Crackers | Digestive Biscuits | Similar texture, slightly less sweet and more rustic. |
| Key Lime Juice | Lime/Lemon Blend | Mimics the specific acidity of the smaller fruit. |
| Vanilla Bean Paste | Vanilla Extract | Same flavor, but loses the visual appeal of the seeds. |
| Heavy Cream | Coconut Cream | Adds a tropical note; sets very firm when chilled. |
Choosing Your Artistic Tools
You don't need a professional pastry kitchen, but a few specific tools will make your life much easier. First, a deep dish 9 inch pie plate is non negotiable. This filling is generous, and a standard shallow tin might overflow.
A Microplane zester is also a "must have" to get that fine zest without hitting the bitter white pith of the lime.
For the filling, a large glass mixing bowl is better than metal, as the acid in the lime juice can sometimes react with certain metals, giving your pie a faint "tinny" flavor. And for that perfect whipped cream topper, a stand mixer or a high-quality hand mixer will save your forearms from a lot of grief. If you're craving something even more decadent after this citrus journey, you have to try my Mississippi Mud Pie.
Sculpting Each Velvety Layer
Now, let's get into the rhythm of the bake. This is where the magic happens.
- Prep the heat. Preheat your oven to 175°C (350°F) to get a head start on that crust.
- Mix the base. Combine the 150g graham cracker crumbs, 65g sugar, and sea salt in a bowl. Note: Using sea salt instead of table salt adds a lovely crunch and depth.
- Bind with butter. Pour in the 85g melted butter and stir until it looks like wet beach sand.
- Form the shell. Press the mixture firmly into your 9 inch pie plate. Bake 8–10 minutes until golden and fragrant.
- Release the oils. In a glass bowl, whisk the 4 egg yolks and 2 tablespoons of zest for 2 minutes until pale and frothy.
- Build the custard. Whisk in the 794g sweetened condensed milk, then slowly pour in the 240ml lime juice while whisking.
- Final Bake. Pour the filling into the cooled crust. Lower the oven to 165°C (325°F) and bake for 10-15 minutes until the edges are set but the center still has a slight jiggle.
- The long wait. Cool at room temperature for 1 hour, then refrigerate for at least 3 hours.
- Whip the clouds. Beat the 240ml heavy cream with powdered sugar and vanilla bean paste until stiff peaks form.
- Final Garnish. Spread the cream over the chilled pie and top with lime rounds for a stunning visual balance.
Fixing Common Custard Mistakes
Even the most seasoned bakers run into trouble. The most common issue with Key Lime Pie is the texture either it's too runny or it's overbaked and cracked.
1. The Bitter Aftertaste
If your pie tastes slightly metallic or overly bitter, you likely zested too deep into the lime. The white part, the pith, is incredibly bitter. Use a light hand and only take the very top layer of the green skin. Another culprit could be using bottled juice that has oxidized.
2. The Runny Slice
If your pie doesn't hold its shape when sliced, it usually means one of two things: it didn't chill long enough, or the juice wasn't acidic enough to react with the milk. Always give it at least 3-4 hours in the fridge. If you are in a rush, you can't force physics; it needs that cold time to bond.
3. Crumbly Falling Crust
A crust that falls apart usually lacks enough "glue." Make sure you are really packing the crumbs down into the pan. Use the bottom of a flat measuring cup to press the mixture into the corners. If it's still crumbly, add an extra tablespoon of melted butter next time.
| Problem | Root Cause | Solution |
|---|---|---|
| Filling is runny | Underbaked or insufficient chill time | Bake until edges set; chill for 4+ hours |
| Crust is soggy | Filling added to hot crust | Let crust cool completely before filling |
| Topping deflates | Cream wasn't cold enough when whipped | Chill bowl and whisk before beating cream |
Chef's Tip: If your crust keeps shrinking down the sides of the pan, try freezing it for 10 minutes before the initial bake. This "shocks" the butter and helps it hold its shape against the heat.
Common Mistakes Checklist:
- ✓ Never skip the pre bake for the crust; it's the difference between "crispy" and "mushy."
- ✓ Don't over whisk the filling once the lime juice is in; you want to avoid adding too many air bubbles.
- ✓ Check your oven temperature with a separate thermometer too much heat will make the eggs grainy.
- ✓ Always zest your limes before juicing them; it's nearly impossible to zest a squeezed lime half.
- ✓ Let the pie reach full room temperature before putting it in the fridge to prevent condensation on the surface.
Creative Tropical Flavor Variations
Once you've mastered the classic key lime pie recipe, you can start playing with the boundaries. The structure of this pie is very forgiving, allowing for some fun swaps.
1. Key Lime Pie Bars
If you're serving a crowd, double the crust recipe and bake it in a 9x13 rectangular pan. Once the filling is set and chilled, you can cut them into neat squares. These key lime pie bars are much easier for people to grab at a picnic than a delicate slice of pie.
2. The Tropical Swap
Swap out 60ml of the lime juice for passionfruit puree or pineapple juice. You'll still get the setting power from the remaining lime acid, but the flavor profile shifts into something even more exotic. This is a great way to use up leftover fruit in the kitchen.
- To Scale Down
- It's hard to scale down a single pie, but you can make "mini pies" using a muffin tin. Reduce the bake time to about 8 minutes.
- To Scale Up
- Making two pies is easy! Most stand mixers can handle four cans of condensed milk at once. Just ensure you don't overcrowd the oven, as this can lead to uneven baking.
- Baking for a Crowd
- If you double the recipe for a larger pan, extend the bake time by about 5-8 minutes and watch for that "jiggle" checkpoint.
Keeping Every Slice Flawless
Proper storage is the difference between a great dessert and a soggy mess the next day. Because this is a dairy based custard, it must be kept cold.
- Fridge: Store in the refrigerator for up to 3 days. Keep it loosely covered with plastic wrap, but try to use toothpicks to keep the wrap from touching the whipped cream topping.
- Freezer: This pie actually freezes beautifully! You can freeze the baked and cooled pie (without the whipped cream) for up to 2 months. Thaw it in the fridge overnight before serving.
- Zero Waste Tip: Don't toss those juiced lime halves. Toss them into a jar with some white vinegar for a natural, citrus scented kitchen cleaner, or zest them completely and freeze the zest in an airtight bag for future baking projects.
Elegant Finishing Touches
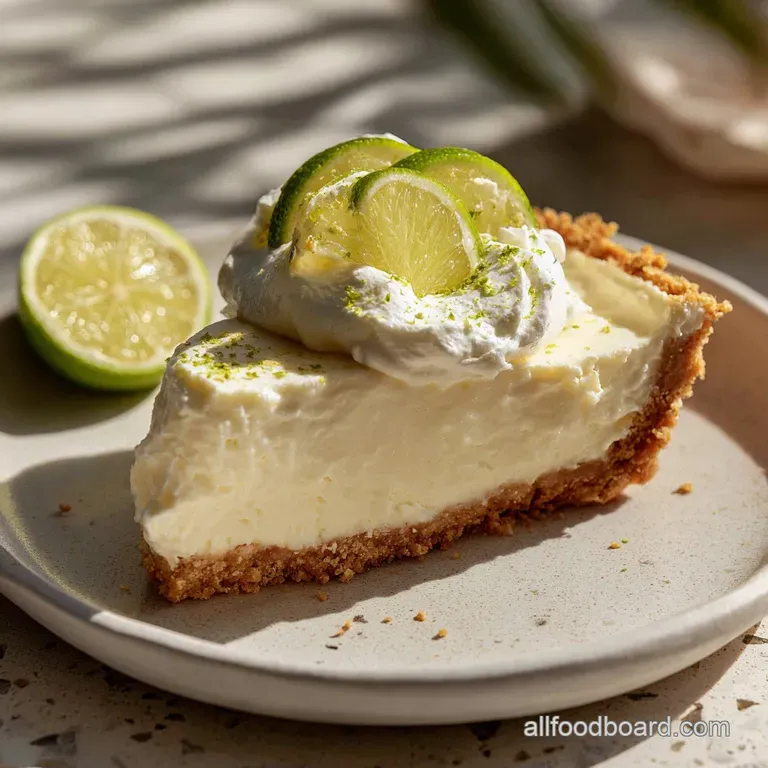
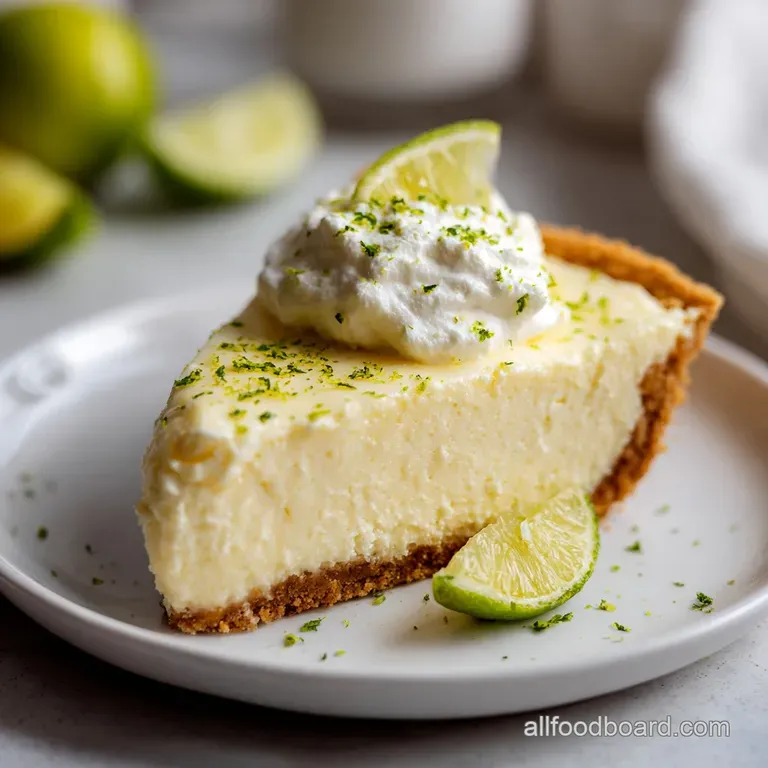
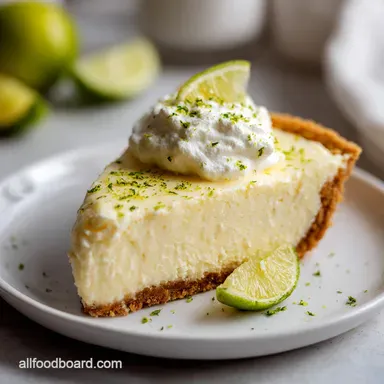
A Lime Pie is a visual treat as much as a culinary one. To achieve that professional look, focus on color balance and garnish strategy. We are looking for three distinct color accents: the golden brown of the crust, the pale, creamy ivory of the whipped topping, and the vibrant, translucent green of the fresh lime rounds.
- The Cream Cloud: Don't just slap the whipped cream on. Use a piping bag with a large star tip to create a border of "kisses" around the edge. This looks intentional and artistic.
- The Zest Dust: Save a tiny pinch of fresh zest to sprinkle over the whipped cream right before serving. This adds a pop of forest green color and a fresh scent.
- The Lime Wheels: Slice your lime into paper thin rounds. Cut a small slit from the center to the edge of each round and twist them into a "butterfly" shape. Place these at regular intervals on top of your cream mounds.
When you bring this to the table, it shouldn't just look like a pie; it should look like a piece of summer. The contrast between the rustic, flour dusted appearance of the crust and the sleek, velvety filling is what makes this southern key lime pie recipe a perennial favorite in my house.
Searing meat does not 'seal in juices.' Moisture loss occurs regardless. The crust adds flavor through the Maillard reaction. Similarly, "Key Limes" are not the only way to get a great pie. The "Key" is the acid to fat ratio, not the geography of the fruit.
Also, adding more eggs won't make it "firmer" it will just make it taste like an omelet. Stick to the four yolks for the perfect balance.
You’ve got the science, the steps, and the secrets. Now, go squeeze some limes and make something beautiful. Your kitchen is about to smell incredible. Regardless of whether you’re making key lime desserts for a party or just a Tuesday treat, this recipe is the one that will never let you down.
Trust the jiggle, respect the chill time, and enjoy every tangy bite.

Recipe FAQs
What is Key lime pie filling made of?
It consists of sweetened condensed milk, fresh Key lime juice, lime zest, and egg yolks. These ingredients combine to create a velvety custard that thickens through the reaction between the citrus acid and milk proteins.
What was Bill Clinton's favorite pie?
He is famously associated with Key lime pie. It became a signature dessert request during his presidency, often highlighted as a favorite comfort food.
Why is Key lime pie called key?
It is named after the Florida Keys. The dish originated in this specific island region, where the smaller, more acidic Key limes were historically the primary variety available for local bakers.
What are common Key lime pie mistakes?
Overbaking and skipping the chill time are the most frequent errors. You must pull the pie when the center still has a slight jiggle to prevent a rubbery texture, then allow it to set in the refrigerator for at least three hours.
How to ensure the crust remains crispy?
Bake the crust until golden brown and let it cool completely before adding the filling. This ensures a structural barrier between the moisture of the custard and the graham cracker base, much like how mastering the crispy crust on scallops requires proper temperature management.
Is it true the pie must be cooked at 400 degrees to set correctly?
No, this is a common misconception. You must use the official temperature of 325°F (165°C) to ensure the custard gently sets without curdling or developing cracks.
How to get the most juice from the limes?
Roll the limes firmly against your countertop with the palm of your hand before cutting. This action breaks down the interior membranes, allowing you to extract significantly more juice for the filling.
Southern Key Lime Pie
Ingredients:
Instructions:
Nutrition Facts:
| Calories | 648 kcal |
|---|---|
| Protein | 11.1 g |
| Fat | 33.2 g |
| Carbs | 79.4 g |
| Fiber | 0.8 g |
| Sugar | 66.2 g |
| Sodium | 315 mg |
