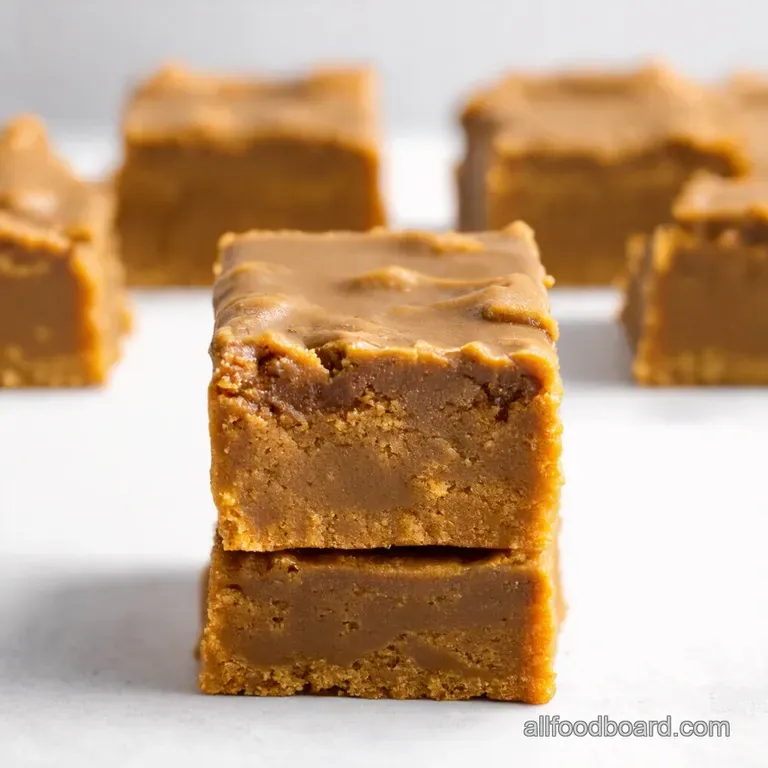
Peanut Butter Bliss Bars Easier Than Cookies Just As Delicious
Recipe Introduction: Get Ready for Peanut Butter Bliss!
Ever find yourself craving a peanut butter cookie but don't want the faff of individual cookies? Honestly, me too! That's where these Peanut Butter Bliss Bars come in.
They're the answer to your easy dessert recipes prayers. Seriously, these chewy peanut butter bars will become a new family favorite.
These Peanut Butter Bliss Bars are basically peanut butter cookie magic in bar form. Think of them as Peanut butter blondies but easier.
This simple bar cookies recipe is rooted in classic American comfort food. It's perfect for bake sales or just a Tuesday night treat.
These bars are a breeze to whip up. They only take about 40 minutes total, including baking time. The recipe yields 12 squares, making them ideal for sharing or keeping all to yourself I won't judge.
Why You'll Love These Peanut Butter Bars
These Peanut Butter Bliss Bars are packed with protein and peanut butter goodness. They are great for quick energy, and everyone loves them.
They're amazing bake sale treats . Their simple ingredients make this treat incredibly special. They are a Peanut butter cookie bars for everyone.
Ready to grab those ingredients?
Ingredients & Equipment for the Ultimate Peanut Butter Bliss Bars
Alright, let's talk ingredients! These Peanut Butter Bliss Bars are so easy. Seriously, even I can't mess them up! It’s like a hug from your grandma, but in bar form.
So, you know, awesome.
Main Ingredients: The Peanut Butter Powerhouse
- Creamy peanut butter: 1 cup (240g) . Get the good stuff.
- Unsalted butter: ½ cup (113g) , softened. Not melted!
- Light brown sugar: 1 cup (200g) , packed. Adds that chewy texture.
- Granulated sugar: ½ cup (100g) . For extra sweetness.
- Large eggs: 2 . Free range if you’re feeling fancy.
- Vanilla extract: 1 tsp (5ml) . Adds a warm touch.
- All-purpose flour: 1 ¼ cups (156g) . The base of our bar.
- Baking powder: 1 tsp (5g) . For a little lift.
- Salt: ¼ tsp (1.5g) . Enhances all the flavors.
- Chocolate chips (optional): ½ cup (85g) . I like dark chocolate!
- Chopped peanuts (optional): ½ cup (50g) . For a bit of crunch.
Honestly, quality peanut butter is key . Look for one that's just peanuts and maybe a little salt. You’ll taste the difference in these chewy peanut butter bars .
Seasoning Notes: Aromatic Awesomeness
The combo of vanilla and salt is everything . It makes these easy dessert recipes pop. Seriously! I sometimes add a pinch of cinnamon for a warm, cozy vibe.
If you don't have vanilla, a little maple syrup works in a pinch. Though, truth be told, a good dash of vanilla is always worth the investment.
You know those peanut butter blondies your mum used to make? This recipe takes me right back! These homemade dessert bars are just the best .
Equipment Needed: Keep It Simple, Stupid
- 9x9 inch baking pan. A must have!
- Parchment paper or baking spray. Trust me, use parchment.
- Mixing bowls. Obvious, but still.
- Electric mixer. Makes life easier.
- Measuring cups and spoons. Can't bake without 'em.
- Rubber spatula. Get every last bit of batter!
Don’t have a mixer? No worries! Just use a good old wooden spoon and some elbow grease. It might take a little longer, but you’ll get there.
The most important thing to remember for these simple bar cookies is prepping your pan. No one likes a sticky bar! These bars are perfect bake sale treats !
Ready to bake some delicious Peanut Butter Bliss Bars ? These quick baking recipes are the best!
Cooking Method for Peanut Butter Bliss Bars
These Peanut Butter Bliss Bars are so ridiculously easy, it's almost embarrassing. Honestly, the hardest part is waiting for them to cool! Let's dive into the baking method.
Prep Steps: Essential Mise en Place for Easy Dessert Recipes
First, preheat your oven to 350° F ( 175° C) . Then, grab a 9x9 inch baking pan . Line it with parchment paper.
This is my secret weapon! Or, grease it well if you're out of parchment. Now, measure out all your ingredients.
Soften the butter and let the peanut butter get to room temp. This essential mise en place makes everything flow smoothly.
step-by-step Process: Baking Chewy Peanut Butter Bars
- Cream the peanut butter, butter, brown sugar, and granulated sugar. Use an electric mixer until it’s fluffy.
- Beat in the eggs one at a time. Then, add vanilla extract.
- Whisk together the flour, baking powder, and salt in another bowl.
- Gradually add the dry ingredients to the wet. Mix on low until just combined. Don't overmix it!
- Fold in chocolate chips or chopped peanuts if you’re feeling fancy.
- Spread the batter evenly into the pan.
- Bake for 20- 25 minutes . A toothpick in the center should have moist crumbs attached.
- Cool completely before cutting into squares.
Pro Tips: Level up your Peanut Butter Recipes
Want to avoid a baking fail? Don't overbake ! Slightly underbaked bars are chewier, so aim for that. You want chewy peanut butter bars , not dry hockey pucks.
Speaking of time, you can make the batter ahead. Just cover it and chill it in the fridge for up to 24 hours.
This bake sale treat is perfect. Also, don't skip the parchment paper. Trust me on this. I remember the time I forgot the parchment paper and I had to scrub that pan for hours.
Nobody wants that!
Recipe Notes for the Best Peanut Butter Bliss Bars EVER!
Okay, so you're about to make these Peanut Butter Bliss Bars . Honestly, they are so easy it's almost embarrassing. Here are a few extra nuggets of wisdom to make sure you get it spot on.
These Peanut butter cookie bars are seriously the best.
Serving Suggestions for Peanut Butter Bliss Bars
First things first: presentation. Think squares, triangles, maybe even cut them into fun shapes if you're feeling fancy! I love a simple dusting of powdered sugar.
And, to be honest, these Peanut Butter Bliss Bars need a scoop of vanilla ice cream. A cold glass of milk is a winner too.
Or, go wild with a drizzle of caramel sauce you deserve it!
Storage Tips for Your Homemade Dessert Bars
Right, storage is key. Pop any leftover Peanut Butter Bliss Bars into an airtight container and keep them in the fridge.
They'll last for up to 5 days . You can totally freeze them too. Wrap them individually, then put them in a freezer bag.
When you're ready to eat them, let them thaw at room temperature. Reheating? A quick zap in the microwave, and they're good to go!
Variations Because We're All Different!
Want to switch things up? No worries! For a dietary twist, use a 1:1 gluten-free flour blend. Also, if you are looking for nut free version substitute sunflower seed butter or tahini for the peanut butter.
Also, These Easy dessert recipes can fit to your needs easily.
Nutrition Basics. These Chewy peanut butter bars are perfect for you!
Okay, let's be real, these are bake sale treats , not health food. But they do have protein from the peanut butter.
Each bar is about 250-300 calories . Hey, life is too short to skip dessert. Besides, a little goes a long way.
So there you have it! All my little secrets for Peanut Butter Bliss Bars success. This Simple bar cookies are fantastic!.
Don't stress too much; baking should be fun! Grab your apron, crank up the music, and get baking!

Frequently Asked Questions
My Peanut Butter Bliss Bars are crumbly, what did I do wrong?
Oh dear, crumbly bars are a common baking woe! It's likely that the dough was overmixed, leading to tough gluten development. Also, ensure you're measuring your flour correctly (spoon and level is best!). Overbaking can also dry them out, so keep a close eye on them in the oven.
Can I make these Peanut Butter Bliss Bars ahead of time?
Absolutely! In fact, making them ahead can enhance the flavor. Once cooled, store the bars in an airtight container at room temperature for up to 3 days, or in the refrigerator for up to a week. They also freeze beautifully for up to 2 months just wrap them individually or in a freezer safe container.
I'm allergic to peanuts, is there a substitute I can use for these Peanut Butter Bliss Bars?
Yes, you can definitely adapt this recipe! Sunflower seed butter (also known as "sunbutter") or tahini (sesame seed paste) make great alternatives. Keep in mind that the flavor will be different, but the texture should be similar. Be sure to check all your other ingredients to ensure they are peanut free as well!
How can I make my Peanut Butter Bliss Bars even more decadent?
Alright, let's get naughty! Try drizzling melted chocolate (dark, milk, or white your choice!) over the cooled bars and swirling it with a knife for a marbled effect. Pressing mini peanut butter cups or chopped Reese's Pieces into the batter before baking will give you an extra peanut butter hit that would make even Elvis jealous.
Are these Peanut Butter Bliss Bars healthy?
Well, "healthy" is a relative term when we're talking about dessert, isn't it? These bars are definitely a treat and should be enjoyed in moderation. They contain fats, sugars, and carbohydrates. However, they also offer some protein from the peanut butter.
You can reduce the sugar content slightly by using a sugar substitute, but remember that moderation is key to a balanced diet.
My bars are too soft and gooey, what went wrong when making these Peanut Butter Bliss Bars?
Sounds like they might have been slightly underbaked. Ovens can vary, so it's always a good idea to start checking for doneness a few minutes before the recipe's recommended time. If the toothpick inserted into the center comes out with wet batter, give them a few more minutes.
Also, letting them cool completely is crucial for them to firm up.
Peanut Butter Bliss Bars Easier Than Cookies Jus
Ingredients:
Instructions:
Nutrition Facts:
| Calories | 275 |
|---|---|
| Fat | 17.5g |
| Fiber | 1.5g |
