Pav Bhaji Recipe Cooking Carnival: Velvety Street Food
- Time: Active 20 minutes, Passive 30 minutes, Total 50 minutes
- Flavor/Texture Hook: A velvety, spice forward vegetable mash paired with buttery, soft shatter toasted rolls.
- Perfect for: Weekend family feasts or bringing a "carnival" vibe to a casual weeknight dinner.
- Unlock the Flavor with This Pav Bhaji Recipe Cooking Carnival
- The Physics of the Velvet Mash
- Method Comparison for Your Homemade Feast
- Quick Statistics for Your Homemade Street Food Feast
- Smart Components for a Vibrant and Velvety Base
- Essential Ingredients and Smart Substitutes
- The Simple Tools for Mashing and Searing
- Step-by-Step Guide to Achieving That Street Texture
- Practical Solutions for the Most Common Texture Issues
- If You Want X, Do Y
- Budget Friendly Substitutions for Your Spice Cabinet
- Debunking Kitchen Myths
- Smart Storage and Zero Waste Leftover Ideas
- Finishing Touches for the Ultimate Family Meal
- Recipe FAQs
- 📝 Recipe Card
Unlock the Flavor with This Pav Bhaji Recipe Cooking Carnival
There is a specific sound a rhythmic, metallic thwack thwack thwack of a heavy spatula hitting a flat griddle that takes me straight back to my favorite street corners.
I remember standing in the humid evening air, watching the vendor toss massive slabs of butter onto a sea of bubbling red vegetables. The aroma of toasted spices and melting fat was enough to make anyone forget their commute and join the crowd.
I’ve spent a long time trying to replicate that exact "carnival" energy at home without needing a professional grade flat top grill. My first few attempts were either too watery or looked a bit grey and unappealing.
But after experimenting with a few clever vegetable swaps and learning how to properly "bloom" my spices, I finally cracked the code for a rich, deep red bhaji that tastes like it came straight from a Mumbai stall.
This recipe is all about the "double mash" and the secret power of a single small beetroot. We're going to use basic ingredients like Russet potatoes and cauliflower to create a thick, satisfying base. It’s a brilliant way to feed a crowd on a budget while making the kitchen smell like a spicy, buttery dream.
Let's crack on and get that tawa sizzling.
The Physics of the Velvet Mash
Starch Gelatinization: Russet potatoes release high amounts of amylopectin when mashed, which acts as a natural thickener to bind the other vegetable waters into a cohesive, velvety sauce.
Anthocyanin Bleed: The natural pigments in 50g of grated beetroot bleed into the starch molecules during the simmer, providing that iconic street red color without any artificial dyes.
Chef Tip: Freeze your butter for 10 minutes before adding it to the final simmering bhaji. Cold butter emulsifies more slowly into the hot vegetables, creating a silkier finish than room temperature oil.
Method Comparison for Your Homemade Feast
| Method | Time | Texture | Best For |
|---|---|---|---|
| Classic Stovetop | 50 minutes | Chunky and rustic | Weekend slow cooking |
| Pressure Cooker | 30 minutes | Perfectly smooth/velvety | Busy weeknights |
| Sauté & Simmer | 40 minutes | Deeply caramelized | Maximum flavor depth |
The choice of method depends on your schedule, but the pressure cooker is my secret weapon for getting those 150g of cauliflower florets to surrender their structure completely. If you’re looking for another crowd pleaser to serve alongside this at a party, our State Fair Corndogs recipe offers that same nostalgic carnival fun.
Quick Statistics for Your Homemade Street Food Feast
To keep things organized, let's look at the basic requirements for this dish. We are aiming for a balance of soft textures and punchy aromatics.
- Yield: 4 servings
- Vegetable Prep: 300g potatoes and 150g cauliflower
- Spice Intensity: Moderate (Adjustable via chili powder)
- Pav Style: Soft rolls with a buttery sear
Smart Components for a Vibrant and Velvety Base
| Ingredient | Science Role | Pro Secret |
|---|---|---|
| Russet Potatoes | Primary Thickener | Use old potatoes; they have higher starch content for a better bind. |
| Beetroot | Color Agent | Grate it finely so it disappears into the texture while providing deep hues. |
| Kasuri Methi | Aromatic Bridge | Always crush between your palms to release the essential oils before adding. |
| Salted Butter | Emulsifier | Don't skimp; the fat carries the fat soluble flavors of the Pav Bhaji masala. |
While these ingredients are standard, the way they interact is what creates the "carnival" magic. For example, the 80g of green bell pepper isn't just for flavor; the slight bitterness cuts through the heavy fat of the butter.
Essential Ingredients and Smart Substitutes
- 300g Russet potatoes: Why this? Provides the necessary starch for a thick, scoopable consistency.
- Substitute: Yukon Gold potatoes (slightly waxier but very creamy).
- 150g cauliflower florets: Why this? Adds bulk and earthy sweetness without being heavy.
- Substitute: Extra cabbage or broccoli stems (peeled).
- 75g peas and 75g carrots: Why this? Adds natural sweetness and textural variety.
- Substitute: Frozen mixed vegetables for a budget shortcut.
- 50g beetroot: Why this? The natural way to get that deep red street style color.
- Substitute: 1/2 tsp paprika or a drop of food coloring (though beetroot is better!).
- 2.5 tbsp Pav Bhaji masala: Why this? The specific spice blend that defines the dish.
- Substitute: Mix of garam masala, dried mango powder, and extra cumin.
- 1.5 tbsp ginger garlic paste: Why this? Provides the essential pungent base notes.
- Substitute: Freshly minced ginger and garlic in equal parts.
- 8 Pav rolls: Why this? The traditional vessel for scooping the bhaji.
- Substitute: Brioche buns or even thick cut white bread toasted in butter.
The Simple Tools for Mashing and Searing
You don't need a massive street side tawa to make this work. A heavy bottomed pot or a Dutch oven is actually better for the boiling phase to prevent scorching. For the final "carnival" finish, a wide cast iron skillet or a non stick frying pan works wonders.
The most important tool in your arsenal is a sturdy potato masher. Since we are dealing with 300g of potatoes and 150g of cauliflower, you need something that can really pulverize those fibers while they are hot. If you don't have a masher, a heavy glass or a fork can work, but it will take more elbow grease.
step-by-step Guide to Achieving That Street Texture
- Boil the vegetables. Place 300g cubed potatoes, 150g cauliflower, 75g carrots, 75g peas, and 50g grated beetroot in a pot with 2 cups water and 0.5 tsp salt. Note: Grating the beetroot ensures it blends seamlessly.
- Pressure cook or simmer. Cook until the vegetables are completely fork tender and falling apart, about 15 minutes in a pressure cooker or 25 minutes on the stove.
- Mash the base. Drain excess water (reserve it!) and use a masher to turn the veggies into a smooth, thick paste while they are still steaming.
- Sauté the aromatics. In a separate wide pan, heat 1 tbsp oil and 1 tbsp butter. Add 100g minced onion and cook until translucent and slightly golden.
- Build the flavor. Stir in 1.5 tbsp ginger garlic paste and 80g minced green bell pepper. Sizzle for 3 minutes until the raw smell vanishes.
- Reduce the tomatoes. Add 150g chopped tomatoes. Cook until the tomatoes soften and oil starts to separate at the edges.
- Bloom the spices. Lower the heat and add 2.5 tbsp Pav Bhaji masala and 1 tsp Kashmiri red chili powder. Note: This creates the deep flavor profile.
- Combine and simmer. Fold the mashed vegetable base into the masala mixture. Add the reserved vegetable water as needed to reach a thick, pourable consistency.
- The final emulsion. Add 2 tbsp of butter and 1 tbsp crushed Kasuri Methi. Simmer for 10 minutes while mashing occasionally in the pan.
- Toast the pav. Slice 8 pav rolls and sear in 2 tbsp butter on a hot pan until the edges are golden and have a slight shatter.
Practical Solutions for the Most Common Texture Issues
Why Your Bhaji Is Too Watery
If your mash looks more like a soup than a thick sauce, it usually means there's too much residual moisture in the vegetables before mashing. You can fix this by turning the heat to medium high and stirring constantly to evaporate the excess water.
The starch from the 300g of potatoes will eventually take over and bind everything together.
To Get That Iconic Street Red Color
If your bhaji looks orange or brownish, you might have skipped the beetroot or used too little Kashmiri chili powder. Kashmiri chili is prized for its color rather than its heat. If it's too late for beetroot, a tiny pinch of smoked paprika can help, but avoid overdoing it or you'll lose the authentic flavor.
| Problem | Root Cause | Solution |
|---|---|---|
| Grainy Texture | Veggies not cooked enough | Simmer longer with a splash of water and re mash vigorously. |
| Bitter Aftertaste | Burnt ginger garlic paste | Always add a splash of water if the paste begins to stick to the pan. |
| Lack of Depth | Spices didn't bloom | Ensure you sauté the masala in butter/oil before adding the mash. |
Common Mistakes Checklist
- ✓ Don't drain the vegetable water into the sink; it contains all the flavor and nutrients save it for thinning the bhaji.
- ✓ Never mash the vegetables when they are cold; they will become gummy instead of velvety.
- ✓ Use a wide pan for the final simmer; the increased surface area allows for better caramelization.
- ✓ Don't skip the Kasuri Methi; it provides that "restaurant" aroma that plain cilantro cannot replicate.
- ✓ Make sure the butter is sizzling before the pav hits the pan to get that perfect toasted crust.
If You Want X, Do Y
- If you want a richer finish, add a final dollop of butter and a squeeze of lemon just before serving.
- If you want it spicier, double the Kashmiri red chili powder or add two finely minced green chilies to the onion sauté.
- If you want it smoother, use an immersion blender for 30 seconds, though some people prefer the rustic hand mashed texture.
Budget Friendly Substitutions for Your Spice Cabinet
| Original Ingredient | Substitute | Why It Works |
|---|---|---|
| Pav Bhaji Masala | Garam Masala + Amchur | Provides the warmth and tang, though it lacks the specific street food punch. |
| Kashmiri Chili | Paprika + Cayenne | Paprika gives the red hue while a pinch of cayenne adds the heat. |
| Kasuri Methi | Dried Oregano/Celery | Note: This will significantly change the flavor, but provides a similar herbal earthiness. |
If you are looking for other budget friendly meals that feed a whole family, you might enjoy my How To Roast recipe for a Sunday dinner that uses simple herbs and garlic.
Debunking Kitchen Myths
A common misconception is that you need a massive amount of food coloring to get the bhaji red. In reality, the combination of 50g beetroot and Kashmiri chili powder creates a much more natural and appetizing color.
Another myth is that the vegetables must be boiled until they are "mush." While they need to be soft, over boiling in too much water can dilute the flavor. It's better to steam them with just enough water to cover them.
Smart Storage and Zero Waste Leftover Ideas
Storage: Keep the bhaji in an airtight container in the fridge for up to 4 days. It actually tastes better the next day as the spices have more time to meld. You can freeze the bhaji (without the pav) for up to 3 months.
To reheat, add a tablespoon of water and a small knob of butter to a pan and stir until bubbling.
Zero Waste: If you have leftover bhaji, don't throw it out! It makes a fantastic filling for a grilled cheese sandwich or can be folded into an omelet the next morning.
If you have extra pav rolls that are starting to go stale, turn them into "Masala Pav" by tossing them in a pan with a bit of leftover bhaji, butter, and chopped onions.
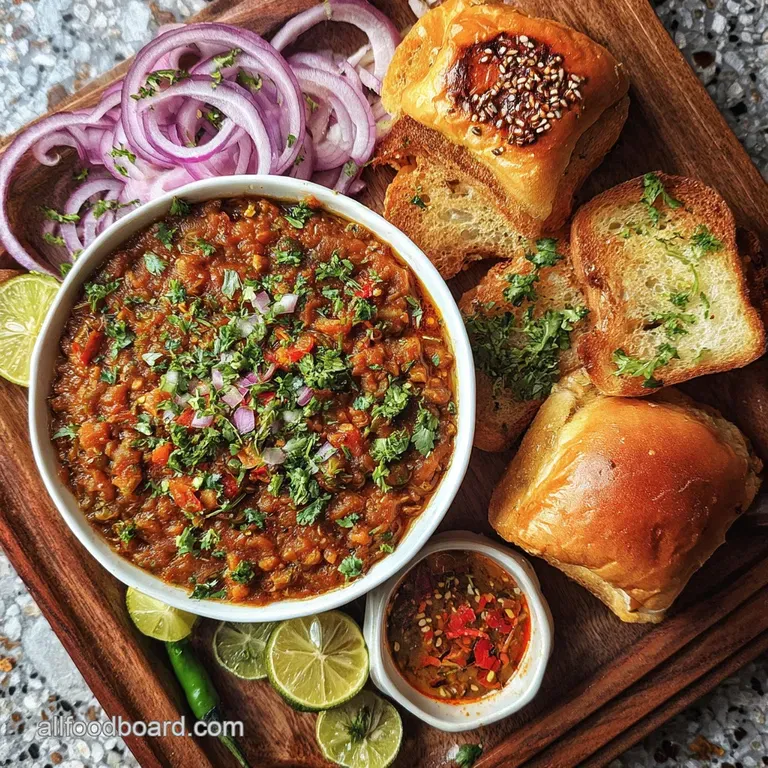
Finishing Touches for the Ultimate Family Meal
To serve this properly, you need the "carnival" presentation. Ladle the hot bhaji into a shallow bowl and create a small well in the center for a fresh pat of butter. Sprinkle the 0.25 cup of fresh cilantro generously over the top.
Always serve with a side of finely minced raw red onions and a couple of lemon wedges. The raw onion provides a necessary crunch against the velvety vegetables, and the lemon juice brightens the heavy, spiced flavors. If you're looking for a different kind of street food vibe, our Chow Mein recipe is another fantastic 35 minute meal that satisfies those takeout cravings at home.
For a Hariyali Pav Bhaji Recipe (Green Bhaji)
To transform this into a "Green Bhaji," omit the beetroot and tomatoes. Instead, blend a large bunch of spinach and cilantro with green chilies and add this paste after the onions are sautéed. This creates a vibrant, earthy version that feels a bit lighter but just as festive.
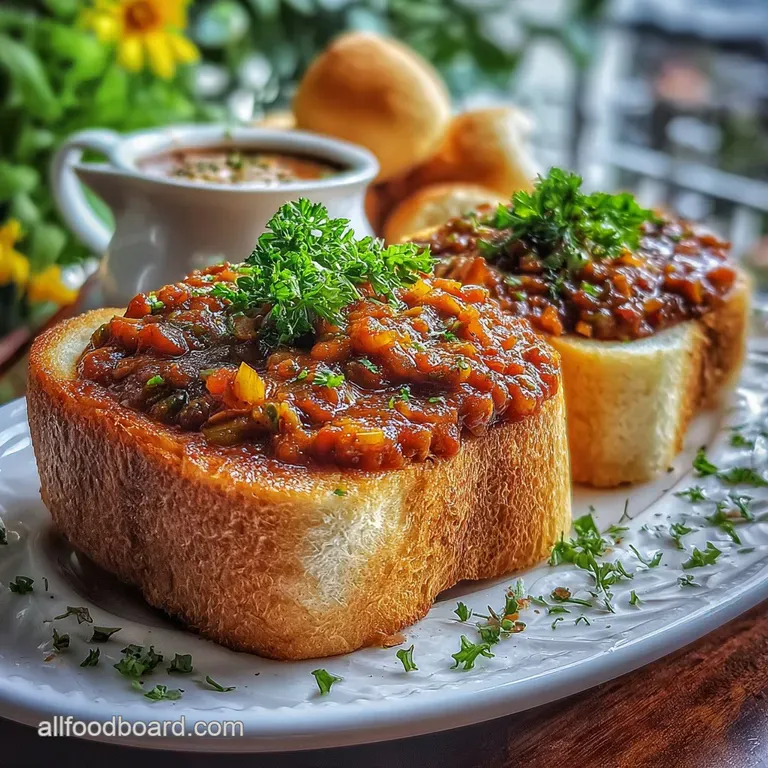
For the Perfect "Pav" Crunch
The secret to the pav is using a high fat butter. When you toast the rolls, press down slightly with your spatula. This ensures even contact with the heat, creating a "shatter" on the surface while keeping the inside cloud soft. It’s that contrast that makes the "Cooking Carnival" experience complete.

Recipe FAQs
Can I skip the beetroot in this recipe and still get the authentic red color?
No, this is a key component for color. The beetroot contains anthocyanins that bloom perfectly with the Kashmiri chili powder to achieve the signature street style hue.
How to achieve the velvety texture if my vegetables aren't breaking down properly?
Simmer the vegetables longer with a splash of reserved water. Ensure your potatoes are completely fork tender before mashing; undercooked starches will result in a grainy texture instead of a smooth emulsion.
How to properly bloom the Pav Bhaji masala for maximum flavor impact?
Sauté the spices in the hot fat (butter/oil) for 60 seconds after adding the tomatoes. This quick heating releases the fat-soluble flavor compounds in the spices, providing depth that cannot be achieved by just stirring them into the water.
Is it true that using cold butter at the end makes the bhaji texture better?
Yes, cold butter works better for the final sheen. Adding cold butter slowly to the hot mash allows it to melt and emulsify gradually, creating a silkier, more stable finish than adding room temperature fat all at once.
How long can I realistically prepare the bhaji mash ahead of time?
Yes, you can prepare it up to 2 days ahead. Cool the mash completely before refrigerating; when reheating, add a splash of water and a small knob of butter to restore its creamy consistency.
How to toast the pav rolls to get that perfect "shatter" on the crust?
Melt butter in a wide, hot skillet and press the cut sides of the rolls down firmly. This high contact, medium heat searing creates the crisp exterior contrast to the soft interior, similar to the technique used when making PanSeared Scallops with Lemon Butter Sauce: Crispy Crust.
What's the easiest way to make this dish spicier without affecting the color too much?
Incorporate finely minced green chilies with the ginger garlic paste. This adds immediate, sharp heat without significantly altering the vibrant red base provided by the beetroot and Kashmiri chili powder.
Pav Bhaji Cooking Carnival Recipe

Ingredients:
Instructions:
Nutrition Facts:
| Calories | 508 kcal |
|---|---|
| Protein | 11.6 g |
| Fat | 21.4 g |
| Carbs | 68.2 g |
| Fiber | 7.4 g |
| Sugar | 8.1 g |
| Sodium | 685 mg |
