Homemade Dulce De Leche: a Sweet Indulgence
Look into into Homemade Dulce de Leche
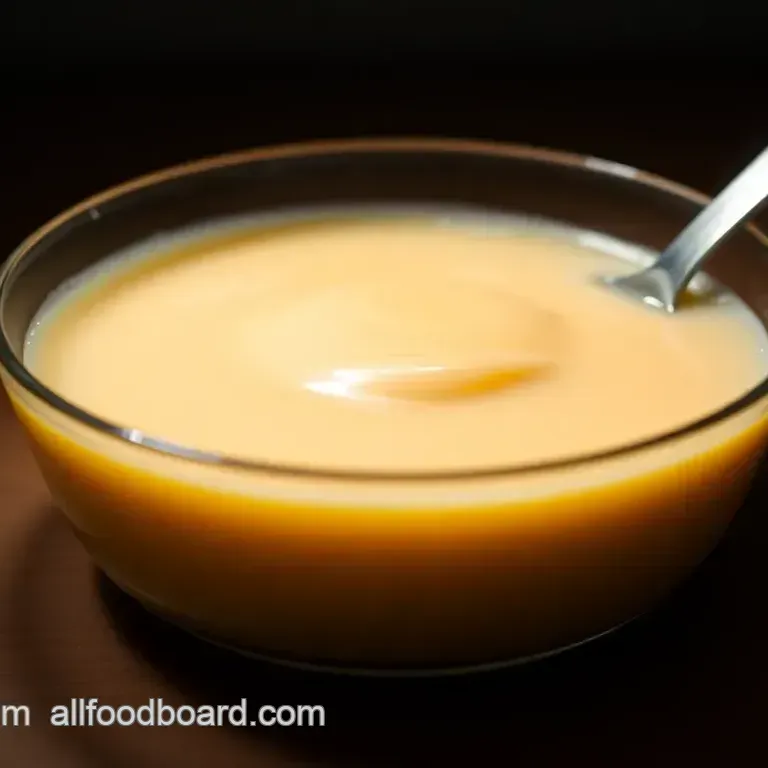
Ever had that moment when you taste something so good, it makes you wanna dance a little? yeah, that’s how i felt the first time i tried homemade dulce de leche .
It’s like a sweet hug in a jar smooth, creamy, and just bursting with flavor. seriously, if you’ve only ever had the store-bought stuff, get ready to elevate your experience to a whole new level!
A Taste of Tradition
Dulce de leche has roots deep in latin america and is beloved for a reason. this caramel like treat is made from just two simple ingredients: milk and sugar.
How easy is that? it’s an “easy” on-the-spot recipe that makes about 1 cup of rich, velvety goodness . perfect for drizzling over pancakes or sneaking a spoonful when no one’s looking no judgment here!
Quick and Simple
When i say this recipe is easy, i mean it. it takes around 10 minutes to prep and roughly 1 to 2 hours of simmering.
Now, i know that may sound like a while, but trust me, good things come to those who wait.
Plus, you’ll get about 240 milliliters of indulgent homemade dulce de leche to enjoy.
Why You’ll Love It
Let’s talk health for a sec. dulce de leche may not win any health awards, but it packs a delightfully sweet punch without any funky ingredients.
It’s perfect for a cozy sunday brunch or as a last minute addition to your dessert spread for guests. the real kicker? there’s something so satisfying about making your own caramel that “ta-da!” moment when it’s all ready to go.
If you’ve ever felt overwhelmed by fancy recipes or complicated instructions, this one is gonna change your game. dulce de leche is the sweet road to happiness, and once you try it, there’s no going back.
Get ready to roll up your sleeves because we’ll be diving into the ingredients next. Trust me; this journey will be worth every sticky spoon!
Let’s Whip Up Some Dulce de Leche!

Oh my gosh, if you’ve never had dulce de leche , you’re in for a treat! seriously, this stuff is like a love letter to your taste buds.
Smooth, sweet, and downright irresistible, it’s perfect for topping your favorite desserts or, let’s be real, just spooning straight from the jar.
So, let's get into the nitty gritty of what you'll need to make this dreamy treat!
Main Ingredients What You’ll Need
- 4 cups whole milk (950 ml) : Go for the good stuff here, not that skim nonsense. Whole milk gives it that creamy richness.
- 1 cup granulated sugar (200 g) : You want it sweet, right?
- 1/4 teaspoon baking soda (1.5 g) : This is your secret weapon for keeping the milk from curdling.
- 1 teaspoon vanilla extract (optional, for flavor) (5 ml) : Adds an extra layer of yumminess.
Now, don’t skimp on quality! You want good milk and pure vanilla to really elevate that sweetened condensed milk caramel vibe. Trust me, it makes all the difference.
Spice It Up! Seasoning Notes
While dulce de leche is a star on its own, you can jazz things up a bit.
- Essential Spice Combo : Try a pinch of sea salt. It balances the sweetness beautifully!
- Flavor Enhancers : If you’re feeling extra, add a cinnamon stick while it simmers. You’ll thank me later.
- Quick Substitutions : No vanilla? No problem! Use almond extract instead; it’ll pop in a different way.
Equipment Keep It Simple!
You don’t need a fancy kitchen to make this magic happen!
- Heavy bottomed saucepan : Seriously, this is crucial. It helps prevent burning.
- Wooden spoon or silicone spatula : Gotta have something to stir with!
- Measuring cups and spoons : Get those measurements right for the best outcome.
- Jar for storage : You’ll want something to keep this deliciousness in!
And hey, if you don’t have a heavy bottomed pan, you can use any pot just keep a close eye on your caramel from condensed milk mix.
Final Thoughts
Cooking is all about experimenting and having fun in the kitchen! making dulce de leche isn’t just about following a recipe it’s about the experience.
Sure, it takes some patience (we’re talking 1 to 2 hours ), but i promise you it’s worth every second.
You’ve got this! so roll up your sleeves and let’s make some sweet memories together.
In the end, you'll have a jar of rich, creamy goodness that makes everything better trust me, your sundae needs this.
And if you end up with a little extra? use it in other sweetened condensed milk recipes ! you can put it in coffee, drizzle it over pancakes, or even swirl it into chia pudding.
How’s that for versatile? enjoy every luscious bite!
Perfecting the Art of Homemade Dulce de Leche
Oh my gosh, have you ever tasted dulce de leche ? it's like a creamy hug for your taste buds! this sweetened condensed milk caramel has graced many a dessert table and honestly, it's about time you bring this luscious treat into your own kitchen.
Prep Steps
First things first, let’s get that mise en place on lock. gather your ingredients: 4 cups whole milk , 1 cup sugar , a pinch of baking soda , and maybe a splash of vanilla if you're feeling fancy.
Having everything in order makes cooking so much smoother, trust me!
Now, for those time saving organization tips: measure everything out before you start. this way, you won’t be scrambling around when the milk is simmering.
And don’t forget safety reminders! make sure your pan is sturdy; we don’t want any disasters with hot milk flying around!
Step-by-step Process
Ready? Here’s how to whip up your own sweetened condensed milk recipes for dulce de leche in just a few steps:
Combine Ingredients : In a heavy bottomed saucepan, mix 4 cups of milk , 1 cup of sugar , and 1/4 teaspoon baking soda . Stir until everything dissolves.
Heat Mixture : Bring it to a gentle simmer over medium heat. Seriously, no boiling, just a nice chill simmer.
Simmer and Stir : Reduce the heat to low and let it work its magic. Keep stirring every few minutes this keeps it from burning.
Monitor consistency : this is the key moment! after about 1 to 2 hours , it should thicken up and turn a beautiful caramel color.
When it coats the back of a spoon, you're golden!
Add Flavor (Optional) : If you want a little something extra, stir in 1 teaspoon of vanilla extract once you reach the desired consistency.
Cool and Store : Remove it from the heat, let it cool a bit, and then pour it into a jar.
Pro Tips
Here’s where the magic happens! stirring frequently is the name of the game; this is your chance to shine. and don’t rush the simmering process! it’s all about patience for that rich flavor.
Don’t forget these common mistakes: if your mixture burns, it’s game over, so keep an eye on it. if it gets too thick after cooling, just reheat it with a splash of milk to loosen it up.
And lastly, make-ahead options? this homemade caramel sauce keeps well in the fridge for about two weeks! so, if you want that sweet indulgence ready for drizzling over warm brownies or ice cream whenever you get that craving (and believe me, you will), just pop it in a jar and store it away.
Now, doesn’t that just sound delicious? look into into the world of authentic tasting dulce de leche . you won’t regret it.
And who knows, it might even inspire your next dessert masterpiece! happy cooking!
Recipe Notes for Homemade Dulce de Leche
Serving Suggestions: Because a Sweet Treat Deserves a Grand Entrance!
Alright, let’s talk plating! dulce de leche has that ooey gooey look to it, which means it’s perfect for drizzling. pour it over a warm slice of chocolate cake or a dollop on top of vanilla ice cream.
Honestly? it could make even a plain bowl of oatmeal feel like dessert! if you want to be fancy (and who doesn’t?), sprinkle a few sea salt flakes for that sweet and-salty vibe.
Pair with a hot cup of coffee or a creamy latte. hello, café vibe in your kitchen!
Storage Tips: Don’t Let Your Sweet Creation Go to Waste!
Now, if you’ve somehow managed to have extras (which, i mean, how could you, right?), store that sweetened condensed milk caramel in an airtight jar in the fridge.
It’ll last about two weeks . just make sure it’s cooled completely before popping it in! want to keep it longer? go ahead and freeze it for up to three months .
Use those ice cube trays, and you can defrost just what you need. when you’re ready to use it, just reheat it low and slow on the stove or in the microwave.
Seriously, it can transform everything back to its original glory.
Variations: Spice It Up or Adapt It to Fit Your Needs!
The world is your oyster when it comes to sweetened condensed milk recipes ! for a fun twist, try a chocolate dulce de leche .
Just whisk in some cocoa powder towards the end divine! got a coffee obsession? add a splash of chilled espresso. want a healthier take? swap out regular sugar for coconut sugar; it gives a deeper flavor.
You could also opt for pudding chia , adding a nutritious boost. seasonal variations like pumpkin spice in fall? oh, sign me up!
Nutrition Basics: Indulge Without Guilt!
Let’s not pretend this isn’t a sweet treat, but here’s the deal: in moderation, it’s all good! a tablespoon of dulce de leche clocks in around 107 calories and has a bit of protein.
Thanks to the milk, it’s a great source of calcium too! just remember the key health benefit here satisfaction, my friends! it brings joy, and that’s priceless!
In summary, your homemade dulce de leche is not just a delicious creation but also endlessly versatile ideal for any occasion.
Whether you’re drizzling it over dessert or enjoying it solo straight from the jar (don’t worry, i won’t tell!), it’ll please your sweet tooth time and time again.
So, roll up your sleeves and get ready to savor the magic of this smooth caramel goodness! trust me, once you make it, you’ll be hooked.
Happy cooking!
Frequently Asked Questions
What is dulce de leche and how is it made?
Dulce de leche is a rich, caramel like sauce made from milk and sugar that is beloved in many cultures, particularly in Latin America. It’s created by slowly simmering the milk and sugar together, allowing the mixture to thicken and develop its signature sweet, nutty flavor.
With just a few ingredients and a bit of patience, you can whip up some delightful dulce de leche at home!
Can I make dulce de leche without using a heavy bottomed pan?
While technically you can use any saucepan, a heavy bottomed pan is highly recommended for making dulce de leche. It distributes heat more evenly, preventing the mixture from scorching and ensuring a smooth, creamy texture. If you find yourself without one, just keep a close eye on it and stir more frequently!
How do I store homemade dulce de leche?
Once your dulce de leche has cooled, transfer it to an airtight jar and store it in the fridge. It should last for about 2-3 weeks, although it rarely lasts that long in my house! If it thickens too much, just reheat it gently with a splash of milk until it reaches your desired consistency.
What are some fun ways to use dulce de leche?
Dulce de leche is incredibly versatile! You can drizzle it over ice cream, use it as a filling for cakes or pastries, or even spread it on toast for a sweet breakfast treat. Feeling adventurous? Try it with fresh fruits like apple or banana slices for a delightful snack!
Is dulce de leche gluten-free and suitable for people with dietary restrictions?
Yes! Dulce de leche made from milk and sugar is naturally gluten-free. However, always double check your ingredients if you’re using substitutes, like coconut sugar, to ensure they meet your dietary needs.
It’s a sweet treat that many can enjoy, but be mindful of added ingredients if you’re adapting for allergies or dietary sensitivities!
Can I make dulce de leche in a slow cooker?
Absolutely! Making dulce de leche in a slow cooker is a fantastic option for those who prefer a hands off approach. Simply combine the ingredients in the slow cooker, set it on low, and let it cook for several hours, stirring occasionally. Just remember, it might take a bit longer to achieve the perfect consistency!
Homemade Dulce De Leche A Sweet Indulgence