Fright Night Fudge Brownie Graveyard Pots
The Decadent Death Trap: Why These Graveyard Pots Rule Halloween
When October rolls around, the culinary landscape shifts from elegant pies to playful, often gory, creations. While store-bought candy fulfills a necessary evil, true satisfaction comes from crafting elevated Halloween Treats that combine rich flavors with striking visual impact.
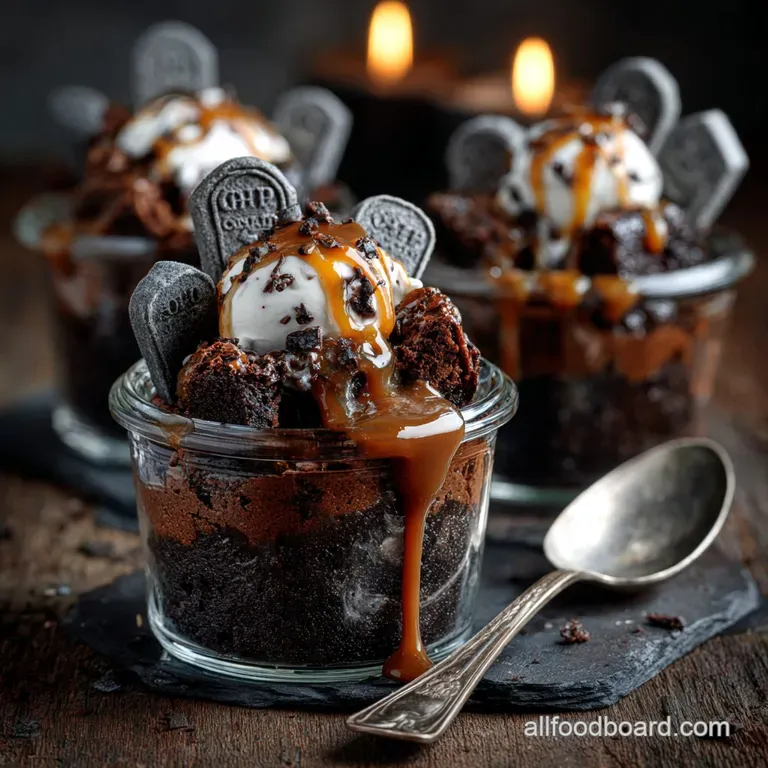
These Fright Night Fudge Brownie Graveyard Pots are precisely that a luxurious spin on the classic dirt cup, leveraging intense, deep chocolate flavor against the fun, macabre aesthetic of a burial ground.
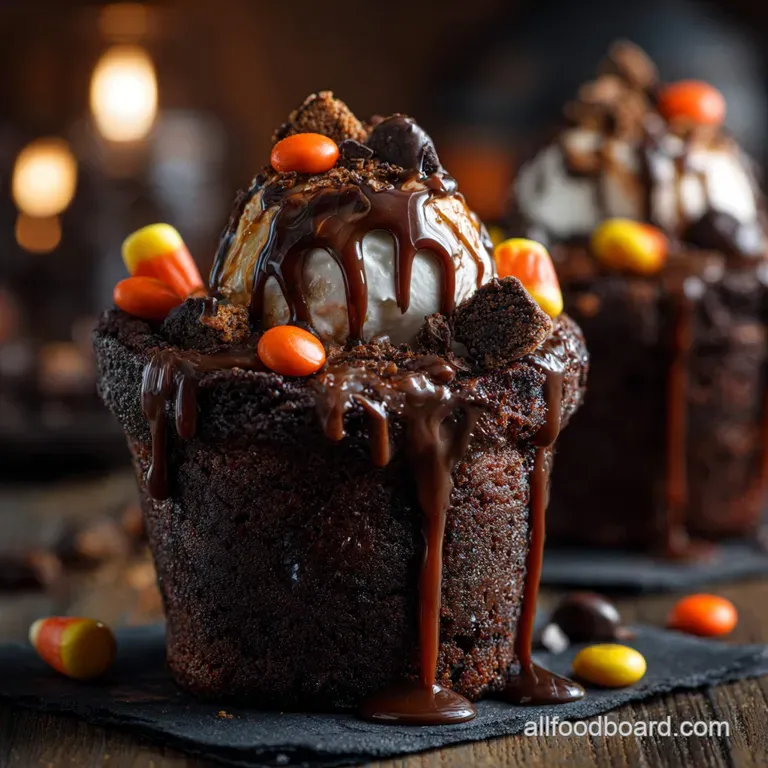
They stand head and shoulders above typical halloween treats recipes because they deliver a multi textured experience: fudgy density, airy lightness, and satisfying crunch.
A Showstopper That Satisfies Both Spirits and Grown Ups
These pots offer fantastic halloween treats ideas that bridge the gap between childish fun and grown-up sophistication. For the little monsters, the concept of eating "dirt" topped with marshmallow ghosts is endlessly entertaining, making them perfect halloween treats for kids .
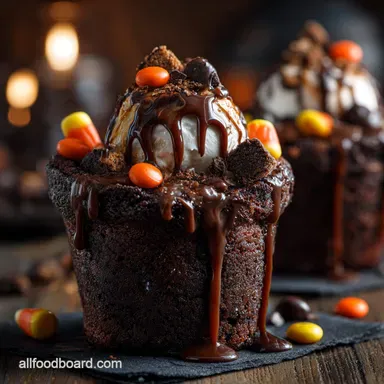
But unlike many overly sweet children's desserts, the richness derived from high-quality dark chocolate in the brownie base ensures this is fully appropriate as elegant halloween treats for adults —a welcome break from punch and basic finger foods.
On top of that,, these desserts are presented in individual jars (we suggest 8 generous 8oz/250ml portions), making them ideal, easily portable Adult Halloween Party Food .
The Secret to Achieving Fudgy, Intense Chocolate Flavor
The foundation of any great graveyard pot is a phenomenal base, and ours relies on a supremely fudgy brownie, not a dry cakey one. The intensity comes from a generous quantity of premium dark chocolate (8 oz / 225g of 70% cacao) melted with a full cup (225g) of butter.
This creates an emulsion of fat and chocolate that locks in moisture. Crucially, after mixing in the 1 1/2 cups (300g) of sugar and three large eggs, the dry ingredients sifted flour (3/4 cup / 90g) and Dutch processed cocoa powder (1/4 cup / 25g) are folded in gently.
The key technique here is under mixing. We are looking for a few streaks of flour to remain when the batter hits the 8 inch square pan, guaranteeing that dense, almost liquid centre after the 30– 35 minutes of baking.
Layering Decadence: Mousse, Mud, and Monument Stones
Once the brownie foundation is cooled and crumbled, we build upon it with contrasting textures. The 'Grave Liner' is a silky smooth chocolate mousse, created by whipping cold heavy cream and confectioners’ sugar, then folding that lightness into a creamy base of softened cream cheese (4 oz / 115g) and cooled milk chocolate.
This mousse provides a cooling contrast to the heavy fudge. The 'dirt,' which gives these Halloween Treats To Make their recognizable texture, is made from 15 to 20 finely crushed chocolate sandwich cookies, applied liberally over the mousse.
Final presentation relies on simple wafer cookies, which are easily transformed into solemn tombstones using a black icing pen, offering an opportunity for halloween treats to make with kids .
Assembling the Macabre Menu: Essential Ingredients and Tools
Creating this deep dish delight requires gathering both high-quality components for optimal flavor and the right tools for efficient assembly. Remember, precise measurements are mandatory for that truly fudgy texture.
Deep Dark Essentials for the Fudge Brownie Layer
The rich, subterranean layer of our pots relies on specific proportions. You will need 1 cup of unsalted butter and 8 oz of chopped dark chocolate (70% cacao is best for depth). For sweetness and structure, have 1 1/2 cups of granulated sugar ready, alongside 3 large, room temperature eggs and 1 teaspoon of vanilla extract.
The dry binders are 3/4 cup of all-purpose flour and 1/4 cup of unsweetened, preferably Dutch processed, cocoa powder, which adds deep colour without bitterness.
Achieving Silky Smooth Chocolate Mousse Perfection
The filling requires ingredients that cooperate perfectly when chilled. Start with 1 1/2 cups (360ml) of heavy cream, kept ice-cold, and 1/4 cup (30g) of confectioners’ sugar for stability.
The base of the mousse is made of 4 oz (115g) of full fat, softened cream cheese combined with 4 oz (115g) of melted milk chocolate. Using milk chocolate here rather than dark chocolate provides a smoother, softer flavour profile that doesn't compete harshly with the intense brownie below.
Edible Epitaphs: Making the 'Dirt' and Tombstones
The 'dirt' topping is simple but effective: you’ll need about 15 to 20 chocolate sandwich cookies (crushed filling and all) to achieve a deep, rich colour and coarse texture. For the tombstones, procure 8 simple, flat wafer cookies or similar biscuits that can stand upright.
The finishing touch is provided by a black food grade icing pen for etching "RIP" or other haunting messages, and a handful of mini marshmallows to serve as small, ghostly additions or scattered 'bones.' This decorating stage is often the highlight when preparing halloween treats to make with kids .
Graveyard Construction Kit: Tools You'll Need
While the ingredients are important, the right equipment ensures success. A standard 8 inch (20 cm) square baking tin is necessary for the brownies, lined with parchment paper for easy removal. You will need a large saucepan for melting the chocolate base.
For the mousse, an electric hand mixer or stand mixer is indispensable for achieving light, medium stiff peaks in the cream. Finally, secure 8 individual serving jars or cups, each with roughly 250ml (8oz) capacity, to showcase the decadent layers.
Related Recipes Worth Trying
- Fudgy Eyeball Brownies The Ultimate Halloween Treat Recipe — Need creepy desserts for Halloween This Halloween Eyeball Brownies recipe delivers intensely fudgy brownies with a fun gory decoration Perfect for parties
- Rich NoBake Brownie Bites Fudgy Chocolate Treats Ready Fast — Craving something chocolatey These easy No Bake Brownies are fudgy rich and require zero oven time Perfect for quick afternoon snacks Get the foolproof...
- The Millionaires Shortbread Snowballs NoBake Christmas Treats — Need quick Christmas sweets These decadent NoBake Christmas Treats use crushed biscuits and salted caramel to create easy Christmas treats no bake truffles...
From Batter to Burial Plot: The step-by-step Graveyard Construction
The process of assembling these pots is divided into structured phases, ensuring each layer sets properly before the next is added, guaranteeing a professional finish for these elaborate Halloween Treats To Make .
Phase 1: Baking the Fudgy Brownie Foundation
Begin by preheating your oven to 350°F (175°C) and lining your pan with parchment. In your saucepan, melt the cubed butter and chopped dark chocolate together until completely smooth, then remove from the heat.
Whisk in the granulated sugar, followed by the eggs, ensuring they are fully emulsified one at a time. This step is critical for density. Next, gently fold in the sifted flour, cocoa powder, and salt. Pour the sticky batter into the prepared tin and bake for approximately 30– 35 minutes.
Crucially, remove the brownies when a toothpick inserted near the centre comes out with moist, sticky crumbs, not liquid batter. Allow the brownies to cool entirely before crumbling them roughly into manageable pieces.
Phase 2: Whipping the Light and Eerie Chocolate Filling
Start the mousse by whipping the very cold heavy cream and confectioners’ sugar until medium stiff peaks form if your bowl is chilled, this happens faster. In a separate bowl, beat the softened cream cheese until it is silky smooth, then slowly incorporate the slightly cooled melted milk chocolate.
Once combined, gently fold the prepared whipped cream into the chocolate cream cheese mixture in two additions. The key is to lift and fold with a spatula rather than stirring vigorously, preserving the maximum amount of air to keep the mousse light and ethereal.
Phase 3: Creating the Deep Dish Layers of Indulgence
First, prepare your 'dirt' by crushing the chocolate sandwich cookies into a fine consistency a rolling pin in a zip-top bag works well. Next, take your individual serving cups. Spoon about 1/4 cup of the crumbled brownie foundation into the bottom of each jar.
Follow this with a generous scoop of the chocolate mousse. Repeat the layering process once more brownie, then mousse leaving roughly an inch (2.5 cm) of space at the top for the final decorations.
Once layered, sprinkle the fine crushed cookie ‘dirt’ heavily and evenly over the top of the mousse, ensuring no filling peeks through the surface.
Phase 4: Final Decoration for the Ultimate Halloween Treat Presentation
With your pots layered and the ground covered in 'dirt,' it’s time to finalize the grave markers. Write "RIP" or a humorous phrase like "HELP!" onto the flat wafer cookies using the black icing pen. Carefully insert one wafer 'tombstone' into the cookie crumb layer of each pot.
Arrange mini marshmallows on the surface to look like scattered bones or stack a few together to resemble small, peering ghosts. Once decorated, the pots must be chilled for at least 30 minutes before serving.
This cooling time ensures the mousse is firm and the overall dessert holds its shape beautifully.
Behind the Tombstone: Storage, make-ahead Tips, and Sinister Substitutions
These graveyard pots are robust, but knowing how to manage them ahead of time is crucial for party prep.
Storing Your Graveyard Pots for Maximum Freshness
Because these individual desserts contain a dairy based mousse and cream cheese filling, they must be refrigerated. If the pots are already fully assembled, cover them tightly with plastic wrap to prevent the cookie dirt from drying out and store them in the refrigerator.
They will remain fresh and delicious for 3 to 4 days. If storing longer, be aware that the brownie layer may begin to absorb moisture from the mousse, softening the texture.
Speeding Up the Spook: make-ahead Components and Hacks
One of the great logistical advantages of these Halloween Treats is how well the components store separately. The fudgy brownies can be baked up to two days in advance; keep them wrapped tightly at room temperature or even frozen for several weeks.
The cookie 'dirt' can also be crushed and stored in an airtight container indefinitely. While the chocolate mousse is best when freshly whipped, you can make it the morning of your event and keep it chilled.
For optimal presentation, we recommend assembling the final pots no more than 24 hours before you plan to serve them.
Customizing Your Grave: gluten-free and Vegan Halloween Treats Variations
These pots are easily adaptable to suit various dietary needs. For gluten sensitivity, substitute the all-purpose flour in the brownie base with a high-quality 1:1 gluten-free baking blend that already contains xanthan gum.
If you are aiming for vegan Halloween Treats , the most significant change involves the mousse: swap the heavy cream for full fat, chilled coconut cream (using only the solid portion from the can), and substitute the cream cheese and chocolate with quality dairy-free alternatives.
For a visual change, consider skipping the chocolate mousse entirely and creating a 'swampy' pot by using vanilla mousse tinted with bright green food colouring for a truly ghoulish halloween treats idea !

Recipe FAQs
These Fright Night Fudge Pots look brilliant! Can I make them ahead of time for a massive Halloween bash?
Yes, absolutely! These pots are an absolute godsend for advance preparation, saving you a mad scramble on the night itself. You can assemble the pots (minus the cookie ‘dirt’ and wafer tombstones) up to 24 hours ahead, keeping them tightly covered in the fridge.
Add the final "dirt" layer and decorations just before serving so the cookies stay crunchy and don't go soggy nobody wants a damp grave!
My brownies turned out a bit dry and cakey, not fudgy like yours. What’s the secret to getting that perfect brownie base for these Halloween Treats?
Ah, the eternal brownie dilemma! The key is underbaking; take them out when a toothpick still has moist crumbs attached, resembling a sticky, fudgy mess, rather than coming out clean.
Also, ensure you use high-quality, high fat dark chocolate and butter, as this combination is what delivers that incredibly rich, dense texture these brilliant Halloween Treats deserve.
I need a dairy-free option for some guests. Can I swap the heavy cream for anything else?
You bet! For a stable, dairy-free mousse, swap the heavy cream for the thick, solid part of a can of full fat coconut milk that has been thoroughly chilled overnight. Just make sure your mixing bowl and whisk are ice-cold before whipping the coconut cream until stiff peaks form.
Ensure your cream cheese alternative and chocolate are also certified dairy-free for those with intolerances.
My chocolate mousse always seems to turn out a bit runny. Have you got any expert tips to make sure it sets firmly in the pot?
Runny mousse usually stems from warm ingredients or under whipping the cream it's a common mistake, so chin up! Make sure both your heavy cream and the mixing bowl are properly chilled; pop the bowl in the freezer for 15 minutes first.
Most importantly, ensure you whip the cream until it forms stiff, stable peaks before gently folding it into the cream cheese mixture folding, not beating, is absolutely crucial.
I’ve run out of wafer biscuits for the tombstones. What else could I use for decorations that’s just as effective?
Don't panic; we can improvise! If wafers are a no-go, you can use rectangular pieces of firm shortbread or even graham crackers trimmed slightly to fit the pot size. For simple alternatives, white chocolate chips can be strategically placed as 'eyeballs,' or pretzel sticks can be used to resemble small, scattered 'bones' sticking out of the dirt.
Fudgy Graveyard Halloween Treats
Ingredients:
Instructions:
Nutrition Facts:
| Calories | 726 kcal |
|---|---|
| Protein | 8.0 g |
| Fat | 26.4 g |
| Carbs | 84.1 g |
| Fiber | 5.5 g |
| Sodium | 5129 mg |
