Deliciously Buttery Olive Garden Breadsticks
- Intro to Deliciously Buttery Olive Garden Breadsticks Made at Home
- A Taste of Breadstick History
- Why You’ll Love These Breadsticks
- What You Need to Make This Happen
- Essential Ingredients Guide to Making Olive Garden-Inspired Breadsticks
- Mastering the Art of Professional Cooking
- Pro Tips & Secrets
- Perfect Presentation
- Storage & Make-Ahead
- Creative Variations
- Complete Nutrition Guide
- Expert FAQ Solutions
- 📝 Recipe Card
Intro to Deliciously Buttery Olive Garden Breadsticks Made at Home
You ever find yourself sitting at the olive garden, staring at those warm, fluffy breadsticks, and thinking, “man, i need these at home!”? well, i totally get you! one evening, my mom and i treated ourselves to some pasta, but honestly, those breadsticks were the highlight.
I couldn’t stop nibbling on them while dreaming about how i could whip up my own version. so, today i'm diving into the famous olive garden breadstick nutrition and sharing an easy, delicious recipe that’ll bring that restaurant feel straight to your kitchen.
Let's get our hands doughy, friend!
A Taste of Breadstick History
Did you know those heavenly breadsticks are a staple of italian american cuisine? yep, they come from a blend of italian bread traditions and american dining culture.
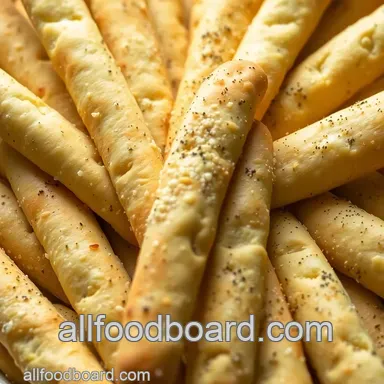
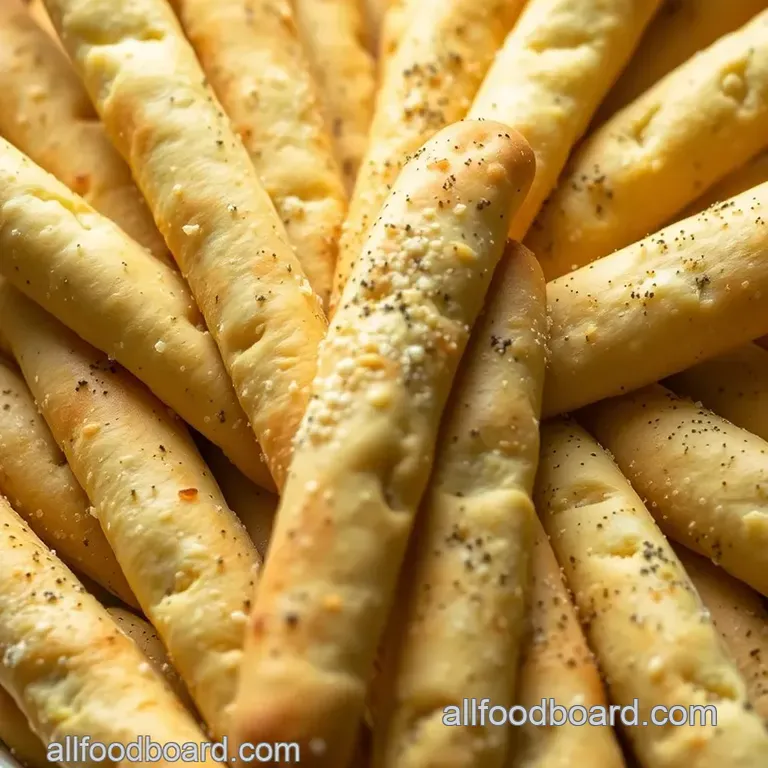
Italian breadsticks, or “grissini,” are crispy and thin, but the olive garden version is all about that soft, warm, buttery goodness we all crave.
It’s no surprise they’ve become a favorite for folks who want an easy side dish with pasta or soups. plus, making these at home? super doable! you’ll need only about 1 hour and 25 minutes to whip these up, and trust me, it ain’t hard at all i promise it’s as simple as pie… or should i say, bread?
Now, about the costs: this recipe yields 12 breadsticks and won’t break the bank. Honestly, it’s way cheaper than that night out!
Why You’ll Love These Breadsticks
Now, let’s talk about the perks of making these buttery breadsticks. first off, they pack a punch of flavor and are much healthier than you might think.
With about 180 calories per stick, they won’t turn your diet upside down, especially when you look at other breadstick options! don’t forget, they’re also great for vegetarians.
Pair ‘em with marinara, and you’re golden.
These beauties shine on occasions such as family dinners, game day snacks, or just a cozy night in with some spaghetti.
Seriously, they can elevate any meal. and let's face it: who wouldn’t want to show off some homemade garlic butter breadsticks? you’ll be the friend known for all the good food!
Compared to store-bought options, these homemade gems scream freshness . plus, you can tweak the recipe! feel like making vegan breadsticks ? simple swaps can get you there, or why not toss in some fresh herbs? you do you, boo.
What You Need to Make This Happen
Alright, let's get ready for the fun part! Here’s what you're gonna need to whip up those dreamy Olive Garden inspired breadsticks:
For the Dough , gather 4 cups of all-purpose flour, active dry yeast, warm water, granulated sugar, olive oil, and a pinch of salt.
For the Garlic Butter Topping , grab some unsalted butter, garlic powder, Italian seasoning, and a tad more salt.
Now you might be wondering how to turn these simple ingredients into pure magic. well, you know i'm all about the easy and fun breadsticks dough recipe .
But first, let’s gather everything and get to baking those fluffy breadsticks like we’re at an italian restaurant!
There you have it! from history to deliciousness, we’re all set for a baking adventure. next up, let’s break down the ingredients and get this party rolling.
Get ready for some warm, buttery bites of joy right from your oven!
Essential Ingredients Guide to Making Olive Garden Inspired Breadsticks
When you're craving those warm Olive Garden breadsticks , there's nothing like recreating the magic at home. Ready to dive in? Let’s break it down!
Premium Core Components
First up, you gotta know what you’re working with. Here’s your cheat sheet on essential ingredients .
- All-Purpose Flour: You’ll need 4 cups (480g) for that perfect texture. Check for lightness when scooping; it should feel airy.
- Active Dry Yeast: Grab a packet (2 ¼ teaspoons or 7g) . It should be fresh for best results. If it smells a bit funky? Toss it out!
- Warm Water: Use 1 ½ cups (360ml) at around 110° F ( 45° C) . Too hot? You’ll kill the yeast. Too cold? Well, it won’t activate.
- Granulated Sugar: Just 2 tablespoons (25g) are perfect to feed that yeast.
- Olive Oil: Use 2 tablespoons (30ml) ; it's the key to that buttery flavor.
- Salt: Just 1 teaspoon (5g) . A little salt goes a long way to enhance the other flavors.
Storage Tip: Keep your flour in a cool, dark place. Yeast should be stored in the fridge if you won’t use it right away. And salt? It pretty much lasts forever!
Signature Seasoning Blend
Next up, let’s talk about the magic that takes these breadsticks from “blah” to “wow!”
- Garlic Powder: You’ll want at least 1 teaspoon (4g) in your garlic butter for that classic flavor.
- Italian Seasoning: Dust on 1 teaspoon (1g) for an Italian vibe.
- Fresh Herbs: If you're feeling fancy, toss in some fresh basil or rosemary. Trust me, your breadsticks will thank you.
Flavor Enhancer: A sprinkle of parmesan before baking can elevate your homemade breadsticks. Try it, you won’t regret it!
Smart Substitutions
Life happens, and sometimes you don’t have everything on hand. No worries!
- Flour Alternatives: If you're out of all-purpose, use bread flour for a chewier bite.
- Garlic Substitution: Got fresh garlic? Use 2-3 cloves minced instead of powder.
- Olive Oil Swap: Can’t find it? Melt some coconut oil or use any neutral vegetable oil in a pinch.
Kitchen Equipment Essentials
Every chef needs the right tools. Here's what you'll need:
- Large Mixing Bowl: For combining all those glorious ingredients.
- Measuring Cups and Spoons: No guesswork here; precision is key!
- Baking Sheet: Line it with parchment for easy cleanup.
- Plastic Wrap or Kitchen Towel: Cover those dough balls while they rise, ok? No drafts allowed!
Quick Prep Tip: Make sure your utensils and workspace are clutter free to avoid any kitchen chaos when you’re shaping those doughy goodness.
Final Thoughts
Making olive garden breadsticks at home is not just about feeding your tummy; it’s about enjoying the process. you can whip up homemade garlic butter in no time to slather on those soft garlic breadsticks .
Honestly, there’s nothing better than pulling those fluffy sticks out of the oven, brushing on melted butter, and smelling that garlic heaven.
This recipe is a perfect starter for anyone wanting to dabble in italian cuisine recipes . plus, you’ll get to enjoy those breadsticks with marinara or as a side to your favorite pasta dish.
So, once you gather your ingredients and gear up, grab your mixing bowl. let’s get into the fun part - the actual baking! your dinner rolls recipe just got an upgrade with these buttery breadsticks .
Keep your eye out for the step-by-step instructions next!
Wait until you taste these bad boys. They’re sure to impress your family and leave you craving more. And just think about the breadstick nutrition facts - a warm, fluffy companion to your meals that won’t break the calorie bank! So, what are you waiting for? Let’s get rollin’!
Mastering the Art of Professional Cooking
Cooking like a pro isn't just about fancy techniques or high end gadgets; it's all about having the right prep steps and knowing how to manage your time.
Whether you’re channeling your inner chef for a big dinner or just making dinner for you and your bestie, let’s break down some essential cooking methods that’ll have you whipping up fabulous dishes in no time.
Get Your Ducks in a Row: Essential Preparation Steps
First thing’s first mise en place . this fancy french term just means having everything ready before you start cooking. chop your veggies, measure your ingredients, and gather your tools.
Seriously, it makes a world of difference. you don’t want to be halfway through baking your awesome homemade breadsticks and realize you’ve forgotten to melt that butter for your garlic topping!
Time management is all about knowing the rhythm. don't let things sit around getting cold or soggy; plan to time your dishes so they're all ready around the same time.
Maybe pop the pasta on while you're pulling the breadsticks out of the oven for peak deliciousness!
And please, for the love of everything delicious, keep your workspace organized. prime example: if you’re making those buttery breadsticks from scratch, keep all your ingredients grouped together.
It’ll save you tons of stress.
Oh, and let’s not forget safety. always wash your hands, use separate cutting boards for meat and veggies, and keep that hot oil away from your face.
We’re cooking, not auditioning for a cooking show gone wrong.
Step-by-step for Success
Alright, let's get down to the nitty gritty. Here’s a solid step-by-step process that'll get you a nice batch of breadsticks worthy of any Italian restaurant.
Activate the yeast : mix 1 ½ cups warm water (that's about 110° f ) with 2 tablespoons of sugar and your packet of yeast.
Let it sit for 5- 10 minutes until bubbly.
Prepare the Dough : Combine 4 cups of flour and 1 teaspoon salt in a bowl. Then, add your yeast mixture and 2 tablespoons olive oil .
Knead Away : Turn the dough onto a floured surface and knead for about 5- 7 minutes . It should be smooth and elastic.
Let It Rise : Cover that bad boy and let it rise in a warm spot for roughly 45 minutes , until doubled in size.
Shape Those Breadsticks : After punching down the dough, divide it into 12 pieces and roll each into a rope about 6-8 inches long .
Second Rise : Place them on a baking sheet and let rise for another 15- 20 minutes .
Bake : Preheat your oven to 400° F and bake for 12- 15 minutes until golden brown.
Butter time : while they’re baking, mix 4 tablespoons of melted butter with garlic powder, italian seasoning, and a dash of salt.
Brush this luscious mix over the warm breadsticks when they come out of the oven.
Tips from the Pros
Now you’ve got the basics down; let’s dive into some expert techniques .
Hydration is Key : If your dough is too stiff, it won’t rise properly. Don’t be afraid to add a touch more warm water if needed.
Quality Checkpoints : The dough should be smooth and elastic. A dough that doesn’t bounce back when you poke it means it needs more kneading.
Troubleshooting : If your breadsticks come out flat, you might’ve over kneaded or your yeast was expired. Always check those expiration dates, folks!
Secrets to Success
Avoiding common mistakes is crucial. Don’t rush the rising process; that’s where the magic happens. About the olive garden breadstick nutrition ? These puppies may not be diet food, but they're definitely worth it for a treat!
Additionally, if you want to make-ahead options, roll the breadsticks and freeze them before the second rise. Pop them out whenever you need a quick bread side with dinner; they'll save you heaps of time!
Transitioning to our last section, I can't wait to dive into additional tasty tips and variations that can take your breadstick game to the next level! Get ready for more ways to make those homemade garlic breadsticks your friends will rave about!
Pro Tips & Secrets
Let’s kick things off with some pro tips that will take your olive garden breadsticks recipe to the next level! first off, do you remember how exciting it was to see that basket of fluffy buttery breadsticks at the restaurant?
Well, to recreate that magic at home, take my word for it don’t skip the yeast activation step! it’s like giving your dough a little pep talk.
Mix warm water, sugar, and yeast, and let it froth up for about 5- 10 minutes . that bubbly goodness means your breadstick dough is gonna rise like a champ.
Now, if you’re short on time, here’s a time saving technique : while your breadsticks are rising, punch out your dishes for dinner.
You can use the free time to whip up an easy pasta sauce or toss a salad. also, when baking, i recommend keeping an eye on those little guys so they don’t burn.
A golden brown color is your signal they’re ready!
For flavor enhancement, don’t be shy with the garlic butter topping. mix in a bit of extra italian seasoning or some fresh herbs if you’ve got ‘em handy.
Trust me; your taste buds will thank you. it elevates the flavor profile from ‘yum’ to ‘oh my gosh, i need seconds!’
Perfect Presentation
Alright, let’s chat about how to make your breadsticks not just tasty but visually appealing too! plating techniques can be super fun.
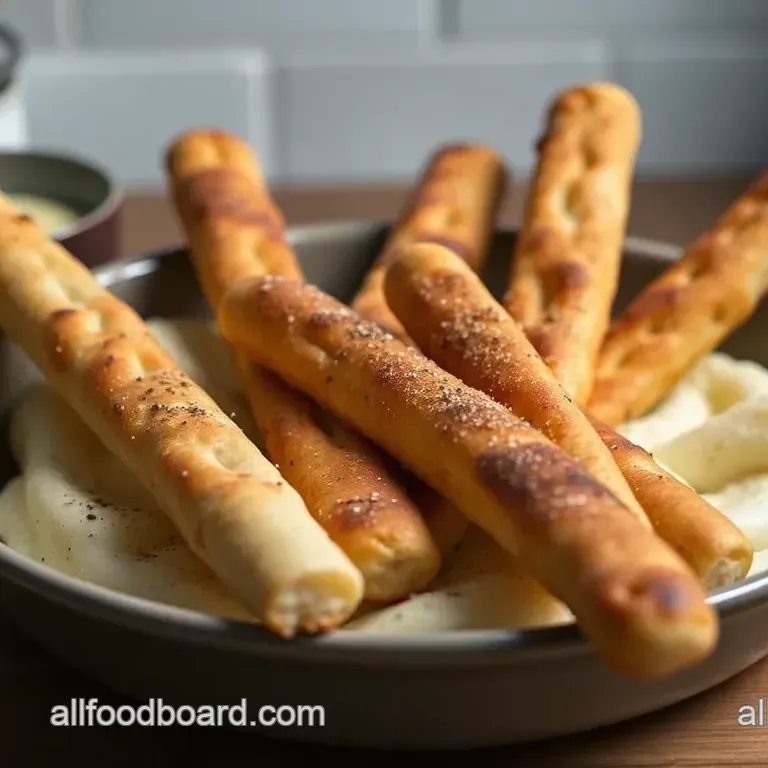
Try stacking a few breadsticks on a fancy plate, leaning them against a little bowl of marinara. color combinations play a huge role here; consider garnishing with fresh parsley or a sprinkle of grated parmesan for that pop of green and white against the golden crust.
If you want to take it a notch higher, serve your breadstick companions with various dipping sauces . a homemade marinara or zesty garlic dip can make your appetizer game strong.
Remember, we eat with our eyes first!
Storage & make-ahead
Now, if you’re like me and can’t finish all 12 breadsticks in one go (let’s be real, they’re fluffy but not endless), here’s how to store them.
Once cooled, wrap them in plastic wrap or stash them in an airtight container. they’re typically good for about 3 days but for best results, i always recommend reheating in the oven over the microwave.
Just pop them in a preheated oven for about 5- 10 minutes at 350° f to regain that glorious crispness.
Want to make ahead? simply prepare the dough but stop after the first rise, then cover it and pop it in the fridge.
This dough can sit for a day or so just let it warm back up for an hour before shaping those fluffy breadsticks !
Creative Variations
Who says your breadsticks need to stay traditional ? the beauty of the breadstick dough recipe is in its flexibility! for a cheesy twist, sprinkle some mozzarella on top right before baking.
Or for a sweet treat, press some cinnamon and sugar into the dough for cinnamon sugar breadsticks . it’s crazy how versatile bread can be!
If you’re thinking about healthier options, consider substituting half of your all-purpose flour with whole wheat flour for a nutty texture.
And for those family members who might be avoiding gluten, vegan breadsticks can totally rock your world too! just swap out the butter in your homemade garlic butter for olive oil or a vegan butter alternative.
Complete Nutrition Guide
Let’s dive into the good stuff the nutritional benefits of these little pieces of joy! each serving (that’s one breadstick) has approximately 180 calories .
If you’re keeping an eye on your macros, that’s about 4g of protein and 5g of fat. so why not feel guilt free as you enjoy these delicious garlic breadsticks from scratch ?
These breadsticks are not just for filling tummies; they carry the warmth and comfort of home cooked meals. And hey, if you’re considering dietary modifications , there are low-calorie versions you can explore!
Expert FAQ Solutions
Now, i know you've probably got some questions bubbling up, so let’s tackle a few common ones. first off, if your dough doesn’t rise properly, it might be due to the yeast not activating.
Check that water temperature 110° f is your sweet spot! if your dough feels too sticky while kneading, sprinkle a bit more flour, but be careful not to overdo it.
Feeling creative? go ahead and mix things up! want something different? try adding fresh herbs or spices directly into the dough.
It’s all about making these italian breadsticks feel personal and unique to your home!
Alright, friends, you’re all set to whip up a batch of these delicious olive garden breadsticks right in your own kitchen! with these tips and tricks, you’ll not just impress your friends and family, but maybe even yourself.
So go get your apron, put on your chef hat, and dive into this easy side dish that can steal the show every time.
Remember, cooking is about having fun and spreading love through delicious food. Olive Garden breadstick nutrition doesn’t have to be complicated; it can be enjoyable! Happy baking, and may your kitchen smell like a slice of Italy!
Deliciously Buttery Olive Garden Breadsticks