Crusty Companion Homemade French Bread Bowls Perfect for Dipping
- The Allure of Edible Vessels: Elevating Your Soup Night
- Why Handcrafting Your Bread Bowls Triumphs Over Store-Bought
- Assembling Your Parisian Pantry Essentials
- Quantifying the Building Blocks for Superior Bread
- The Crafting Process: From Shaggy Mass to Loaf Shape
- Proofing Strategies for Maximum Volume and Flavor
- The Ultimate Bake for Golden-Brown French Bread Bowls
- Troubleshooting Common Bread Bowl Challenges
- Creative Ways to Stuff and Serve Your Loaves
- Preserving the Crispness: Storage and Reheating Tips
- Recipe FAQs
- 📝 Recipe Card
The Allure of Edible Vessels: Elevating Your Soup Night
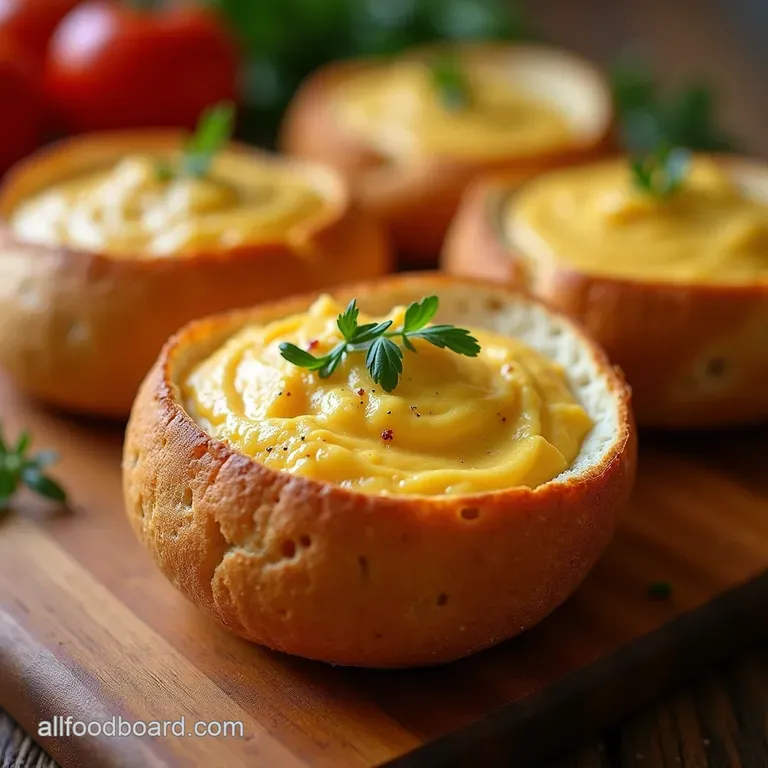
There is something deeply satisfying about serving a steaming bowl of chowder or a rich French Onion Soup nestled inside its own edible container. This is more than just presentation; it’s an invitation to indulge.
We are talking about crafting French Bread Bowls —sturdy, flavorful vessels that absorb the broth without immediately surrendering to sogginess. Forget the lackluster, overly soft store-bought versions; mastering the French Bread Bowls recipe from scratch transforms a simple meal into an event.
This recipe, inspired by rustic French country loaves, focuses on developing a robust structure perfect for scooping and dunking. The resulting edible soup bowls offer the perfect marriage of a shatteringly crisp exterior and a soft, chewy interior.
Why Handcrafting Your Bread Bowls Triumphs Over store-bought
Making your own bread for bread bowls delivers unparalleled results, primarily because you control the hydration levels and the proofing times. store-bought versions are often rushed, resulting in a bread that collapses under the weight of a heavy filling.
Our goal is to create the best bread for soup , one capable of holding chili or a hearty stew for the duration of the meal. This guide outlines how to achieve the specific characteristics needed for the Large bread bowl recipe .
Achieving That Perfect Crust-to-Crumb Ratio
The magic lies in balance. We need a robust outer shell that characteristic crackle of true French bread while maintaining an internal crumb open enough to soak up flavor without becoming immediately saturated.
This is largely managed through precise water temperature during yeast activation and ensuring sufficient steam during the initial bake phase. A well developed gluten structure, achieved through thorough kneading, is what grants these loaves the necessary strength to become truly dunkable bread bowls .
Understanding the Magic Behind Authentic French Dough
Authentic French baking emphasizes simplicity: flour, water, yeast, and salt. We introduce a touch of melted butter in this Homemade French Bread Bowls iteration not to soften the crumb excessively, but to aid in managing the dough’s extensibility, ensuring it stretches beautifully when shaped into individual bowls.
The use of warm water (aiming for 105° F– 115° F) is crucial for coaxing the yeast into its most active state, leading to a higher rise and better aeration within the final loaf structure.
Serving Suggestions: Beyond Just Chowder
While these loaves are famously paired with rich fillings, their versatility shines when considering alternatives. Imagine them stuffed with creamy spinach artichoke dip, baked until the topping is molten, or used to serve a thick, slow simmered beef bourguignon.
Even if you aren't making classic French Onion Bread Bowls , the robust nature of this dough means it stands up beautifully to any chunky filling.
Assembling Your Parisian Pantry Essentials
To embark on crafting these glorious French Bread Bowls , preparation is key. Ensure all your components are ready before you start combining ingredients. We are aiming for a yield of six medium sized loaves, which requires attention to detail in the timing of the fermentation stages.
Before mixing, gather your precise measurements; bread baking is fundamentally a science, and slight deviations can impact the final texture significantly.
Quantifying the Building Blocks for Superior Bread
For the dough, you will need 1 ¾ cups (415 ml) of warm water calibrated between 105° F and 115° F. To feed the yeast, incorporate 1 tablespoon of granulated sugar.
For the main structure, plan on starting with 5 cups (600g) of flour, though you may need up to 5 ½ cups (660g) to achieve the right consistency. The essential flavor balancer is 2 teaspoons (10g) of fine sea salt, complemented by 2 tablespoons (28g) of unsalted butter, melted and slightly cooled.
Selecting the Right Flour for Structural Integrity
While all-purpose flour works adequately, selecting high protein bread flour will significantly improve the chewiness and structure of your loaves. Bread flour possesses more gluten forming proteins, which are essential when you need the finished product to support heavy fillings.
This choice directly impacts how successfully you create the ideal bread for bread bowls .
Yeast Activation: The Key to a High Rise
The first critical step is blooming your 2 ¼ teaspoons (7g) of active dry yeast. Combine the yeast and sugar with the precisely warmed water. If the water is too hot, you will kill the yeast; too cool, and it will struggle to activate.
Allow this mixture to sit undisturbed for 5 to 10 minutes until it becomes visibly foamy and fragrant a clear indicator that your leavening agent is ready to work its magic.
Essential Equipment for Artisan Bread Shaping
While a stand mixer with a dough hook attachment speeds up the process considerably, this Large bread bowl recipe can certainly be made by hand. You will need a substantial mixing bowl, a sturdy surface for kneading, parchment paper, and, crucially, a small, oven safe pan to hold water for the steam bath necessary for the crust development during baking.
The Crafting Process: From Shaggy Mass to Loaf Shape
Once the yeast is bloomed, combine it with the dry ingredients (5 cups of flour and the salt) in your mixing vessel, along with the cooled melted butter. Mix until a shaggy mass forms. If using a mixer, this takes about 2 minutes on low speed.
The total active preparation time for mixing and kneading is approximately 30 minutes, though rising times account for the bulk of the 2.5 to 3 hours total time commitment.
Mixing and Initial Kneading Techniques
Turn the dough out onto a lightly floured surface. Begin kneading vigorously for about 8 to 10 minutes. You are aiming for a smooth, elastic dough that springs back slowly when poked.
If, after 5 minutes of kneading, the dough is excessively sticky and clinging everywhere, incorporate the remaining half cup of flour gradually, avoiding the temptation to add too much, which leads to dense bread.
The Importance of the Autolyse Rest Period
Though not strictly necessary for this slightly enriched dough, many artisan bakers benefit from an autolyse. After mixing the flour and water (but before adding the yeast or salt, if you follow a different technique), allowing the mixture to rest for 20 minutes lets the flour fully hydrate.
For this quicker method, the initial rest after kneading is the first proof.
Developing Strength Through Folding and Resting Intervals
After the initial 8– 10 minutes of kneading, place the dough in a lightly oiled bowl, cover it, and allow it to rise in a warm area for 60 to 90 minutes, or until doubled. This first proof builds the majority of the flavor and strength.
Instead of heavy kneading repetitions, we rely on these long rests to allow the gluten network to strengthen naturally.
Scoring Mastery: Preparing Your Dough for Oven Spring
Once the dough has doubled, gently deflate it and divide it into 6 equal portions. Shape each portion into a tight, round boule. After placing these rounds onto a parchment lined baking sheet for their second proof (about 30– 45 minutes), they need preparation for the oven.
Just before baking, brush them lightly with a beaten egg white wash. Then, using a very sharp knife or lame, score the top of each loaf a few shallow, diagonal slashes are traditional and allow the dough to expand predictably during oven spring.
Related Recipes Worth Trying
- The Best Sturdy Bread Bowl Recipe for Hearty Soups — Bake your own robust chewy Homemade Bread Bowlperfectly engineered to hold chowder without going soggy Follow my foolproof method
- The Ultimate Sturdy Homemade Bread Bowls Recipe Foolproof — Forget soggy bottoms These yeast bread bowls bake with a crisp crust perfect for holding thick soups or chili Learn this easy bread bowls from scratch...
- The Best Crusty Bread Bowls Recipe for Hearty Soups — Ditch the storebought versions Master homemade bread bowls with a sturdy crust perfect for holding rich chili or chowder Get the foolproof recipe here
Proofing Strategies for Maximum Volume and Flavor
The second proofing stage, after the dough has been divided and shaped, is crucial for achieving the light interior needed for your edible soup bowls . This shorter rest ensures the yeast provides enough lift during baking without allowing the structure to over relax, which would lead to flat loaves.
Aim for them to be noticeably puffy but not quite doubled again.
The Ultimate Bake for Golden Brown French Bread Bowls
Preheat your oven to a strong 400° F ( 200° C). The secret weapon for that fantastic, professional crust is steam. Place your small, oven safe pan filled with ½ cup of water on the lowest rack while the oven preheats.
The moisture released during the first 10 minutes of baking keeps the exterior pliable enough to expand fully before setting into a crisp shell.
Scoring Mastery: Preparing Your Dough for Oven Spring
As mentioned, scoring should be done immediately before the loaves enter the oven. The purpose is to direct where the loaf expands. For the French Bread Bowls , simple diagonal cuts allow for a beautiful, rustic appearance as they bake, promising those wonderfully dunkable bread bowls .
Bake the loaves for 30 to 35 minutes. You must watch for color; they should achieve a deep, rich golden brown hue. If you have a thermometer, the internal temperature should register around 200° F ( 93° C).
Remember to rotate the sheet halfway through baking to ensure even browning across all six loaves.
Troubleshooting Common Bread Bowl Challenges
Even with the best intentions, baking can present hurdles. Pay attention to your dough’s behavior during the initial mix; if it feels like concrete, you likely added flour too quickly.
If it’s a sticky mess that won't hold shape, let the dough rest for 10 minutes mid-knead sometimes the gluten just needs a short break to come together.
Fixing Dense Dough: When Fermentation Goes Awry
If your loaves end up dense, it usually points to one of two issues: under proofing (not enough rise) or killing the yeast with water that was too hot. If the yeast bloomed poorly, the final product will lack the airy interior structure that makes for great French Bread Bowls .
Next time, check your water temperature meticulously.
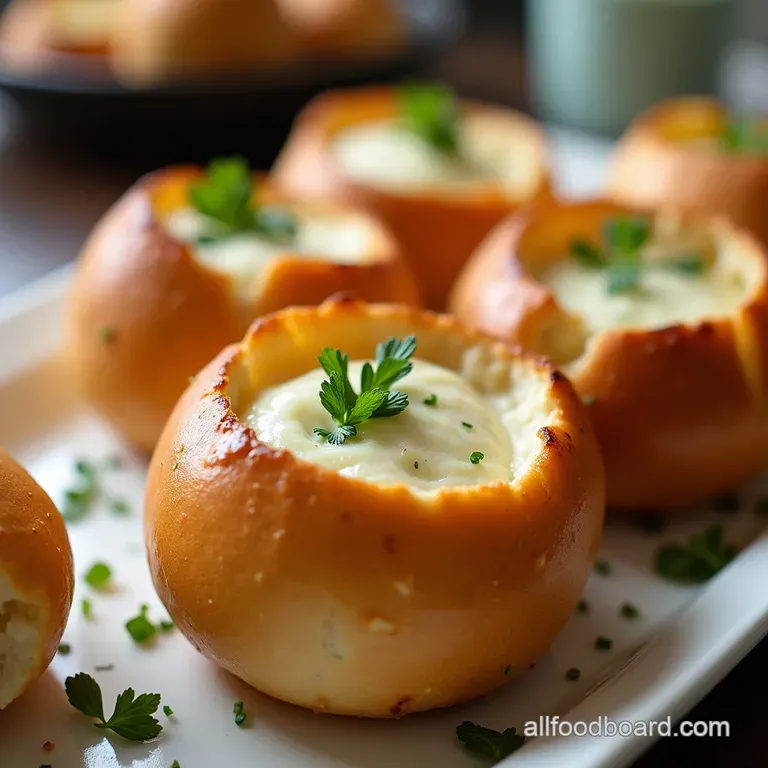
Ideas for Savory Fillings (Think Cheddar and Herb)
Once baked and cooled, the assembly phase begins. For a truly luxurious experience, especially when making French Onion Bread Bowls , you'll want fillings that complement the crust.
Beyond the classic soup, consider mixing soft cheddar, cream cheese, and chives to create a savory spread you bake inside the hollowed out bread for 10 minutes until bubbling.
Creative Ways to Stuff and Serve Your Loaves
To transform your baked goods into perfect edible soup bowls , you must master how to cut a bread bowl . Once completely cool, place the loaf on a cutting board.
Use a sharp serrated knife to cut a circular lid from the top crust, leaving about a half inch border around the edge. Gently scoop out the soft interior, being careful not to puncture the base or sides. Save the scooped out bread for making incredible croutons or breadcrumbs.
Preserving the Crispness: Storage and Reheating Tips
The enjoyment of this recipe hinges on the crust remaining crisp. Once the loaves have cooled fully on a wire rack, they should be stored at room temperature in a paper bag, not plastic, to allow residual moisture to escape. Plastic traps humidity, turning your magnificent crust soft overnight.
Optimal Cooling Practices for a Lasting Crust
Cooling on a wire rack is non-negotiable. This allows air to circulate completely around the bottom of the loaf, preventing condensation that leads to a soggy base. Only attempt to hollow out the bread after it has cooled for at least two hours; this resting period allows the internal structure to fully set, ensuring the sides don't collapse when you fill them.

Recipe FAQs
Can I make these French Bread Bowls ahead of time? I'm hosting a bash!
Absolutely! The baked bread itself is quite sturdy, so you can bake your French Bread Bowls a day or two in advance. Store them tightly wrapped at room temperature no need to refrigerate, as that makes them go stale quicker. Just wait until just before serving to scoop out the middles and warm them up.
My dough isn't rising! Is my yeast dead, or am I doing something wrong?
Ah, the classic baker's panic! First, check the water temperature if it was too hot (over 130°F), it likely killed the yeast. If the water felt just right (lukewarm, like bathwater), then the yeast might be old.
Ensure your kitchen isn't too chilly; yeast needs a cosy spot (around 75-80°F) to properly spring to life.
How do I stop the bottom of my French Bread Bowls from getting soggy once I fill them?
This is key for any good edible bowl! Once you've scooped out the interior, brush the inside cavity lightly with a bit of olive oil or melted butter and pop the bowls back into a 350°F oven for about 5 10 minutes to toast the inside walls.
This creates a moisture barrier that keeps your soup from breaking through.
What's the best way to use the bread removed from the centre? Can I just throw it away?
Heavens, no, we don't waste good bread in this house! The scooped out soft interior is perfect for making incredible, crunchy croutons just toss with olive oil, garlic powder, and bake until crisp. Alternatively, you can dry it out and blitz it for the best breadcrumbs you've ever tasted.
Can I make smaller, individual portions instead of large serving bowls?
Absolutely, this recipe scales down beautifully! If you divide the dough into 8 or even 10 smaller balls, you'll end up with lovely personal sized rolls perfect for dipping into chili or serving alongside a simple side salad. Just watch the baking time, as smaller loaves might cook through a few minutes faster.
Crusty French Bread Bowls

Ingredients:
Instructions:
Nutrition Facts:
| Calories | 666 kcal |
|---|---|
| Protein | 12.0 g |
| Fat | 16.0 g |
| Carbs | 56.2 g |
| Fiber | 7.2 g |
| Sodium | 6713 mg |
