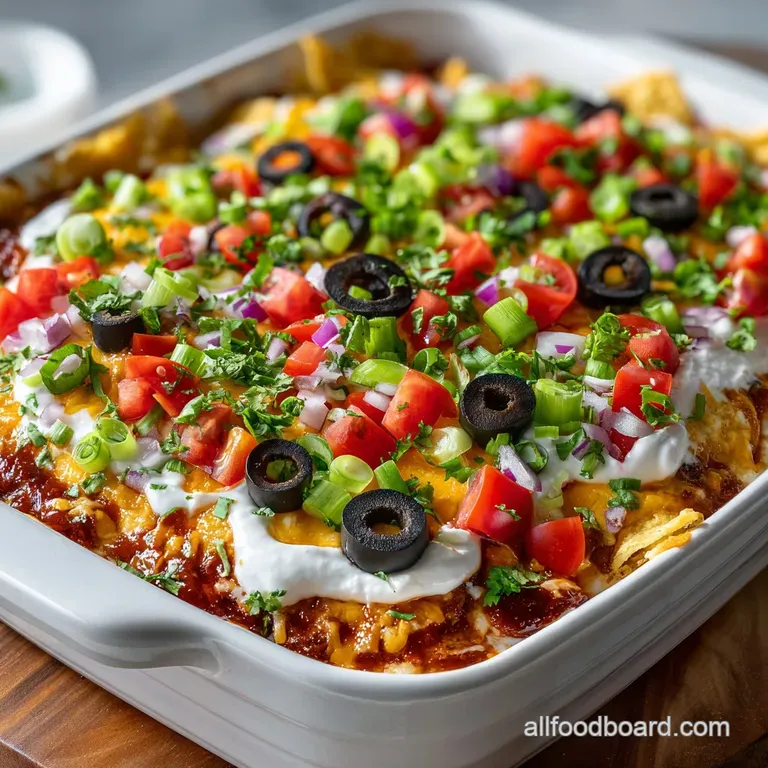
Crowdpleasing 7Layer Dip for Game Day: Sturdy Stack
- Time: Active 20 minutes, Passive 0 minutes, Total 20 minutes
- Flavor/Texture Hook: Velvety cream layers meeting the crisp crunch of fresh garden toppings.
- Perfect for: Tailgates, potlucks, and anyone needing a reliable, budget-friendly appetizer.
- Winning CrowdPleasing 7Layer Dip for Game Day
- Why This Dish Wins
- Recipe Performance Metrics
- Selecting the Best Ingredients
- Required Kitchen Gear
- Layering Your Masterpiece
- Fixing Common Dip Issues
- Vibrant Flavor Variations
- Scaling the Party
- Storage and Scraps
- Perfect Party Pairings
- Dip Myths Debunked
- Recipe FAQs
- 📝 Recipe Card
Winning CrowdPleasing 7Layer Dip for Game Day
I still remember the Great Dip Disaster of 2018. I had spent all morning prepping what I thought was the ultimate appetizer, only to watch it transform into a soupy, beige puddle by halftime. It was heartbreaking.
The salsa had leaked into the beans, the guacamole had turned a suspicious shade of grey, and the chips were literally snapping under the weight of the soggy mess. I realized then that a great dip isn't just about throwing ingredients in a bowl; it's about structural engineering.
Since that day, I've treated this recipe like a construction project. We need a solid foundation, moisture barriers, and a colorful finish that doesn't just look good but tastes like a party.
There is something uniquely satisfying about hearing the "shatter" of a sturdy corn chip as it plunges through seven distinct layers, emerging with a perfect vertical slice of every single flavor. No more muddy messes here.
Trust me on this: the secret isn't in some expensive, "gourmet" ingredient. It's in the way we treat the humble staples sitting in your pantry right now. We're going to use simple tricks to keep the salsa thick, the beans spreadable, and the dairy layer so velvety it feels like luxury.
Let's get into how we make this happen without breaking the bank or your chips.
Why This Dish Wins
Building the perfect appetizer requires a little bit of hidden logic to keep everything in its place. This isn't just a pile of food; it's a calculated arrangement of fats and acids.
If you've ever wondered why some dips feel like a chore to eat and others disappear in minutes, it usually comes down to the "scoopability" factor.
The Barrier of Fat: Mixing cream cheese with sour cream creates a dense, hydrophobic layer that prevents salsa moisture from migrating downward.
The Acid Stabilizer: Adding lime juice to the beans doesn't just add brightness; it thins the starch just enough to prevent the "chip breaker" effect.
Moisture Management: Straining the salsa and seeding the tomatoes ensures the dip stays vibrant and firm rather than watery and limp.
Structural Integrity: Placing the heaviest, densest layer at the bottom provides a counterweight that keeps the dish stable as guests dig in.
| Servings | Bean Layer | Cream Layer | Pan Size | Prep Time |
|---|---|---|---|---|
| 5 people | 8 oz beans | 1/2 cup mix | 8x8 square | 10 minutes |
| 10 people | 16 oz beans | 1 cup mix | 9x13 glass | 20 minutes |
| 20 people | 32 oz beans | 2 cup mix | Half sheet | 35 minutes |
This serving size calculator helps you plan for any size crowd, ensuring you don't end up with mountains of leftovers or, worse, hungry guests. For another fantastic party option that feeds a crowd, you might want to try our Party Dips recipe which offers a warm, salty contrast to this chilled classic.
Recipe Performance Metrics
When we talk about a reliable party snack, we need to look at how the "fast" versions compare to the "classic" methods. Sometimes, taking an extra two minutes to prep an ingredient makes a world of difference in the final result.
I used to just dump a jar of salsa on top and call it a day, but that's exactly what leads to the puddle problem.
| Feature | The Fast Way | The Classic Method | Outcome |
|---|---|---|---|
| Salsa Prep | Straight from jar | Strained in mesh | Strained avoids "soggy bottom" syndrome |
| Dairy Base | Sour cream only | Sour cream + Cream cheese | Cream cheese adds vital structural support |
| Tomato Prep | Chopped whole | Seeded and diced | Seeding prevents juice from thinning the dip |
The Physics of the Stack
The real magic happens in the "Internal Moisture Control." By using 4 oz of softened cream cheese as a stabilizer, we create a layer that has a higher viscosity than plain sour cream. This acts as a sealant.
When the 1 cup of thick and chunky salsa sits on top, any residual liquid is blocked by the fat heavy dairy layer, keeping the beans underneath perfectly seasoned and dry.
Selecting the Best Ingredients
You don't need a massive budget to make this taste like a million bucks. In fact, some of the best versions of this CrowdPleasing 7Layer Dip for Game Day come from the most basic store brands. The trick is how you enhance them.
We’re using 16 oz of refried beans as our foundation, but we're going to treat them with 1 tsp of ground cumin and a splash of lime to wake up that earthy flavor.
| Component | Science Role | Pro Secret |
|---|---|---|
| Refried Beans | Structural Foundation | Whip with lime juice for a lighter, easier scoop |
| Cream Cheese | Emulsion Stabilizer | Use full fat for the best "cling" to the chip |
| Mexican Blend | Texture Contrast | Shred your own for a softer, more velvety mouthfeel |
Essential Components and Substitutes
- 16 oz refried beans: The heavy lifter. Why this? Provides the weight needed to keep the dip from sliding around.
- Substitute: Black bean re fry or mashed pinto beans with a splash of broth.
- 1 cup full fat sour cream: Adds the necessary tang. Why this? The acidity cuts through the richness of the beans.
- Substitute: Plain Greek yogurt for a higher protein, sharper flavor profile.
- 4 oz softened cream cheese: The "glue" of the recipe. Why this? Prevents the sour cream from becoming too runny at room temp.
- Substitute: Mascarpone for a milder, even creamier texture.
- 2 cups prepared guacamole: Providing that verdant, buttery fat. Why this? Adds a cooling element to the spiced layers.
- Substitute: Smashed avocado with salt and lime if you want it chunkier.
- 1 cup thick and chunky salsa: The flavor engine. Why this? Brings the heat and acidity in one go.
- Substitute: Pico de gallo (well drained) for a fresher, less saucy vibe.
- 2 cups shredded Mexican blend cheese: The salty finish. Why this? A mix of Monterey Jack and Cheddar melts on the tongue.
- Substitute: Sharp cheddar or Pepper Jack if you want a spicy kick.
Required Kitchen Gear
Honestly, you don't need much, but a few specific items will make your life significantly easier. I've tried making this in a deep bowl, and it's a nightmare the bottom layers become a mystery that no one can reach.
A shallow 9x13 glass dish is your best friend here because it allows for a high "surface to dip" ratio.
A fine mesh strainer is the one "non negotiable" for me. Use it to drain that 1 cup of salsa for at least 10 minutes. You'll be shocked at how much water comes out. If that water stays in, it ruins the structural integrity of your guacamole layer.
A sturdy silicone spatula is also helpful for smoothing out the 16 oz of beans without tearing up the layer beneath it as you build.
Layering Your Masterpiece
Before we start, make sure your 4 oz of cream cheese is truly softened. If it's cold, it won't mix with the sour cream, and you'll end up with lumps that look like unmixed paint. Not exactly the "velvety" look we're going for.
- Prepare the base. In a small bowl, mix the 16 oz refried beans with 1 tsp ground cumin and 1 tbsp fresh lime juice until smooth and spreadable. Note: This makes the beans less dense so chips won't break.
- Spread the foundation. Layer the bean mixture into the bottom of a 9x13 dish until the surface is completely level.
- Whip the crema. Combine 1 cup sour cream, 4 oz softened cream cheese, and 2 tbsp taco seasoning until no white streaks remain.
- Apply the barrier. Spread the cream mixture gently over the beans until the edges are sealed.
- Add the green. Carefully spoon 2 cups of guacamole over the cream layer until the middle is slightly thicker than the sides.
- Drain the salsa. Pour 1 cup of salsa into a fine mesh strainer for 5 minutes until the liquid stops dripping.
- Layer the spice. Scatter the strained salsa over the guacamole until evenly distributed.
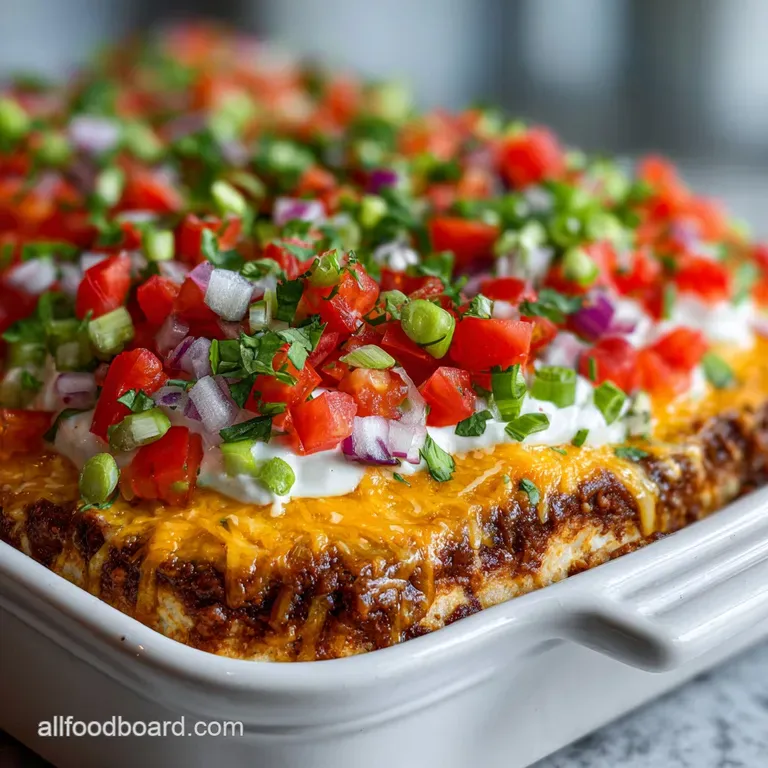
- Shower with cheese. Sprinkle 2 cups of shredded Mexican blend cheese over the salsa until the red is barely visible.
- Add the garden. Top with 1 cup seeded/diced Roma tomatoes, 1/2 cup black olives, and 1/4 cup green onions until the dish looks like a mosaic.
- Chill and set. Place the dish in the fridge for 30 minutes until the layers feel firm to the touch.
Fixing Common Dip Issues
Even the simplest dishes can have a bad day. The most common heartbreak with a layered nacho dip is the "Soggy Bottom." This happens when the vegetables or salsa release water after the dish is assembled.
Dealing with the "Soggy Base"
The main culprit is usually the tomatoes or the salsa. If you see a pool of pink liquid at the bottom of your dish, you can actually save it! Take a paper towel, roll it into a tight point, and gently dip it into the corner of the pan where the liquid is gathering.
It will wick the moisture away without disturbing the layers. To prevent this next time, always seed your tomatoes by scooping out the watery guts before dicing.
The "Chip Breaker" Beans
If your 16 oz of refried beans feel like dried cement, no one is going to enjoy the dip. This happens when the beans are too cold or have lost too much moisture in the canning process. The fix is simple: add a tablespoon of water or lime juice and stir vigorously. You want the consistency of creamy peanut butter.
| Problem | Root Cause | Solution |
|---|---|---|
| Slippery Layers | Too much moisture in salsa | Strain salsa for 10 mins before adding |
| Brown Guacamole | Air exposure (oxidation) | Seal the guacamole layer completely with cheese |
| Bland Flavor | Lack of seasoning in beans | Add cumin and lime juice to the bean base |
Common Mistakes Checklist
- ✓ Never skip straining the salsa; the excess liquid is the enemy of structure.
- ✓ Always seed the Roma tomatoes to keep the top layer crisp and dry.
- ✓ Soften the cream cheese completely to ensure a silky, streak free cream layer.
- ✓ Don't build this more than 4-6 hours in advance or the layers will begin to bleed.
- ✓ Use "Scoop" style chips for the best experience with these heavy layers.
Vibrant Flavor Variations
The beauty of this taco dip recipe is how easily it adapts to your pantry or your guests' preferences. If you're on a tight budget, you can skip the olives and onions and just double down on the cheese. It’s still going to be the star of the show.
- The Spicy Kick: Add 1/4 cup of diced jalapeños (canned or fresh) to the tomato layer.
- The Smoky Twist: Mix 1 tsp of smoked paprika or a teaspoon of chipotle in adobo into the bean layer.
- The Mediterranean Version: Swap beans for hummus, sour cream for tzatziki, and salsa for bruschetta topping.
Decision Shortcut
- If you want maximum stability, use a 50/50 mix of cream cheese and sour cream.
- If you want a fresher taste, use homemade pico de gallo instead of jarred salsa.
- If you want faster prep, buy pre chopped onions and pre shredded cheese.
For those who love a bit more heat in their appetizers, I highly recommend checking out our Party Dip Recipes which features a fiery chorizo bake that pairs brilliantly alongside this cool 7 layer classic.
Scaling the Party
Sometimes ten servings just isn't enough, especially when the game goes into overtime.
Scaling UP (2x): When doubling this recipe, don't just double the salt and taco seasoning. Use about 1.5x the seasoning (3 tbsp instead of 4) and taste as you go. You’ll need a larger surface area, so a half sheet pan or two 9x13 dishes work best.
Working in batches for the bean mixing and cream whipping ensures everything stays consistent.
Scaling DOWN (1/2): If you're just making this for a small movie night, use an 8x8 square pan. Since you're using half a can of beans, store the rest in an airtight container immediately. For the dairy layer, you can use 2 oz of cream cheese and 1/2 cup of sour cream.
It’s a great way to use up half opened containers in the fridge.
Storage and Scraps
This Mexican layer dip is best enjoyed the day it's made, but life happens. If you have leftovers, cover the dish tightly with plastic wrap, pressing it directly onto the surface of the cheese to minimize air contact. It will stay good in the fridge for about 2 days.
After that, the tomatoes start to lose their "shatter" and the guacamole might begin to dull in color.
Zero Waste Tip: If you find yourself with a small amount of leftover dip that isn't enough for a full serving, don't toss it! It makes an incredible filling for a breakfast burrito the next morning. Just scoop it into a warm tortilla with some scrambled eggs. Also, those tomato seeds you scooped out?
Toss them into a soup base or a pot of rice for a little extra umami and moisture.
Perfect Party Pairings
While chips are the classic vessel, don't be afraid to branch out. Jicama sticks or bell pepper wedges offer a refreshing, watery crunch that balances the density of the 16 oz of beans. If you're looking for a full spread, this dip sits beautifully next to heavier, warm snacks.
It pairs exceptionally well with Slider Recipes, specifically those with a savory, beefy profile. The cool acidity of the lime and salsa in the dip cuts right through the richness of a garlic glazed slider.
Dip Myths Debunked
Many people believe that adding the avocado pits to the dip will stop the guacamole from browning. This is a total myth. Browning is caused by oxidation (exposure to air). The pit only protects the small patch of avocado directly beneath it.
The only way to stop the browning in this dip is to ensure the guacamole layer is completely covered by the salsa and cheese, sealing it away from the air.
Another common misconception is that "low-fat" dairy works just as well. While you can use it, the lower fat content usually means a higher water content. This leads back to our "Soggy Bottom" problem. For a dip that stands tall and stays creamy, full fat sour cream and cream cheese are the structural heroes you need.
Finally, don't believe that you have to cook the beans. Most canned refried beans are already fully cooked and seasoned. Heating them up just to let them cool back down can actually change the starch structure, making them more prone to drying out and cracking your chips.
Keep it simple, keep it cool, and enjoy the game!

Recipe FAQs
What dip is always a crowd pleaser?
The 7 Layer Dip is consistently a top performer for large gatherings.
Its success lies in its combination of cool, creamy, and spicy textures that appeal to nearly everyone, making it a reliable centerpiece for any snack table.
What are the 7 layers of dip?
The standard layers are: Refried Beans, Creamy Dairy Mix, Guacamole, Salsa, Shredded Cheese, Tomatoes, and Olives/Onions.
The key to this dip is layering heavy, stabilizing ingredients first, followed by the wettest components like salsa, and finishing with fresh toppings.
What is the order of 7 layer bean dip?
Start with the heaviest, densest ingredient at the bottom: Seasoned Refried Beans.
Follow with the cream cheese/sour cream mix to act as a moisture barrier, then guacamole, strained salsa, shredded cheese, and finally the diced tomatoes and garnish.
Can you make a 7 layer dip the night before?
No, assembly should be done no more than 4 to 6 hours ahead of serving time.
While the ingredients are cold stable, waiting overnight allows moisture from the salsa and tomatoes to wick down and potentially dilute the bean layer.
What is the secret to keeping the layers from getting soupy?
Thoroughly drain the salsa and seed the fresh tomatoes before adding them to the stack.
The cream cheese mixed with the sour cream also acts as a crucial hydrophobic barrier, preventing the upper layers' moisture from sinking into the beans below.
How do I stop my chips from breaking in the thick bottom layer?
Whip the refried beans with a tablespoon of lime juice or water until they are noticeably lighter and fluffier.
This simple action breaks down the density of the beans, making them more scoopable, similar to how we thin sauces in our Chili Cheese Bean recipe.
Is it true that I must use only full fat dairy for the creamy layer?
No, using low-fat dairy is possible, but not recommended for structural integrity.
Lower fat versions contain more water, which increases the risk of the layers separating and creating a watery base later in the party.
Crowd Pleasing 7 Layer Dip

Ingredients:
Instructions:
Nutrition Facts:
| Calories | 313 kcal |
|---|---|
| Protein | 9.8 g |
| Fat | 23.6 g |
| Carbs | 15.2 g |
| Fiber | 5.7 g |
| Sugar | 3.2 g |
| Sodium | 678 mg |
